

This is a premium feature that may not be available on your current plan. Check availability on the Applivery pricing page.
Enabling TeamViewer Remote in a Windows Policy makes Applivery silently install the TeamViewer Host app on every Device that Policy applies to, and register those Devices with TeamViewer. From then on, you start a remote session from the Device's Action menu — no setup on the Device itself, and nothing for the person using it to install or accept beforehand.
Also available on macOS. Check out TeamViewer Remote Support for macOS.
Before you start
TeamViewer Remote depends on the Windows Agent: the Agent is what installs and registers TeamViewer Host on the Device. Before enabling the Policy, make sure the Device's Segment has the Windows Agent & Self Service enabled, with Scripts enabled — the TeamViewer Host installation is delivered as a Script that the Agent runs.
If either one is missing, the feature won't work even if the Policy itself says Enabled. The Policy's own warning links straight to the Agent settings for that Segment, so you can check it without leaving the page.
Enabling TeamViewer Remote
Once in the Applivery Dashboard, go to Policies 1 and open the Policy you want to enable Remote Support on.
In the left-hand menu, select the TeamViewer Remote section and find the TeamViewer Remote configuration 2.
Choose Enabled and save your changes. Every Device that Policy applies to will now get TeamViewer Host installed automatically.
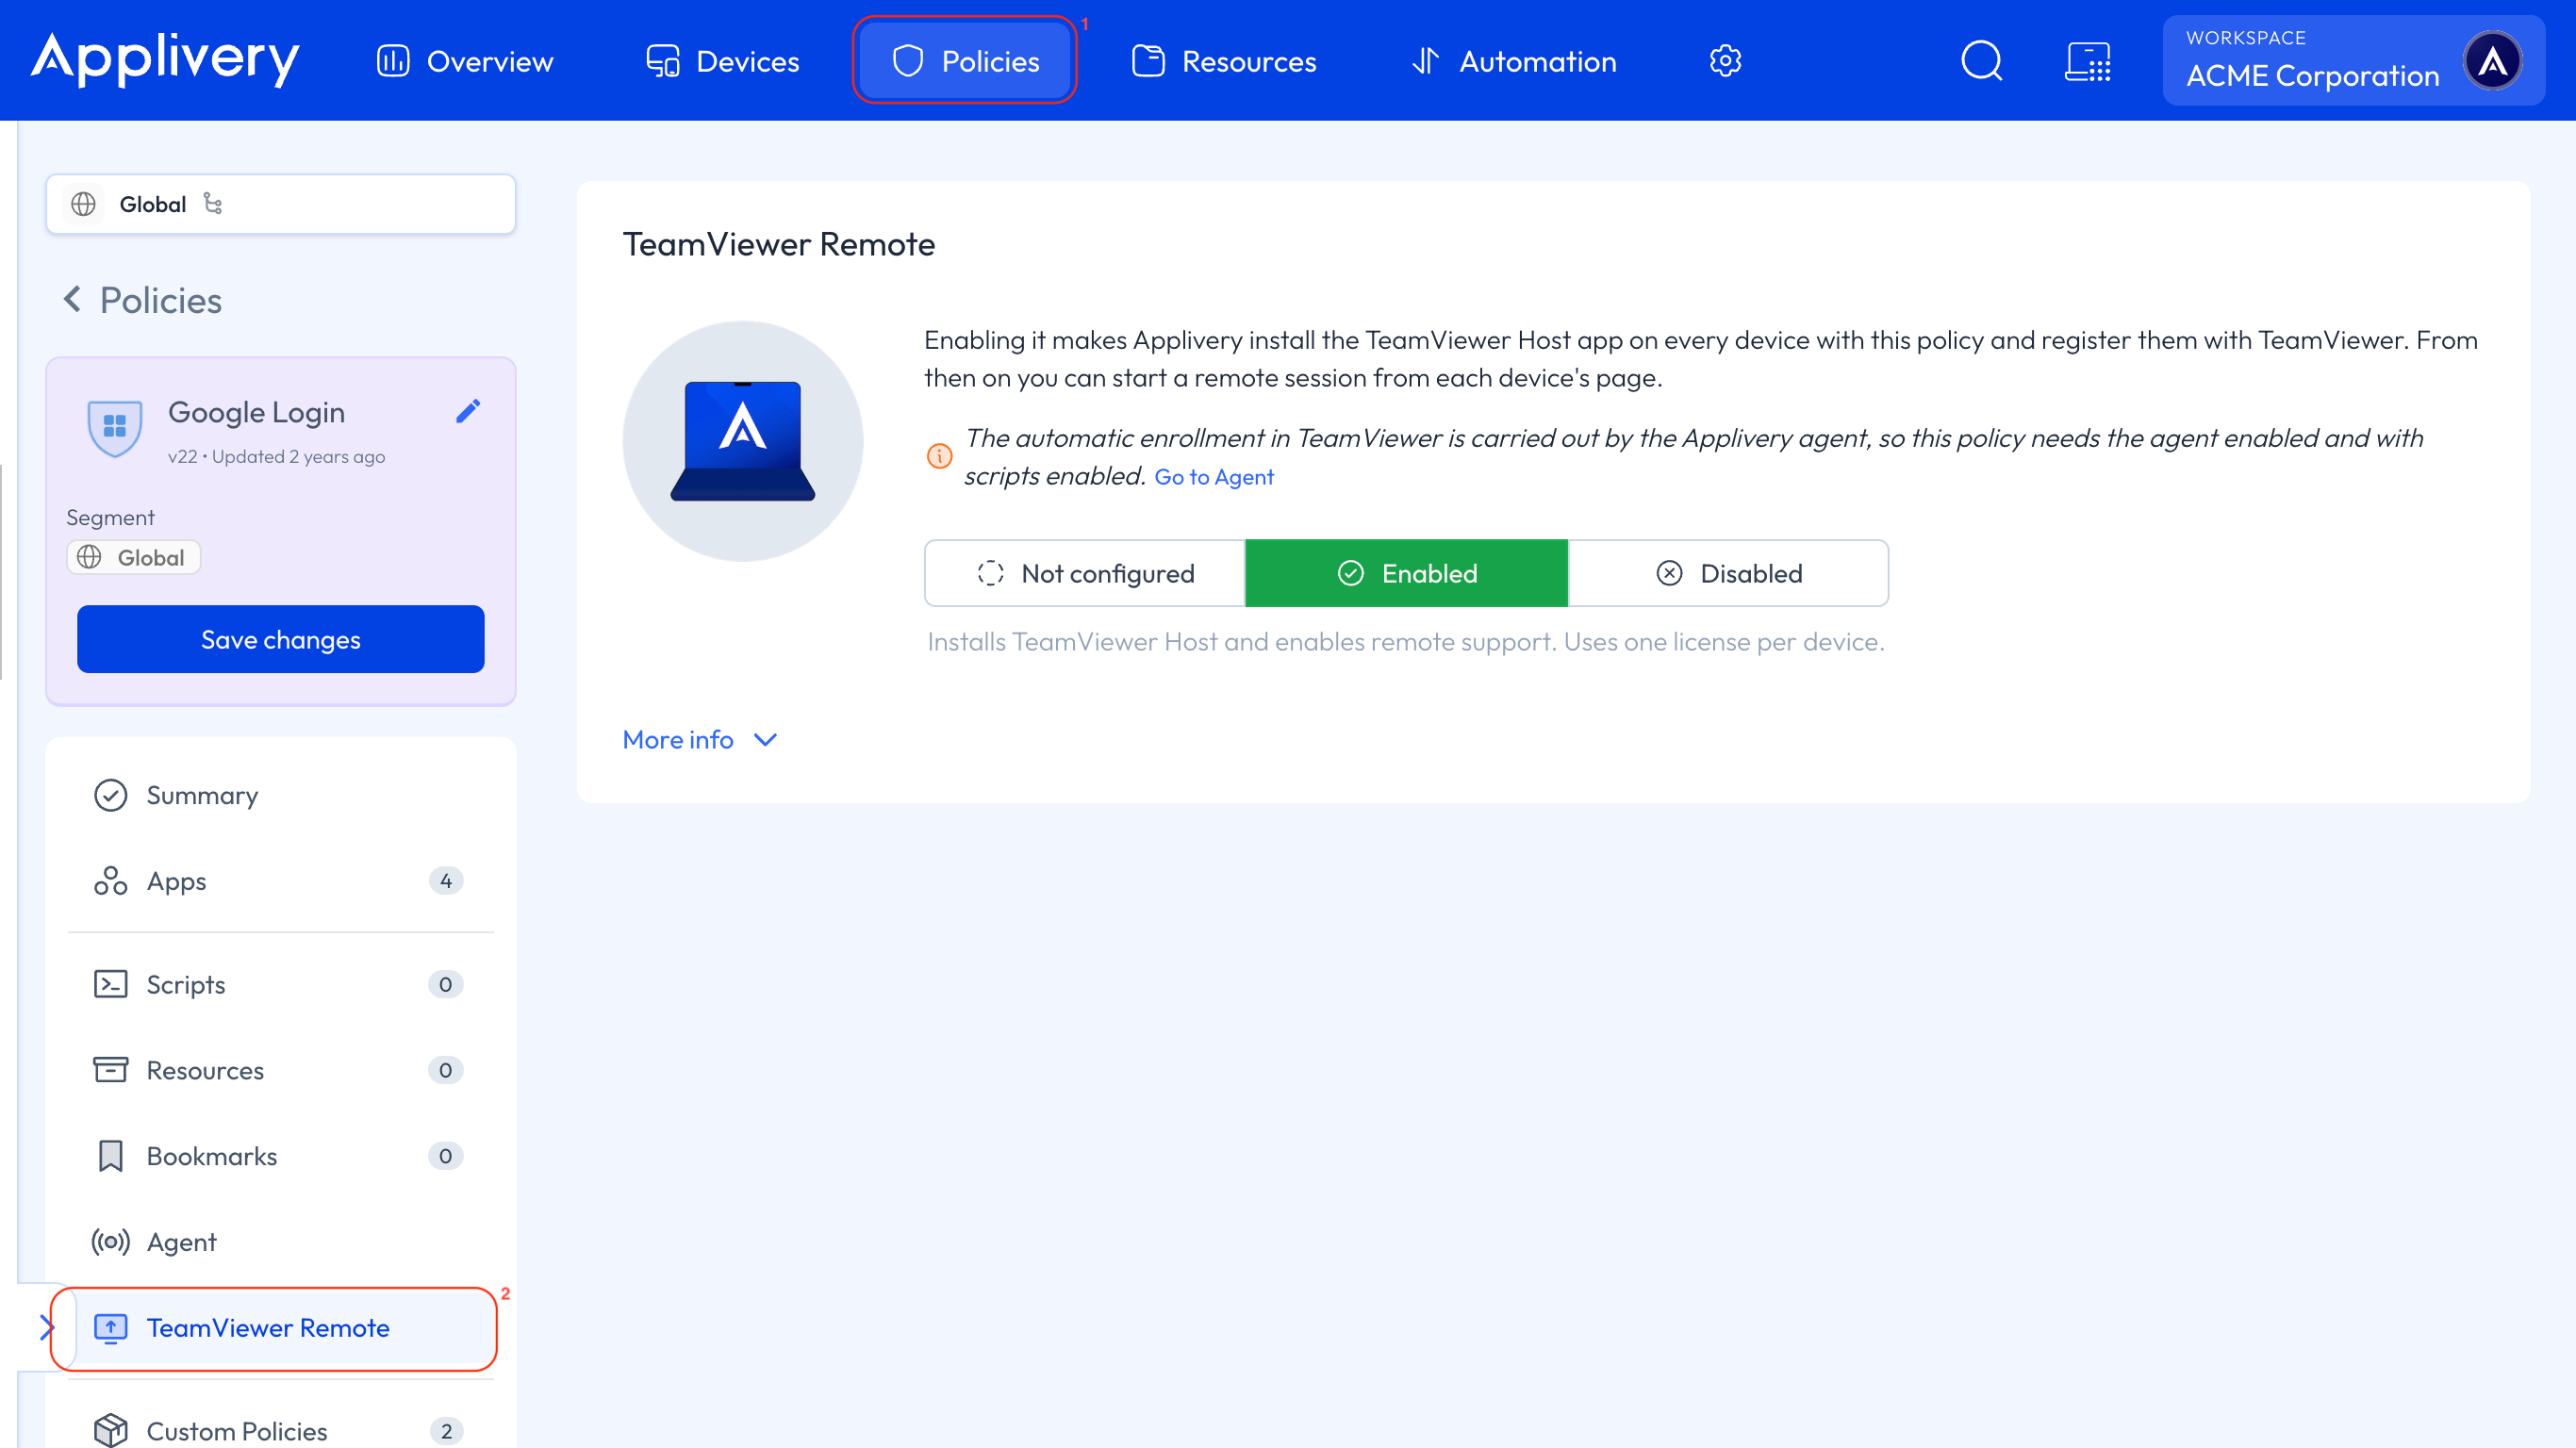
The three configuration states
TeamViewer Remote uses the Not configured / Enabled / Disabled pattern. This matters because a Device can have more than one Policy applied to it: what actually reaches the Device is the composed result of every Policy in its set, not the value of any single one.
So each state is really what this Policy contributes to that composition:
State | What this Policy contributes |
|---|---|
Enabled | Turns TeamViewer Remote on. TeamViewer Host is installed, the Device is registered with TeamViewer, and it takes a license from your pool |
Disabled | Turns TeamViewer Remote off. Any Device that ends up without it active is deregistered from TeamViewer and its license is released back to the pool |
Not configured | Contributes nothing. This Policy stays out of the decision, and the result comes from the other Policies in the set |
Which Policy wins
Policies are evaluated sequentially, in the order set by their Priority in the composition. The first Policy that actually sets a value decides the outcome — Not configured is skipped over, and no later Policy overrides a value that has already been set.
Neither Enabled nor Disabled beats the other, in other words: order is what decides. Here it is on a Device with two Policies, where Policy 1 is evaluated first:
Policy 1 | Policy 2 | Composed result |
|---|---|---|
Not configured | Enabled | Enabled — Policy 1 sets nothing, so Policy 2 decides |
Disabled | Enabled | Not active — Policy 1 got there first, and Policy 2 doesn't override it |
Enabled | Disabled | Enabled — the same rule the other way round: Policy 1 got there first |
Use Not configured when a Policy has no business deciding about Remote Support — one that only deploys apps, for example. Use Disabled when you want a Policy to actively keep Remote Support off, and check that it is evaluated before any Policy that enables it, or it won't have any effect.
Automatic installation
Applivery deploys TeamViewer Host silently — the person using the Device doesn't have to do anything, and won't be asked to approve anything. The Device shows up as Ready once the app has fetched its configuration, which usually takes a few minutes.
How licenses are counted
Each Device with TeamViewer Remote active in its composed configuration uses one TeamViewer license from your plan, whether or not anyone ever actually connects to it. What counts is the number of Devices with the feature active, not the number of sessions you open.
The moment a Device stops having TeamViewer Remote active through its Policies, it is unregistered from TeamViewer and its license is released automatically. How the composition changed doesn't matter: setting a Policy to Disabled, removing the Policy that was enabling it, or moving the Device elsewhere all have the same effect.
Starting a remote session
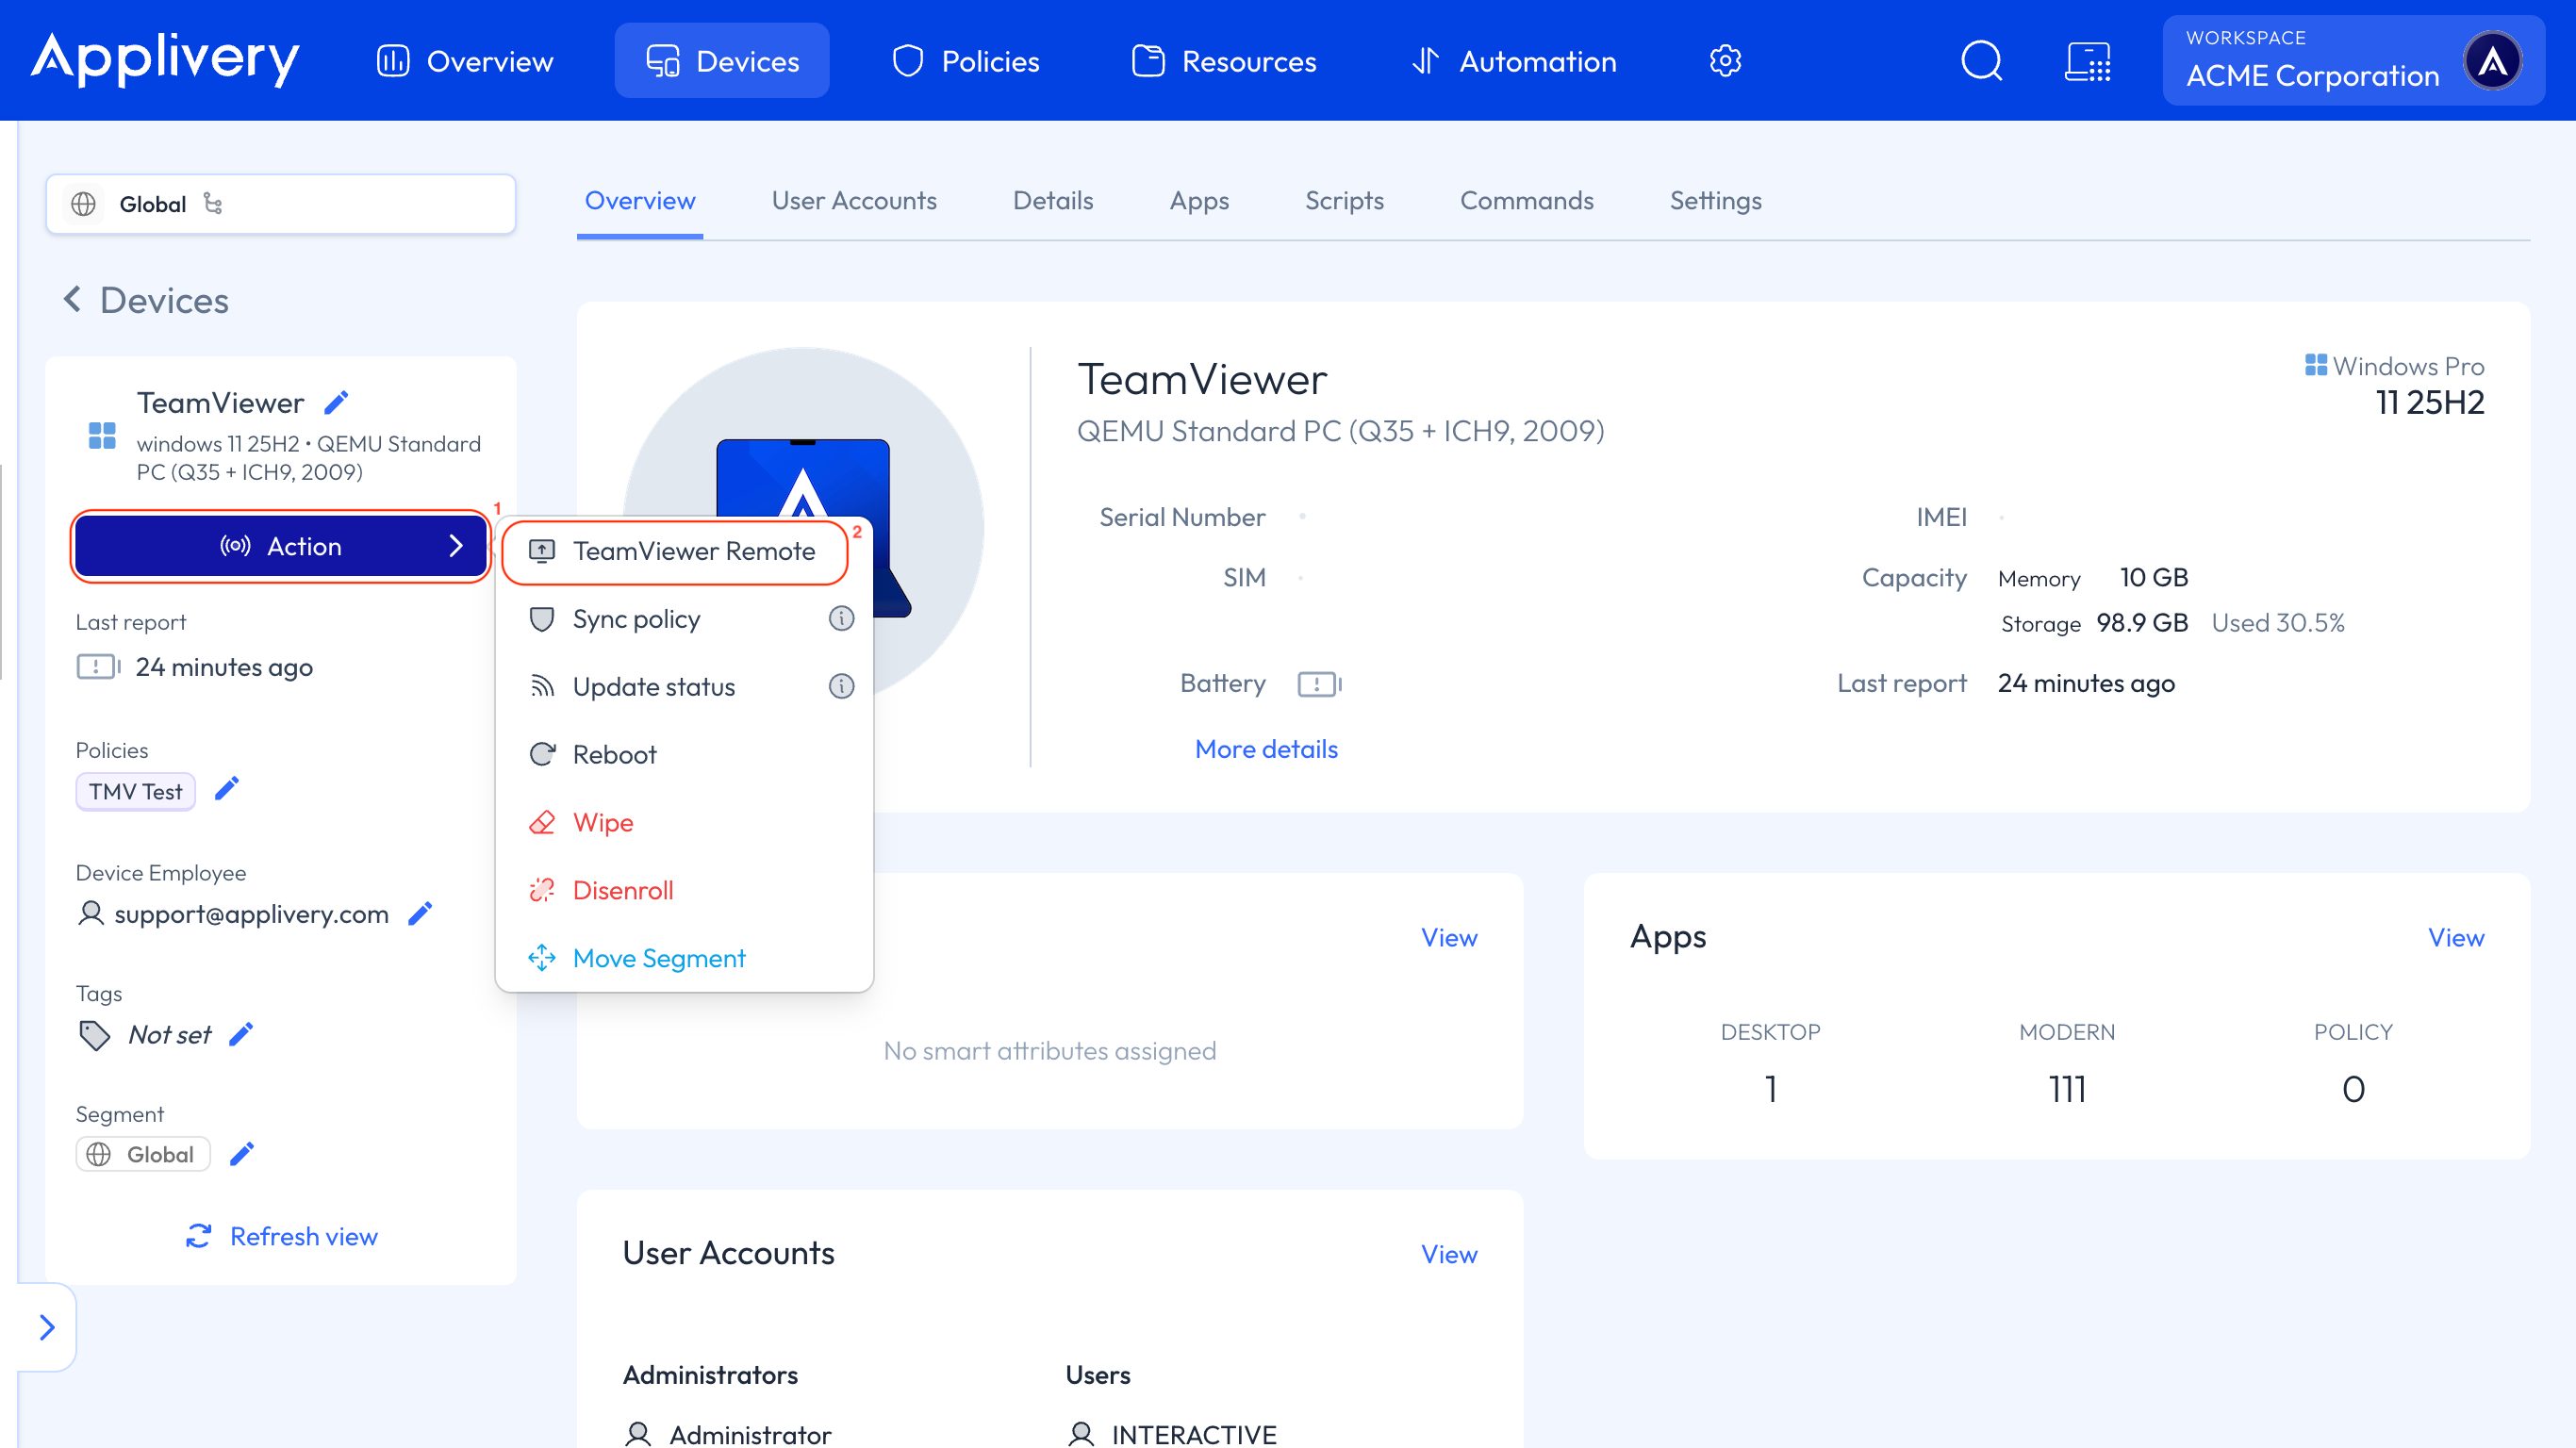
Navigate to any of your Windows Devices and click the Action button 1. TeamViewer Remote 2 is the first option in the menu.
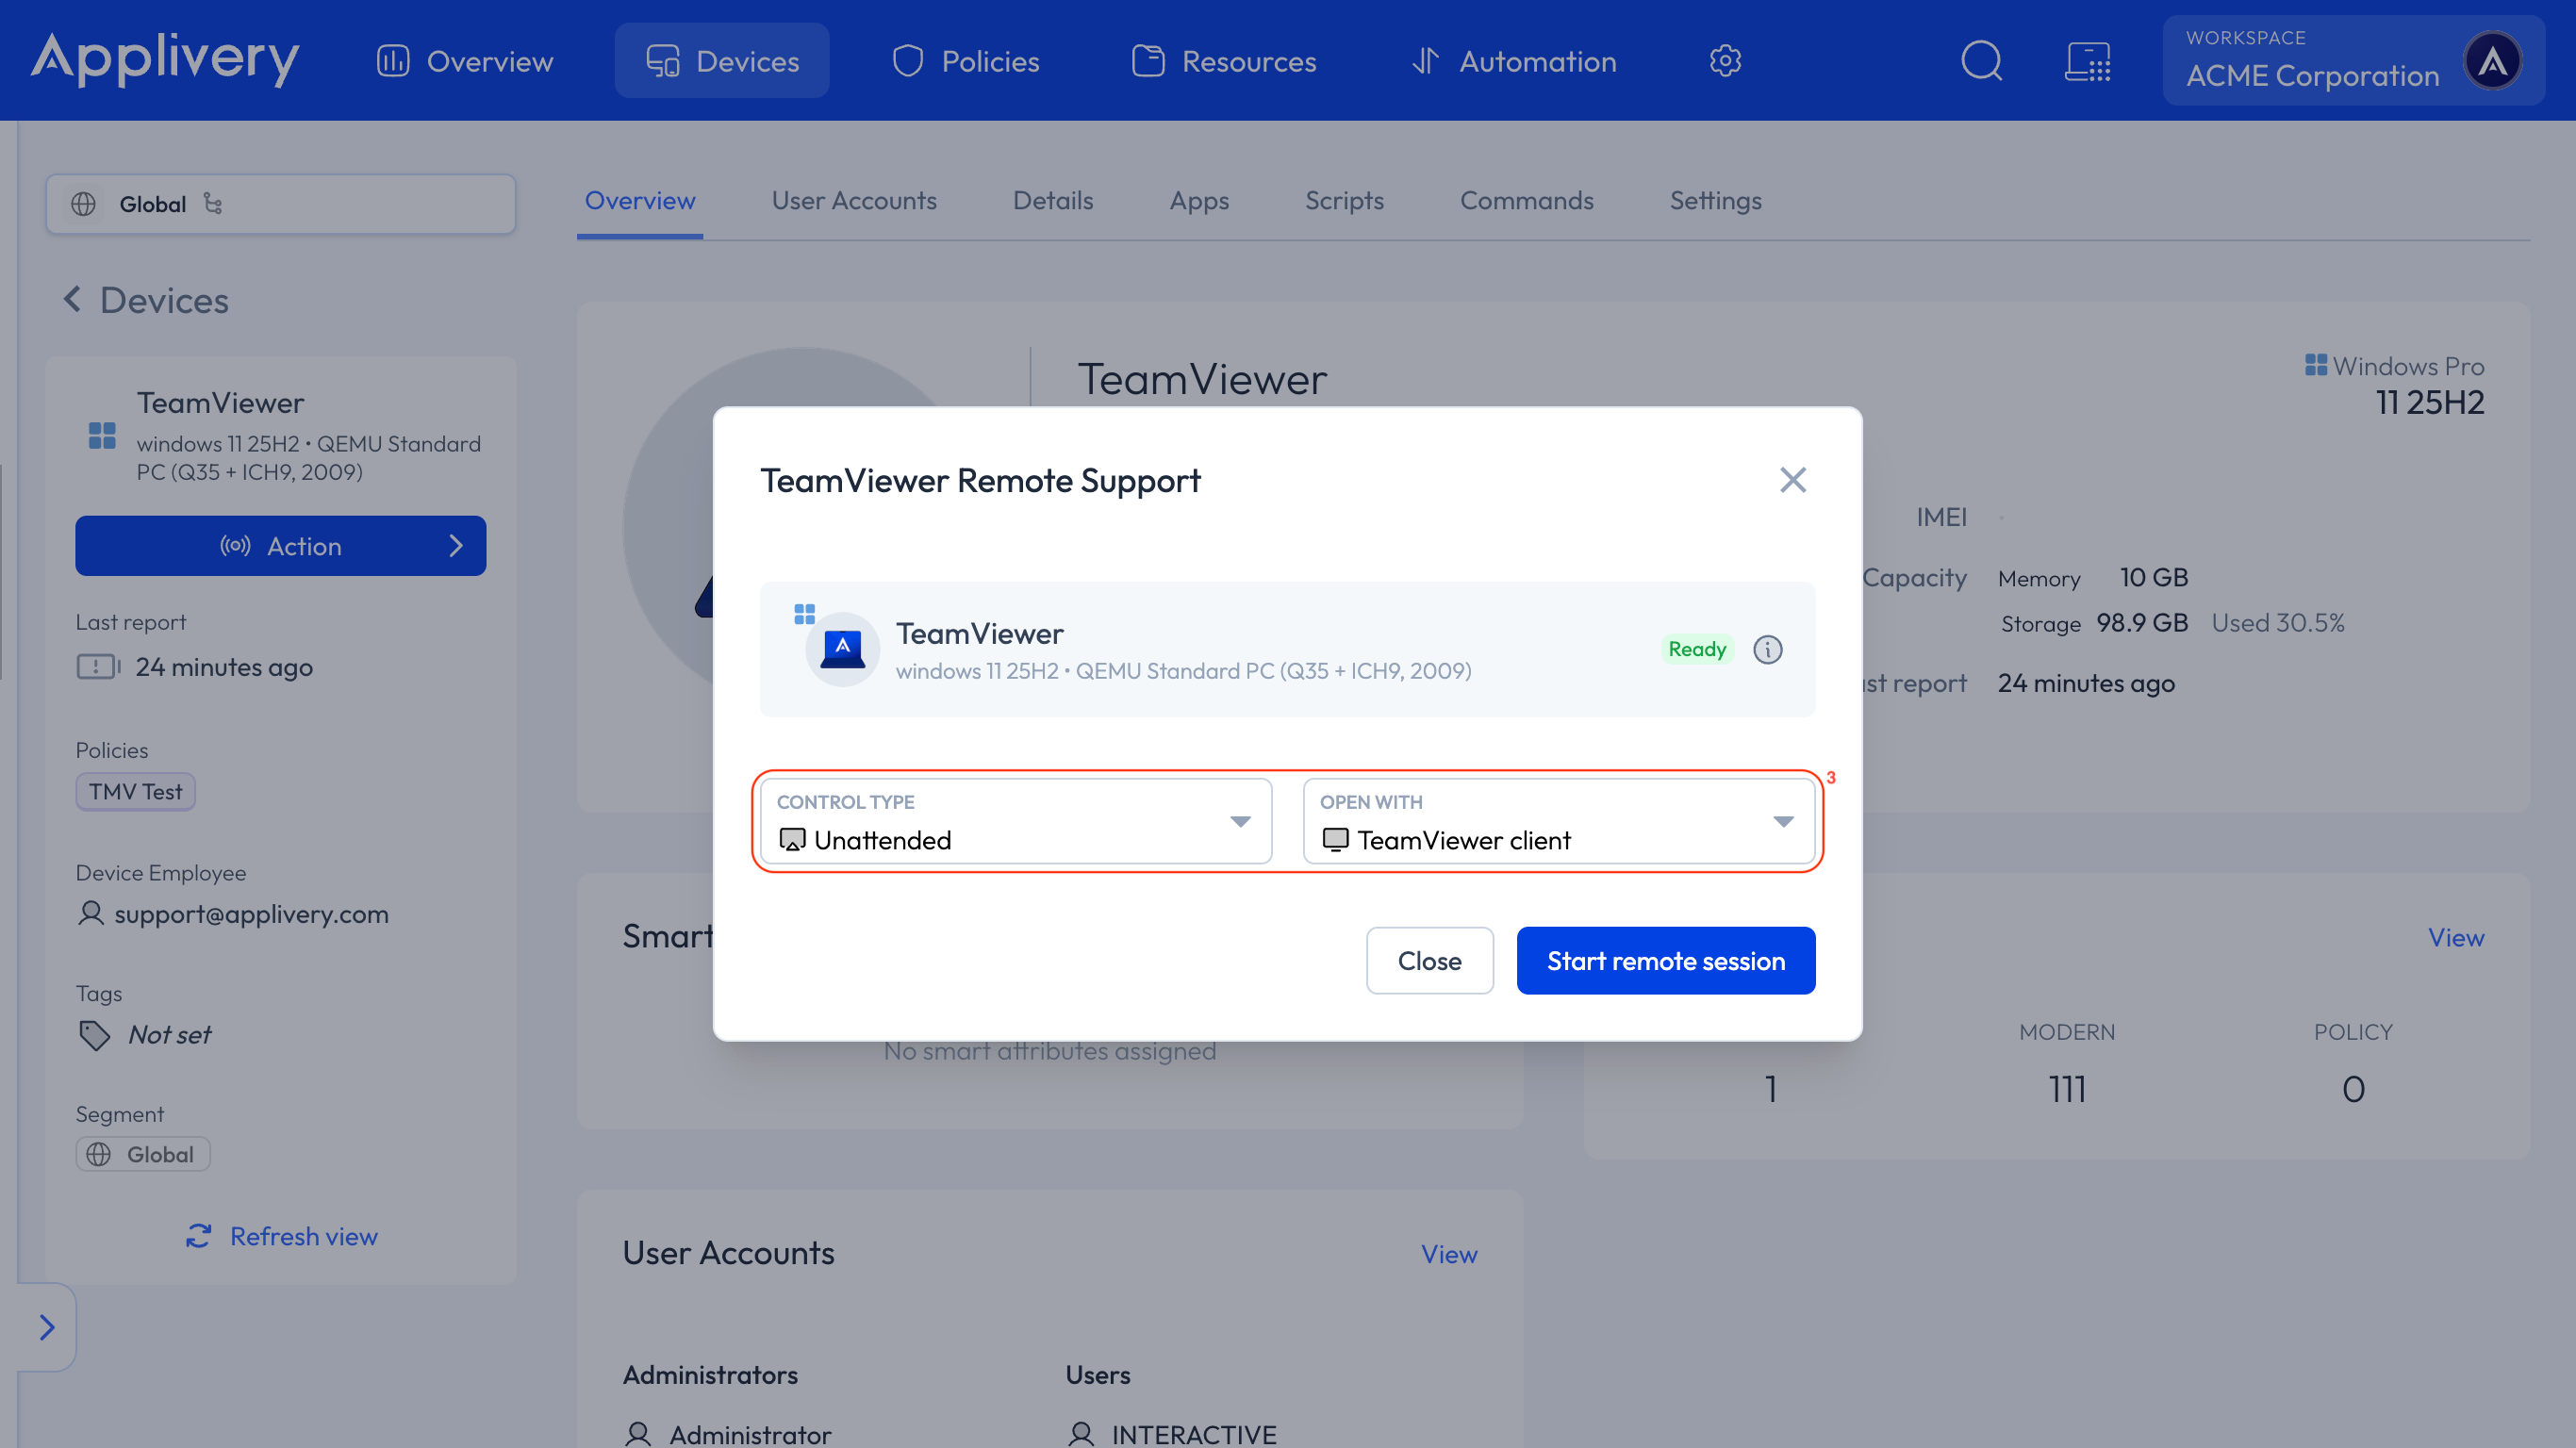
The TeamViewer Remote Support modal opens. Choose the Control Type and the Open With option for this session 3.
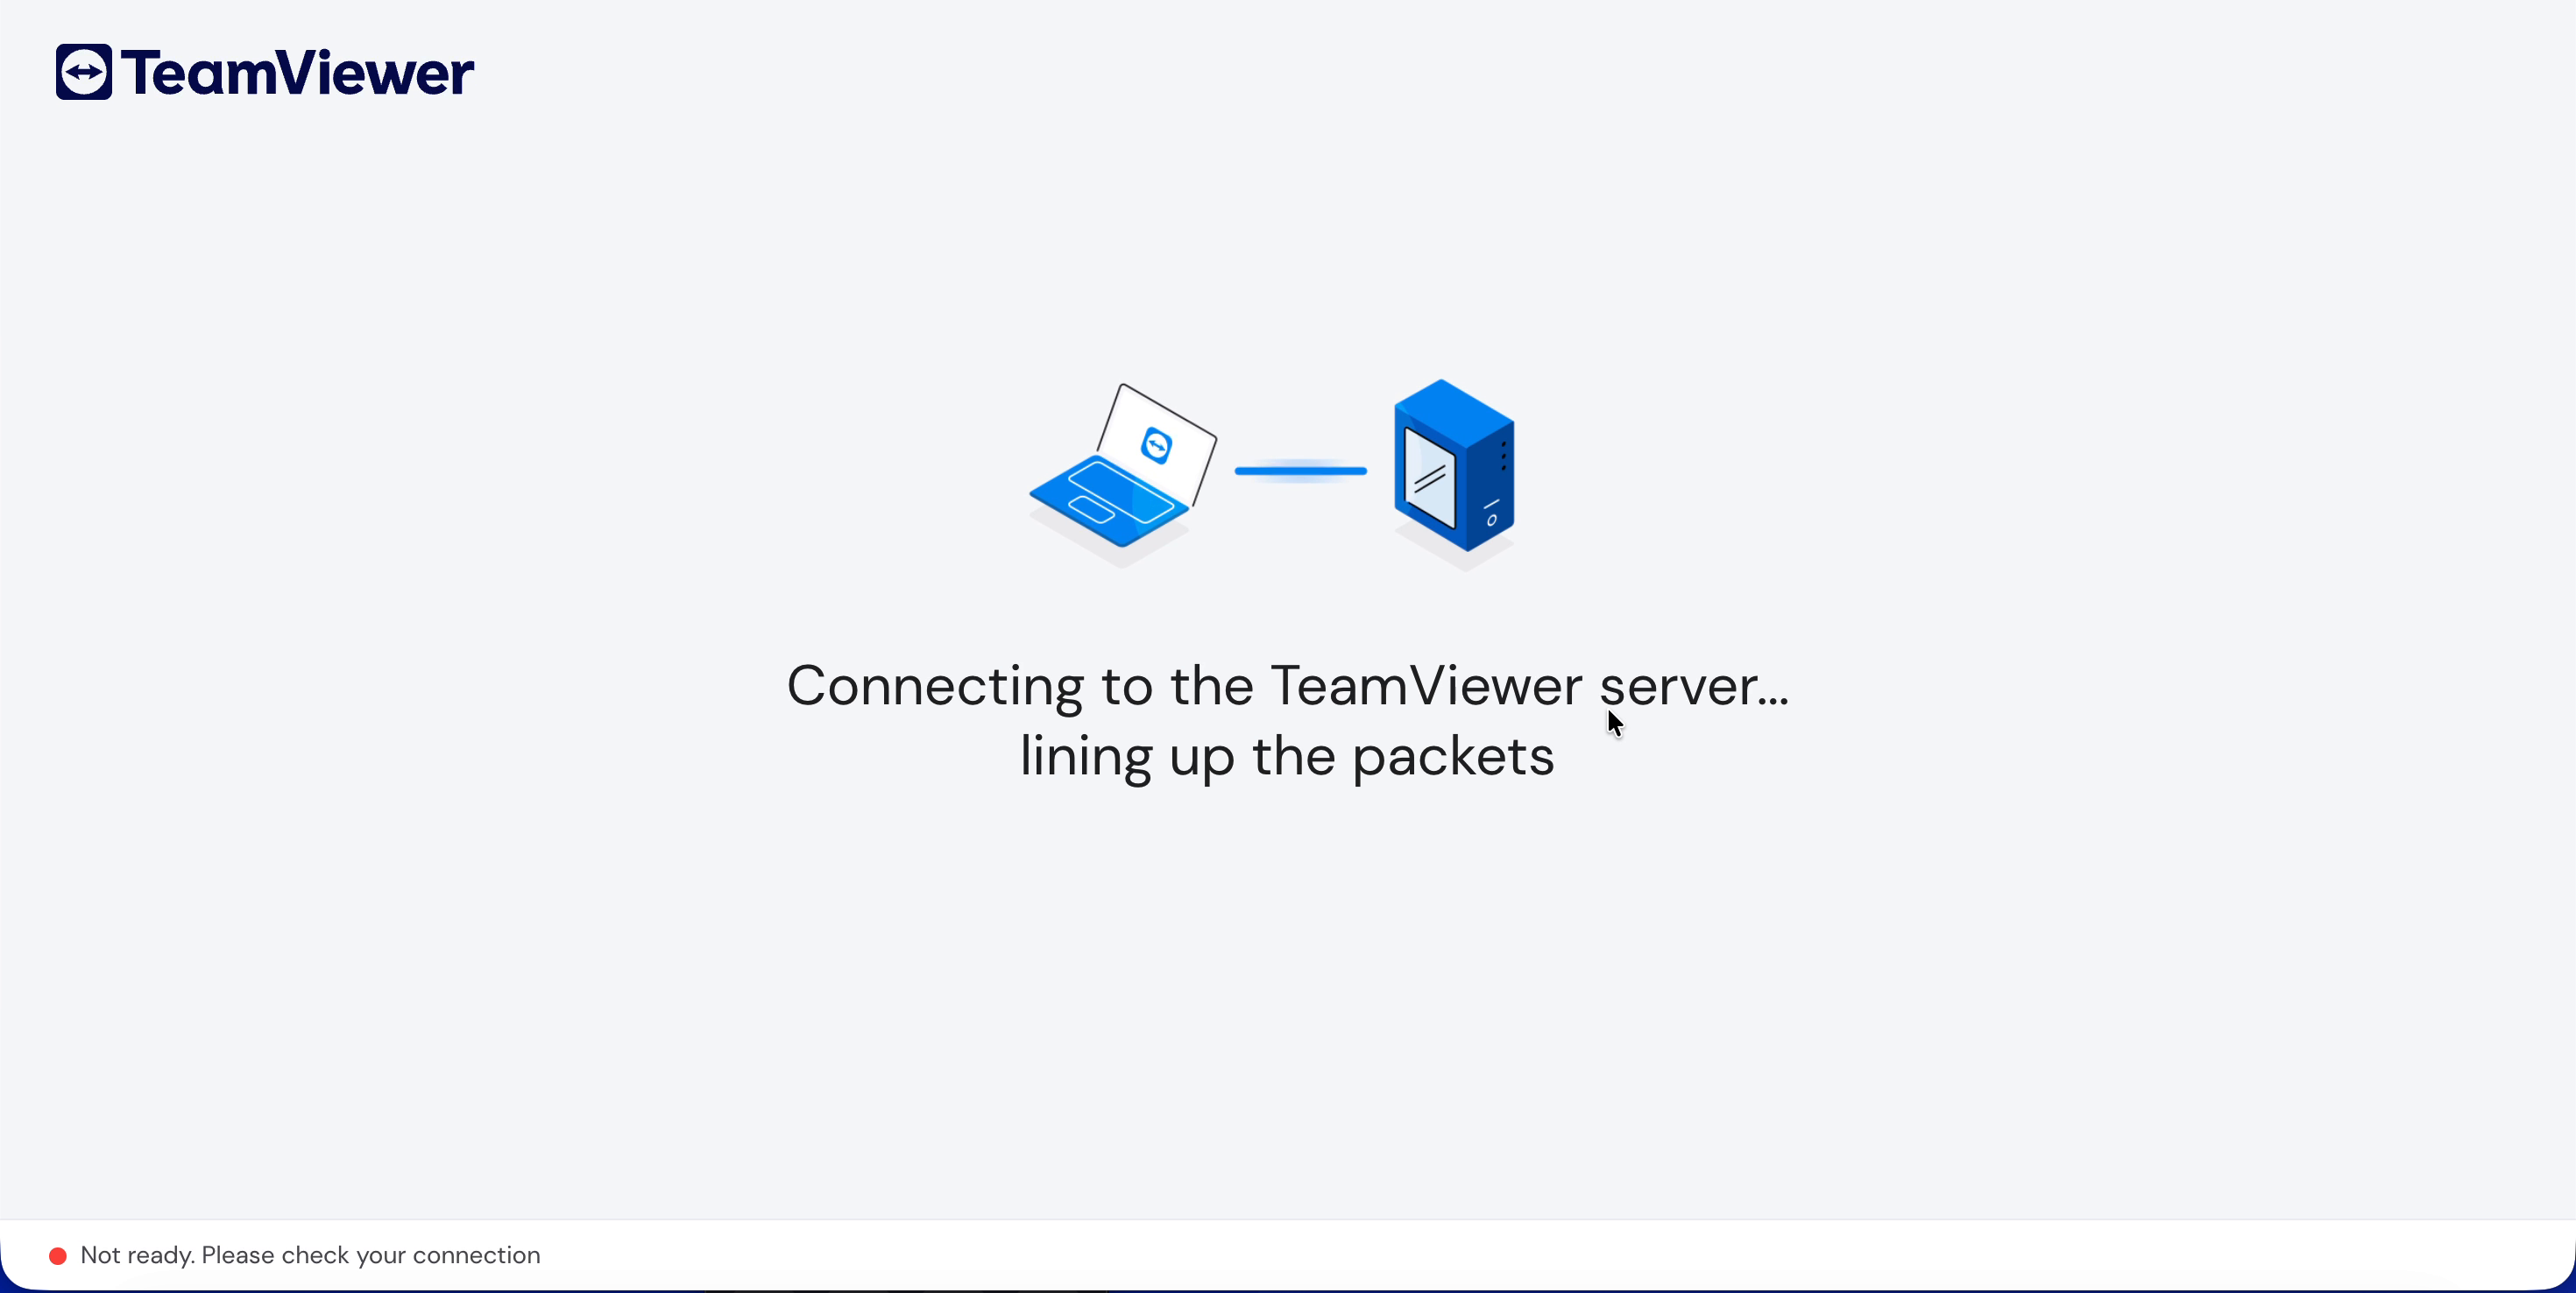
Click Start remote session. If you chose TeamViewer client, the session is handed off to the TeamViewer desktop app on your machine, which connects to the Device.
You don't fix a session type when enabling the Policy — every option is available every time, and you pick per session:
Setting | Options |
|---|---|
Control Type | Unattended — connects without anyone accepting on the Device, for machines with nobody in front of them. Attended — someone at the Device has to accept the incoming session. View only — someone at the Device also has to accept, and you see the screen without any keyboard or mouse input being sent |
Open With | New browser tab — runs on TeamViewer's web client, nothing to install on your machine. TeamViewer client — hands the session to the TeamViewer desktop app, with its full set of features |
You can change your selection as many times as you like before clicking Start remote session — the value showing when you click is the one that gets used.
What you can do during a session
Once connected, TeamViewer gives you clipboard sharing, black screen, file transfer, chat, audio call, augmented reality, remote reboot, screen recording, and the ability to leave notes for the user.
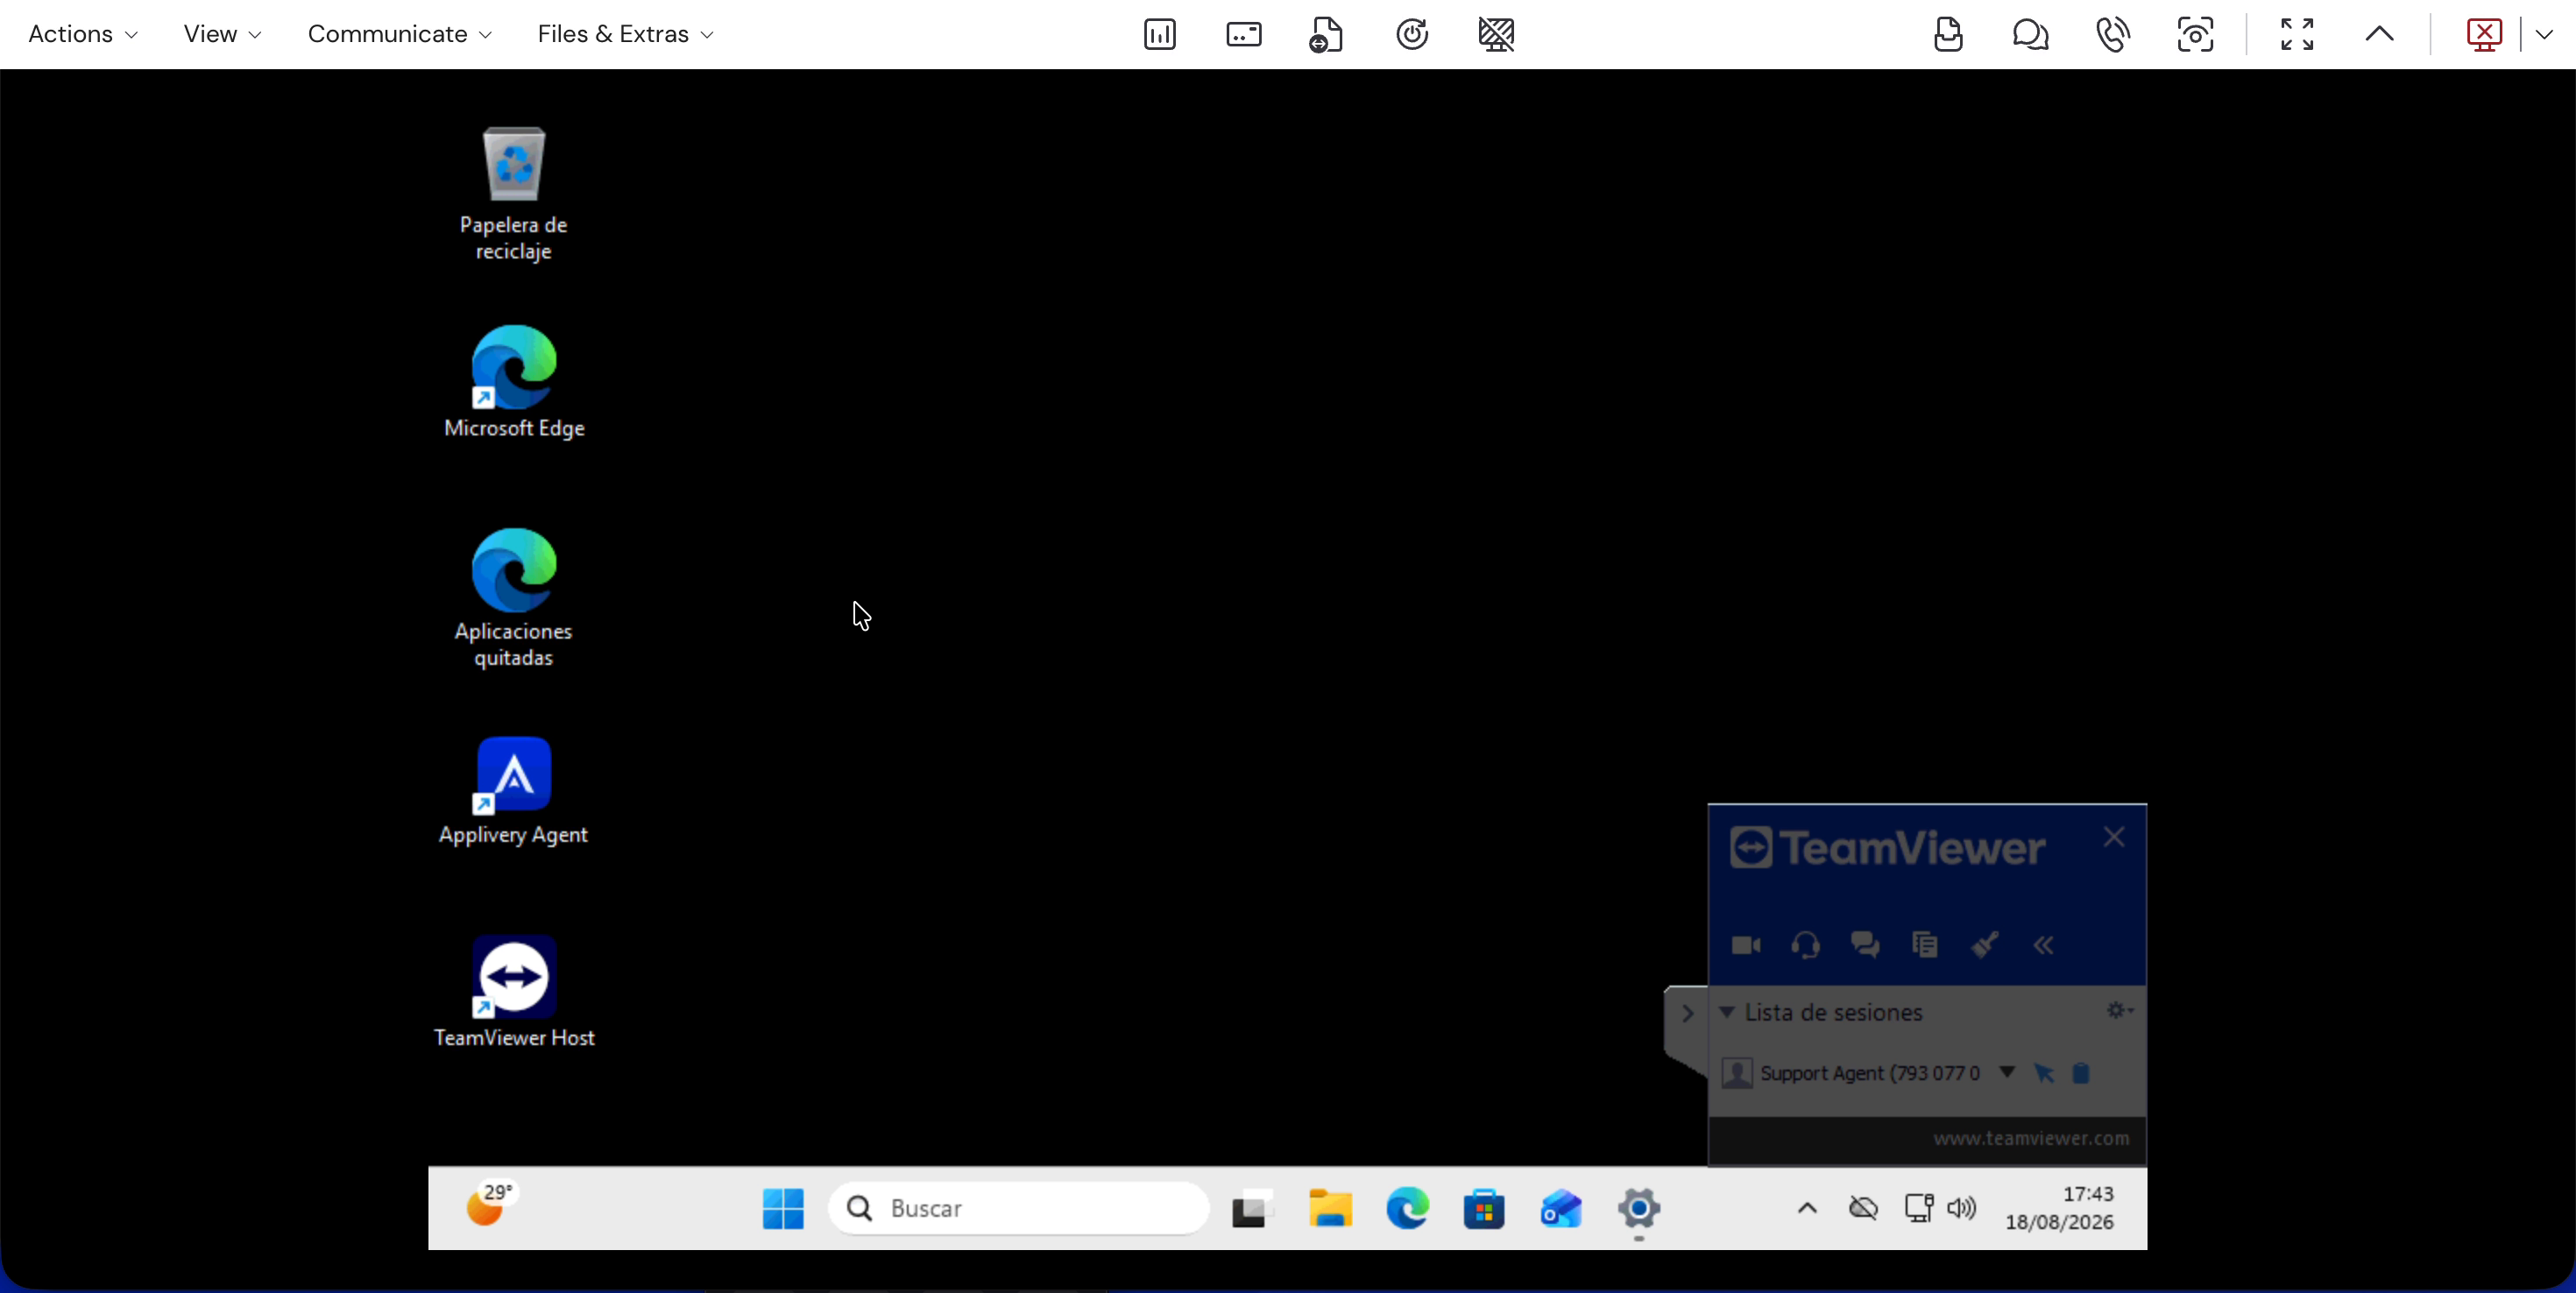
On the managed Device itself, TeamViewer Host shows up installed alongside the Applivery Agent — both put there by the automatic installation described above.
Troubleshooting
The TeamViewer Remote Support modal shows a status badge next to the Device, so you can tell at a glance whether a session can start. Hover the ⓘ icon next to the badge for a short explanation.
Ready
TeamViewer Host is installed and configured on the Device. You can start a session.
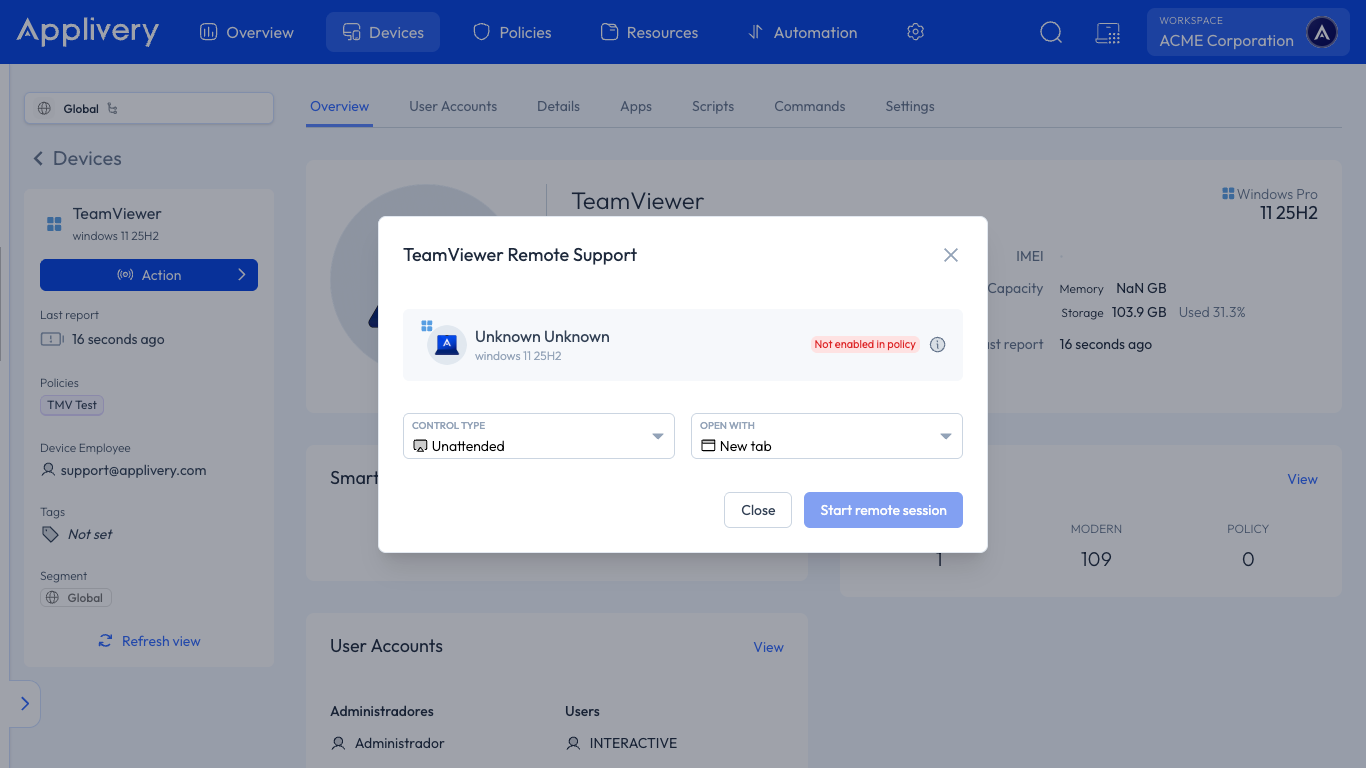
Not enabled in policy
The Device's assigned Policy doesn't have TeamViewer Remote set to Enabled. Go back to Enabling TeamViewer Remote and confirm you're editing the Policy that Device is actually assigned to.
App not installed
The Policy is enabled, but TeamViewer Host hasn't finished installing on that Device yet — or couldn't. Since the install is silent and can take a few minutes, wait and retry first.
If it persists, check that the Device's Segment actually meets the Agent and Scripts requirement. This is by far the most common cause, because the install is delivered through a Script run by the Agent.
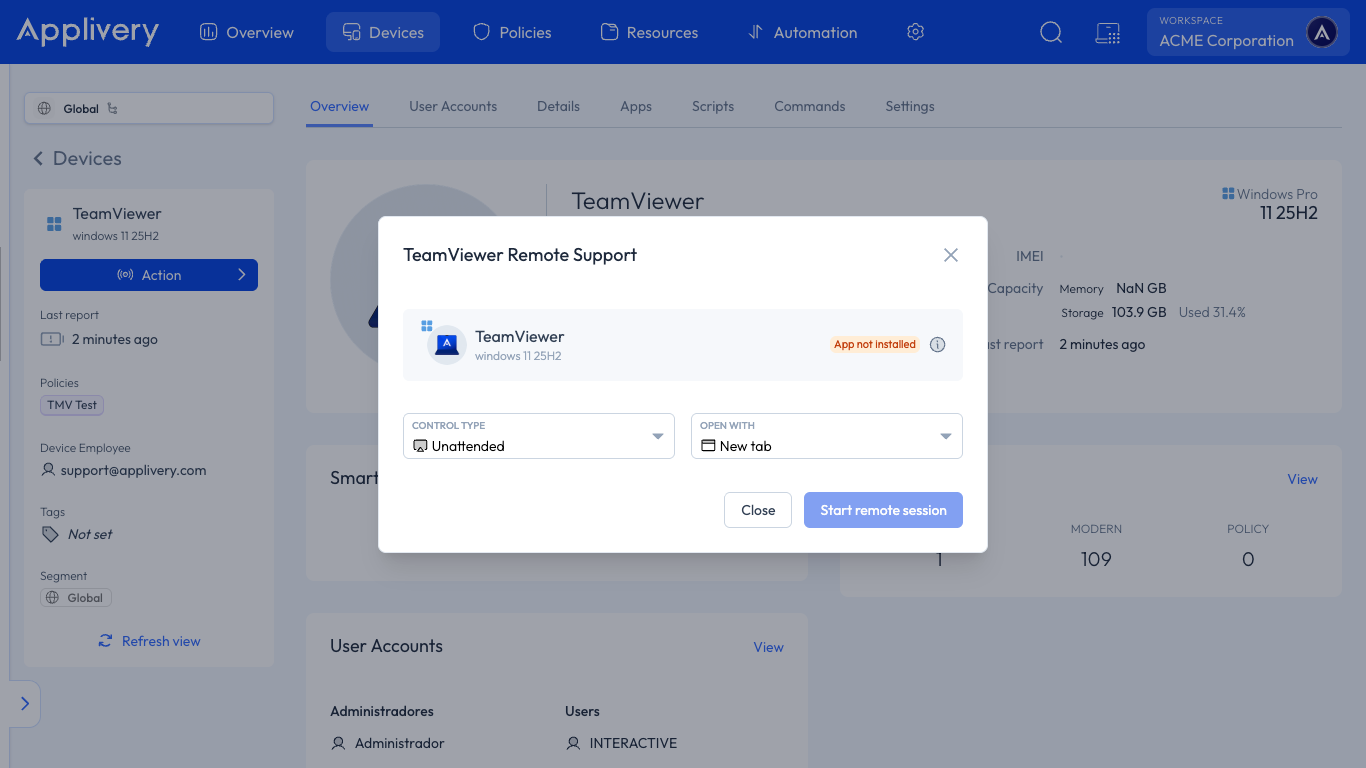
Starting a session against a Device in this state fails, whichever Control Type or Open With option you pick.
The Device goes offline mid-session
If the Device disconnects right after you click Start remote session, the remote session window closes on its own. Wait for the Device to come back online and start a new session.
Nothing seems to happen when I click Start remote session
Give it a moment before clicking again — double-clicking Start remote session won't open two sessions, so a second click doesn't speed anything up.