

The recommended way to install Google Chrome extensions on macOS is to import a Plist with the ExtensionInstallForcelist key (com.google.Chrome payload) into a macOS Policy, just like the Chrome homepage. Applivery scripts help you verify the result or serve as an alternative when you can't use a Policy.
Before you start
macOS Devices managed by Applivery, with Google Chrome installed.
The extension ID.
Access to the Applivery Dashboard with permission to edit Policies and, if you use scripts, the Resources section.
How to get an extension's ID
The ID is a string of 32 lowercase letters (from a to p) that uniquely identifies the extension. You can get it in three ways:
From Chrome Web Store. Open the extension's page and copy the last part of the URL:
https://chromewebstore.google.com/detail/extension-name/<ID>From
chrome://extensions. Turn on Developer mode (top-right corner). Each installed extension shows its ID below the description.From Terminal on a Mac with the extension installed. The folder names in this directory are the IDs:
ls ~/Library/Application\ Support/Google/Chrome/Default/Extensions/If you use several Chrome profiles, replace
Defaultwith the profile name (for example,Profile 1).
For extensions hosted outside Chrome Web Store, you get the ID the same way, but in the Plist you must use your own server's update URL instead of https://clients2.google.com/service/update2/crx.
Recommended method: Policy with a Plist
Prepare the Plist
The following payload force-installs an extension. Replace EXTENSION_ID with your extension's ID:
	PayloadContent

			ExtensionInstallForcelist

				EXTENSION_ID;https://clients2.google.com/service/update2/crx

			PayloadDisplayName
			Google Chrome - Extensions
			PayloadIdentifier
			com.google.Chrome.extensions.REPLACE-UUID
			PayloadType
			com.google.Chrome
			PayloadUUID
			REPLACE-UUID
			PayloadVersion
			1
Each list entry has the format EXTENSION_ID;UPDATE_URL. To install several extensions, add one <string> per extension inside the same <array>.
What to put in the REPLACE-UUID placeholders
Replace each REPLACE-UUID with a UUID, a unique identifier with this format: 754C545B-75B5-4E50-927D-3BC06EBD47E0. There are two places:
PayloadUUID: a full UUID.PayloadIdentifier:com.google.Chrome.extensions.followed by a UUID. It can be the same as thePayloadUUIDone or a different one.
To generate one from Terminal on a Mac (each run returns a new one):
uuidgen
For example, if uuidgen returns A1B2C3D4-E5F6-4A7B-8C9D-0E1F2A3B4C5D:
<key>PayloadIdentifier</key>
<string>com.google.Chrome.extensions.A1B2C3D4-E5F6-4A7B-8C9D-0E1F2A3B4C5D</string>
<key>PayloadUUID</key>
<string>A1B2C3D4-E5F6-4A7B-8C9D-0E1F2A3B4C5D</string>
Any UUID v4 generator works too.
When to generate a new UUID
Situation | UUID |
|---|---|
Adding more extensions to the same Plist | They don't change: add another |
Editing a Plist you've already imported | Keep the same UUIDs |
Creating a different Plist (another Policy or another payload) | Generate new UUIDs, so two configurations don't share an identifier |
You don't need a new Plist or UUID for every extension.
Put all force-installed extensions in a single Plist and a single Policy. If you split the ExtensionInstallForcelist key across several configurations that apply to the same Device, Chrome isn't guaranteed to merge them, and only one of them may stay active.
Import it into an Applivery Policy
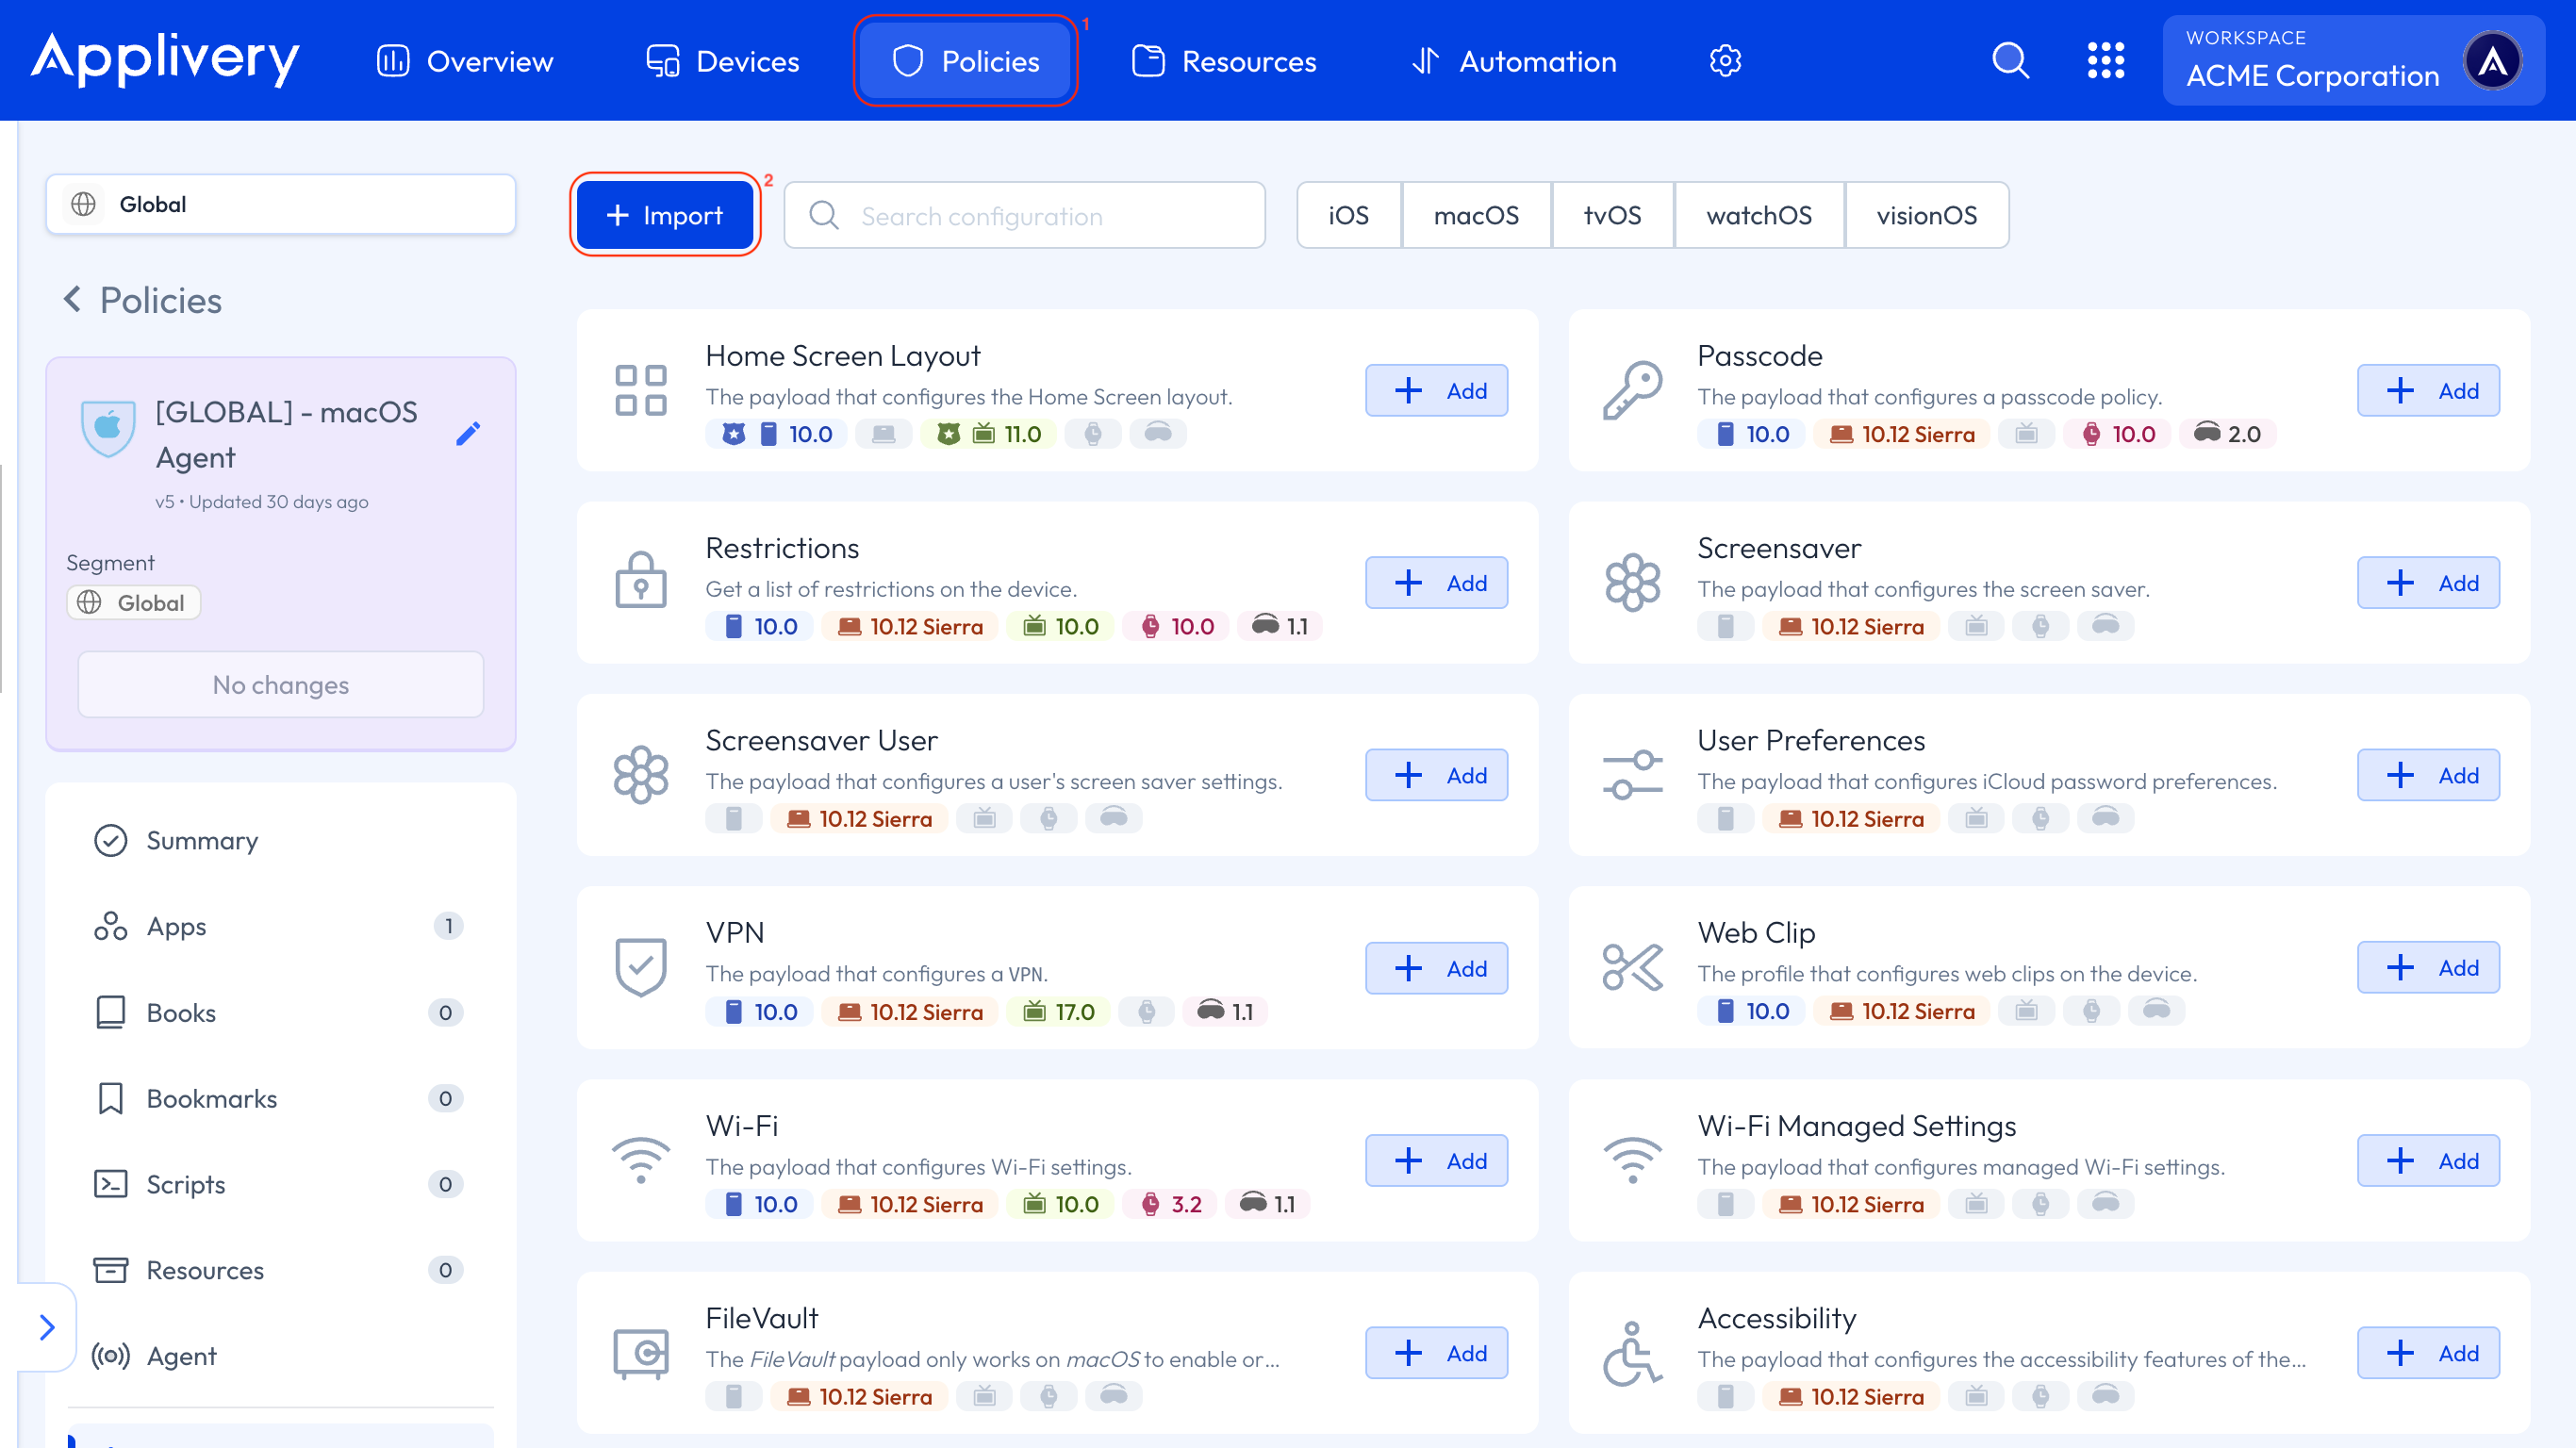
Once in the Applivery Dashboard, go to any of your Policies 1 or create a new one.
Click the + Add configuration button on the left-hand menu, then click + Import 2.
Paste the Plist or use the Upload XML button to upload the file.
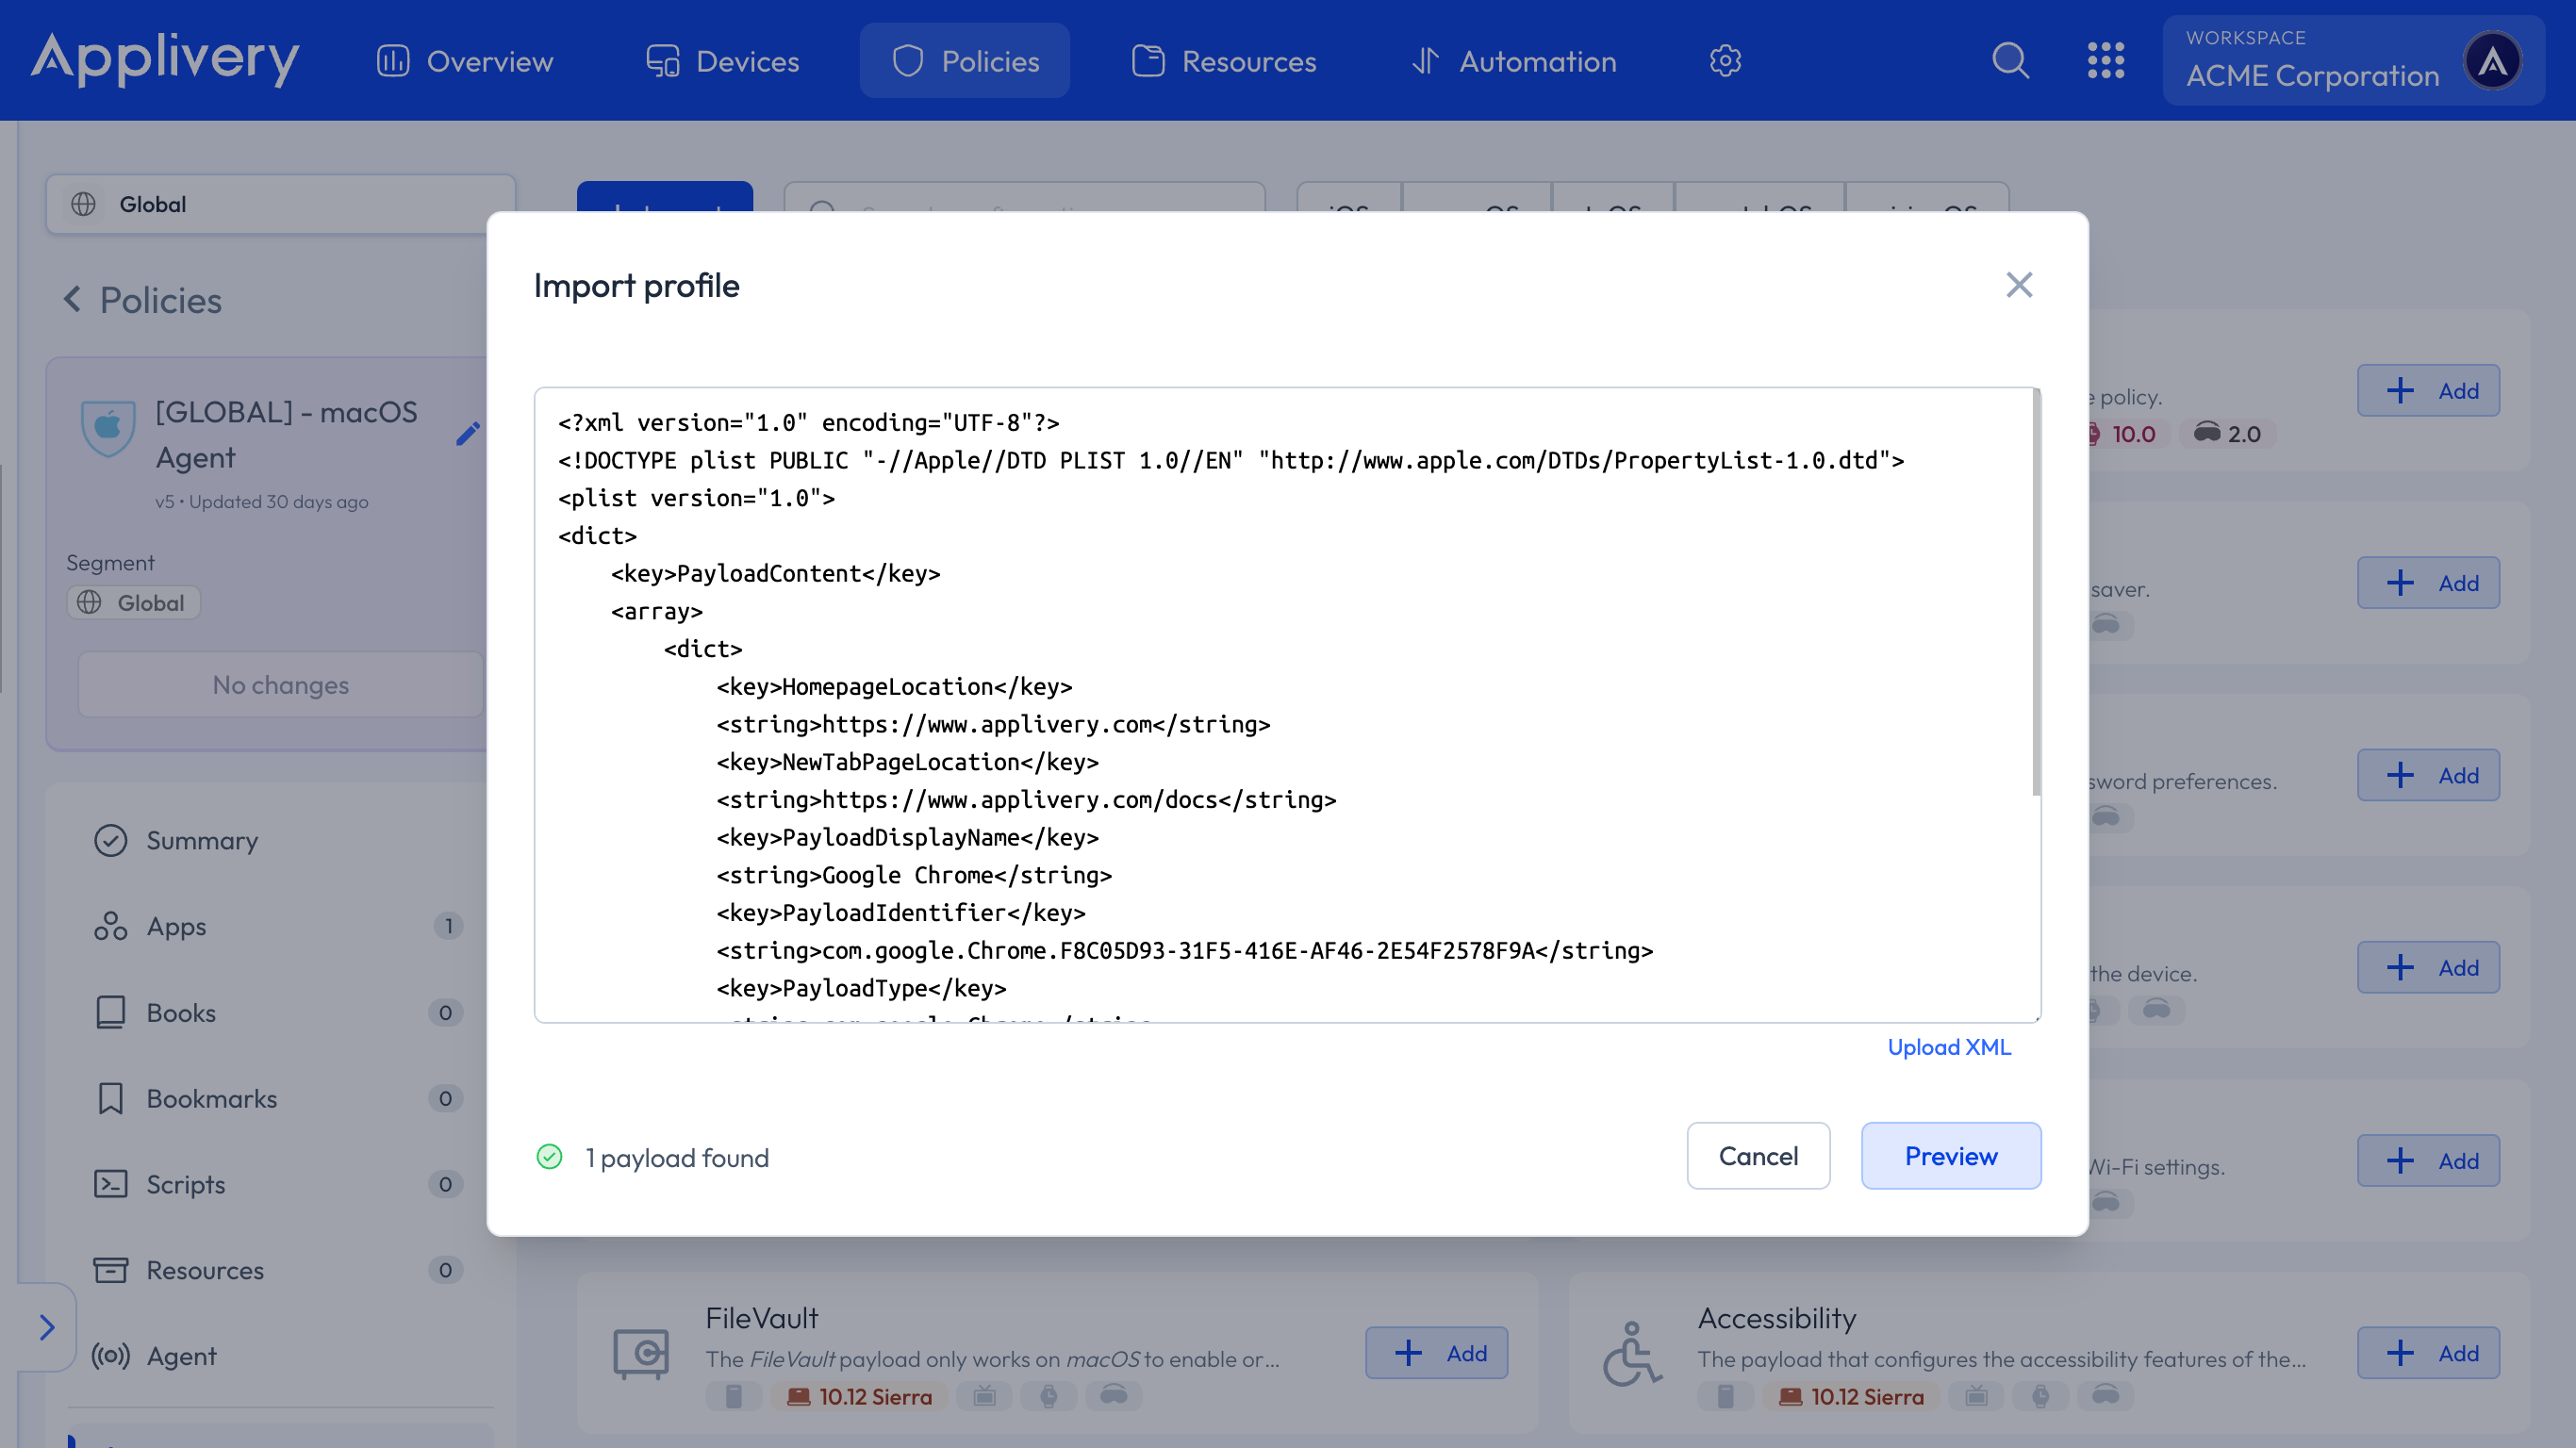
Save your changes.
Verify the result
Once the Policy has synced to the Device, open Chrome and check:
chrome://policy→ click Reload policies and confirm thatExtensionInstallForcelistappears with the OK status.chrome://extensions→ the extension should appear installed and marked as managed by your organization.
If Chrome was open when the Policy was applied, restart it to verify that the configuration has been applied.
Pin the extension to the toolbar
A force-installed extension is available in Chrome's extensions menu (the puzzle icon), but it isn't pinned to the toolbar. To have it pinned from the start, use the ExtensionSettings key with the toolbar_pin option.
ExtensionSettings groups all the settings for each extension in a dictionary, identified by its ID. It lets you force-install the extension and pin it to the toolbar in the same block, so it replaces ExtensionInstallForcelist for those extensions:
	PayloadContent

			ExtensionSettings

				aaaaaaaaaaaaaaaaaaaaaaaaaaaaaaaa

					installation_mode
					force_installed
					update_url
					https://clients2.google.com/service/update2/crx
					toolbar_pin
					force_pinned


			PayloadDisplayName
			Google Chrome - Extensions
			PayloadIdentifier
			com.google.Chrome.extensions.REPLACE-UUID
			PayloadType
			com.google.Chrome
			PayloadUUID
			REPLACE-UUID
			PayloadVersion
			1
Key | Value | Effect |
|---|---|---|
|
| Force-installs the extension |
| Update URL | Same as in |
|
| Pins the extension to the toolbar |
To configure several extensions, add one key per ID inside the ExtensionSettings dictionary, each with its own <dict>. Import the Plist into the Policy just like with ExtensionInstallForcelist.
Don't declare the same extension in both ExtensionInstallForcelist and ExtensionSettings. Pick one of the two keys for each extension.
If you only want to install the extension and let each user decide whether to pin it, use ExtensionInstallForcelist and leave out toolbar_pin.
The extension ends up installed and pinned to the Google Chrome toolbar.
Using scripts
Applivery scripts (Bash on macOS) aren't needed to install the extension with the method above, but they're useful in two cases. You'll find more details in Scripts.
Verification script
Checks that the Plist with the extension has reached the Mac. Pass the extension ID as an argument (in double quotes).
#!/bin/bash
# Usage: the first argument is the Chrome extension ID
EXT_ID="$1"
PLIST="/Library/Managed Preferences/com.google.Chrome.plist"

if [ -z "$EXT_ID" ]; then
  echo "Missing the extension ID as an argument."
  exit 2
fi

if [ ! -f "$PLIST" ]; then
  echo "$PLIST does not exist: the Chrome configuration is not applied."
  exit 1
fi

if /usr/libexec/PlistBuddy -c "Print :ExtensionInstallForcelist" "$PLIST" 2>/dev/null | grep -q "$EXT_ID"; then
  echo "OK: extension $EXT_ID is in ExtensionInstallForcelist."
  exit 0
else
  echo "Extension $EXT_ID is NOT in ExtensionInstallForcelist."
  exit 1
fi
Alternative script: install without a Policy (External Extensions)
If you can't use a Plist, Chrome supports registering extensions externally through one JSON file per extension in a system path. This script creates it:
#!/bin/bash
# Usage: the first argument is the Chrome extension ID
EXT_ID="$1"
DIR="/Library/Application Support/Google/Chrome/External Extensions"

if ! [[ "$EXT_ID" =~ ^[a-p]{32}$ ]]; then
  echo "Invalid extension ID: $EXT_ID"
  exit 2
fi

mkdir -p "$DIR"
cat > "$DIR/$EXT_ID.json" <<EOF
{
  "external_update_url": "https://clients2.google.com/service/update2/crx"
}
EOF
chmod 644 "$DIR/$EXT_ID.json"
echo "Extension $EXT_ID registered. Restart Chrome so it detects it."
This method is less robust than the Policy: Chrome may ask the user to confirm or enable the extension, and the user can disable or remove it. For a forced deployment that can't be changed, use the Plist method.
Troubleshooting
Symptom | Possible cause | What to do |
|---|---|---|
| The Policy hasn't synced or Chrome hasn't been restarted | Check that the Device has the Policy assigned, force a sync and restart Chrome |
The key shows an error | Misspelled ID or wrong entry format | Check that it's |
Only one of several extensions installs | Keys split across several configurations | Put all extensions in a single Plist |
The verification script says the Plist doesn't exist | The configuration hasn't reached the Mac | Check the Policy assignment and the script's execution history |
The extension appears but is disabled | External Extensions install waiting for user confirmation | Switch to the Policy method (Plist) |