

A security or VPN App only protects a Device once it's installed and configured. If that depends on the user, Devices stay unprotected for days, and typing errors end up as support tickets.
From a Policy, you can install Mobile Threat Defense (MTD) and VPN Apps silently and send them their configuration, so the user doesn't have to type anything.
You can find specific guides for Check Point Harmony Mobile, Check Point Harmony VPN on Android, Check Point VPN on Apple, Microsoft Defender on Android and Cloudflare WARP on macOS.
What you can preconfigure
Each vendor decides which settings its App exposes and what they're called, so check its documentation. These are the most common:
Setting | What it's for |
|---|---|
Server or gateway address | The VPN server or gateway the App connects to. |
Tenant or customer ID | Identifies your organization in the vendor's console. |
Token | Authorizes the Device with the vendor. |
User and Device identifiers | Link the Device to its user in the vendor's console. |
Auto-connect | Starts protection or the tunnel automatically. |
For values that change on each Device, use Dynamic Variables such as {{device.serialNumber}}, {{device.udid}}, {{device.imei}} or {{user.email}}.
Deploy on Android
Once in the Applivery Dashboard, go to Policies 1, select your Android Policy, and open Apps in the left-hand menu. Click + Add App and select the App in Managed Google Play.
In Install Type, choose one of these:
Force installed: the App installs without user interaction and the user can't remove it.
Required for setup: the same, and Device setup doesn't finish until the install completes.
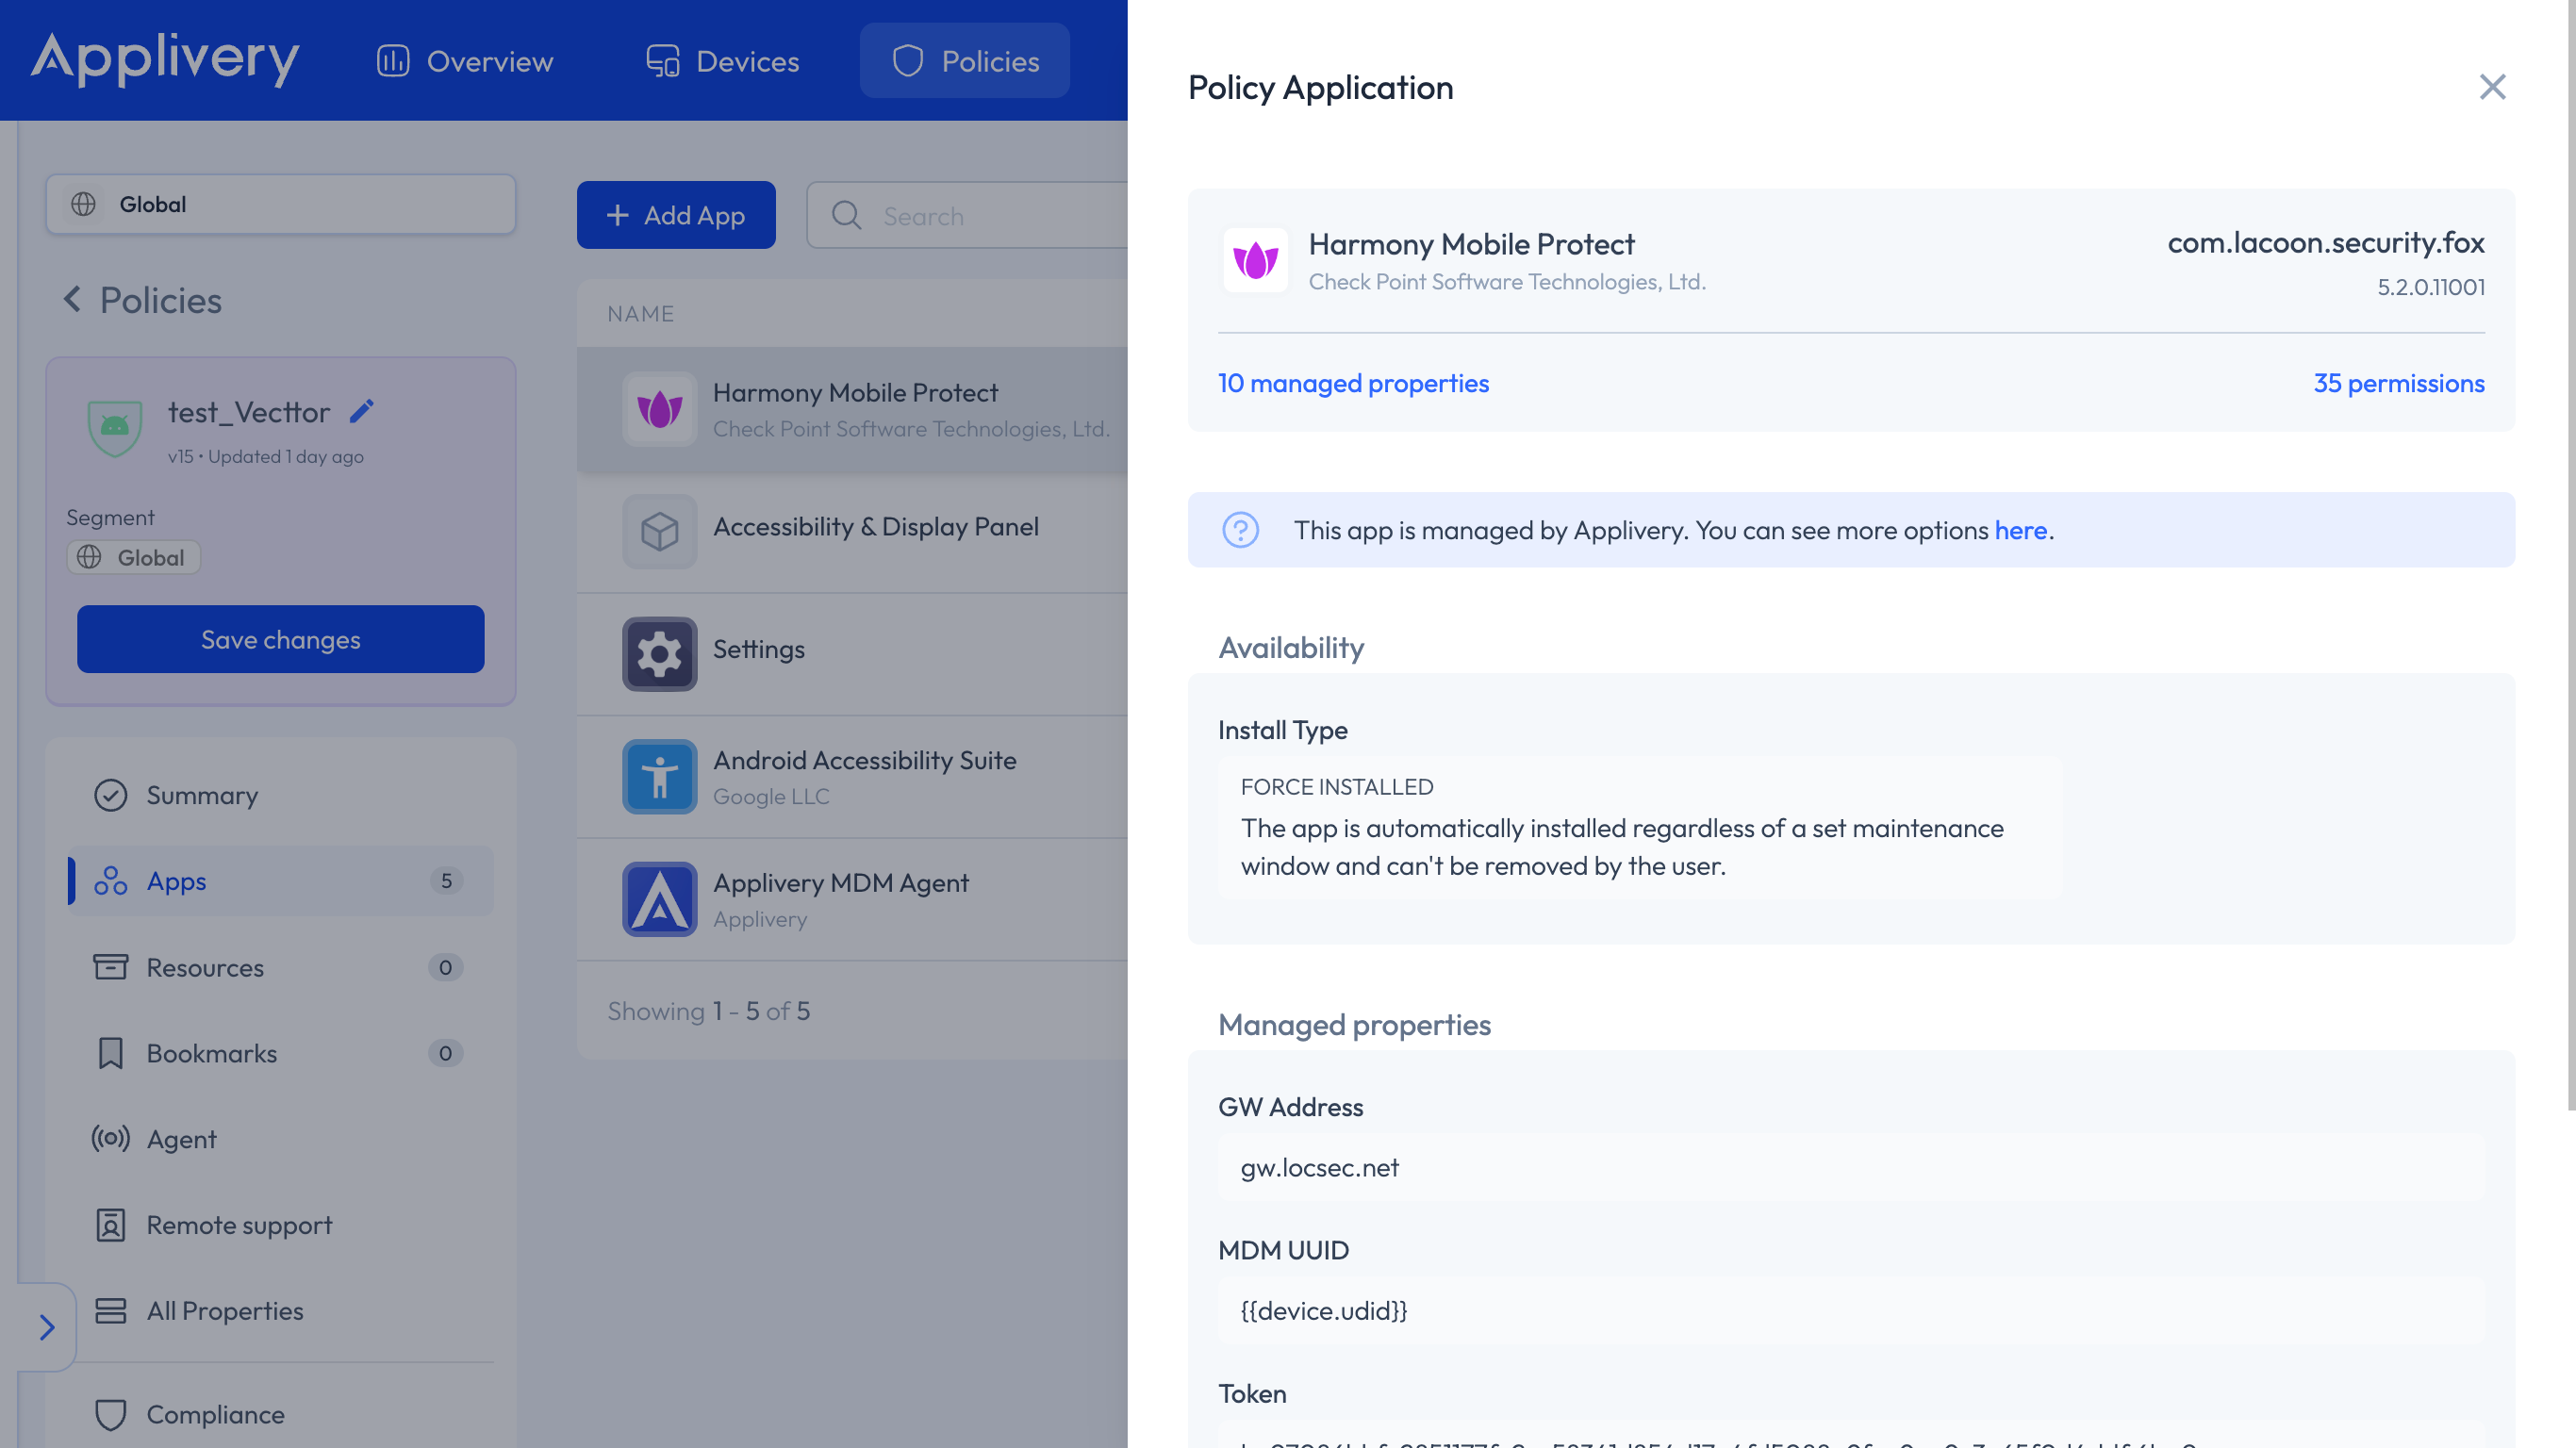
Fill in the properties that the App exposes with the values from your vendor. You can learn more about Managed Properties by following this link.
If it's a VPN App, select Network in the left-hand menu and go to AlwaysOn Vpn Package 2. Enter the App's package name in Package Name.
Turn on Lockdown Enabled if you want to block network traffic whenever the VPN isn't connected.
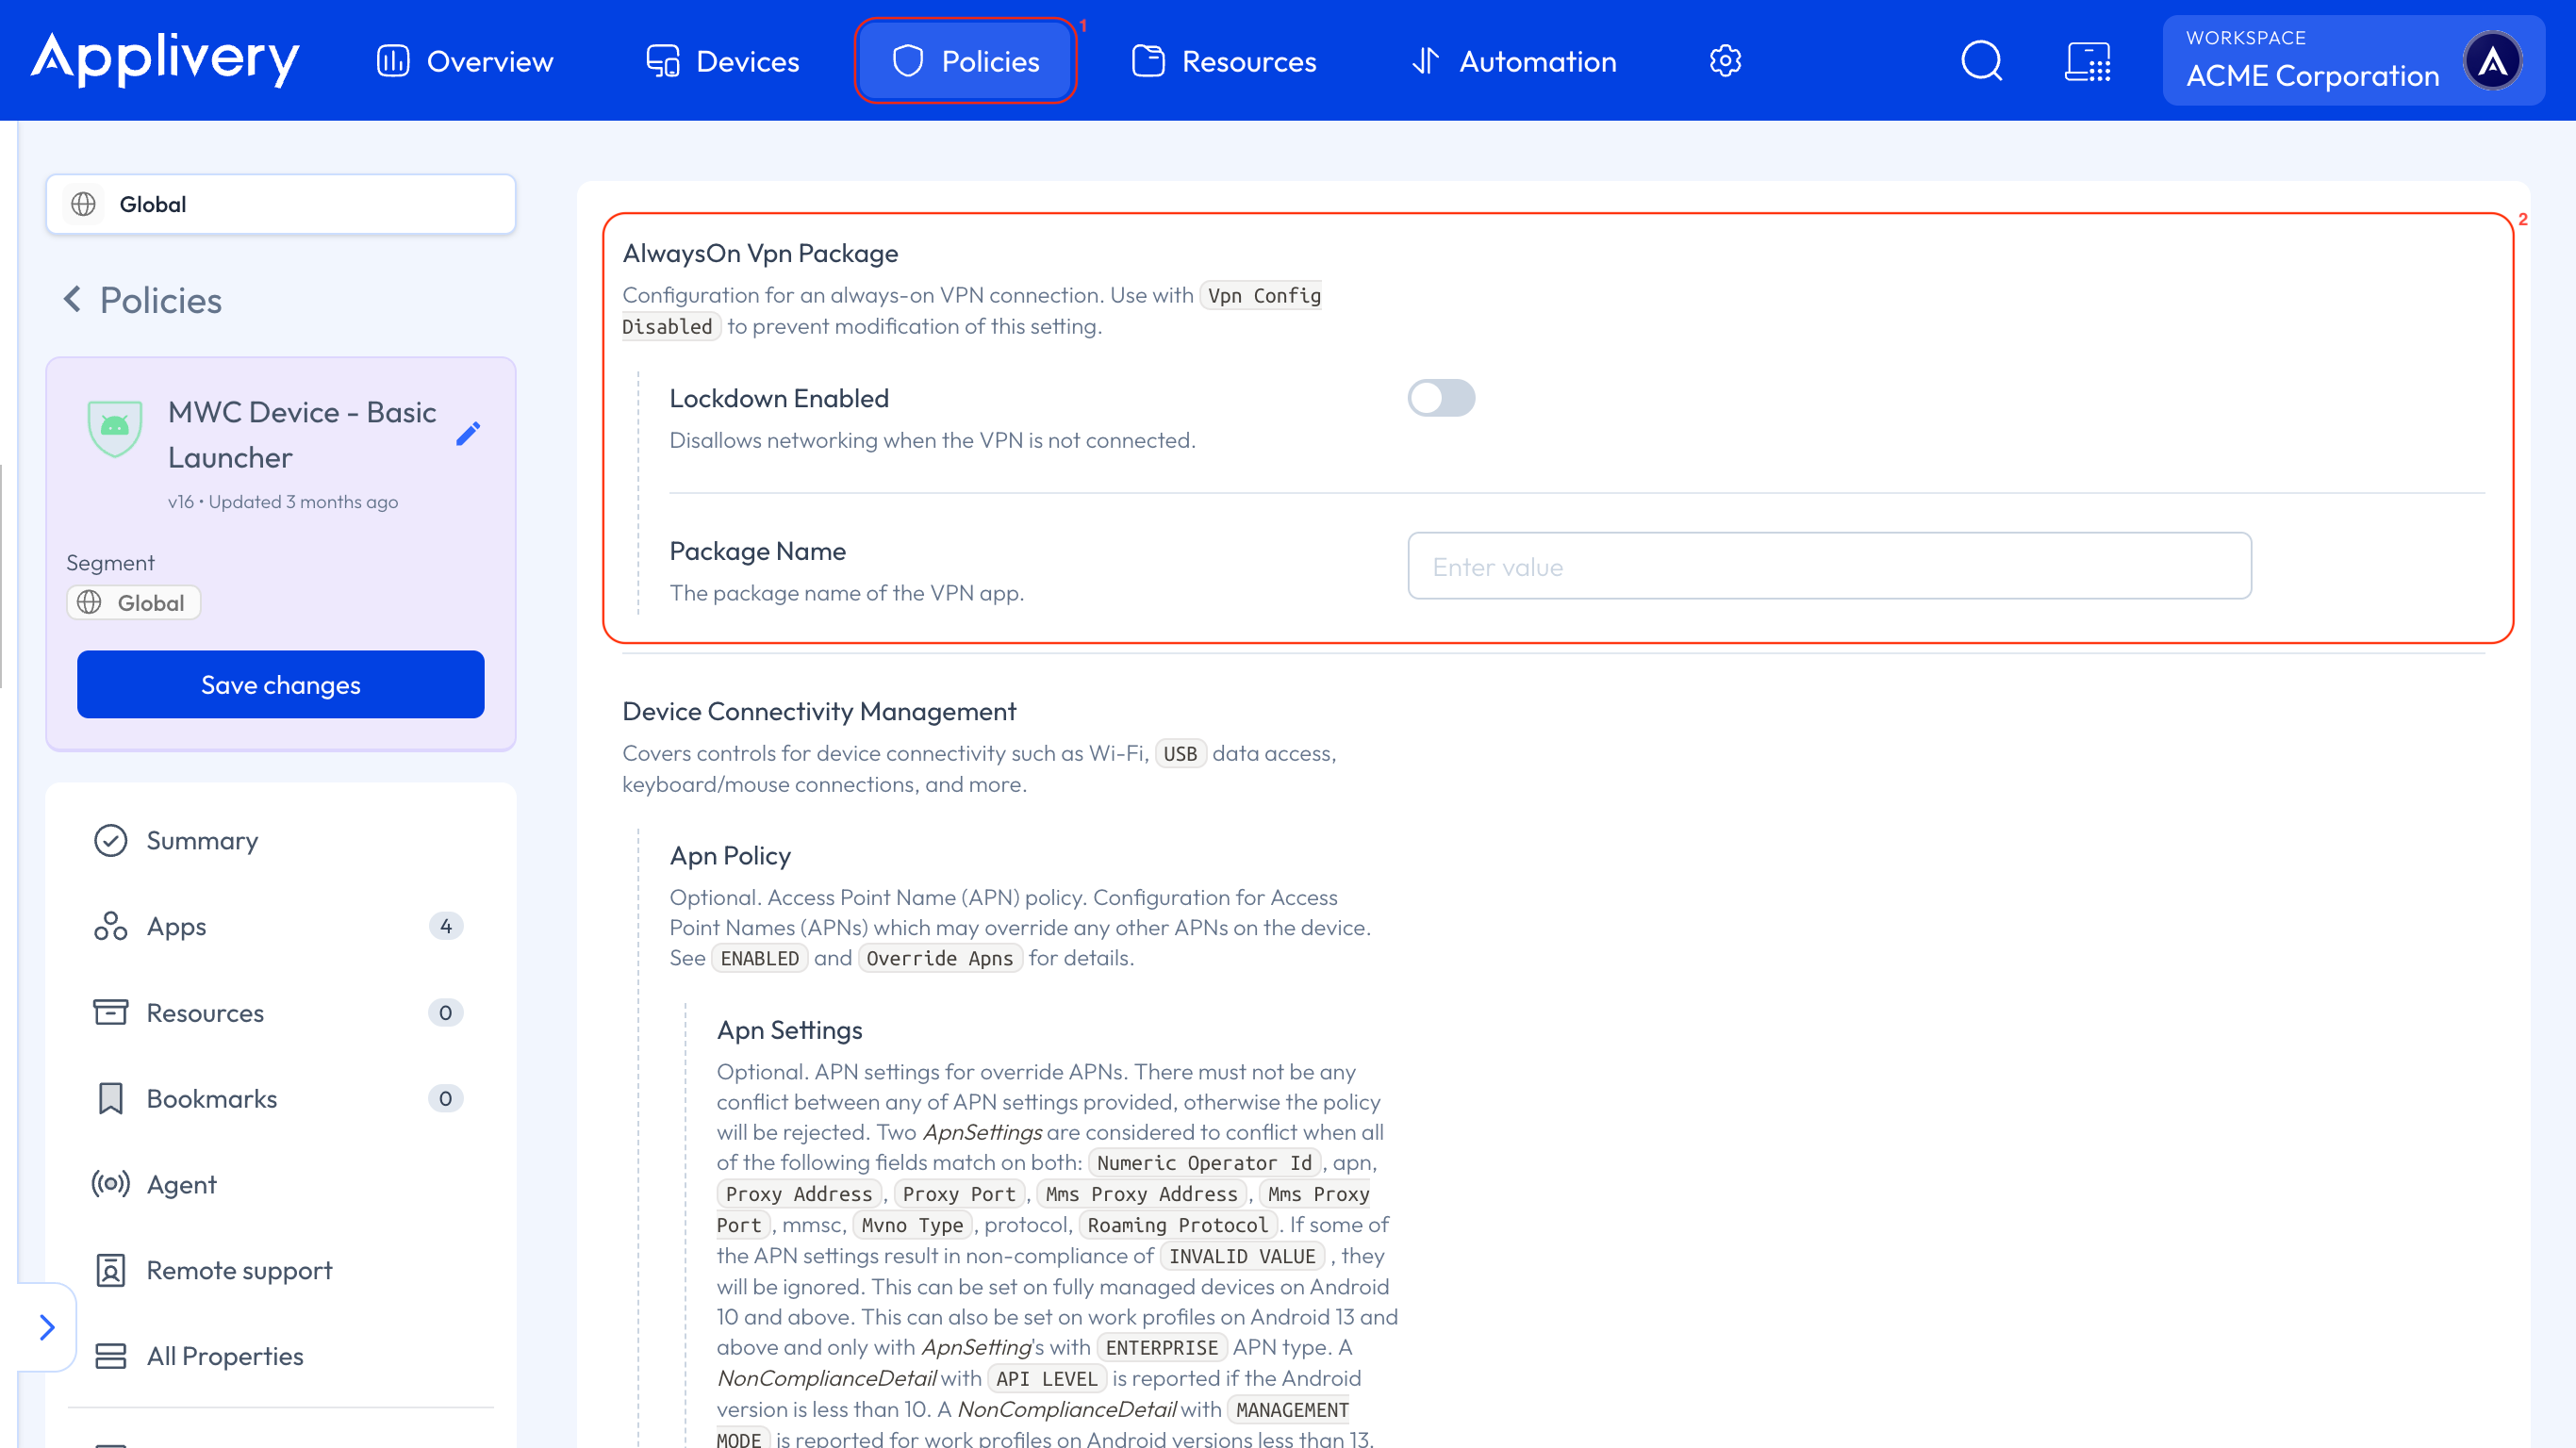
The VPN App must be force-installed through the Policy before this setting takes effect.
Click Save changes.
Managed Properties and Always-On VPN are also available on AOSP Devices.
Deploy on Apple
Get the licenses you need in Apple Business and sync them with Applivery. You can learn more about VPP by following this link.
Once in the Applivery Dashboard, go to Policies, select your Apple Policy and open Apps. Click + Add App and select the App.
In Install mode, select Force installed or Required for setup. On Supervised Devices, the App installs silently.
On iPhones and iPads, add the keys and values from your vendor in the Configuration field. Click Add property to add them one by one, or Define as JSON to paste them all at once.
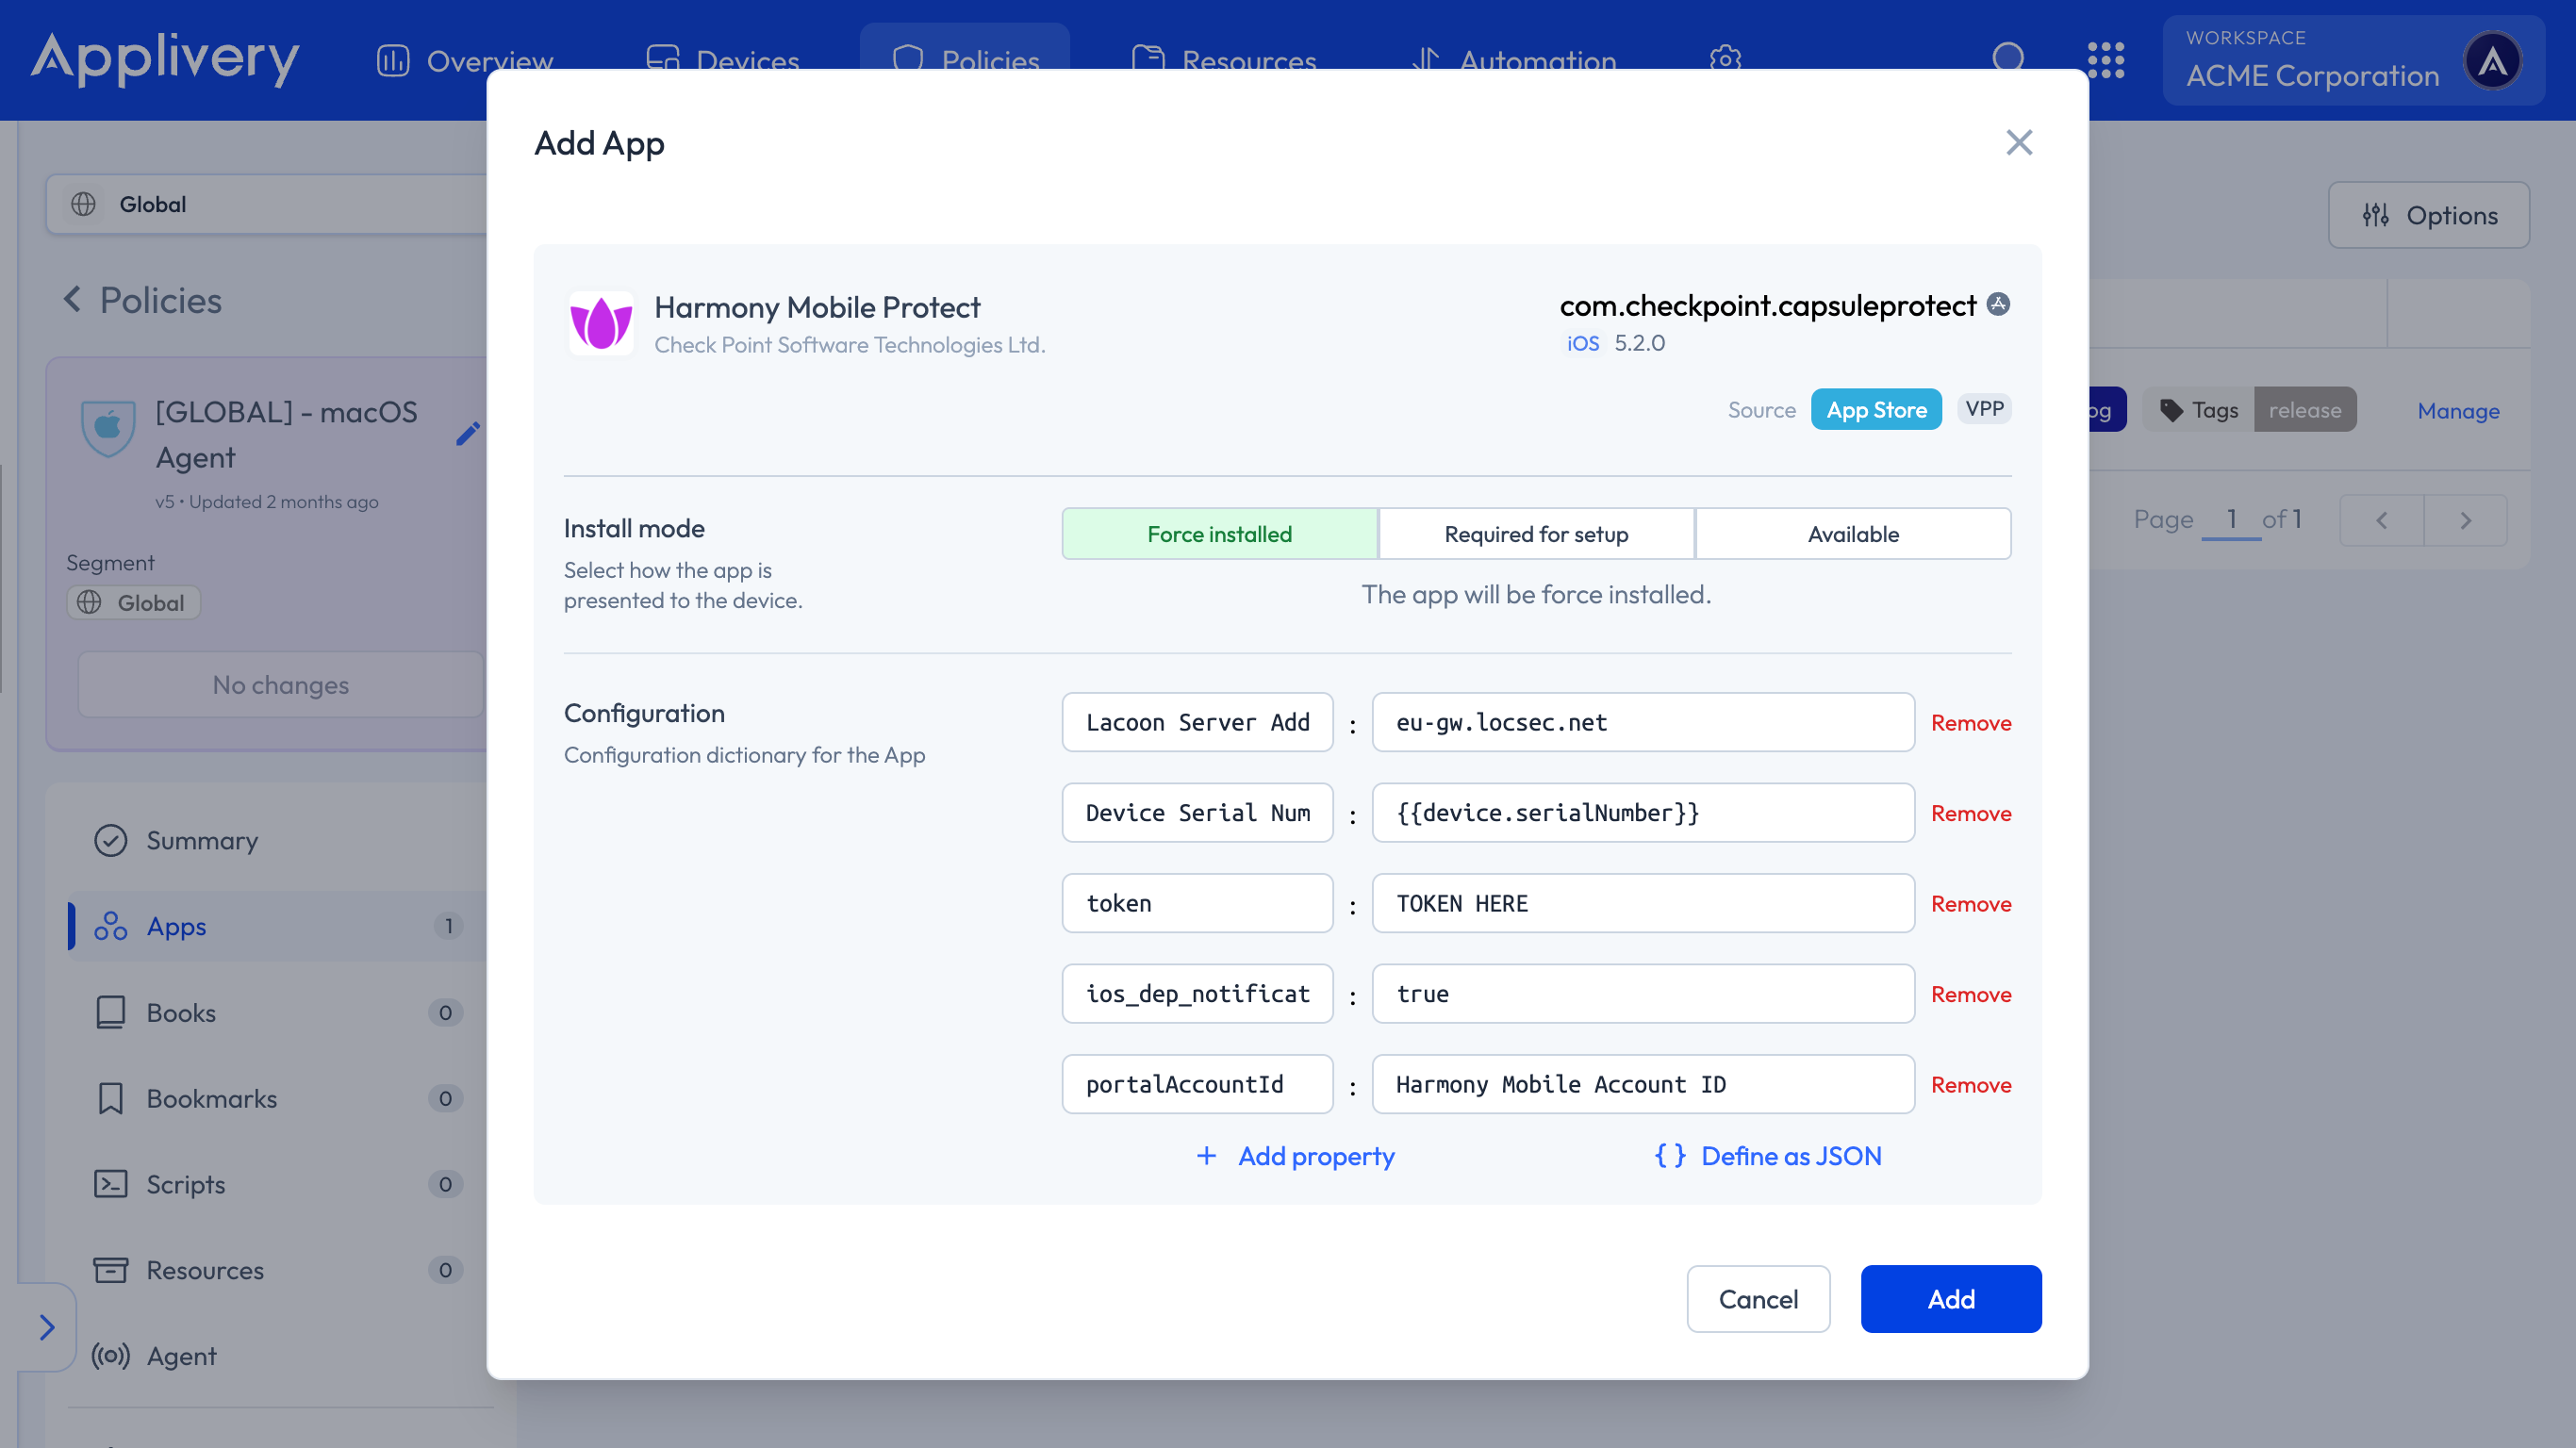
On a Mac, use the method your vendor documents. For example, Cloudflare WARP is configured with a configuration profile.
If your App needs a VPN configuration, click + Add configuration and choose VPN. Fill in the fields with the values from your vendor. These are the ones that identify the App:
Provider Type:
Packet-tunnel.VPN Subtype: the identifier your vendor gives you.
Vendor Config: the JSON parameters from your vendor.
Account Username: you can use a Dynamic Variable such as
{{user.email}}.
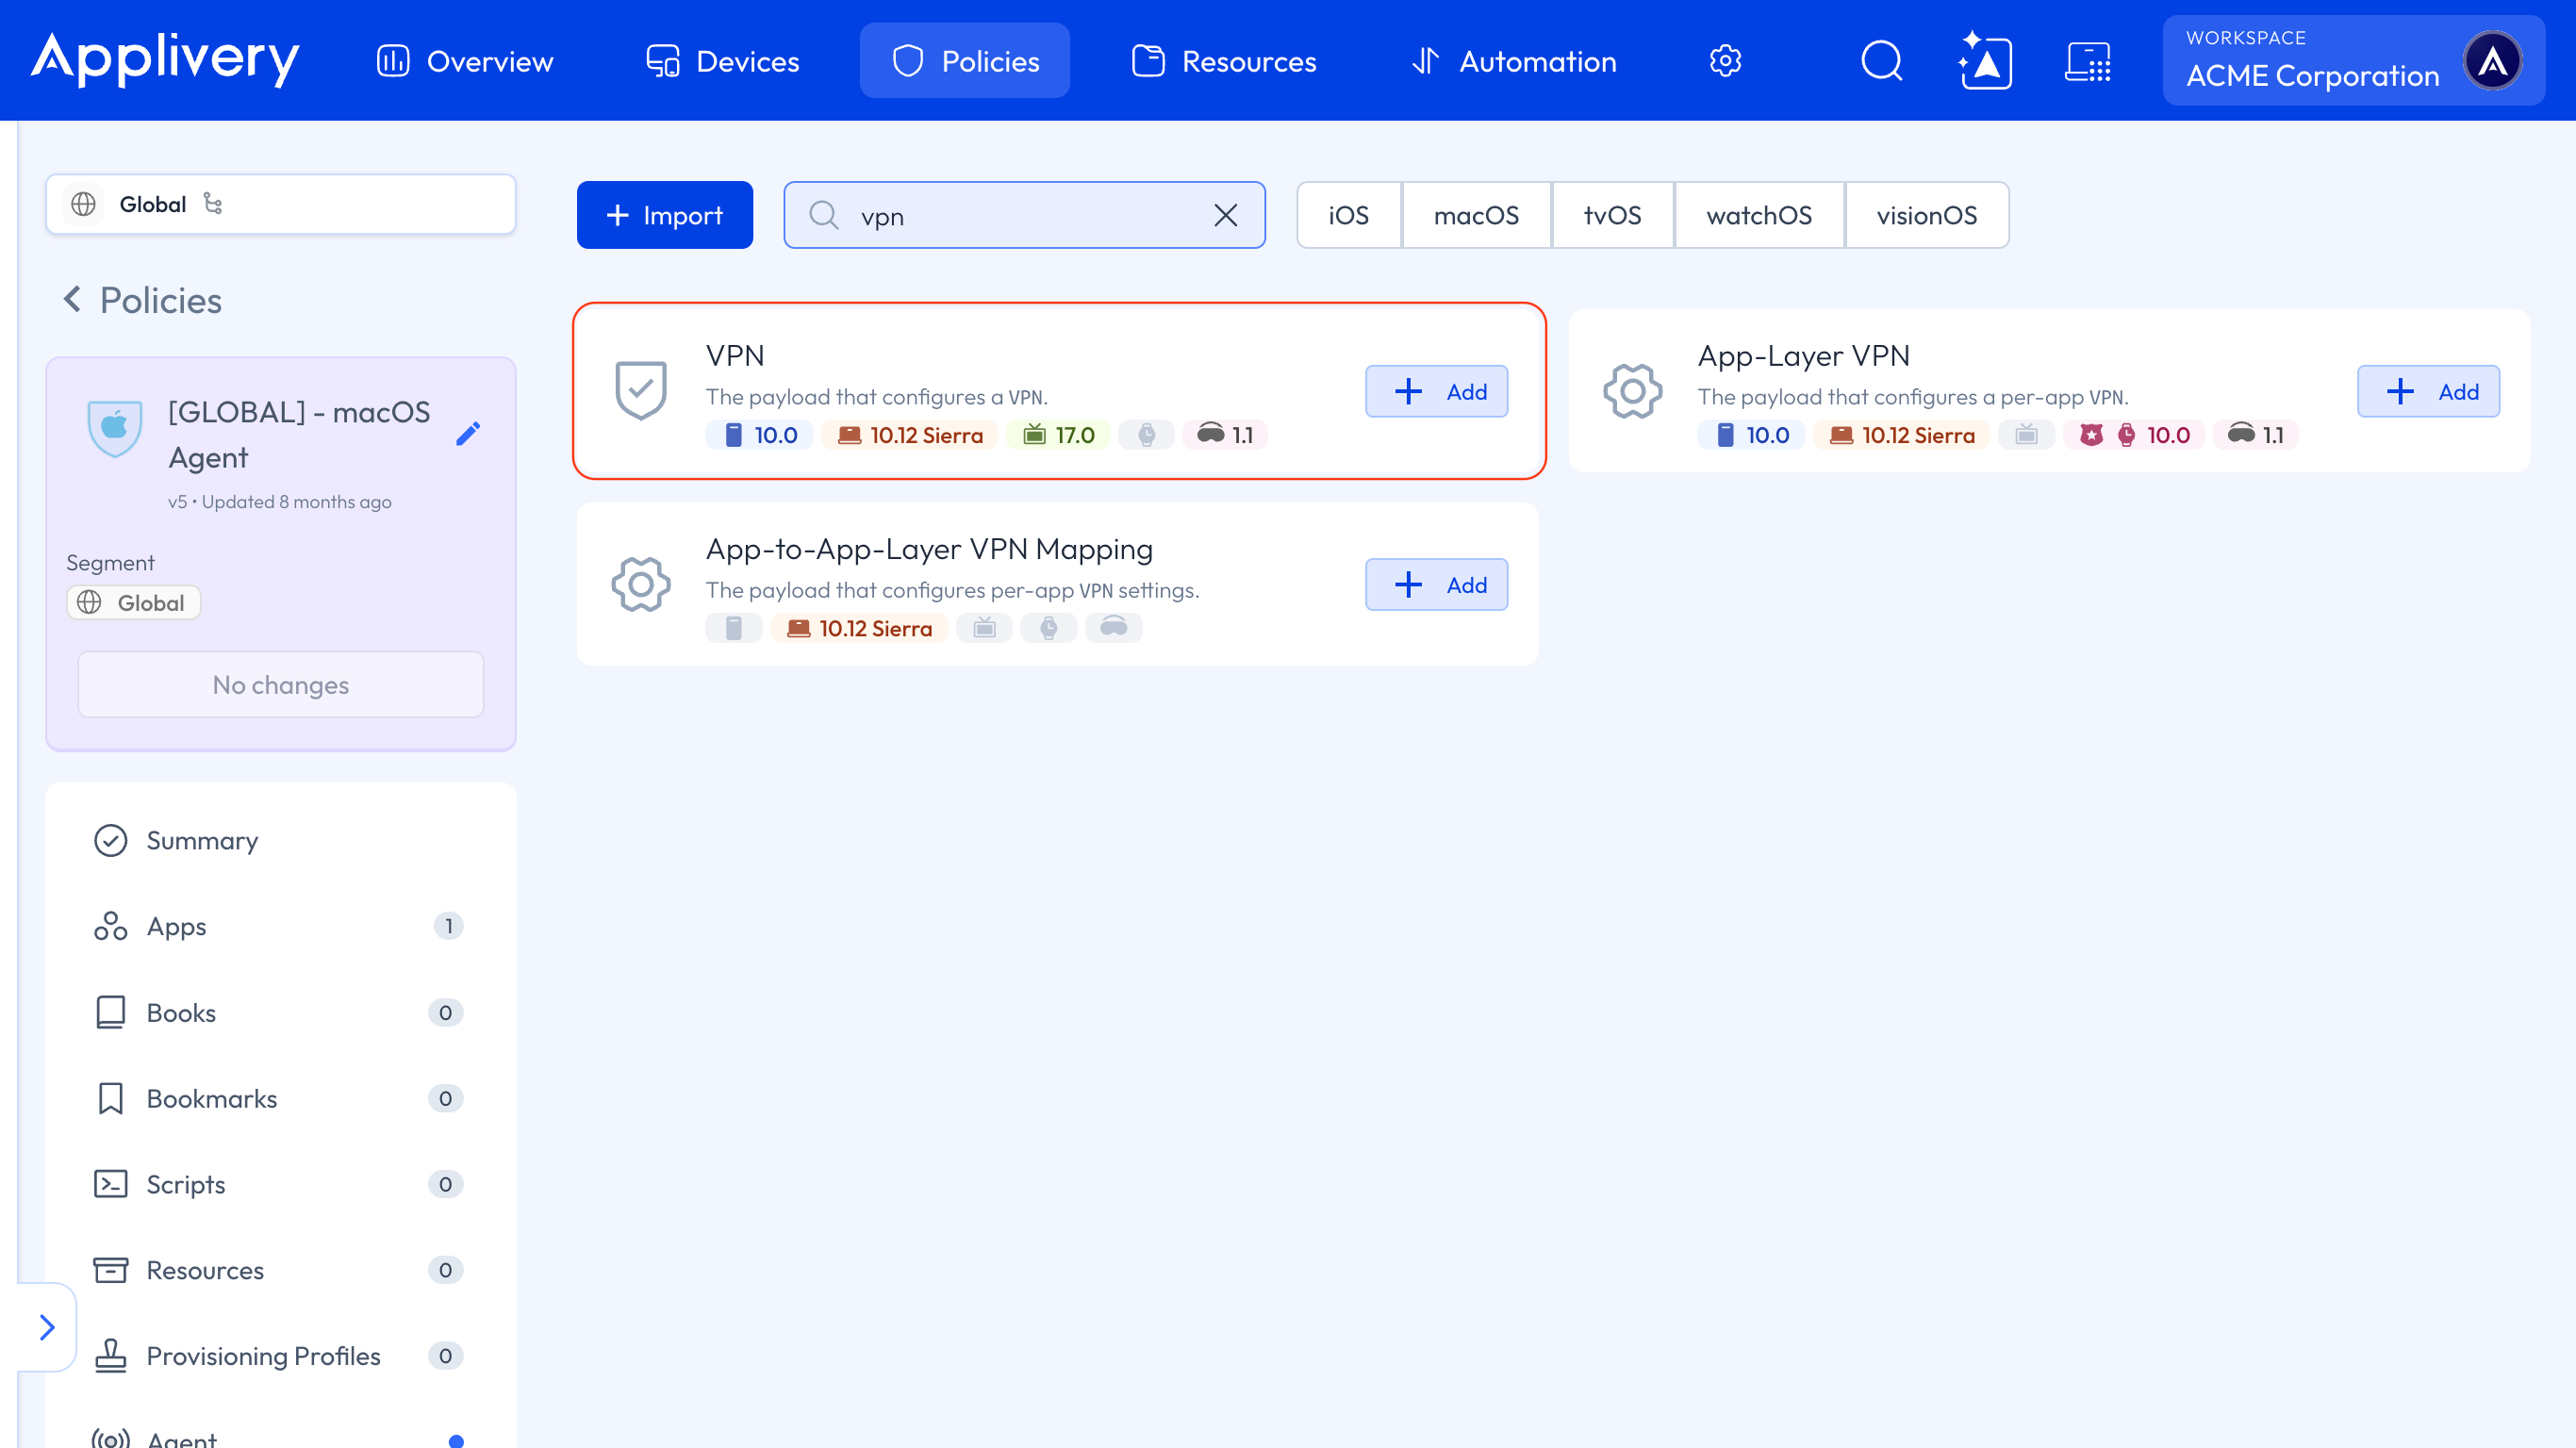
Turn on Enable VPN On Demand. In On-Demand Rules, add a rule with the Connect action for each type of connection: Wi-Fi and Mobile, plus Ethernet for wired connections.
The tunnel then connects by itself, with no action from the user.
If your gateway uses a private certificate authority, click + Add configuration, choose Certificate (Trusted CA), and upload the certificate in Payload Content.
Save the Policy and deploy it.
Best practices
Keep security in its own Policy: use Policy Composition to separate these settings from the ones each department needs.
Test before you roll out: create a Device Audience with a few test Devices and check that the values reach the App correctly.
Check your licenses: make sure Apple Business has enough licenses so installs don't get stuck.
Apply a stricter Policy to at-risk Devices: if you mark those Devices with a Device tag, an Automation Rule can select them and apply a stricter Policy with Set a Policy. Automation Rules don't send commands, so they can't lock or wipe a Device.