

Applivery Intelligence is a conversational layer over your Applivery Workspace. Instead of navigating to a list, filtering it and reading it, you ask:
Which Macs have not checked in for 30 days?
Show me every Device that is missing disk encryption, grouped by Policy.
Lock the laptop David lost yesterday.
It answers from live Applivery data, renders the result as an interactive table, chart, map or Device card, and — when you ask it to change something — asks you to confirm before it does.
Generally Available — and actively evolving. Applivery Intelligence is generally available and supported. It is also an AI product under continuous research and improvement: answers are generated, capabilities change between releases, and mistakes are possible. Read what it produces before acting on it, and read Permissions and approvals before you relax the approval prompts on anything that writes to real Devices.
Requirements
Before anyone can use it, you need:
An Applivery account with access to at least one Workspace. Intelligence never creates accounts or Workspaces.
Applivery Endpoint Manager (UEM/MDM) in that Workspace. Intelligence reads and acts through the same Applivery API the dashboard uses, so a Workspace with only App Distribution returns very little.
A seat, assigned by the Workspace Owner. See Plans, seats and billing.
Nothing else. There is no agent to install, no API key to generate, no network change and no separate password. Intelligence reuses your existing Applivery session.
Intelligence acts as you. Your Applivery role is the ceiling: if you cannot wipe a Device in the Applivery dashboard, you cannot wipe it by asking Intelligence either — the API returns the same permission error it always would.
Applivery Intelligence is licensed per person, by seat. The organization Owner buys a quantity of seats at a given tier; nobody else buys anything.
Open Intelligence and go to Plan & billing > Seats & billing.
Pick a Tier — Pro, Max or Ultra — and enter the total number of seats the Workspace should end up with.
Confirm. The organization's card on file is charged straight away, prorated for the rest of the current period.
Only the Applivery organization Owner sees the purchase controls. The role is resolved live from the Applivery directory every time, so promoting somebody to Owner in Applivery gives them the controls without any action in Intelligence.
Tiers, prices and what each one includes are in Plans, seats and billing.
A bought seat does nothing until it is given to somebody.
Go to Plan & billing > Seats & billing > Who has a seat.
Find the person and assign them a seat of the tier you want them on.
Optionally set their Extra credits cap — how much of the Workspace's shared credit balance that person may spend once their own plan allowance runs out. Leave it empty for no cap; set it to
0to stop them drawing on the shared balance at all.
Unassigning a seat frees it immediately, so it can be given to someone else the same day. It is not refunded — the seat stays paid until the period ends.
You cannot reduce the number of seats below the number currently assigned. Unassign first, then lower the quantity.
Anyone with a seat opens Intelligence from the Applivery dashboard, using the ✨ button in the top navigation bar, next to the search icon.
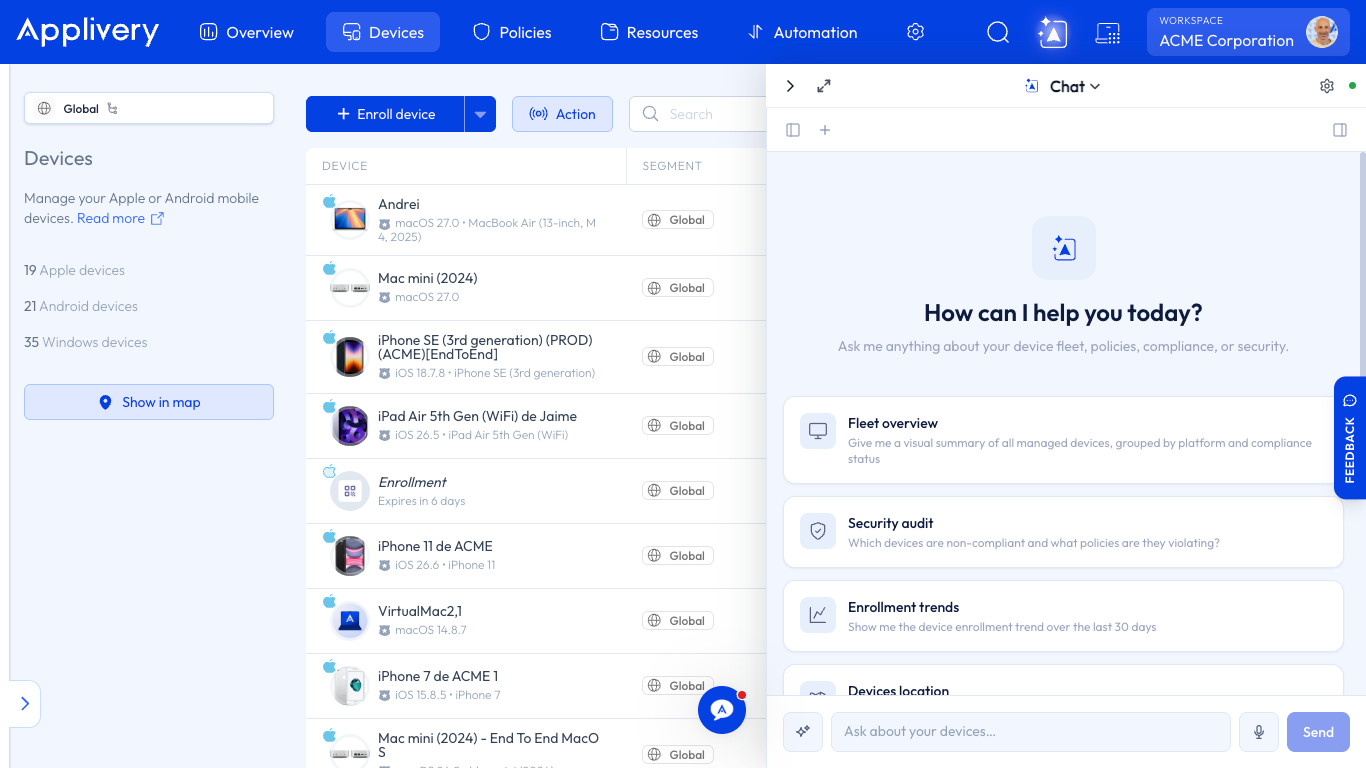
Intelligence opens embedded inside the dashboard, on the Workspace you are already looking at. That is the whole setup:
No credentials to configure. It reuses your active Applivery session.
No second login. Signing out of Applivery signs you out of Intelligence.
No workspace picker to get wrong. It starts on the Workspace the dashboard is on.
If your account reaches several Workspaces, switch from the Workspace selector in the Intelligence top bar. Each Workspace has its own conversations, dashboards, workflows, monitors and seats.
Start read-only. A good first question proves the connection end to end:
How many Devices are enrolled in this workspace?
Then try something that produces an artifact — an interactive result you can sort, drill into, download as CSV, or pin to a dashboard:
Show me all Android Devices with their OS version and last check-in.
Which Devices are below macOS 26.3? Group them by employee.
Where are my lost-mode Devices right now?
Three things worth knowing on day one
Type
@to reference a specific object. You can mention a Device, Policy, MDM User, Segment, Device Audience, Automation Rule or Enrollment Template by name instead of describing it.Suggestions appear under each answer. They are grounded in what Applivery can actually do, so they are a fast way to learn the surface.
It asks before it acts — at first, before everything. Every capability starts on Needs approval, reads included, so your first few questions will each raise a prompt. Go to the gear icon > Integrations > Applivery MDM > Tool Permissions and set the reads you use constantly to Always allow. Wipe, lock and delete stay gated whatever you choose.
What you will not have on every plan
Chat is available on every tier, including Free. Insights, Workflows, Cowork and the AI Workflow Builder require a Max or Ultra seat. If the navigation shows a surface you cannot open, the seat tier is why — see Plans, seats and billing.
If something does not work
Symptom | Most likely cause |
|---|---|
"Connect Applivery" instead of the chat | The embedded session has not been handed over yet. Reload the Applivery dashboard. |
"Session expired" | Your Applivery session ended. Sign in to the dashboard again. |
Intelligence answers but never reads real data | The Workspace exposes no MDM tools — usually a Workspace without Endpoint Manager, or an Applivery role with no Device permissions. |
A surface is missing from the navigation | Your seat tier does not include it. |
"No seat assigned" on Plan & billing | Ask your Owner to assign you one. |