

Once a Windows Device is enrolled, Applivery can manage it remotely without physical access: pushing the latest Policy, rebooting it, wiping it, or removing it from management.
All of these are one-click actions from the Device's detail page, and each one is tracked so you can confirm it actually reached the Device.
Sync policy
Pushes the Device's currently assigned Policy again, without waiting for the next scheduled check-in.
It's the first thing to try after changing a Policy, when you'd rather not wait for the Device to pick the change up on its own.
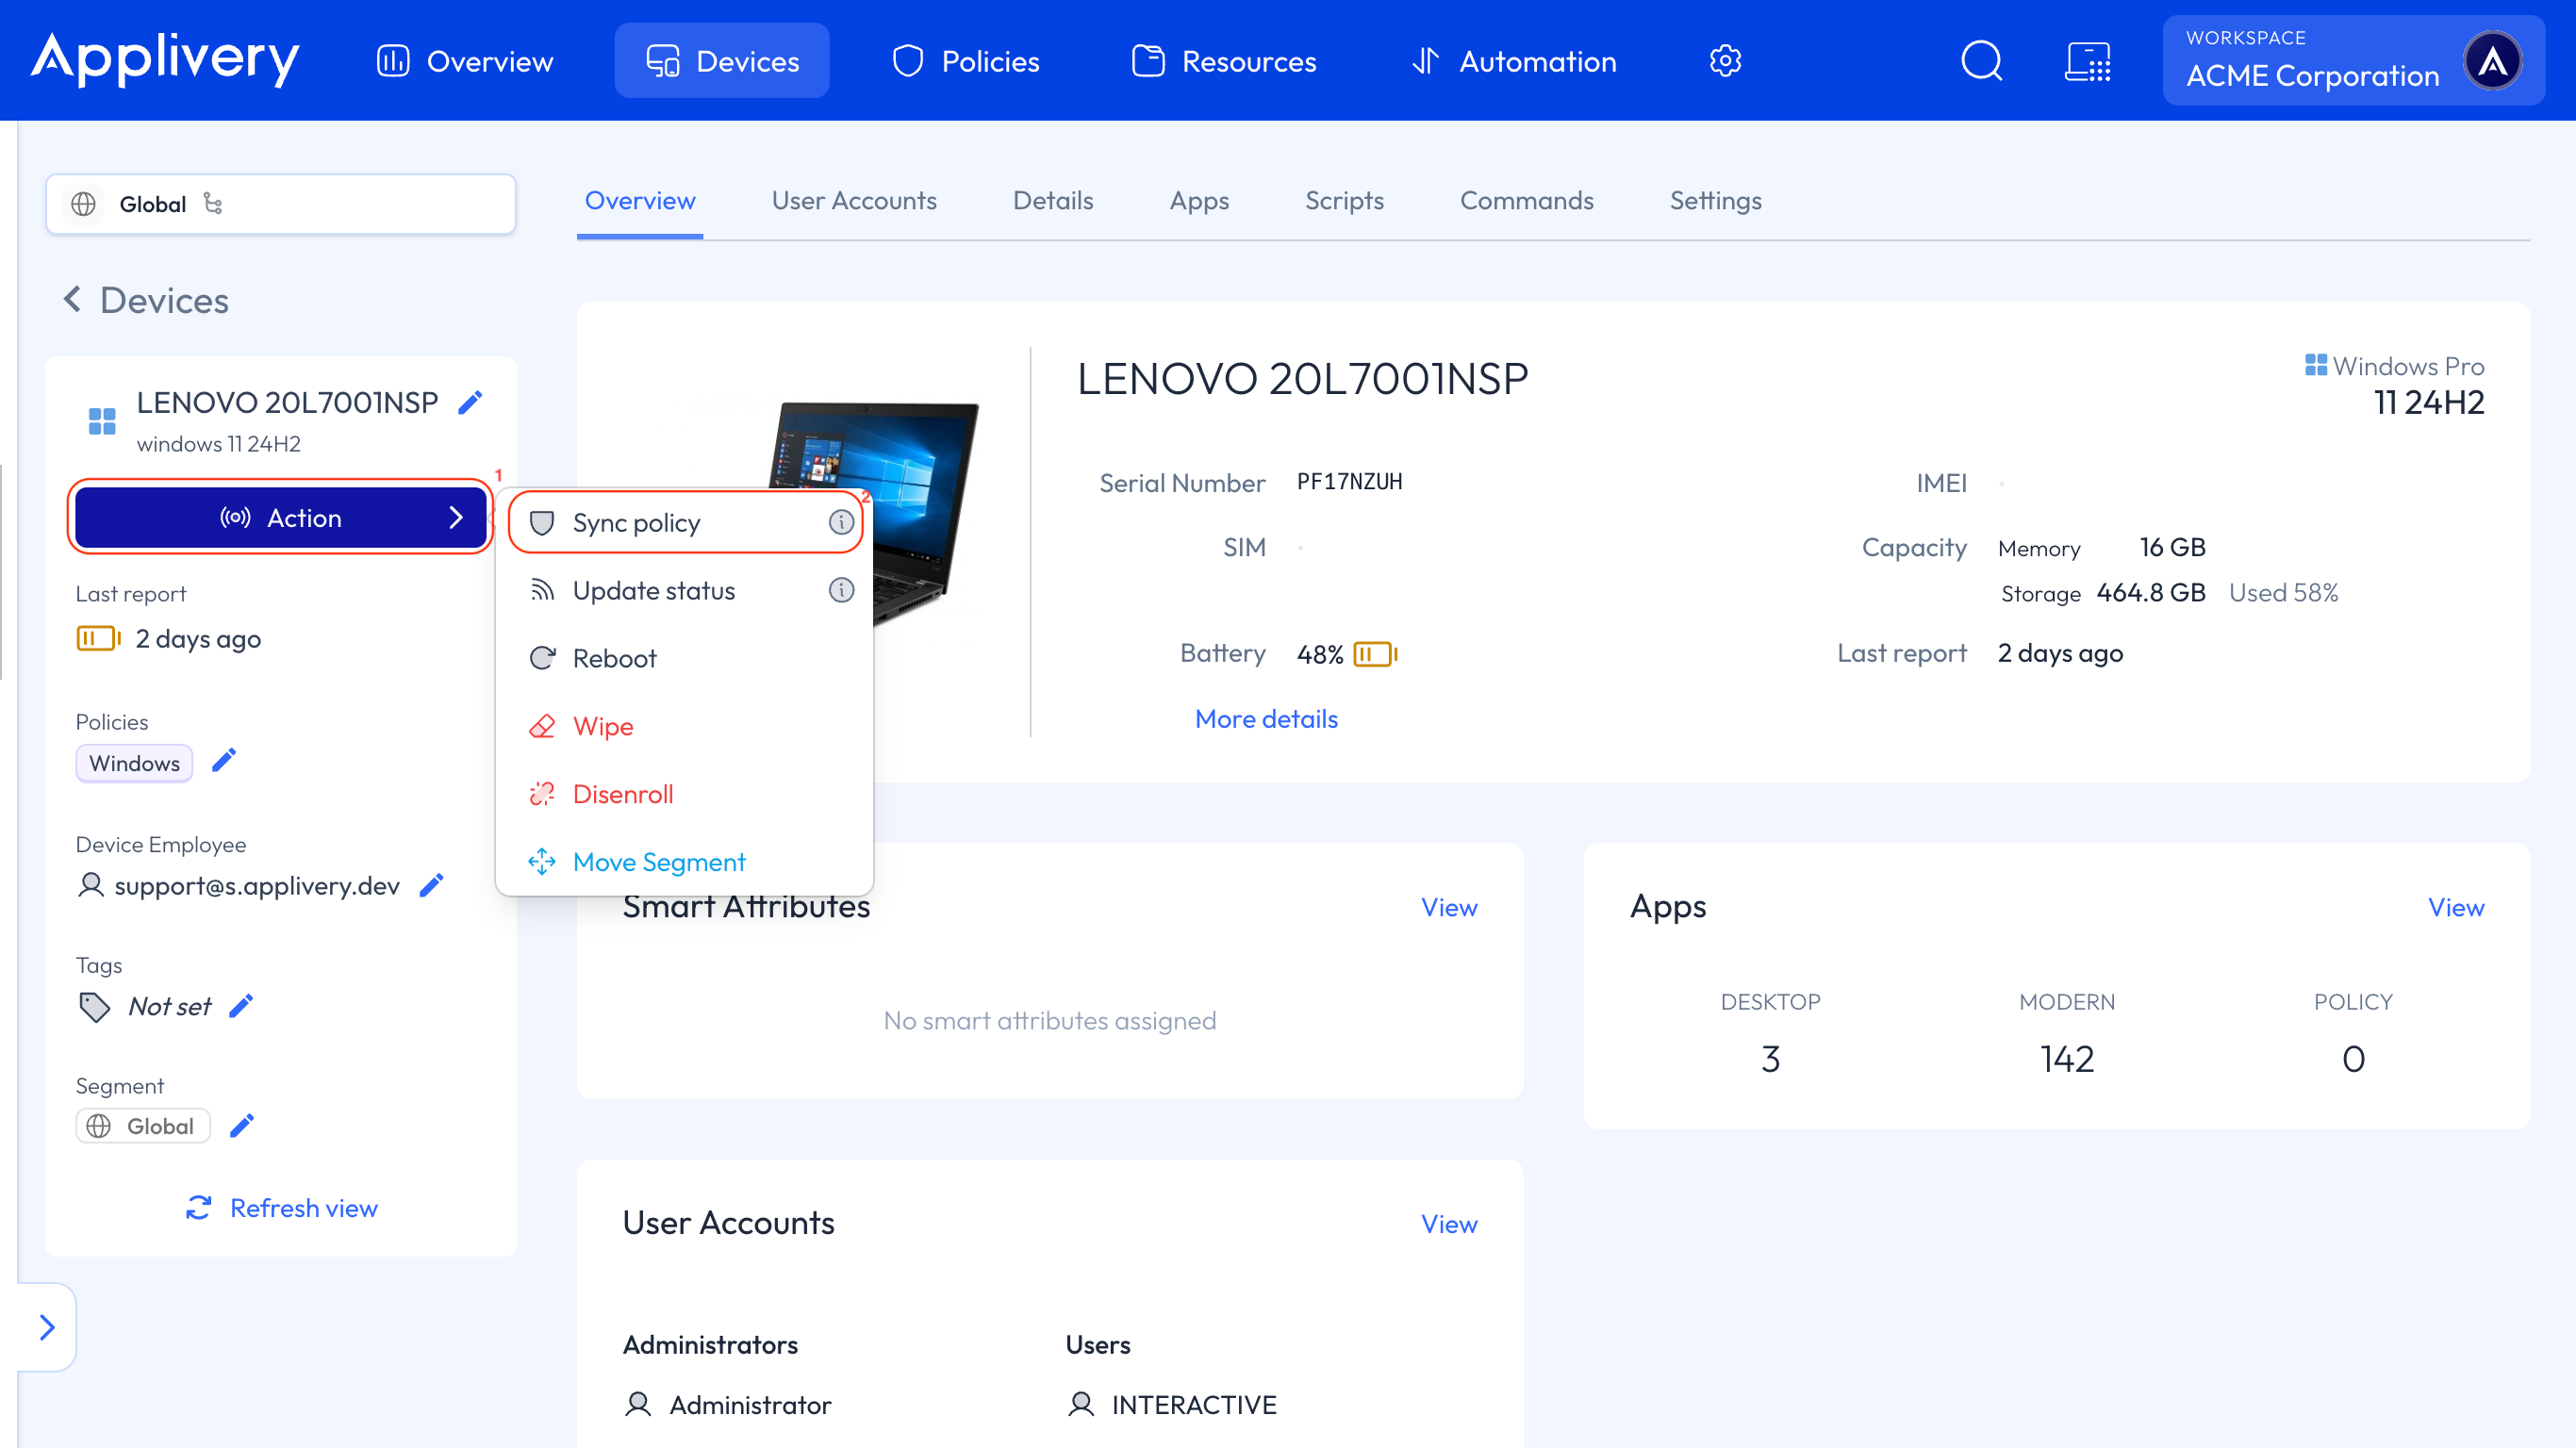
Once in the Applivery Dashboard, navigate to any of your Devices and click the Action button 1.
From the dropdown menu, select Sync policy 2.
Update status
Requests a fresh report from the Device — battery, storage, installed apps and the rest of the information shown on the Overview tab.
Useful when the Device details look stale, or before making a decision based on what the Dashboard is showing.
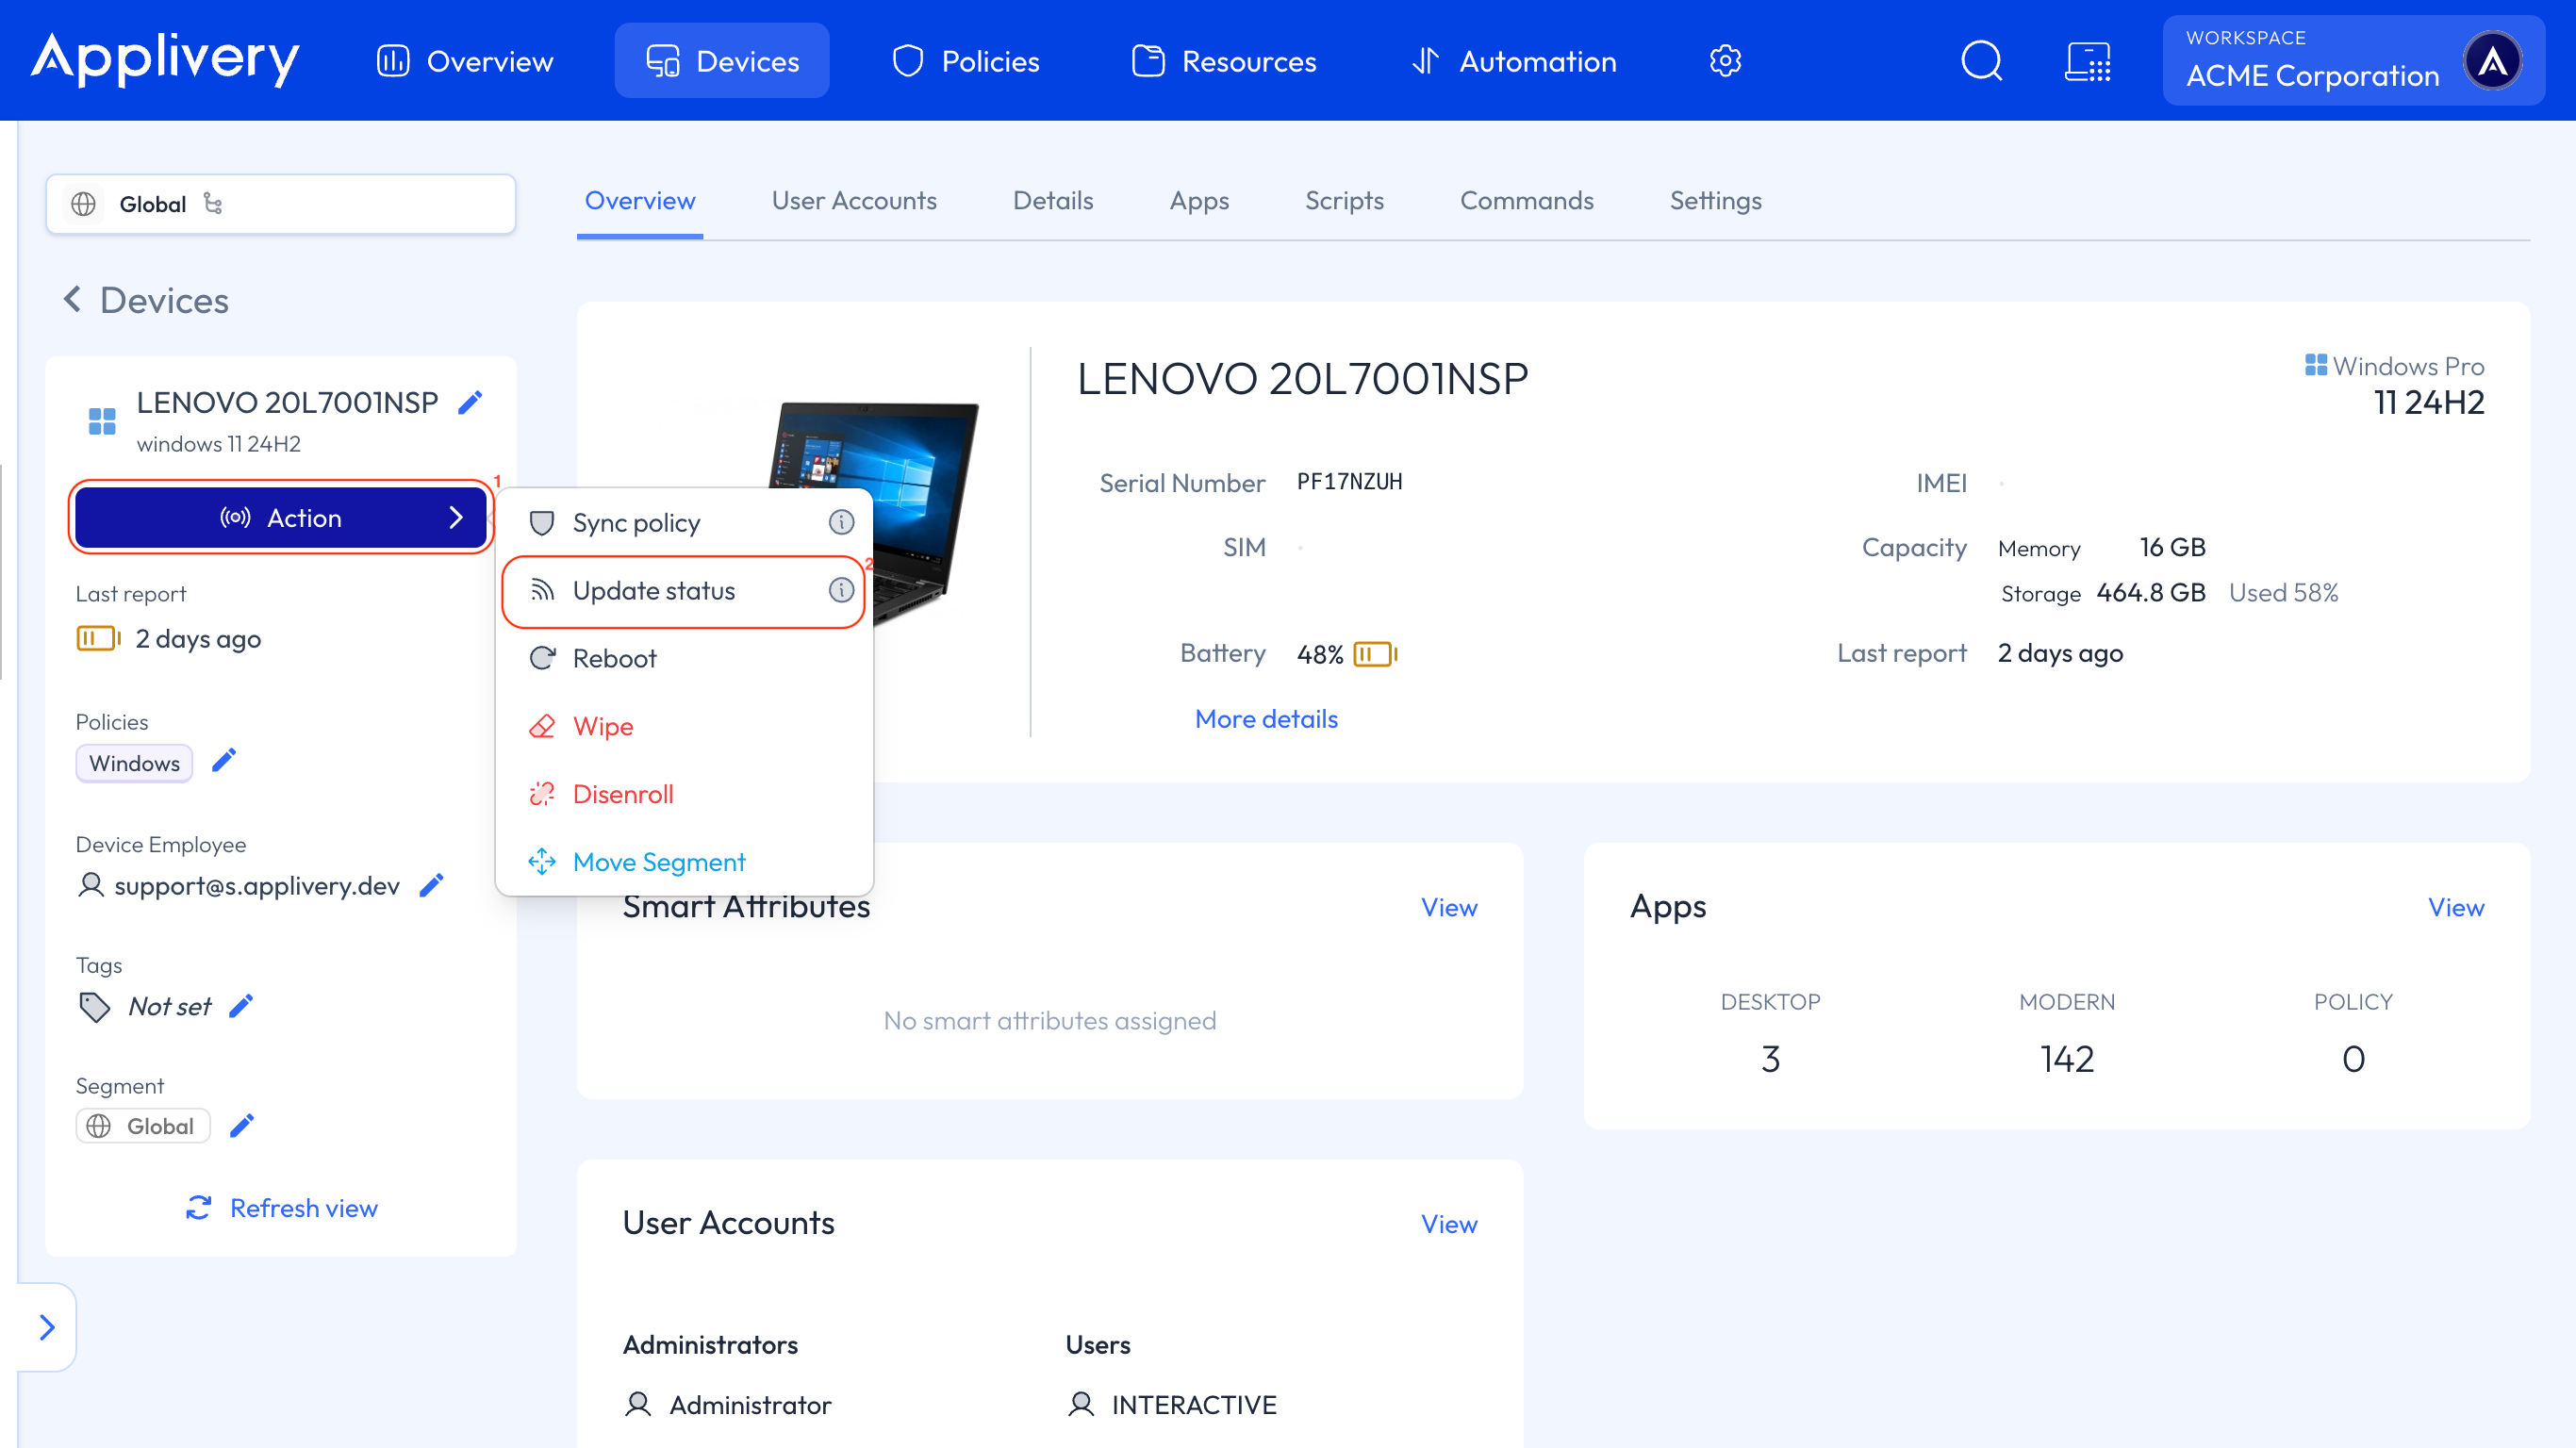
Once in the Applivery Dashboard, navigate to any of your Devices and click the Action button 1.
From the dropdown menu, select Update status 2.
Reboot
Restarts the Device remotely.
Sending a restart is useful in several situations: it frees up memory when performance degrades, applies system updates that only take effect after a reboot, and clears minor faults such as unresponsive Apps. It's also worth doing on Devices that have been running for weeks without a restart, and after applying settings that need one to take effect.
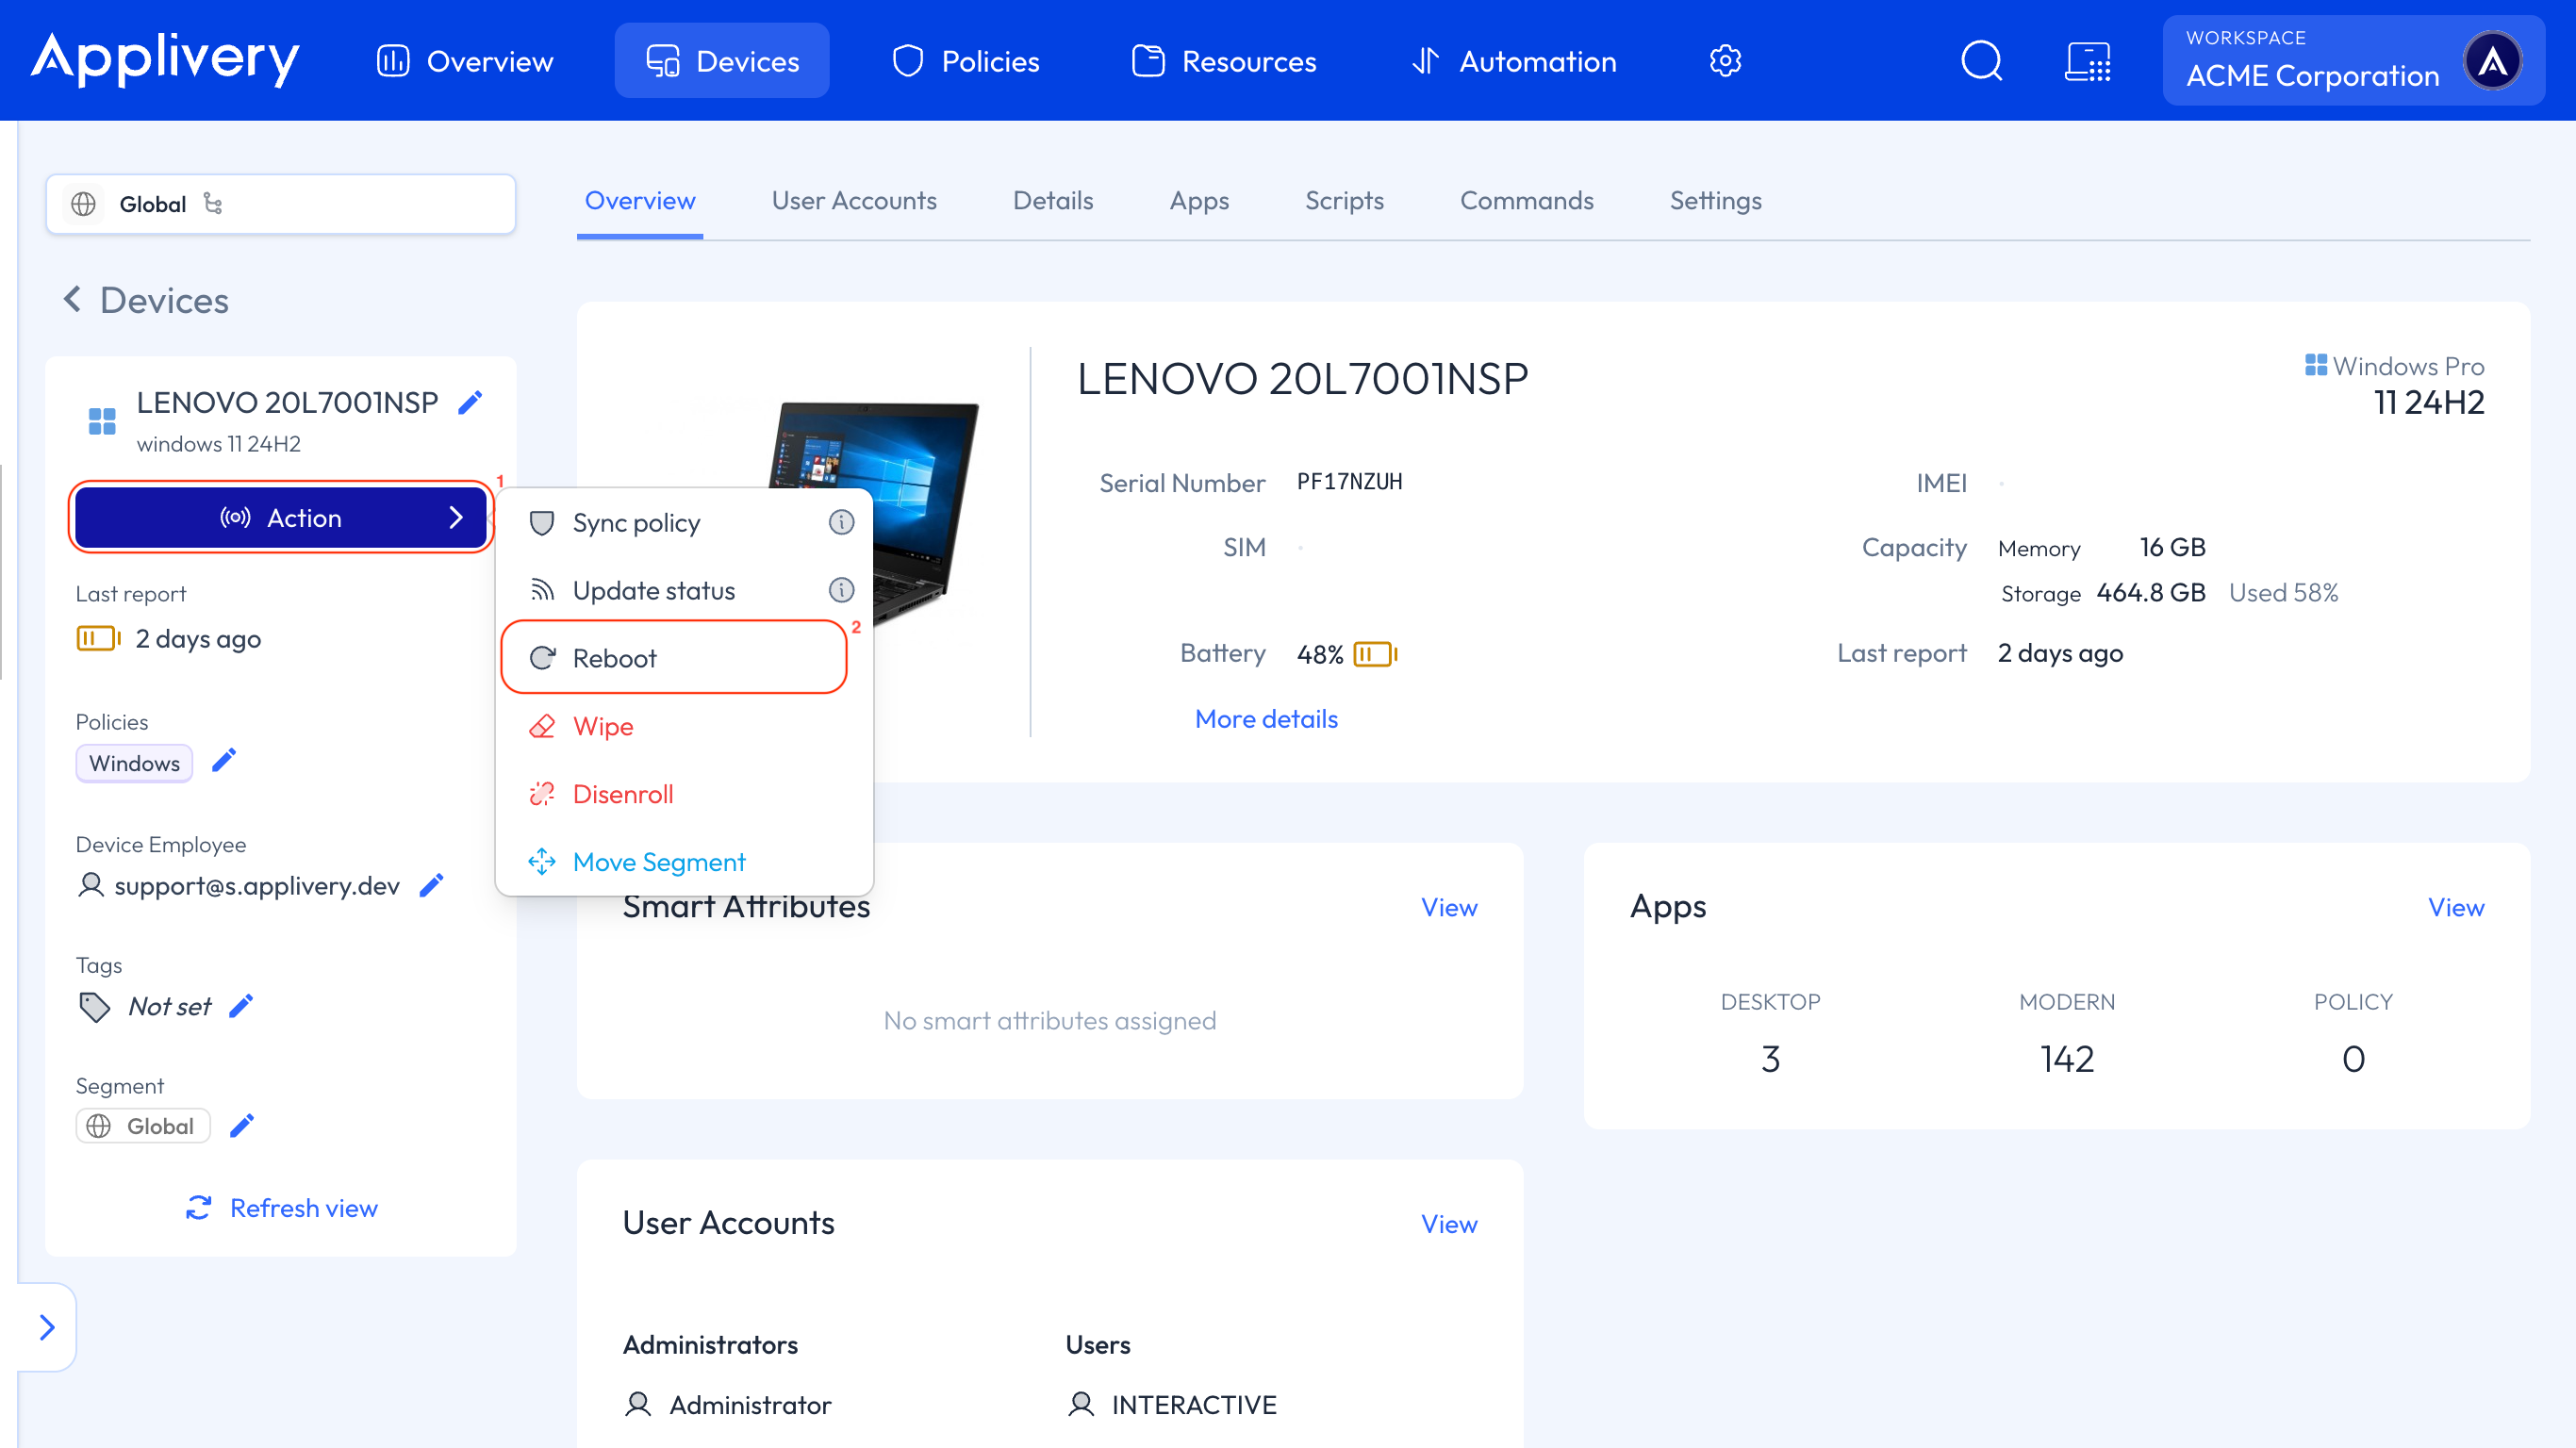
Once in the Applivery Dashboard, navigate to any of your Devices and click the Action button 1.
From the dropdown menu, select Reboot 2.
Wipe
Resets the Device. Selecting Wipe opens a dialog where you choose between two types:
Wipe device — resets the Device to factory state. All data is removed.
Protected wipe — resets the Device and fully cleans the internal drive. Unlike a standard wipe, the Device keeps attempting to complete the reset even if the process is interrupted, for example by a power loss.
Use the standard wipe for an ordinary reset — a Device being reassigned internally, say. Use Protected wipe when you need to guarantee the data is actually gone: a lost or stolen Device, or one leaving the organization.
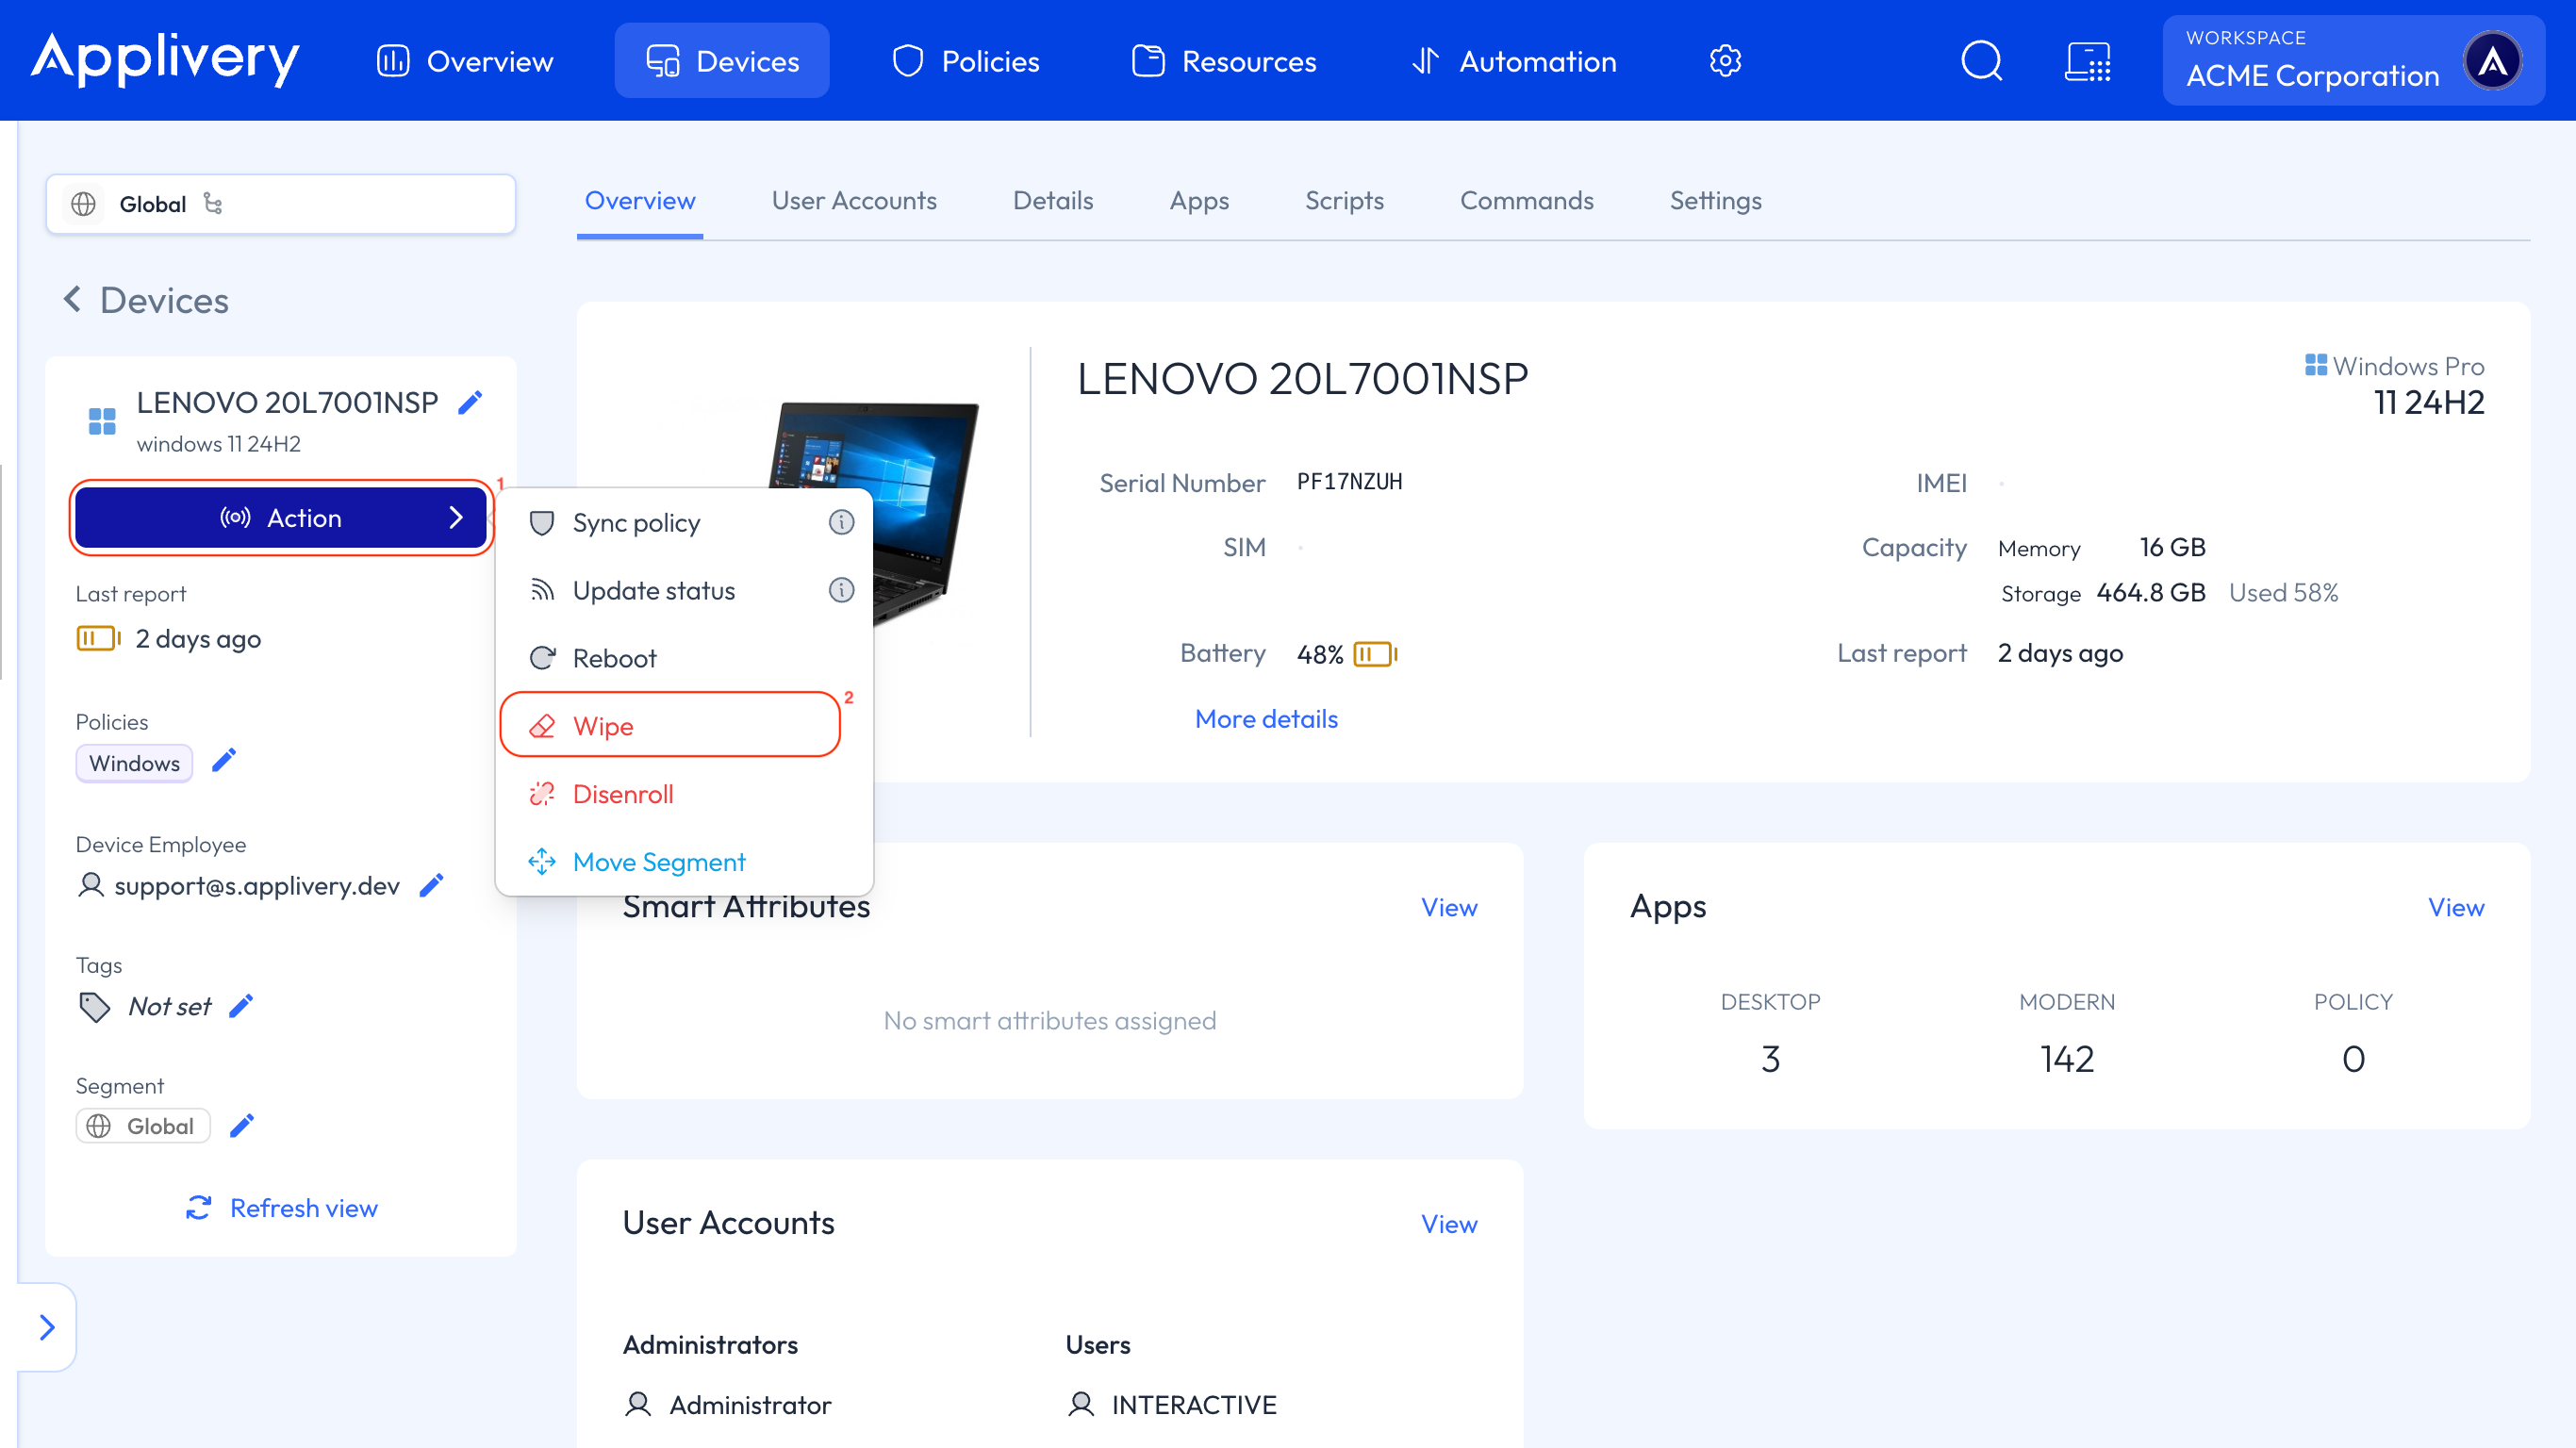
Once in the Applivery Dashboard, navigate to any of your Devices and click the Action button 1.
From the dropdown menu, select Wipe 2, then choose Wipe device or Protected wipe in the dialog.
Wiping a Device is irreversible. Make sure you're targeting the right Device before confirming, especially with Protected wipe — since it survives interruptions, there's no window in which to stop it once it's underway.
Wipe is also available from Settings → Danger Zone on the Device's detail page, where both types are explained side by side.
Disenroll
Removes the Device from Applivery's management.
The Device stops receiving Policies, Apps, and commands, but keeps its data and installed software. That's the difference from a wipe: disenrolling is what you want when the Device stays with the user and simply shouldn't be managed anymore.
Once in the Applivery Dashboard, navigate to any of your Devices and click the Action button 1.
From the dropdown menu, select Disenroll 2.
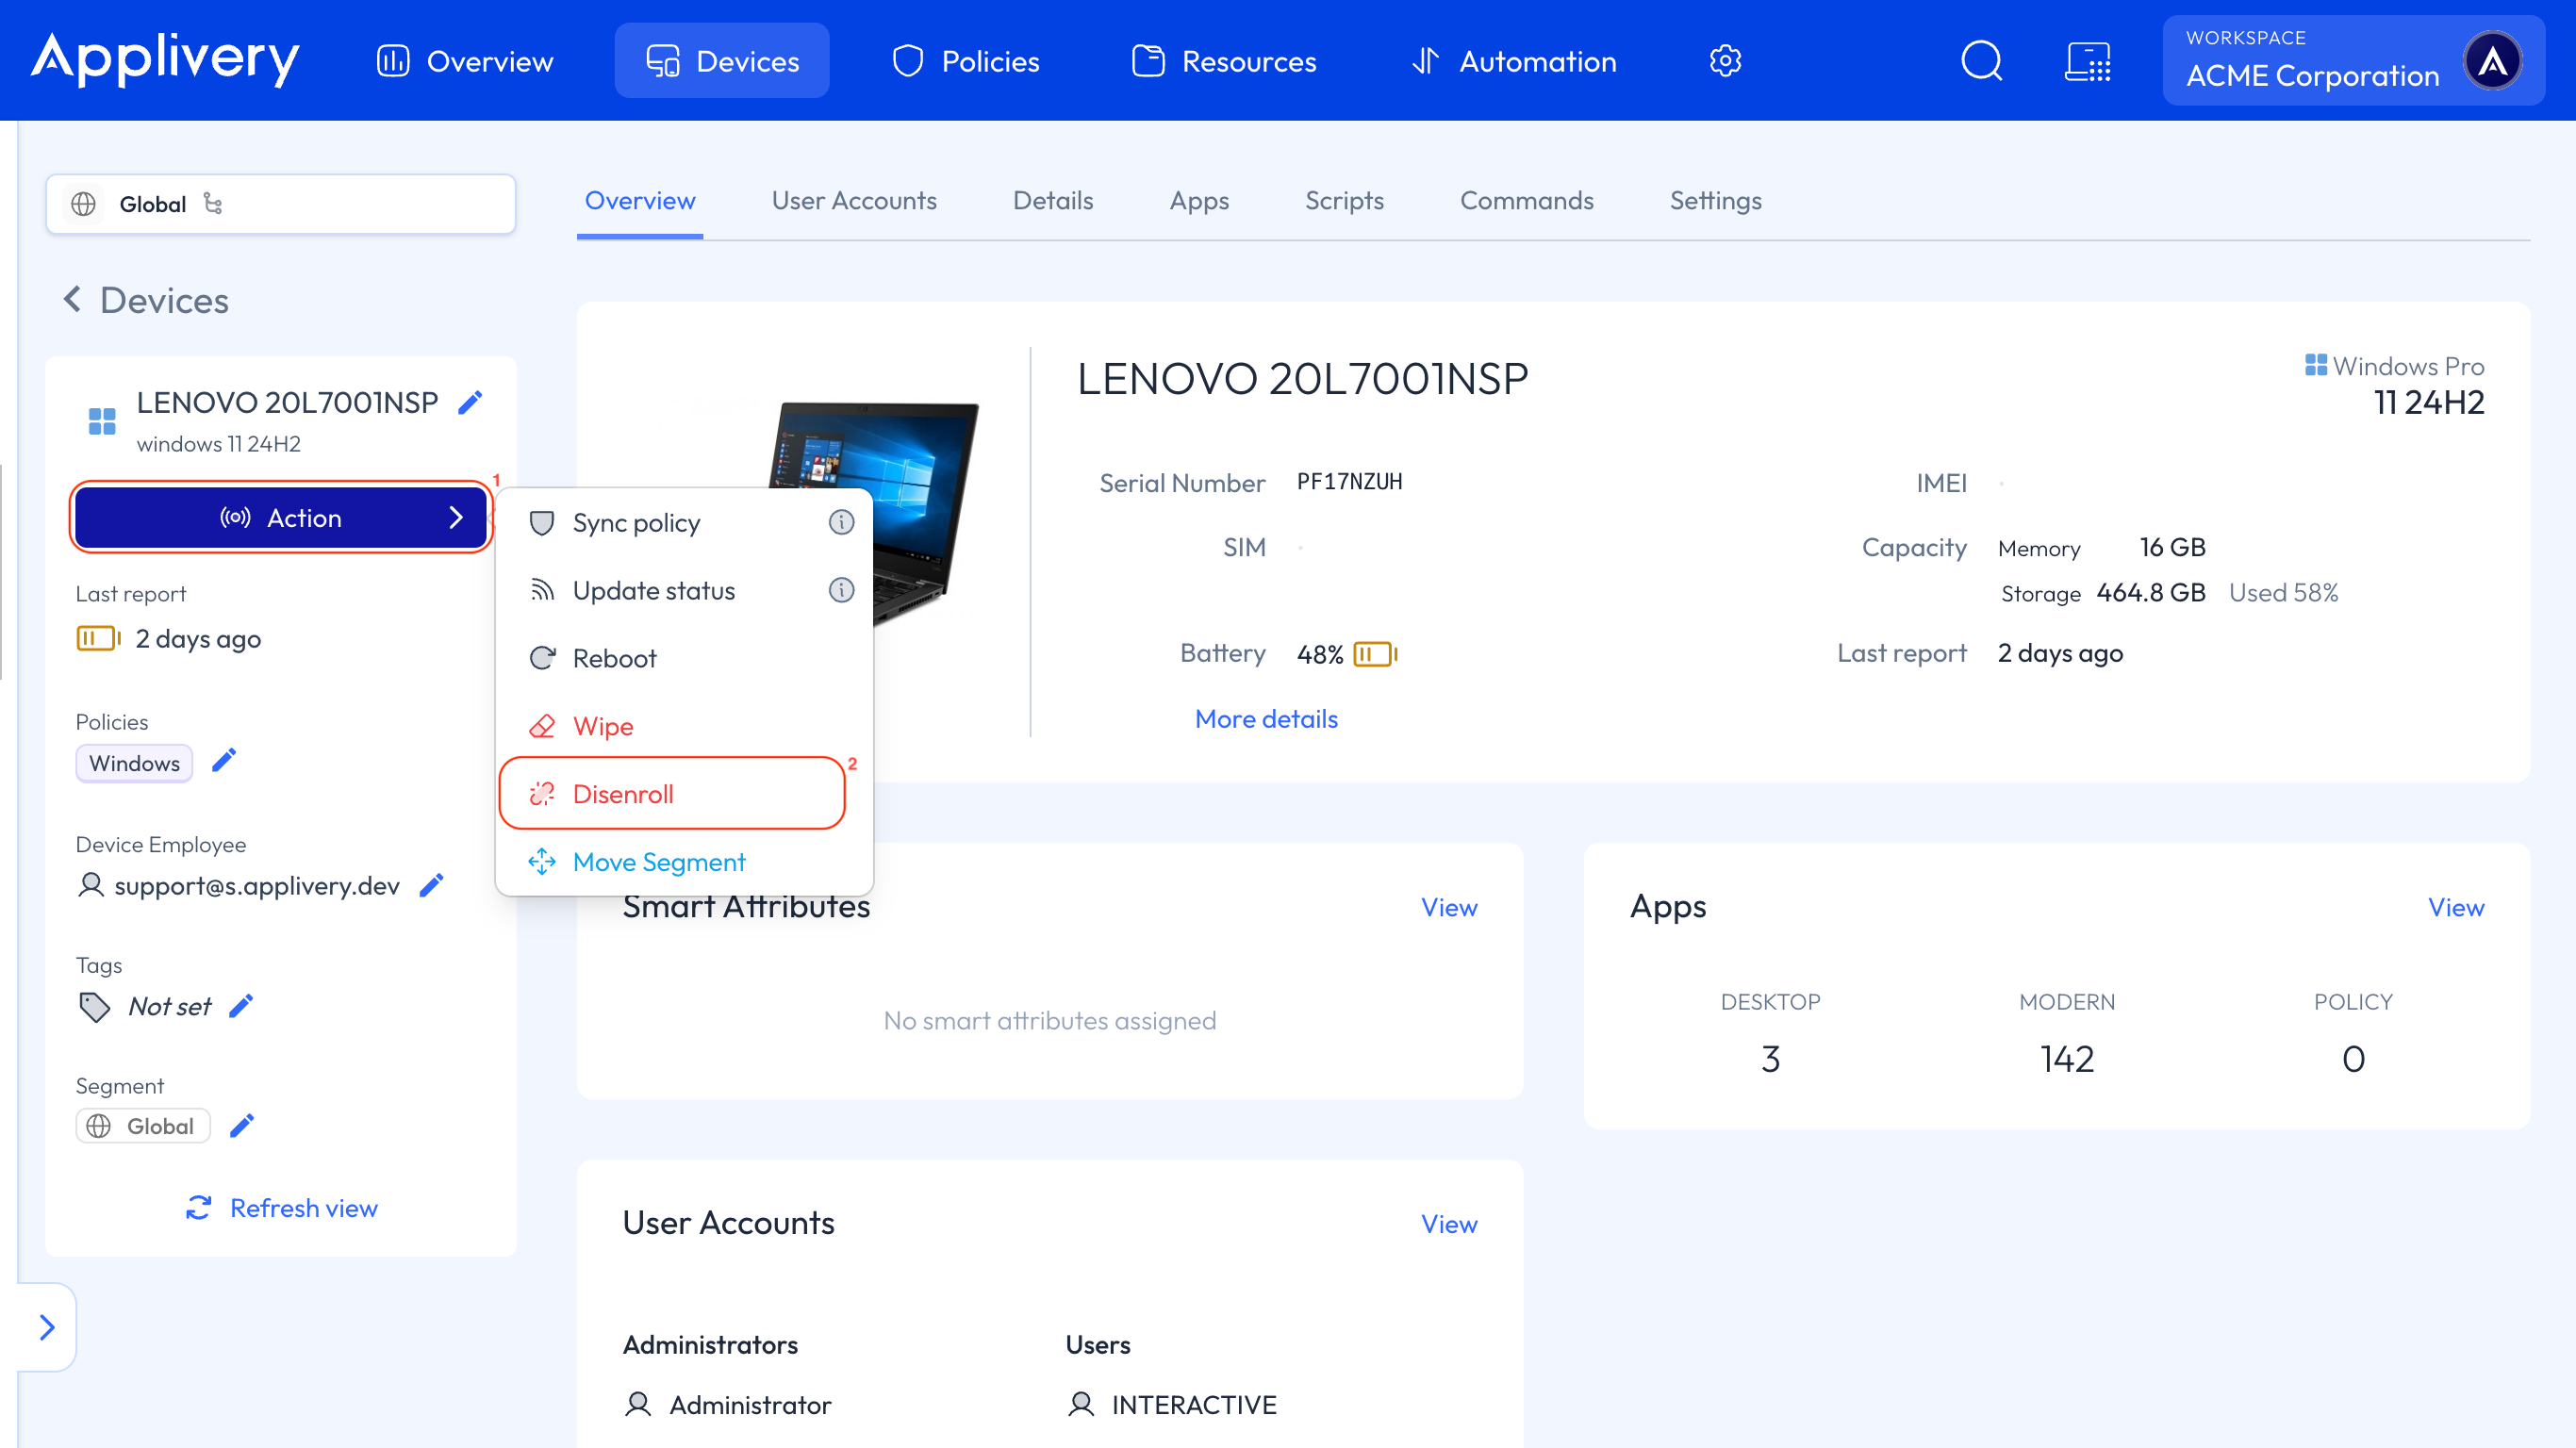
Disenroll is also available from Settings → Danger Zone.
Move Segment
Moves the Device to a different Segment.
Once in the Applivery Dashboard, navigate to any of your Devices and click the Action button 1.
From the dropdown menu, select Move Segment 2 and choose the destination.
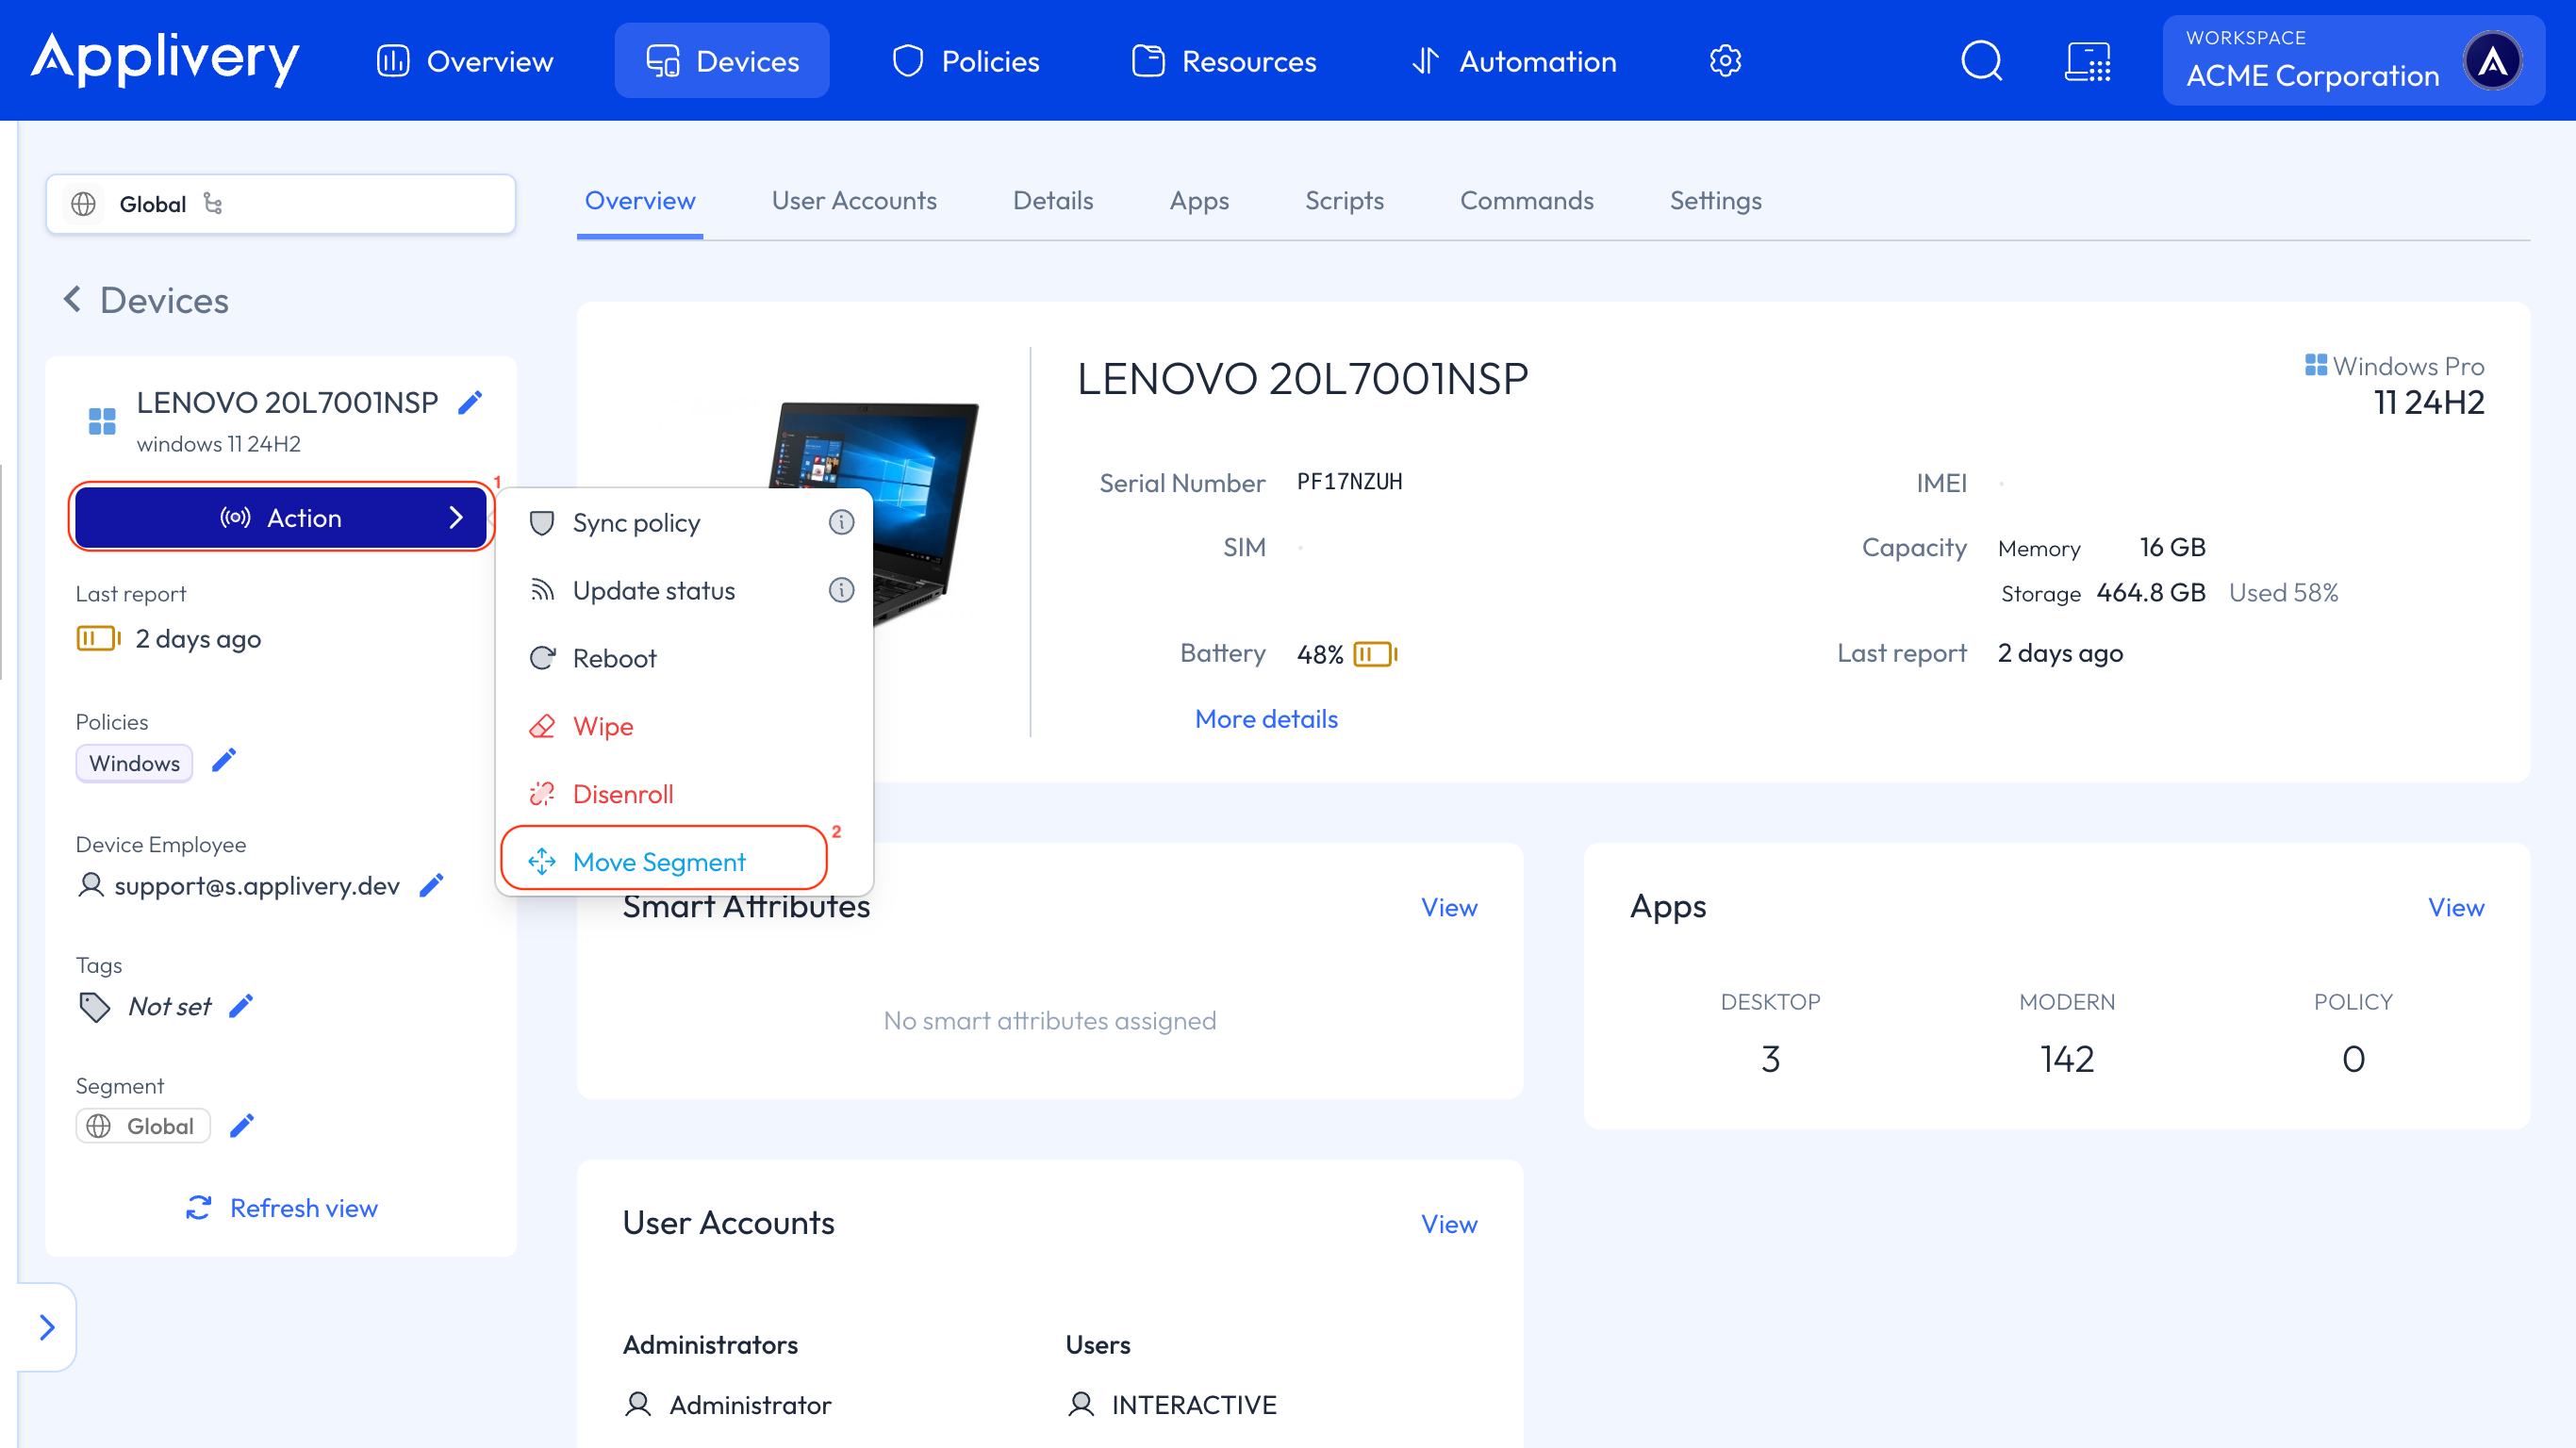
All the commands mentioned above can also be executed from the Commands tab or from the Danger Zone section within the Settings tab.