

Applivery ships with a set of built-in Custom Policies categories for Windows — Application Control, Assigned Access, BitLocker, Device Manageability and more — that cover the most common Group Policy settings out of the box.
But plenty of what you need to manage doesn't live in those categories. Third-party applications like Google Chrome Enterprise, Adobe or Zoom publish their own ADMX templates, the same Group Policy file format used on-premises. For those, you can import the vendor's template directly into a Policy: Applivery reads it and turns every setting it defines into a manageable configuration, with its description, registry path and possible values, exactly like a native Applivery category.
When to use this
Import a Custom ADMX Configuration when:
You need to manage an application or component that isn't one of the built-in Custom Policies categories.
The vendor of that application publishes an official ADMX template, and optionally an ADML file with localized names and descriptions.
You want those settings manageable from the Dashboard, instead of resorting to scripts or raw registry keys.
Importing a template
Once in the Applivery Dashboard, open Policies 1 and choose the Windows Policy where you want to add the configuration.
From the left-side menu, select + Add configuration 2, where you will find the Custom Policies 3 configuration. Alongside the built-in categories, you'll find an Import ADMX 4 search bar at the top.
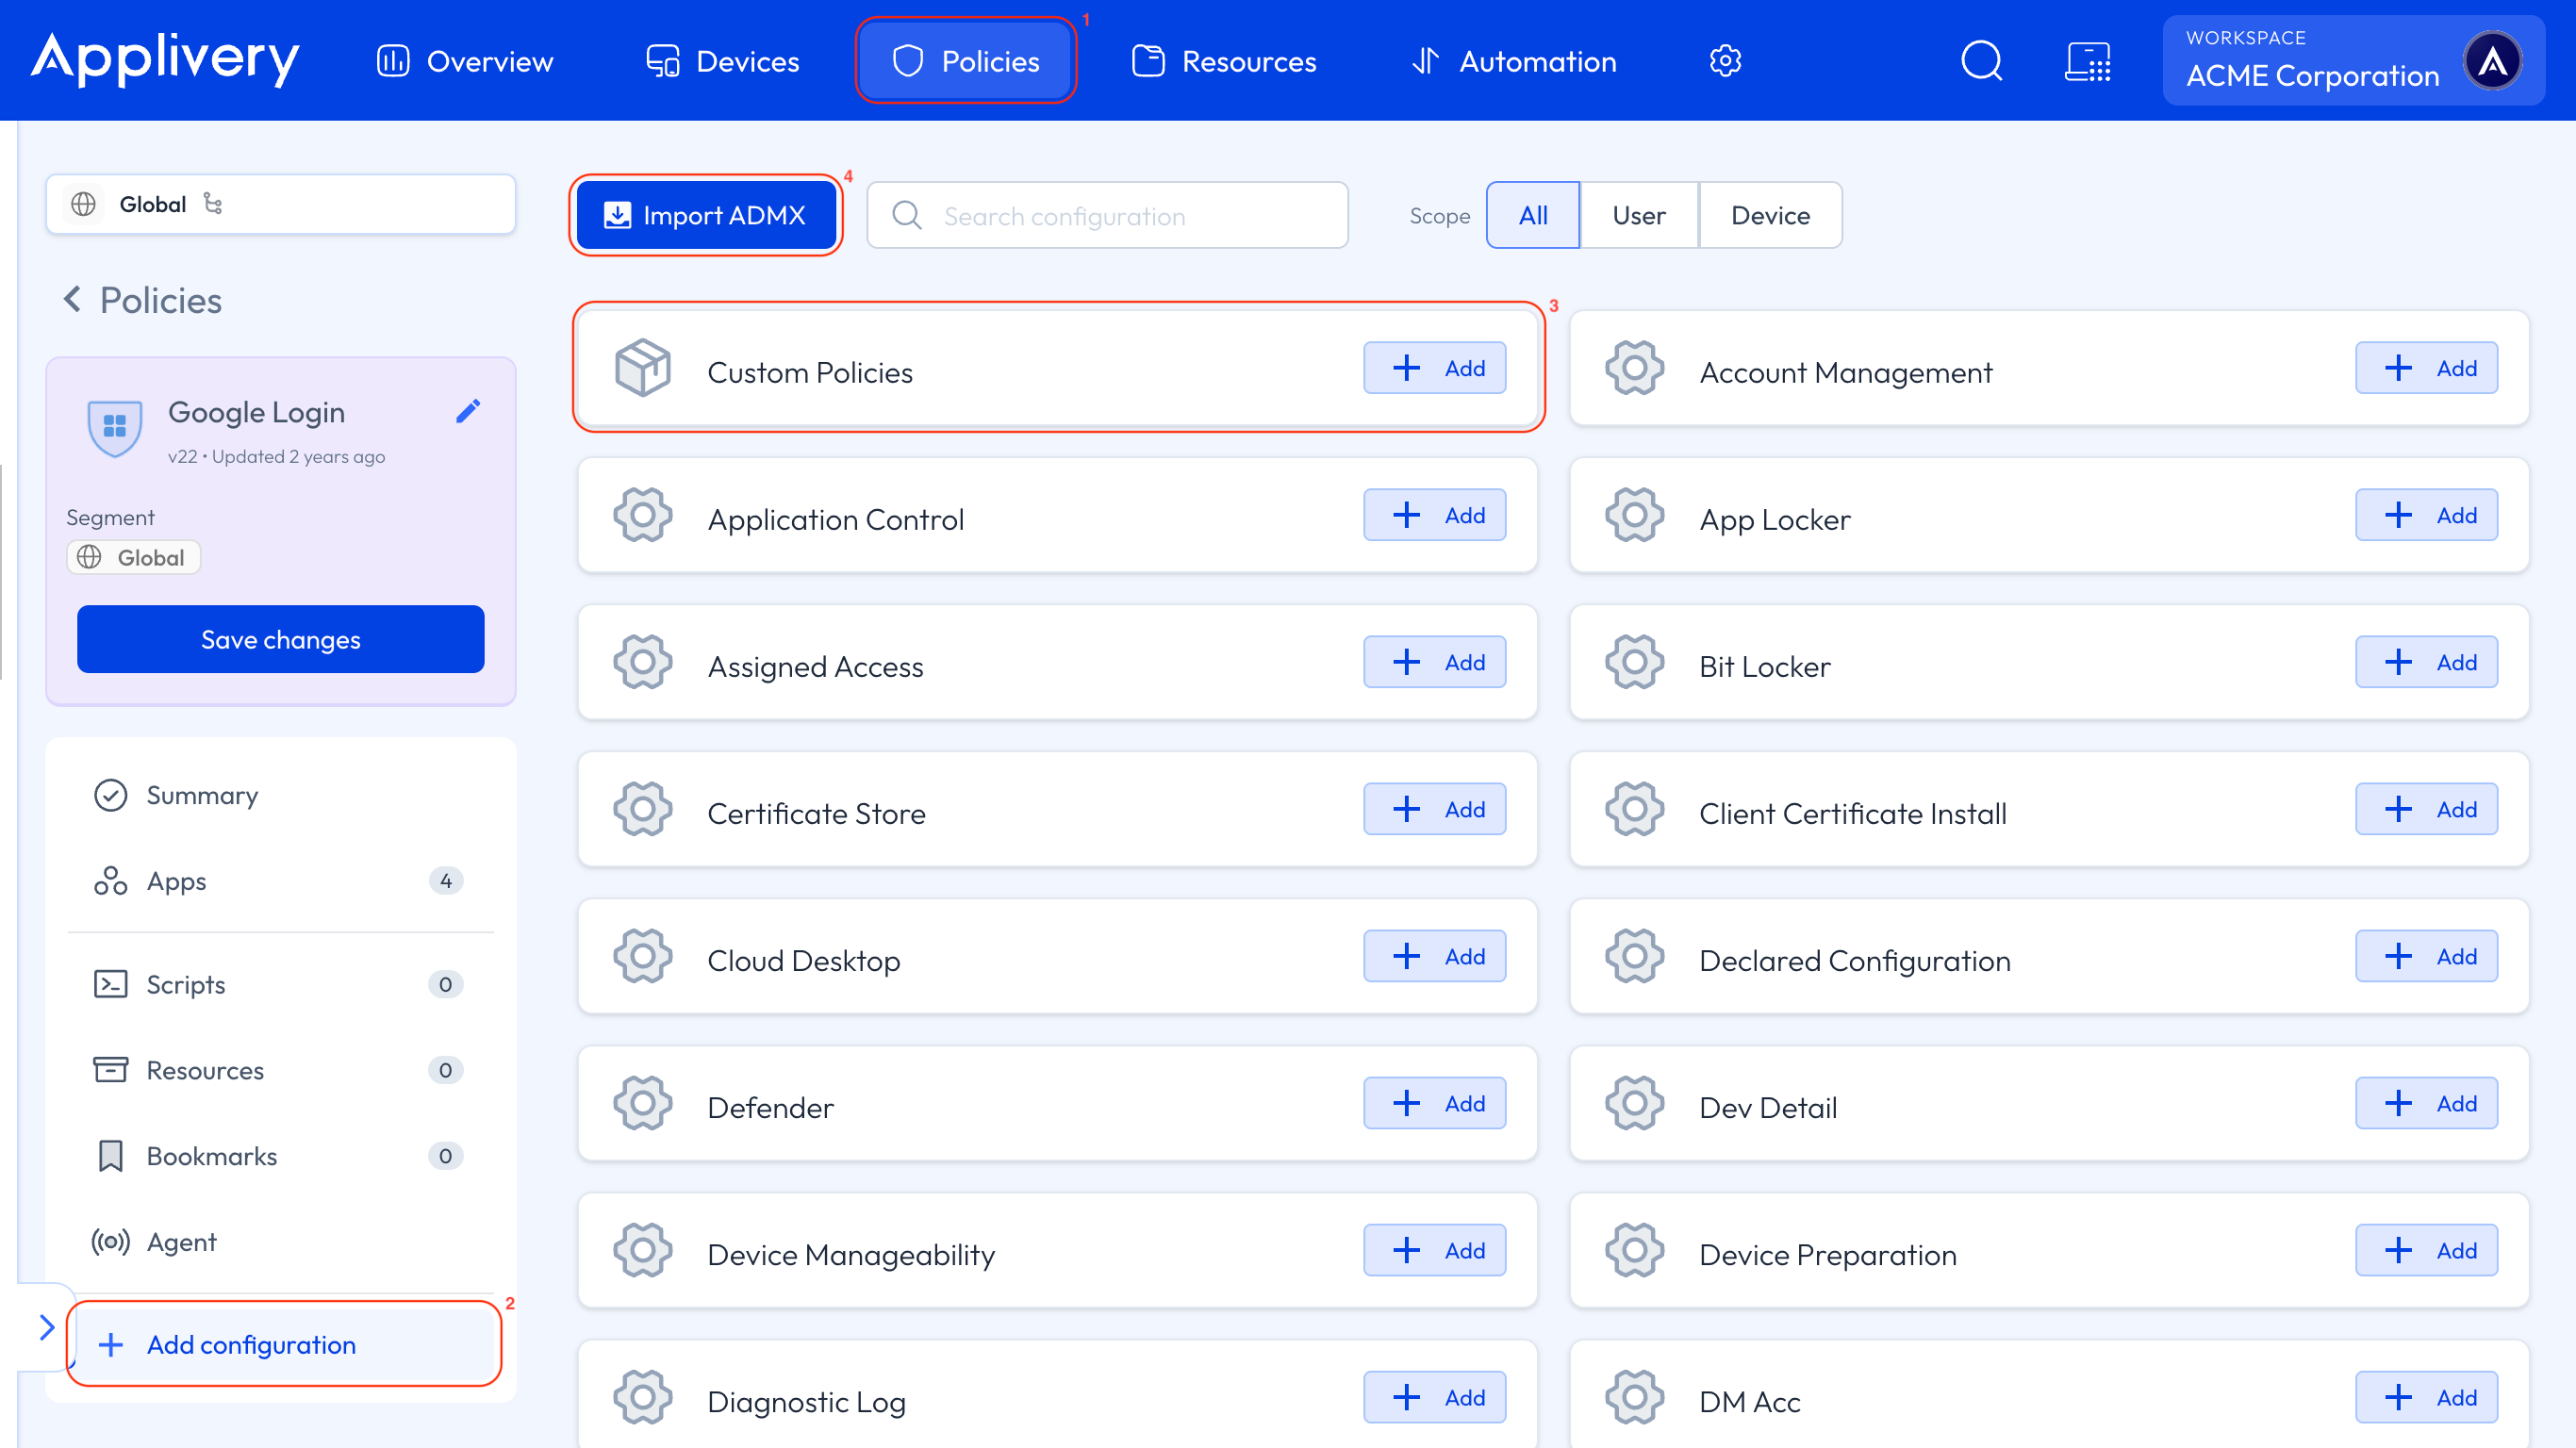
Click Import ADMX to open the import dialog. From here you can either:
Select an existing ADMX configuration — pick from templates your organization has already imported. They appear under Recently used, each showing its setting type and how many properties it contains, split by device, user, and both scopes.
Upload new configuration — upload a new
.admxfile, and optionally its.admlfile for localized setting names and descriptions.
The ADML file is optional, but worth uploading when the vendor provides it. Without it, settings appear with their raw internal names — which makes a template of several hundred entries considerably harder to work through.
Check Apply to User Scope if you also want the template's user-scoped settings, the ones under HKCU. Left unchecked, only the device-scoped HKLM settings are imported.
Click Import. Applivery parses the template and adds it under Custom Policies as a new configuration entry, which then appears in the left side menu.
Configuring the imported settings
Open the new configuration from the left side menu. Every setting defined in the template is listed individually with:
Its display name and description, exactly as published by the vendor.
The registry path it maps to — for example
Software\\Policies\\Google\\Chrome\\LiveCaptionEnabled.A toggle to mark it as Configured, along with the value or values to set.
You only configure what you care about. Leaving a setting untouched means Applivery doesn't enforce a value for it at all — importing a template with hundreds of settings doesn't mean you're now managing hundreds of settings.
If the same vendor publishes more than one template — separate files for different setting groups, for instance — repeat the import under the same category with + Add configuration, without leaving the Policy.
When you're done, click Save at the top of the Policy to push the changes to the assigned Devices.
Your ADMX library
Imported templates are stored at Workspace level, not per Policy. That's why they show up under Recently used the next time you import one into a different Policy: you upload a vendor's template once and reuse it wherever you need it.
From the import dialog, Manage 5 opens the full list of templates uploaded to your Workspace, where you can review which ones are currently assigned to a Policy and remove the ones you no longer need.
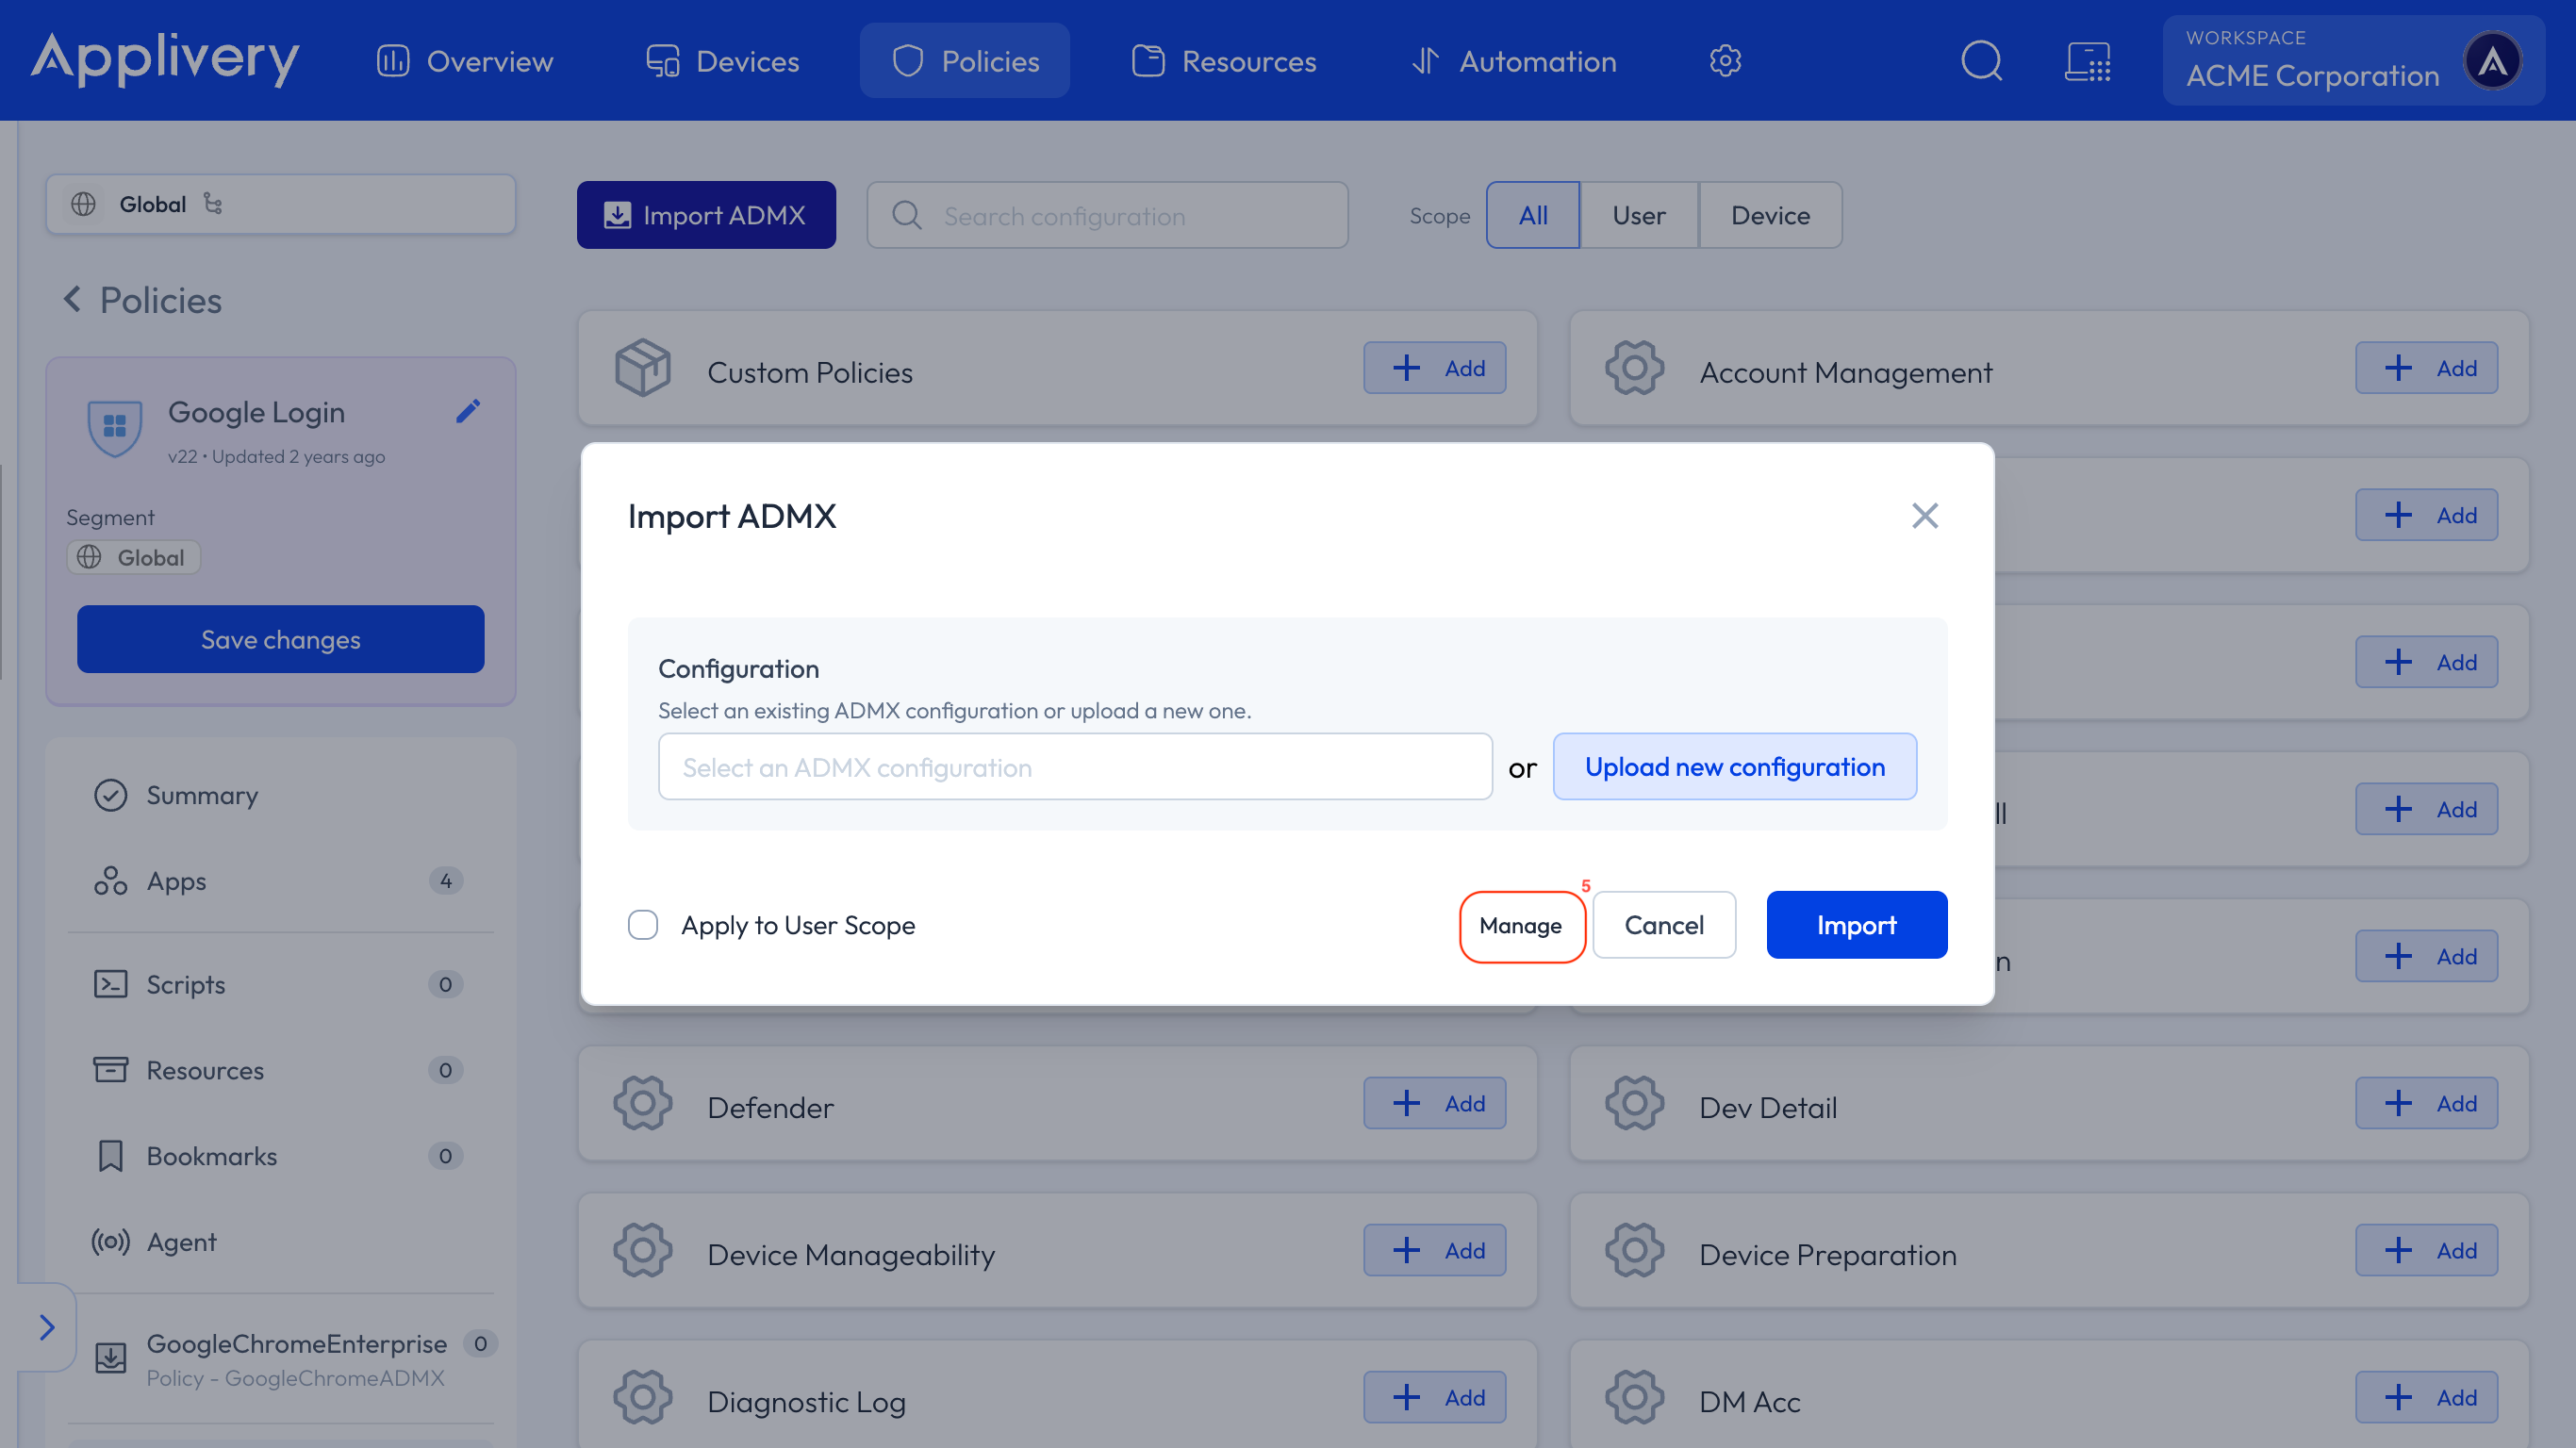
Check what a template is assigned to before deleting it. Since templates are shared across the Workspace, removing one affects every Policy currently using it — not just the one you happen to have open.