
Distributing private Apps through Managed Google Play requires Google Mobile Services and is not available on AOSP Devices. On AOSP, private Apps are distributed directly through the Applivery Self-Service. See AOSP Android Management for details.
Applivery Device Management allows you to manage and distribute your Private Apps in three different ways:
As a Self-hosted Private App managed outside the Google Play Console (you can read more here).
As a Self-hosted Private App managed through Applivery App Distribution (you can read more here).
As a Private App managed through the Google Play Console. It provides two options:
Use Google’s Managed Google Play Console account that will be created automatically when uploading Private Apps through your Managed Google Play.
Use your own Google Play Console for advanced configuration, automation requirements, and more flexibility. You can read more about how to connect your existing Google Play Console Developer Account with Applivery here.
We will go through the third scenario (3.1), using Google’s Managed Google Play Console account.
Create and upload a Private App
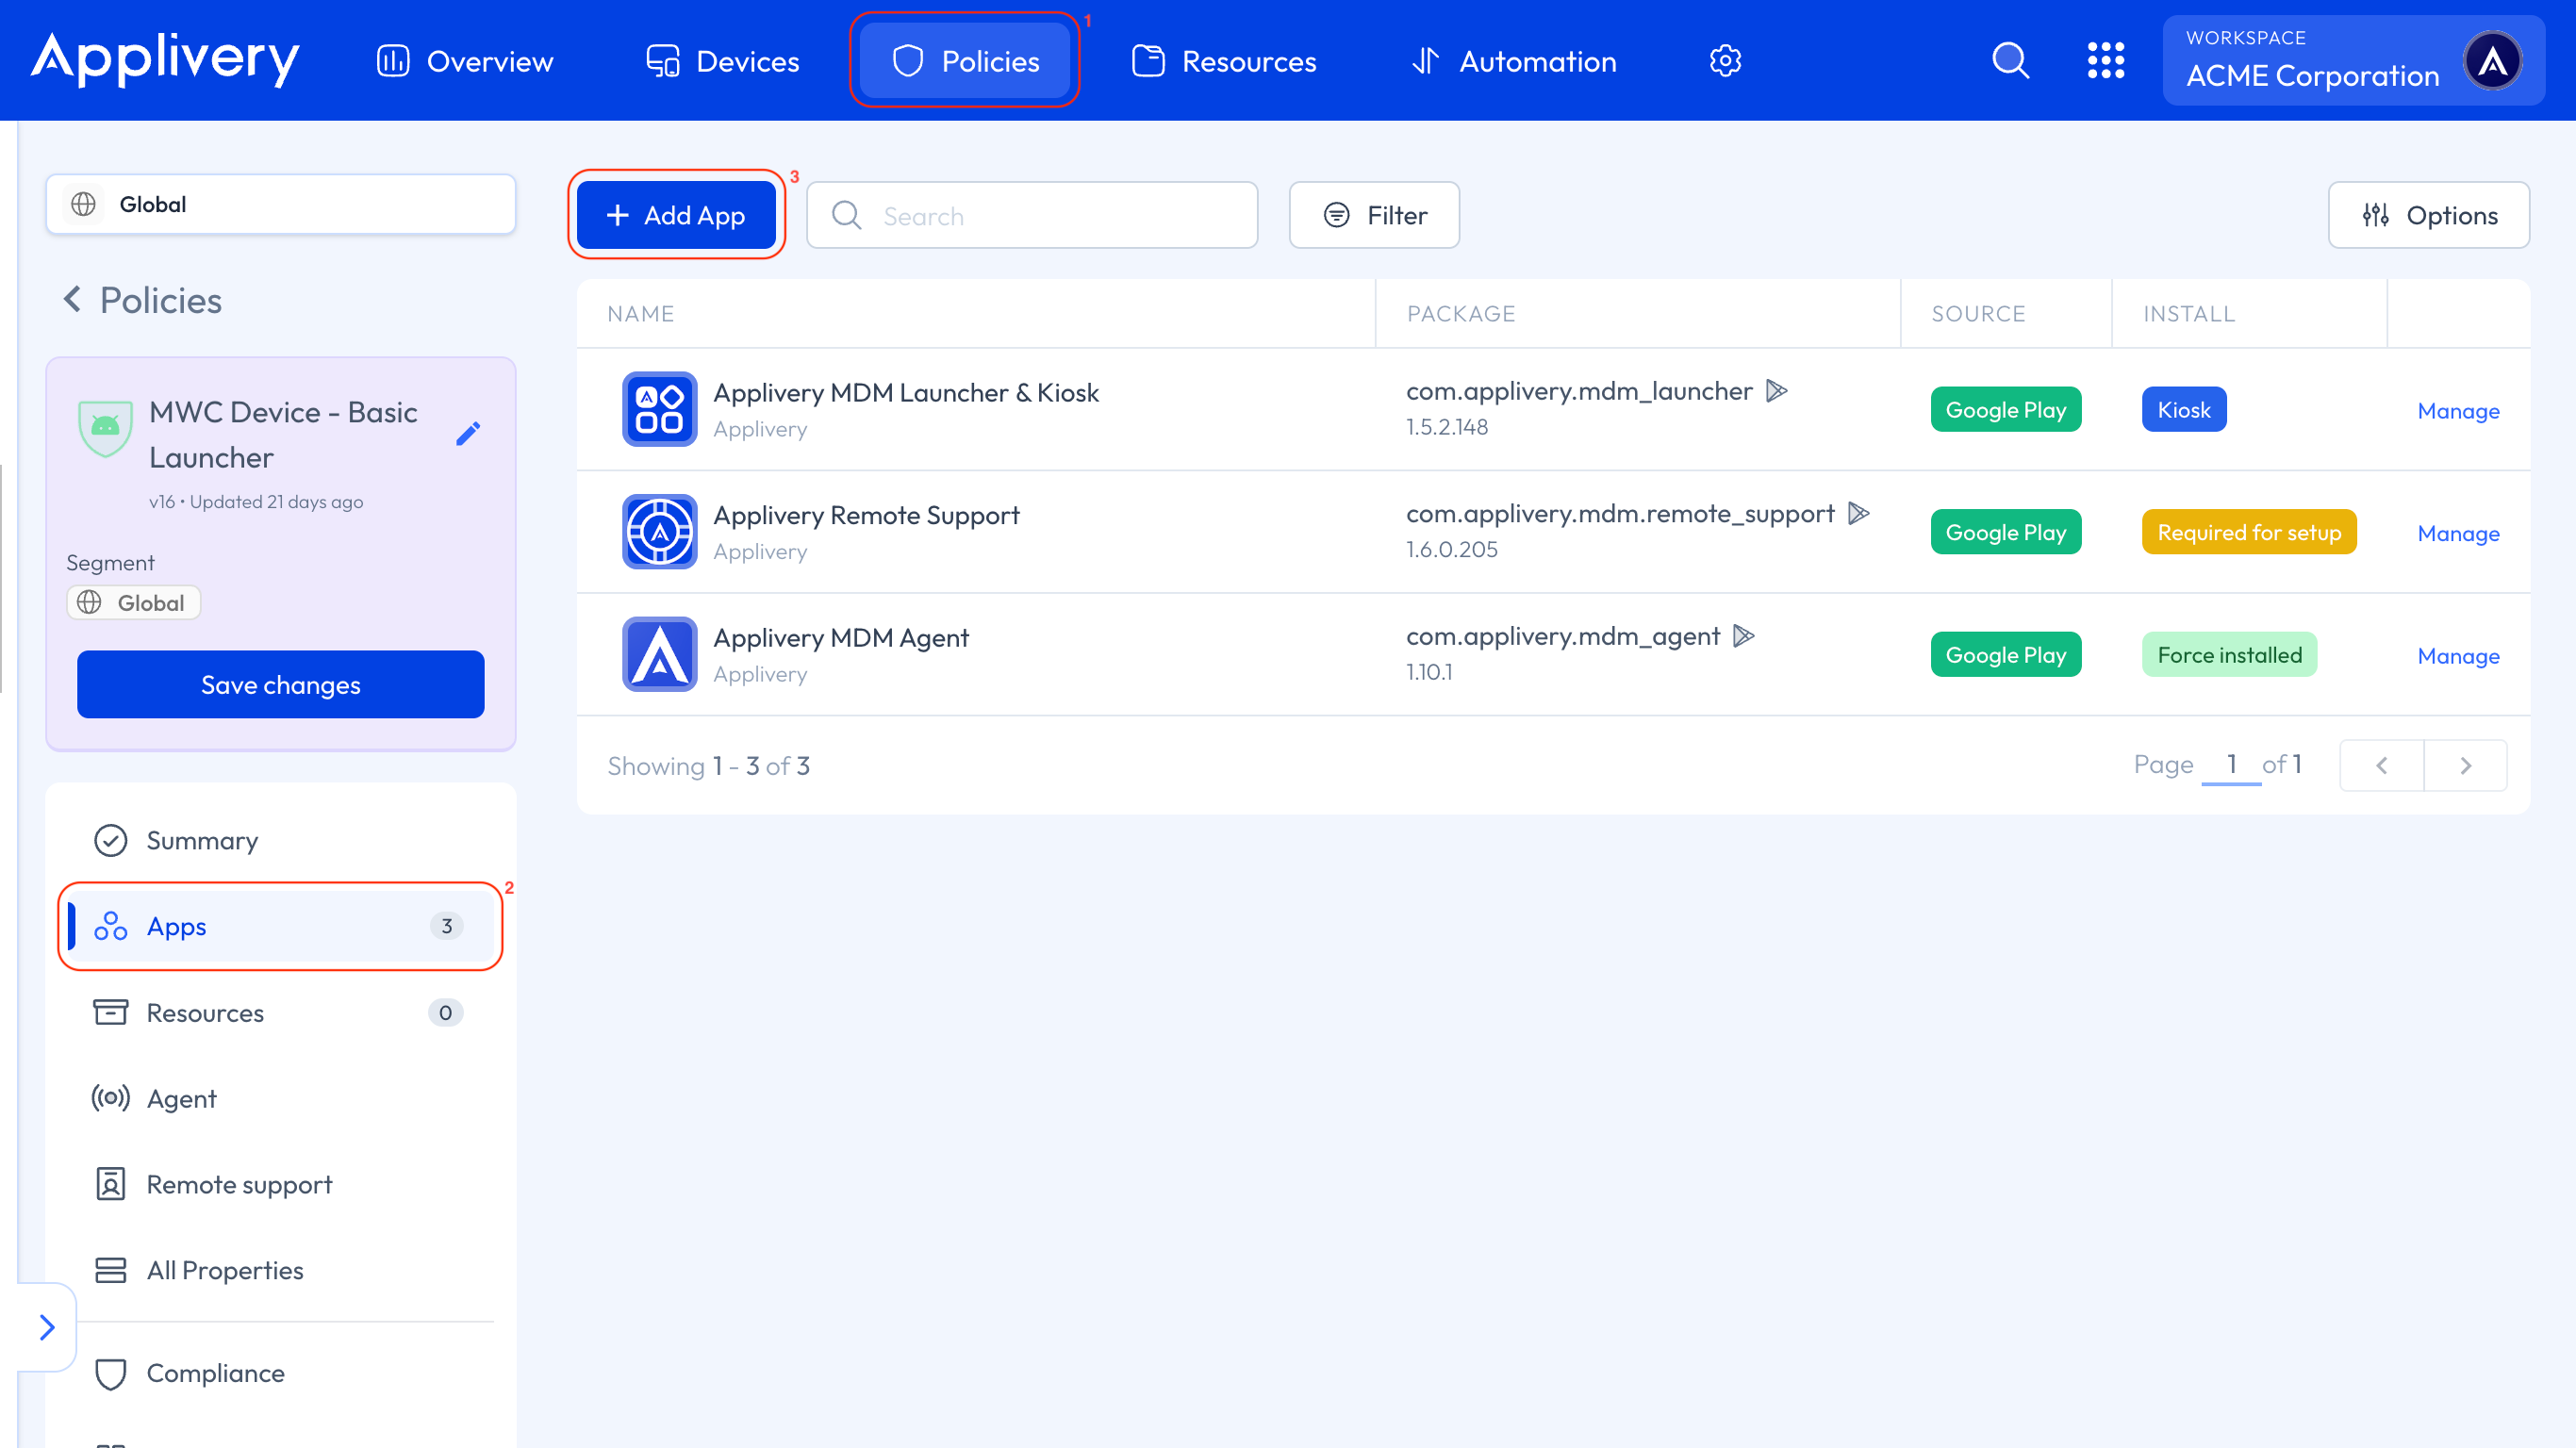
Once in the Applivery Dashboard, go to any of your Policies 1. From the left side menu, go to Apps 2 and click the + Add App button 3.

Then select the Google Play 4 tab. Once inside your Managed Google Play, go to the Private Apps 5 side menu option.
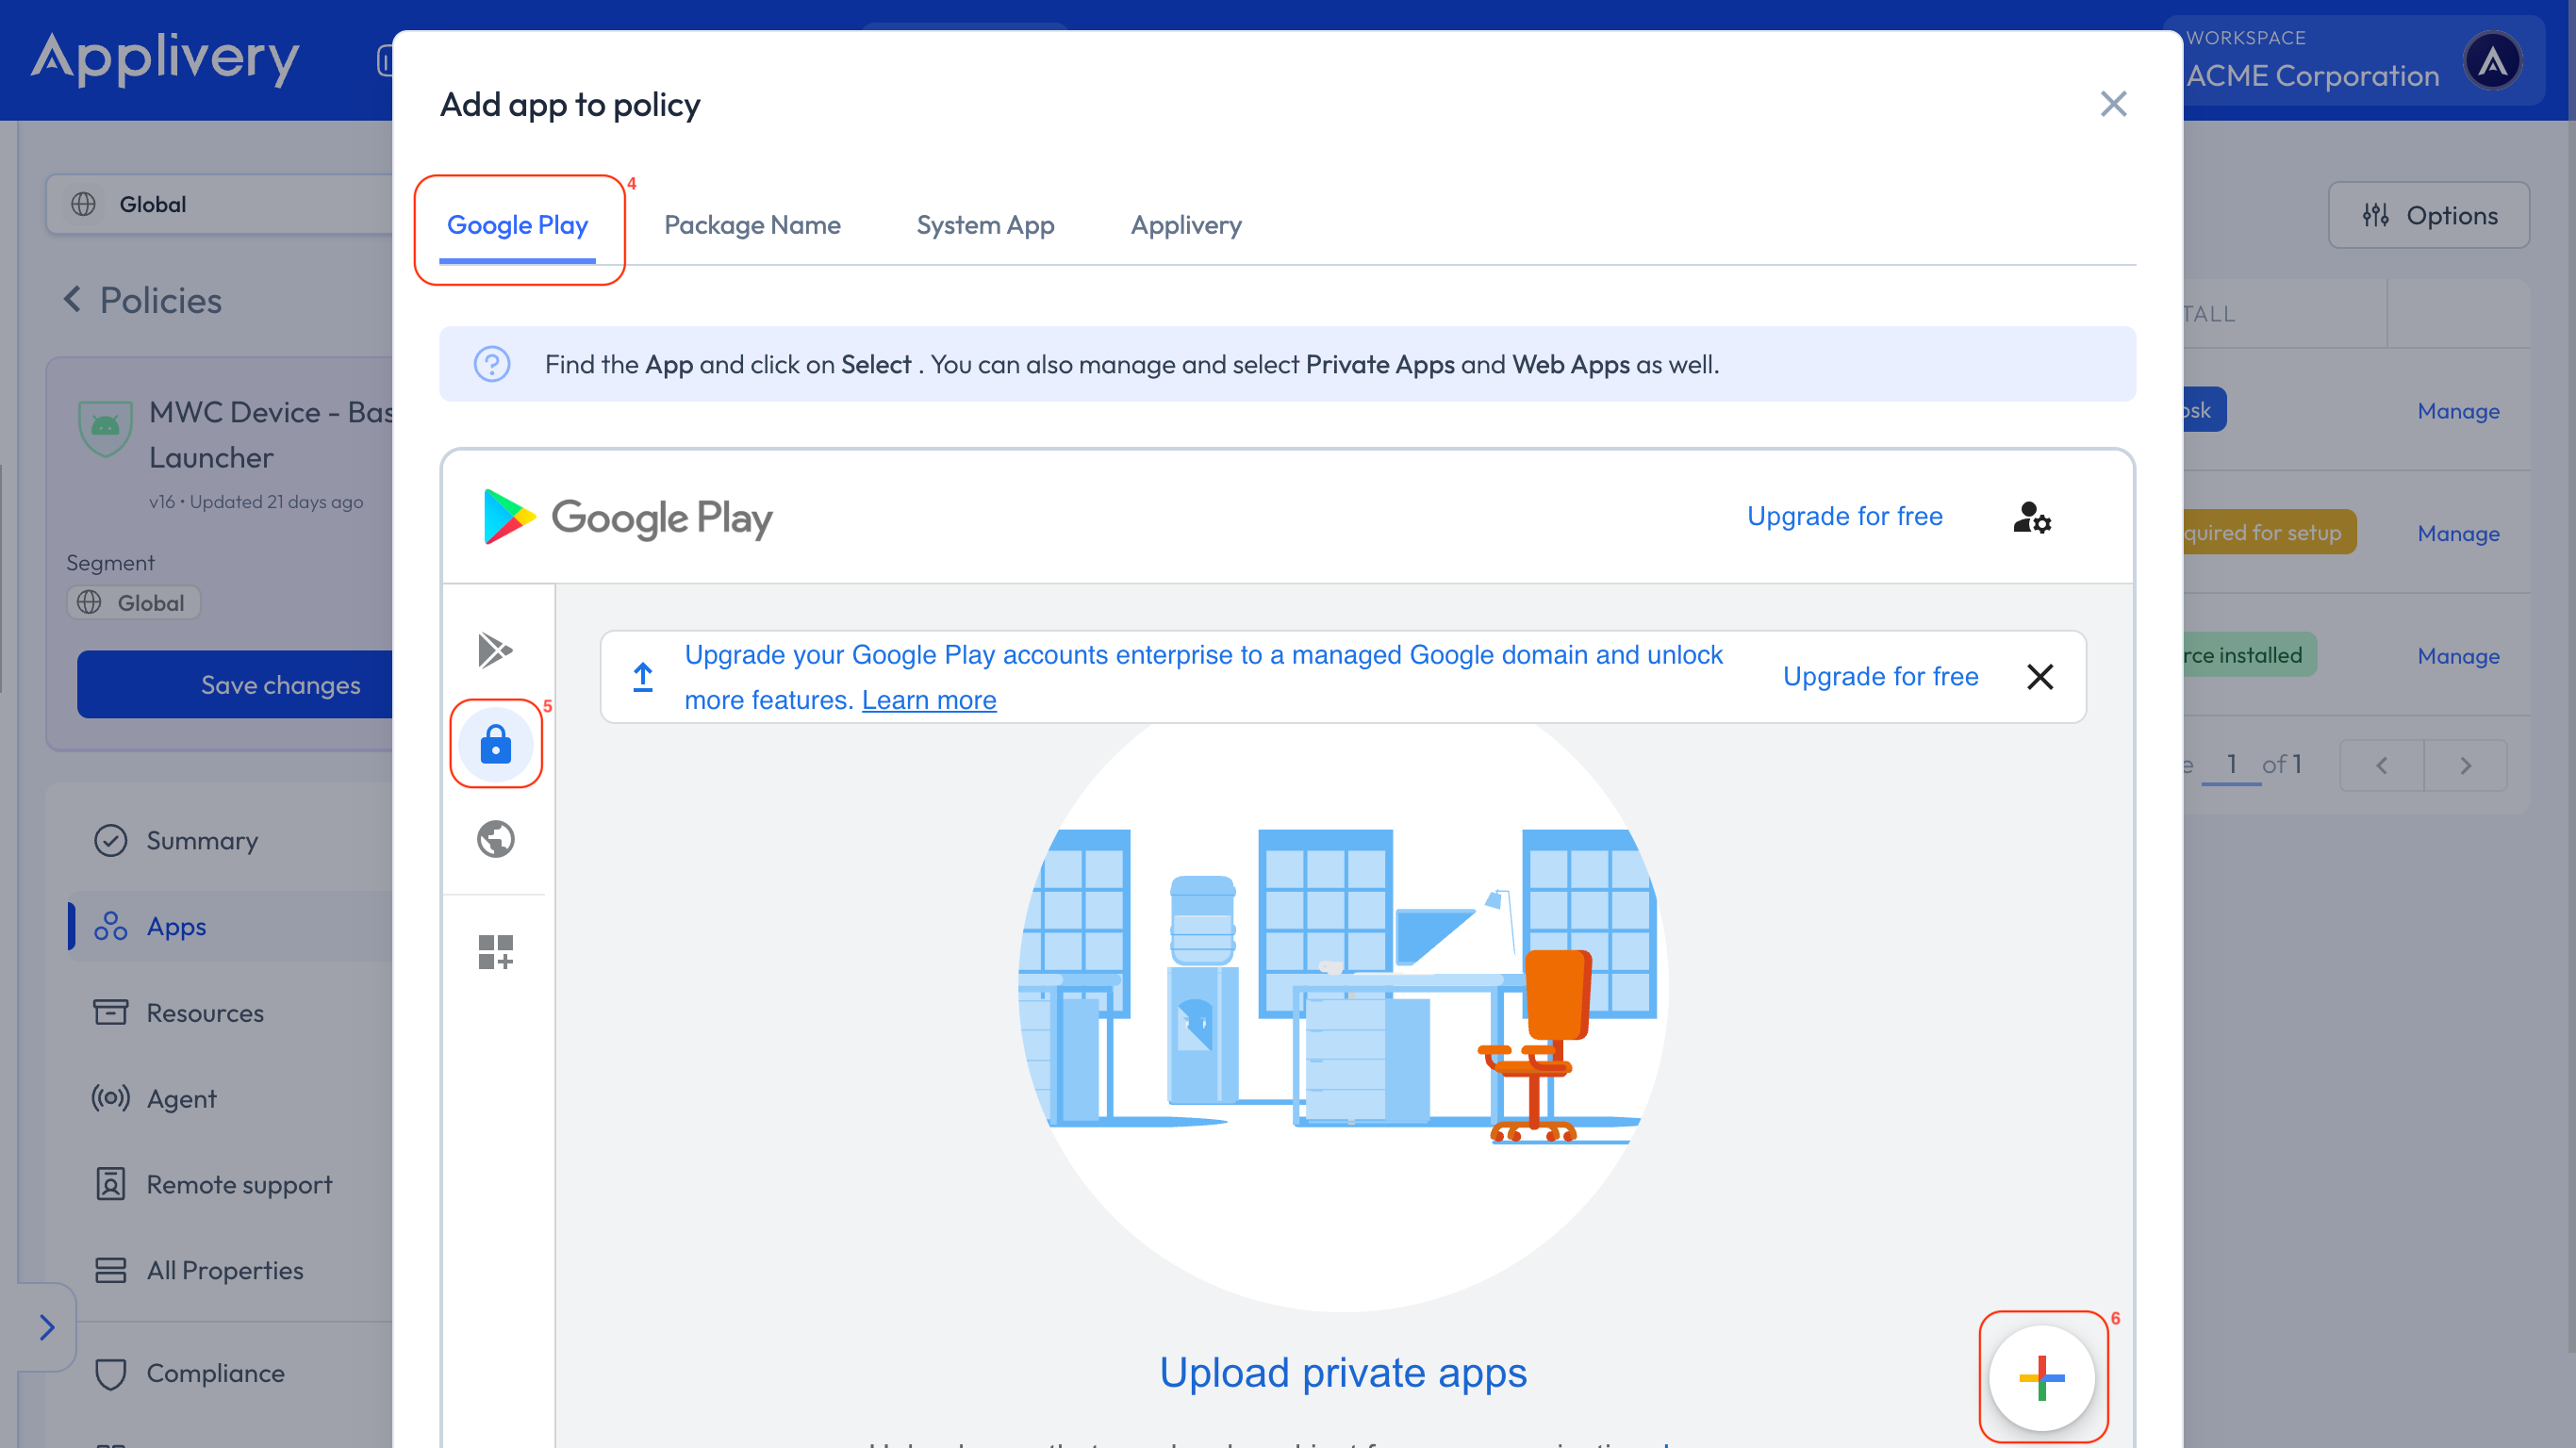
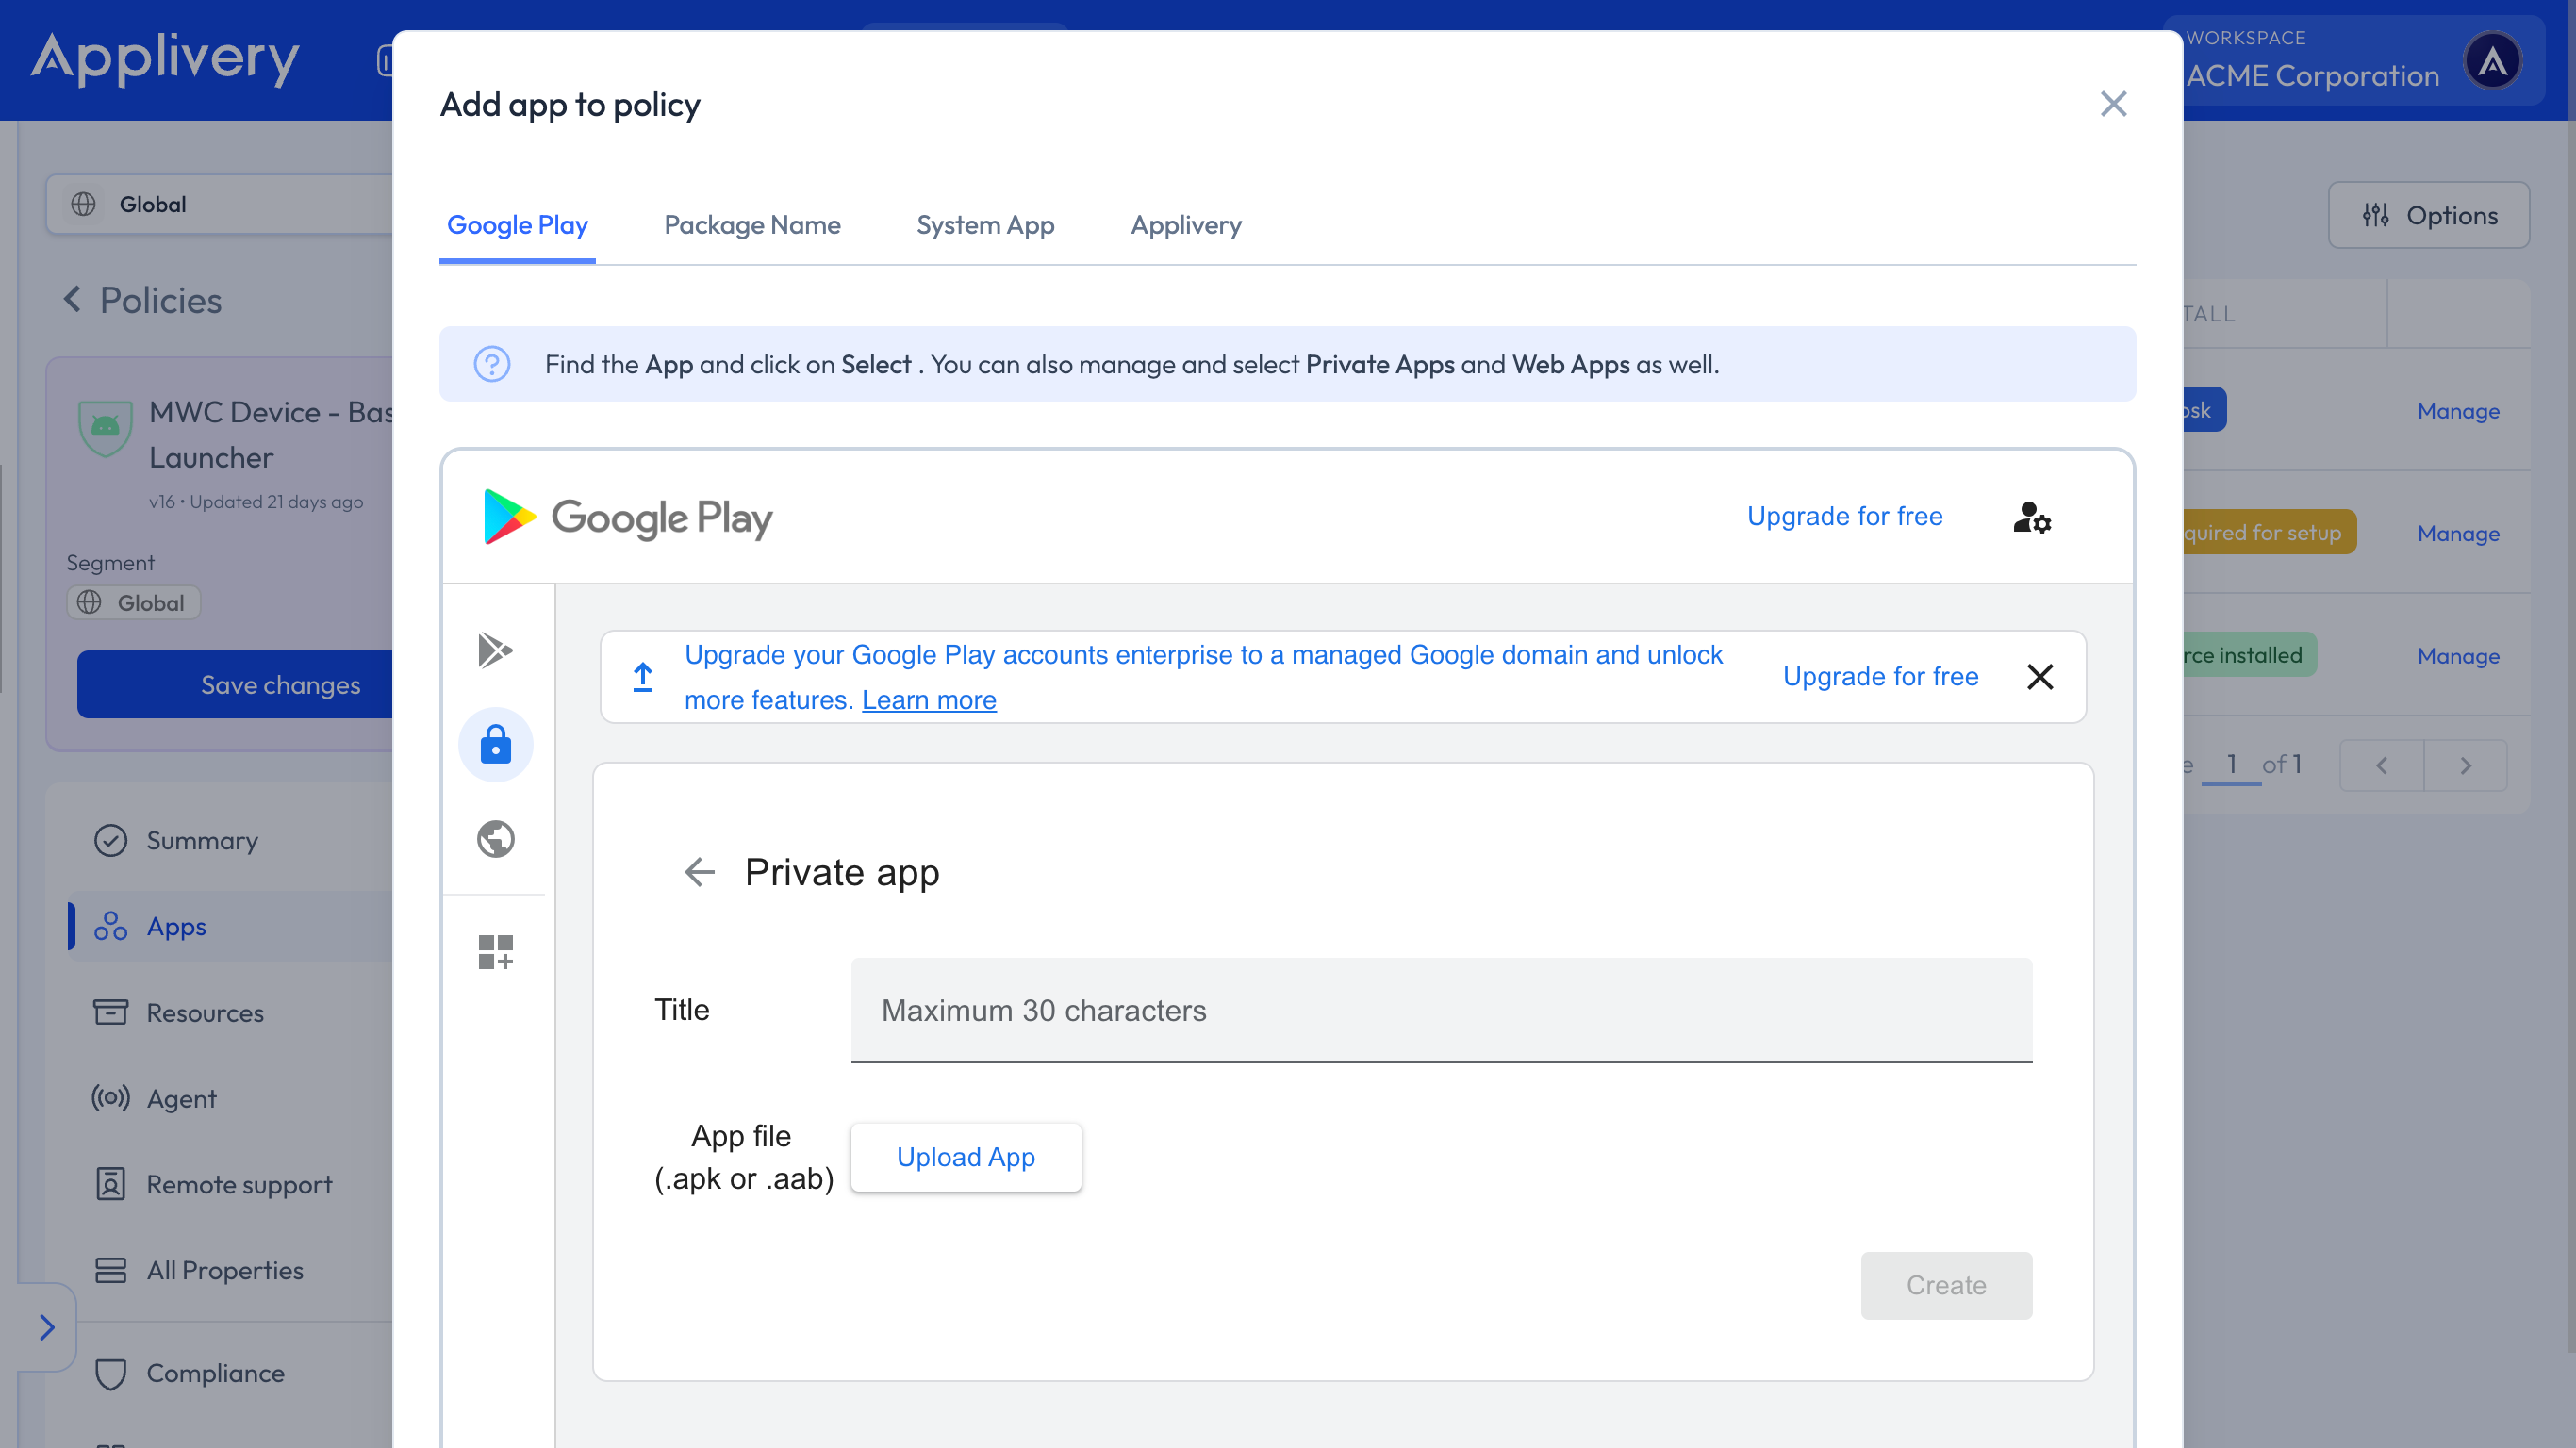
Now, click the + 6 circle button to start creating and uploading your first Private App. Choose a name for your App and browse your drive to select an APK file.
Please note that you are going to upload a new Private App to the Google Play Console, so Google will reserve and block the package name of your App (i.e.: com.applivery.kioskapp) for this Organization, and you will no longer be able to use it again in any other App or organization. We highly recommend carefully choosing the package name or even adding a suffix for testing purposes.
Once uploaded, your App may take between 2 and 48 hours to become fully available in your account. Please note that this timeframe depends on Google’s review and publishing process.
Update a Private App or make advanced edits
You will probably want to update your private applications from time to time or make advanced edits to change the icon, description, language, or any other aspect of your application.
These operations can be done from Applivery through the Google Play Console.
Upload a new version of your Private Apps
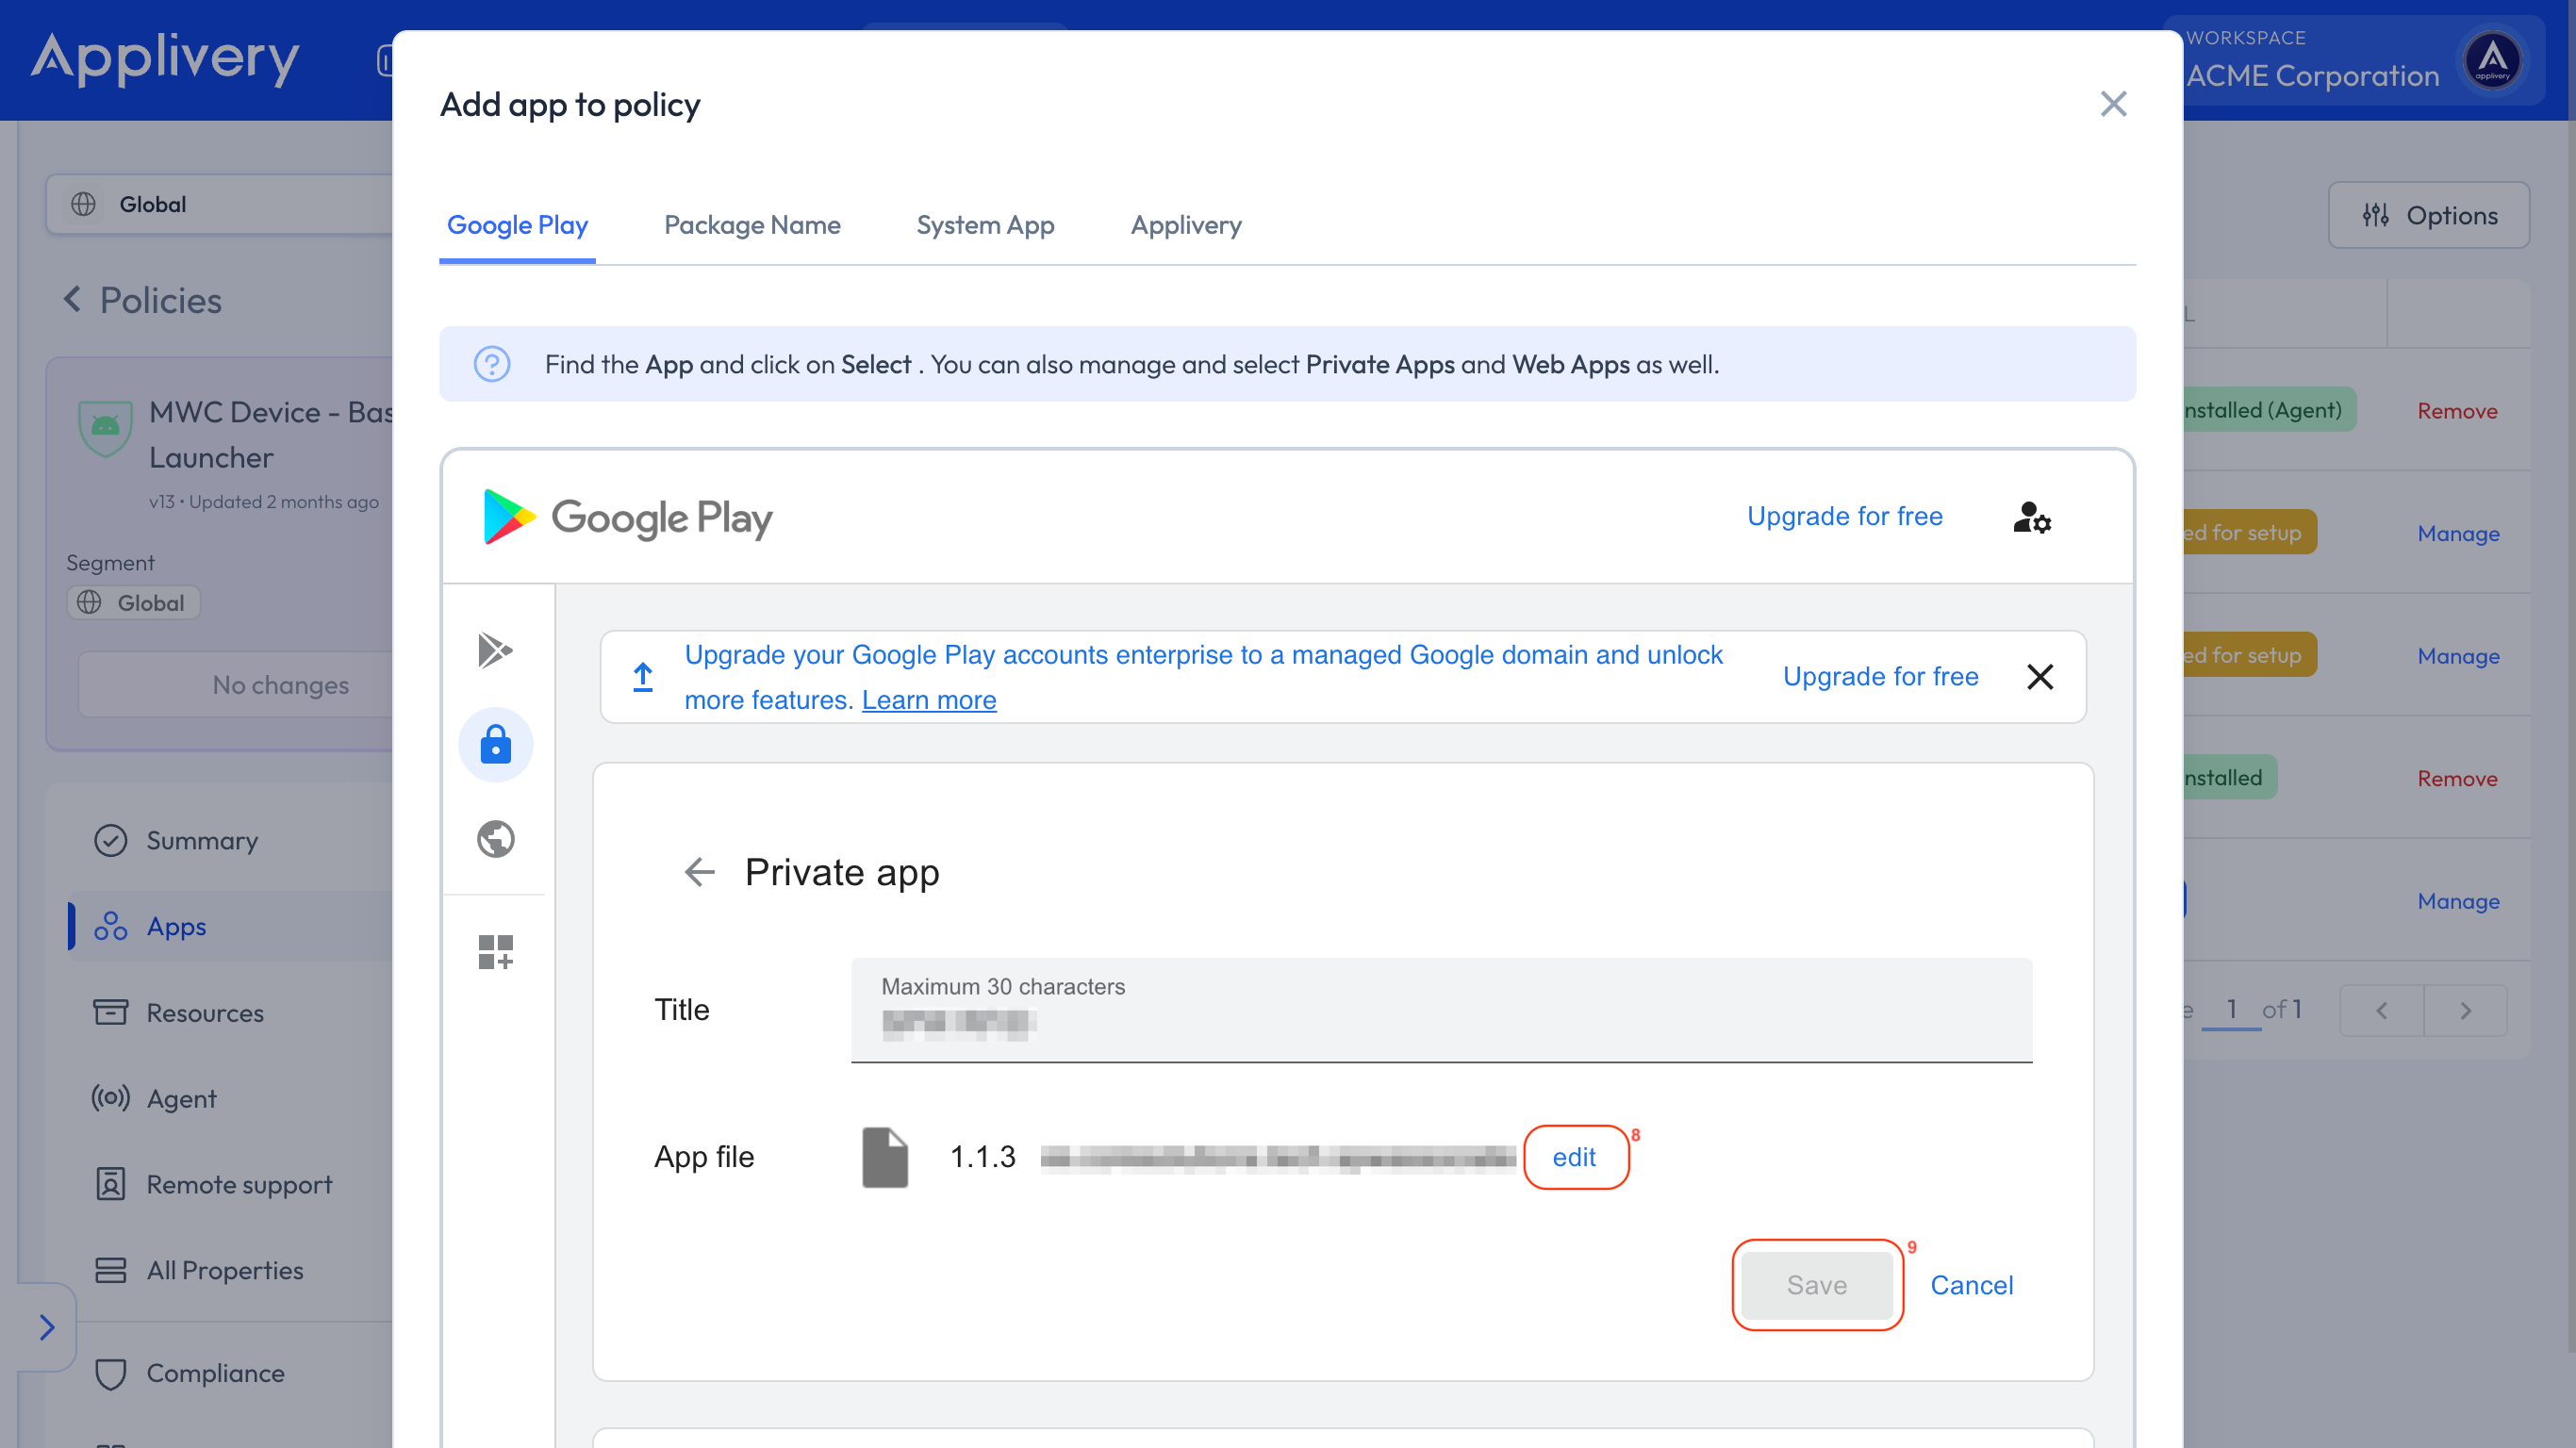
From one of your Policies 1, go to Apps 2 and click the + Add App button 3.
Then select the Google Play 4 tab. Once inside your Managed Google Play, go to the Private Apps 5 side menu option and select one of the Apps 6.
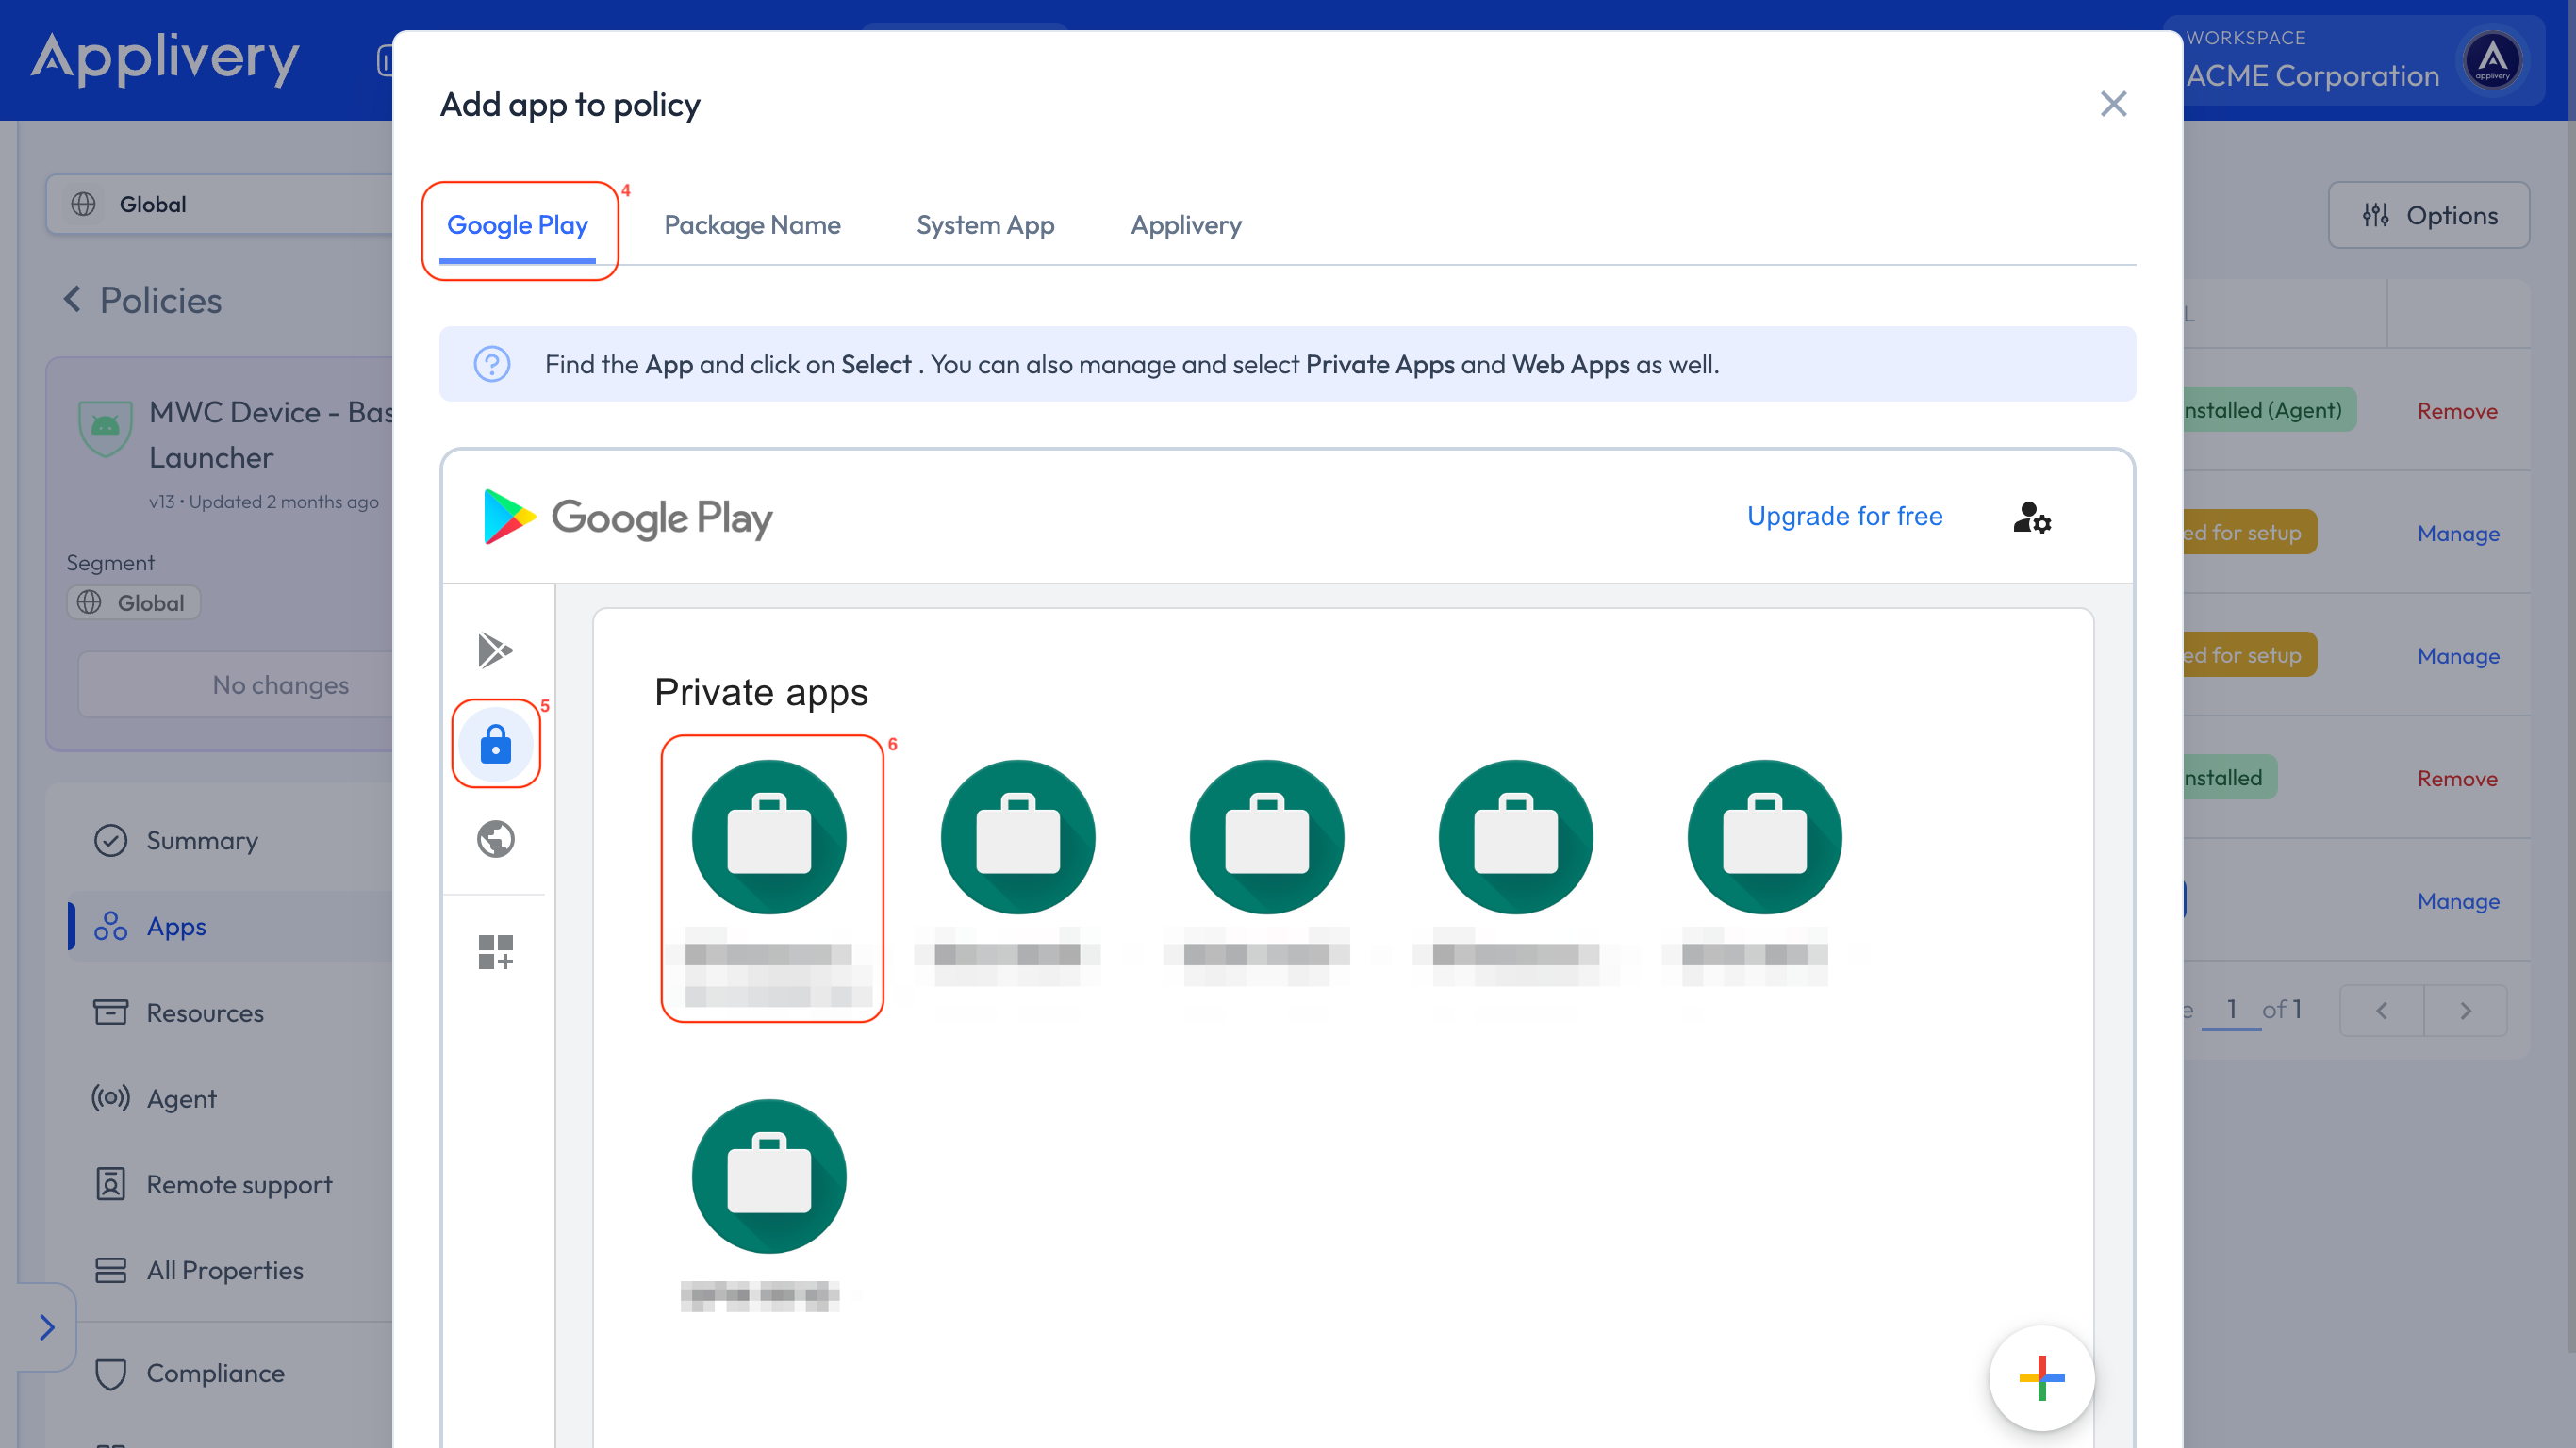
Then click Edit 7 beside the Select button.

Last, click edit 8 again beside the APK file name and select a file from your file system.
Google Play will analyze the package and, once finished, will allow you to press the Save 9 button to start uploading the file.
Please note that you must increase the version number and version code of your App before uploading a new version. In any other case, the upload will be rejected.
Control App updates and update time
Regularly updating applications on your organization’s Devices ensures that users benefit from the newest functionalities, enhanced security, and greater reliability.
App updates are managed by Google through the Google Play Services, and Applivery can not force the update of an App (you can read more about this here).
Many factors may affect the update timings.
Default update behavior: In the default setting, applications automatically update when specific conditions are fulfilled:
The Device connects to a Wi-Fi network.
The Device is in charging mode.
The Device is not in active use.
The application scheduled for an update is not open in the foreground.
Google Play usually conducts checks for application updates daily. Therefore, it might take a maximum of 24 hours for an application update to enter the update queue. Once an application is queued, it will automatically update the next time the above conditions are satisfied.
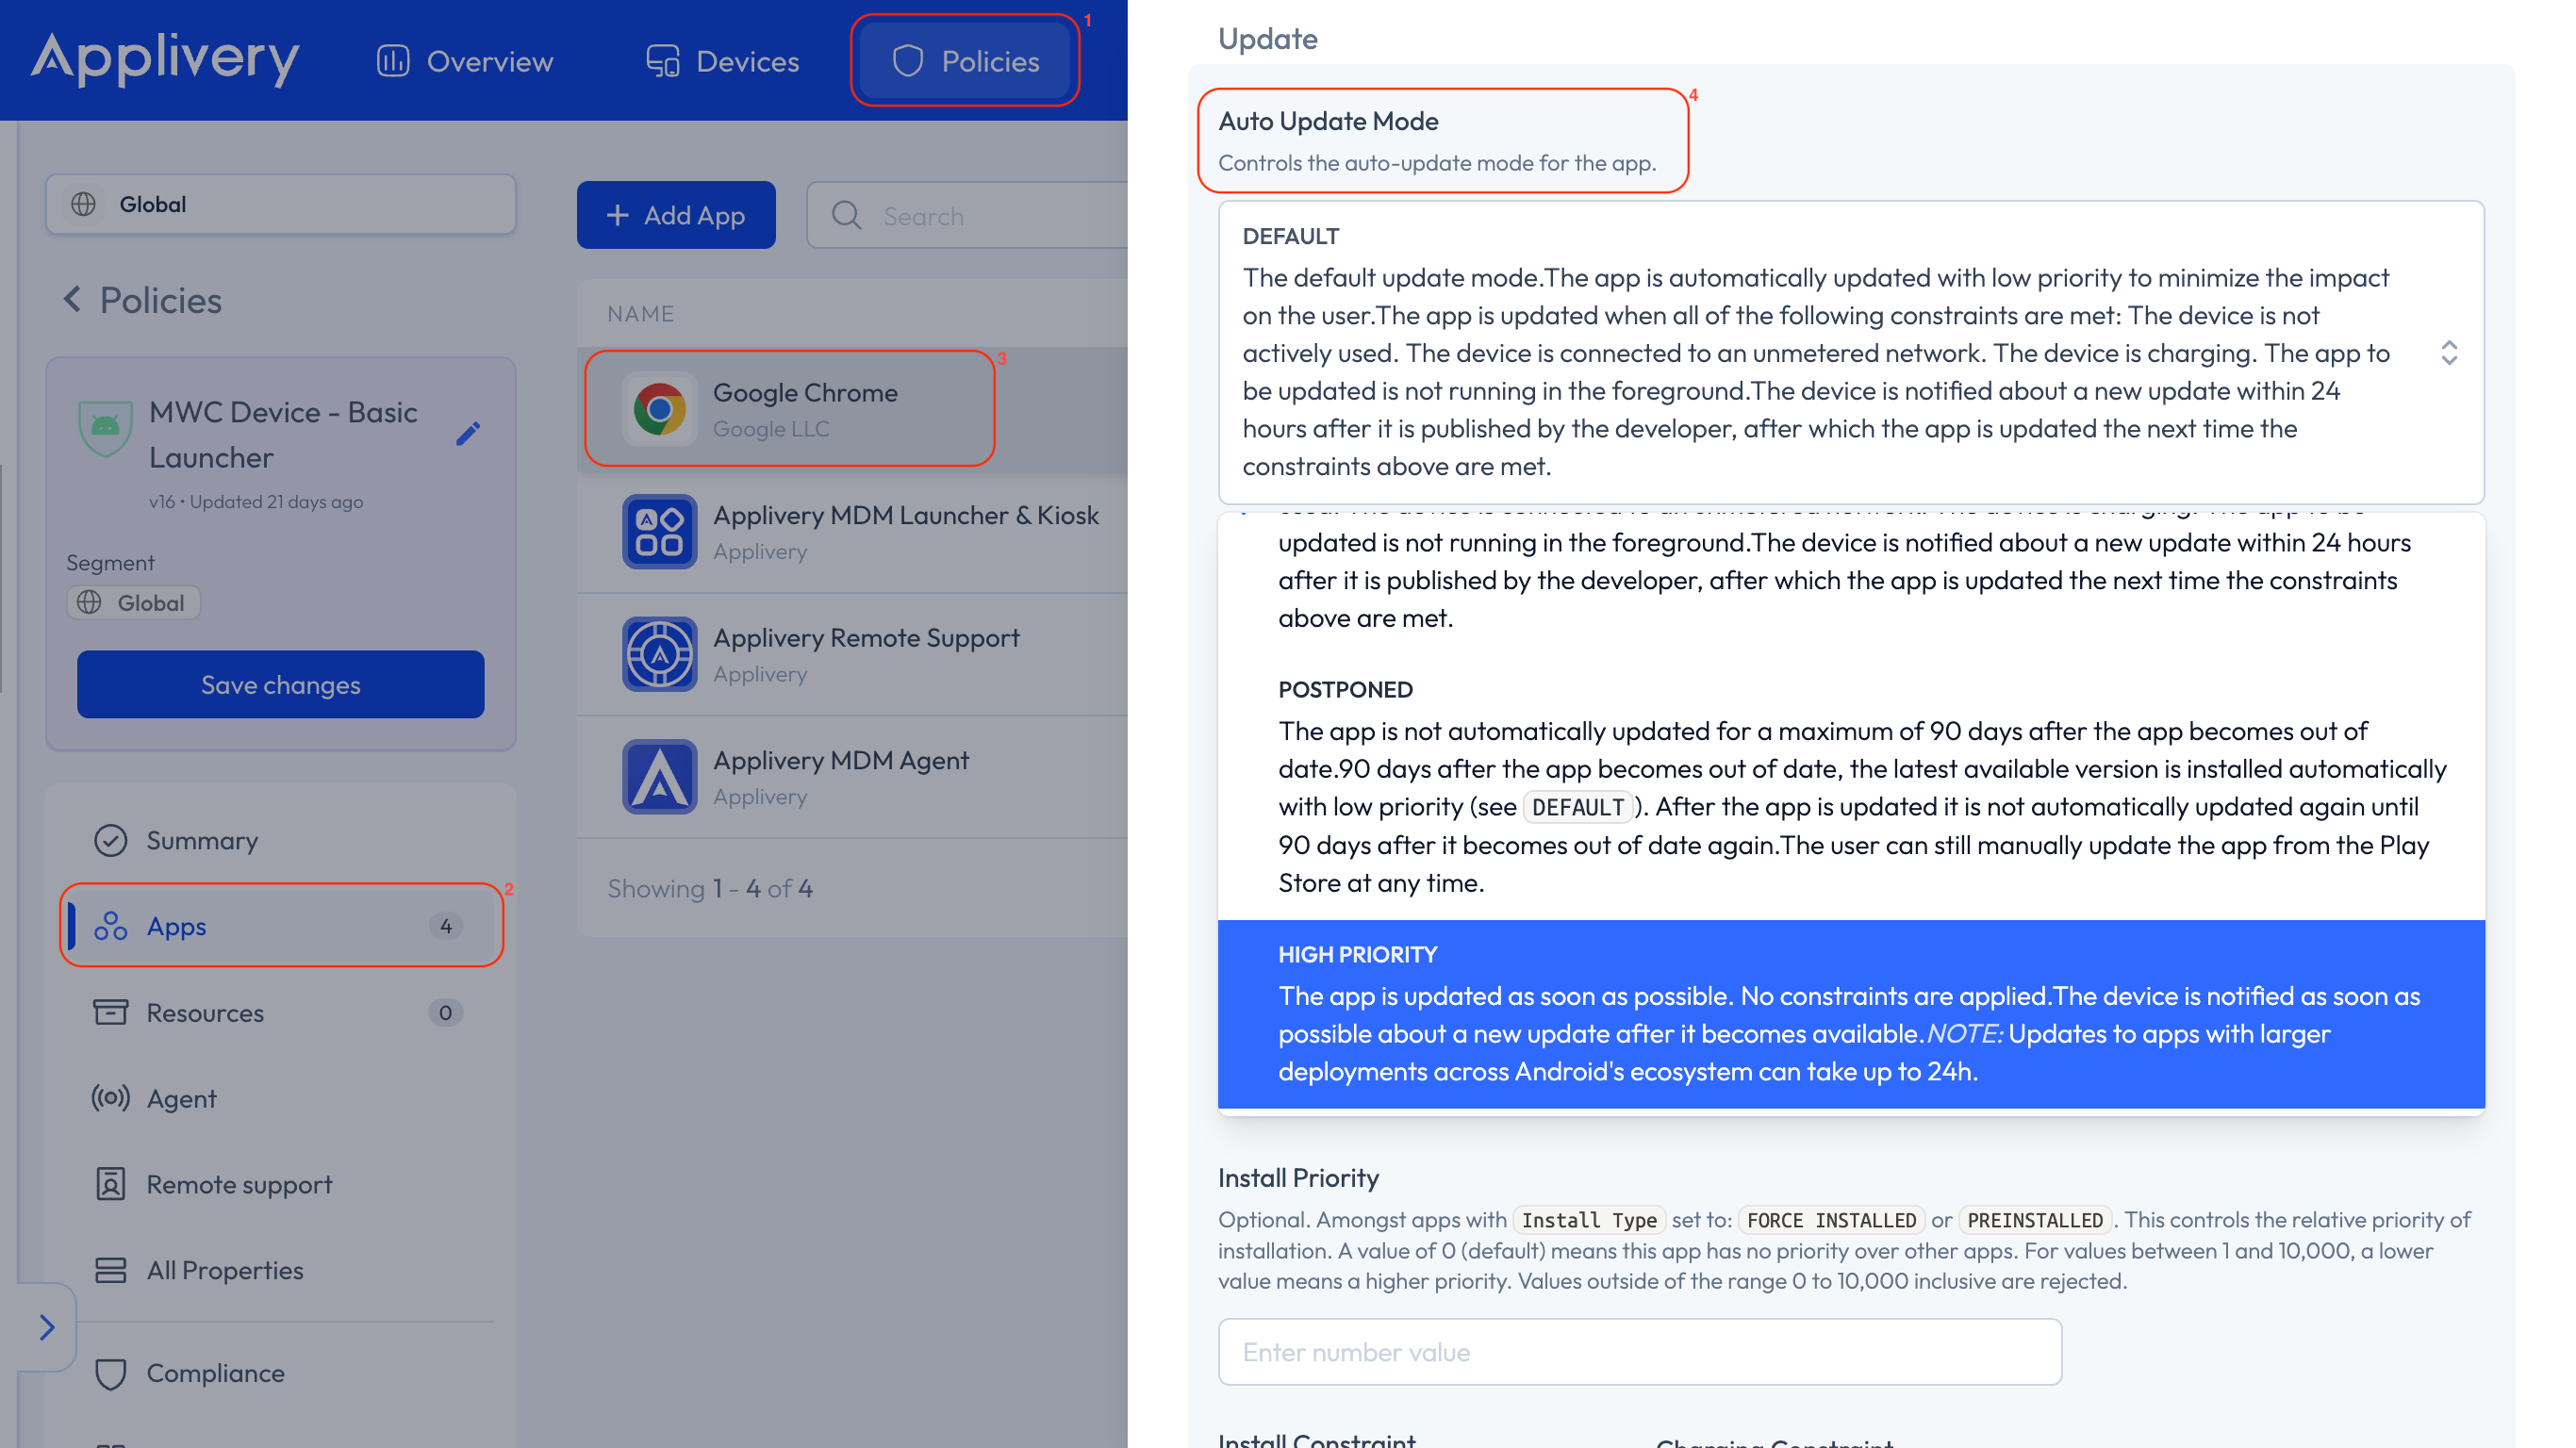
You can override the update settings to further customize the App update behavior on the Devices you manage:
- High Priority: This mode guarantees that your App stays up-to-date, updating it immediately upon approval by Google Play. In case your Device is offline when an update is released, it will update automatically the moment you reconnect to the internet.
If the App is in use when the update is ready to install, the App will be closed during the update, which could affect your users.
- Postpone mode: Use this option if you want to pause updates for an App that prevents the App from automatically updating for an initial 90 days after it first became out of date. After this 90-day period, the latest available version of the App is automatically installed using the default update mode. After the App is updated to the latest available version, a new 90-day postponement period will begin from the next time that the developer publishes a new version of the App.
Postpone mode does not prevent your users from manually updating the App. During the 90-day postponement period, your users can manually update the App by visiting the Google Play Store on their Devices.
To modify the update mode, go to any of your Policies 1, look for the Apps 2 section from the left side menu, and then click the App you want to modify 3 the update mode.
Find the Auto Update Mode 4 option under the right side appearing slide and choose your preferred option.
Make advanced edits
You can also fully customize the aspect of your App in your Managed Google Play from the Make Advanced Edits button that you will find below your Private Apps.
You will be redirected to the Google Play Console, where you can fully customize every aspect of your App and even upload new versions in a more advanced way (or even automated) through tools such as Fastlane or Bitrise.
