If you have ever dreamed of automating 100% of the Device Enrollment process and conditional Policy assignment based on user data (name, email, User Groups) or the Device data (IMEI, Serial Number, etc), Smart Enrollments are the tool you were looking for.
Introduction
Smart Enrollments are the most efficient way to manage Device Enrollments in an unattended manner since they will allow you to define a set of rules and conditions that must be met for a Device to be enrolled and, in addition, will allow you to conditionally assign Policies based on these rule sets.
Smart Enrollments are useful for:
Limit Device enrollment:
Based on user authentication through SSO integrations (User Groups or email patterns).
Based on Device information (IMEI, Serial Number).
Conditionally assign different Policies based on rules.
Automate Android Enrollments to enable unattended Zero-touch experiences.
Smart Enrollment configuration
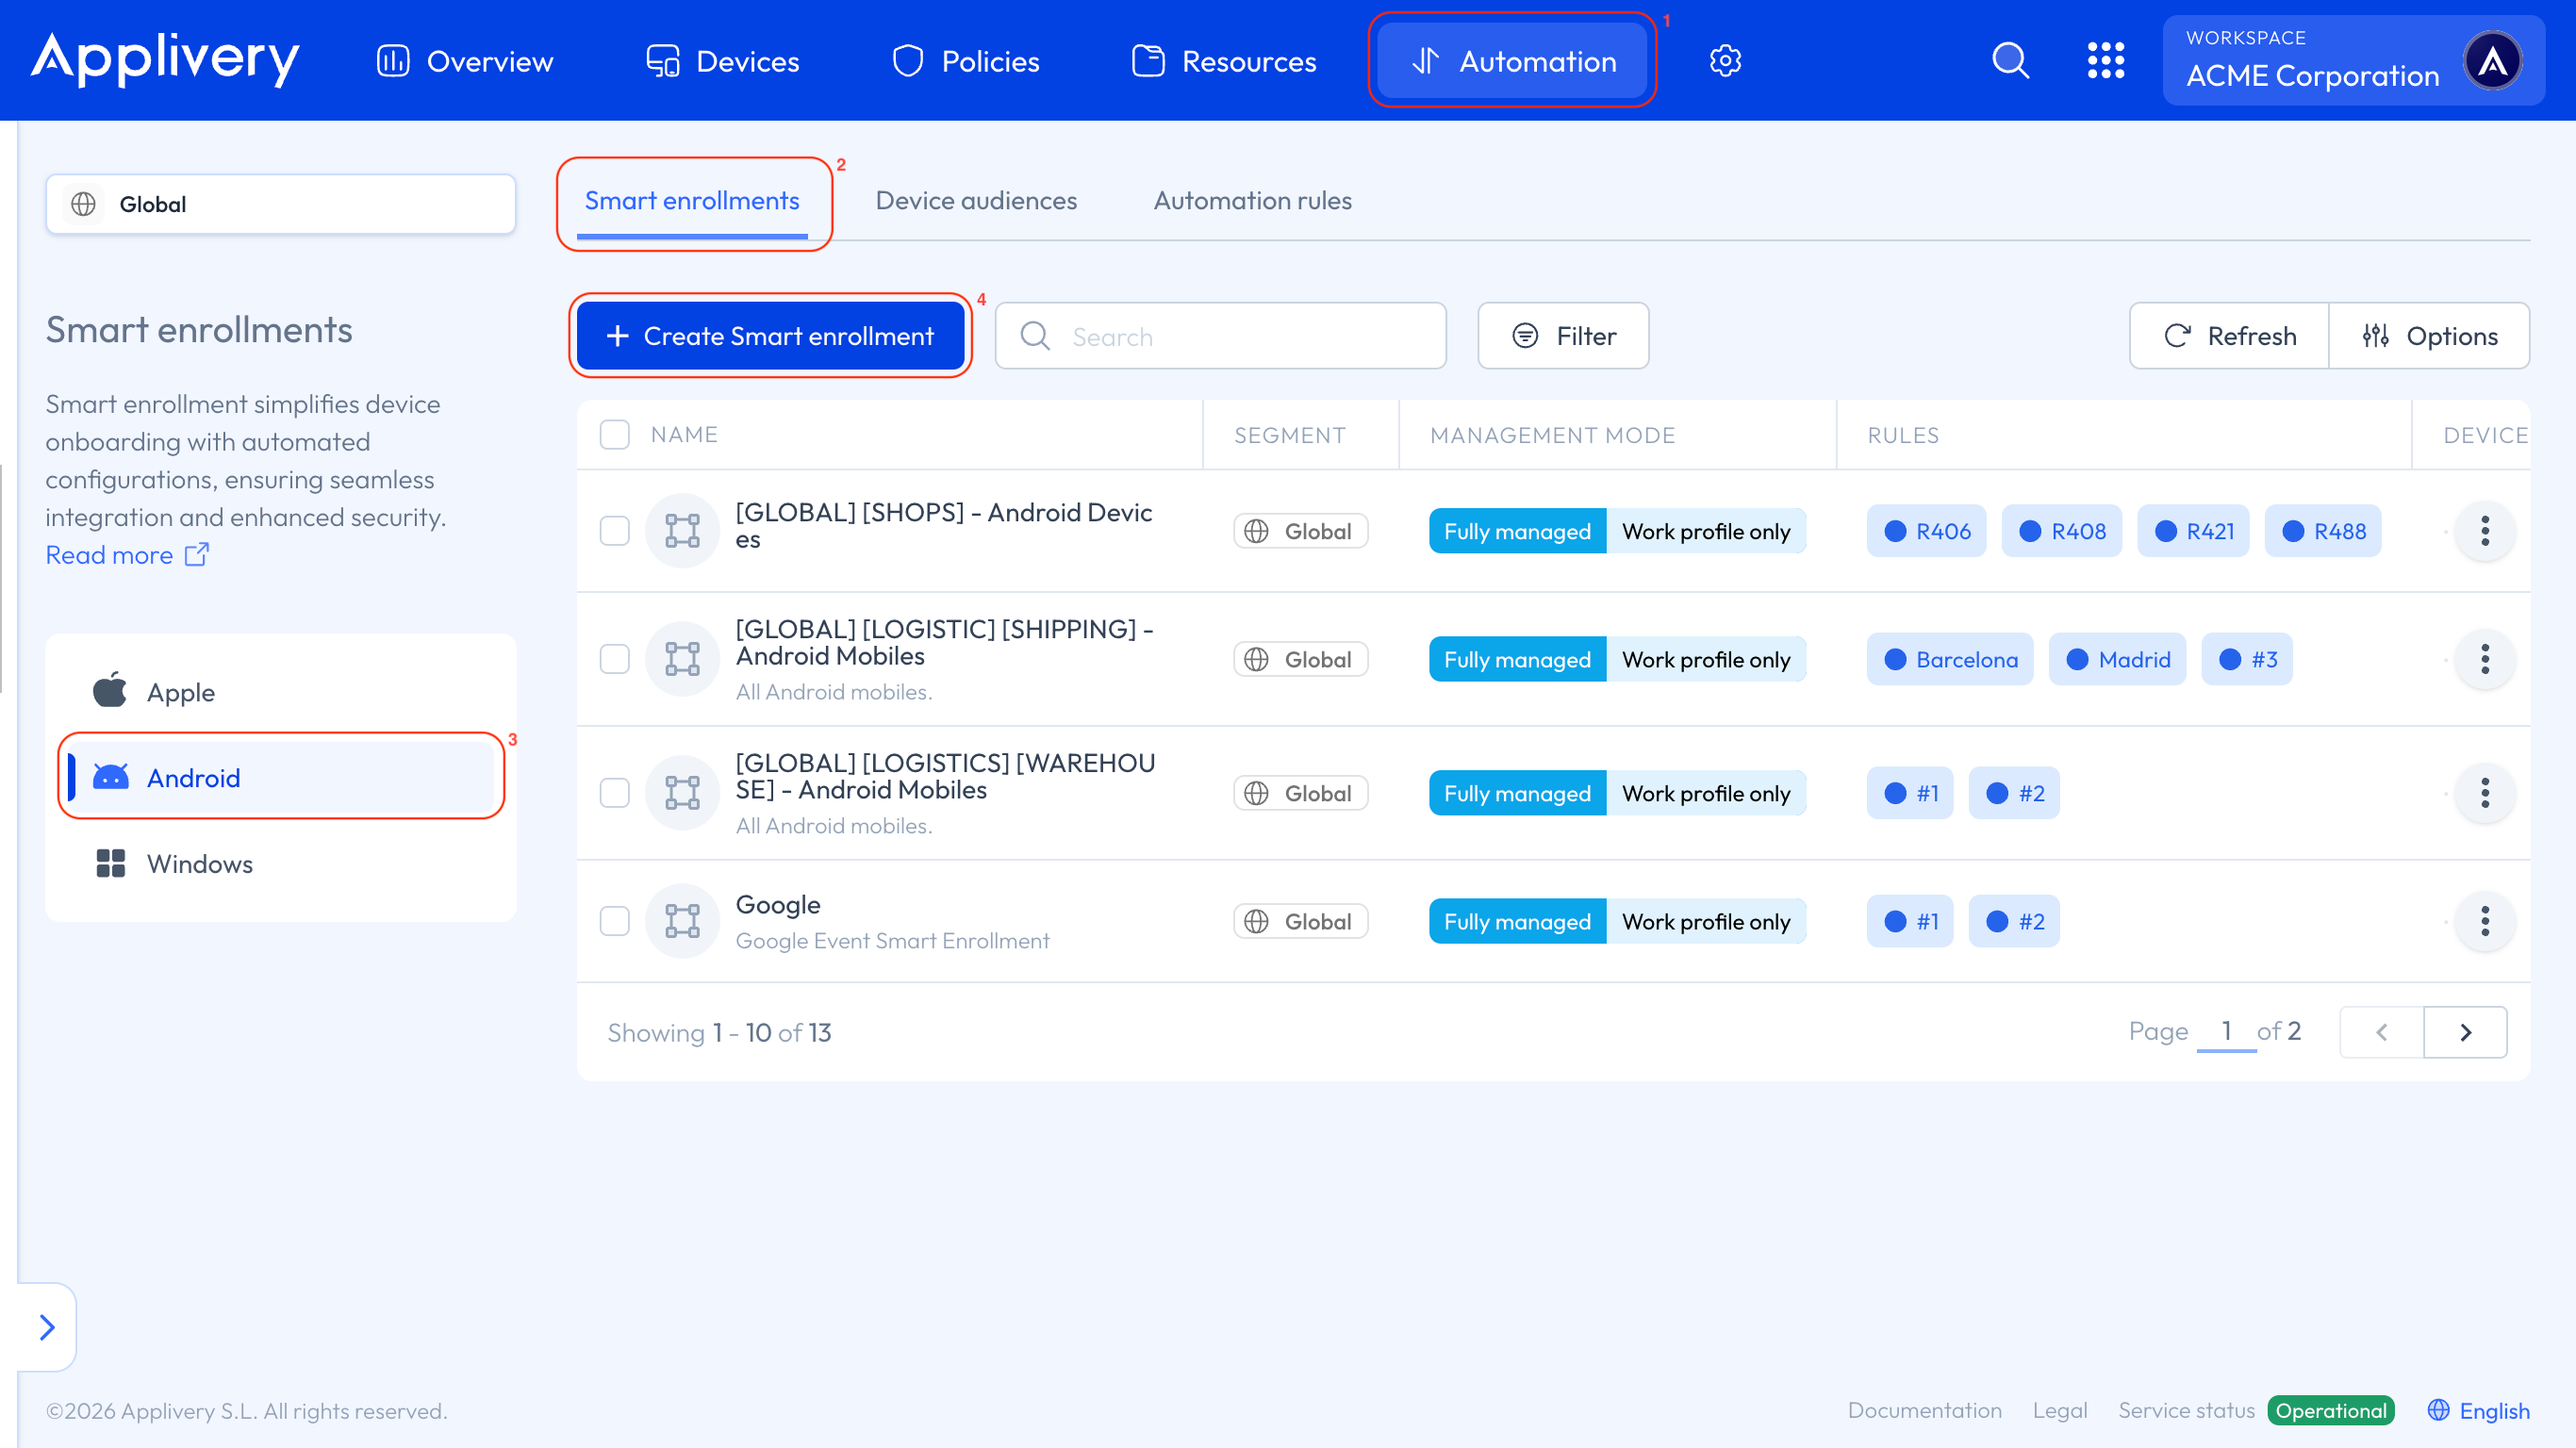
Let’s get started configuring your first Smart Enrollment. First, go to Automation (1), select Smart Enrollments (2), and choose Android (3) as the platform from the left-hand menu. Then click the + Create Smart Enrollment (4) button.
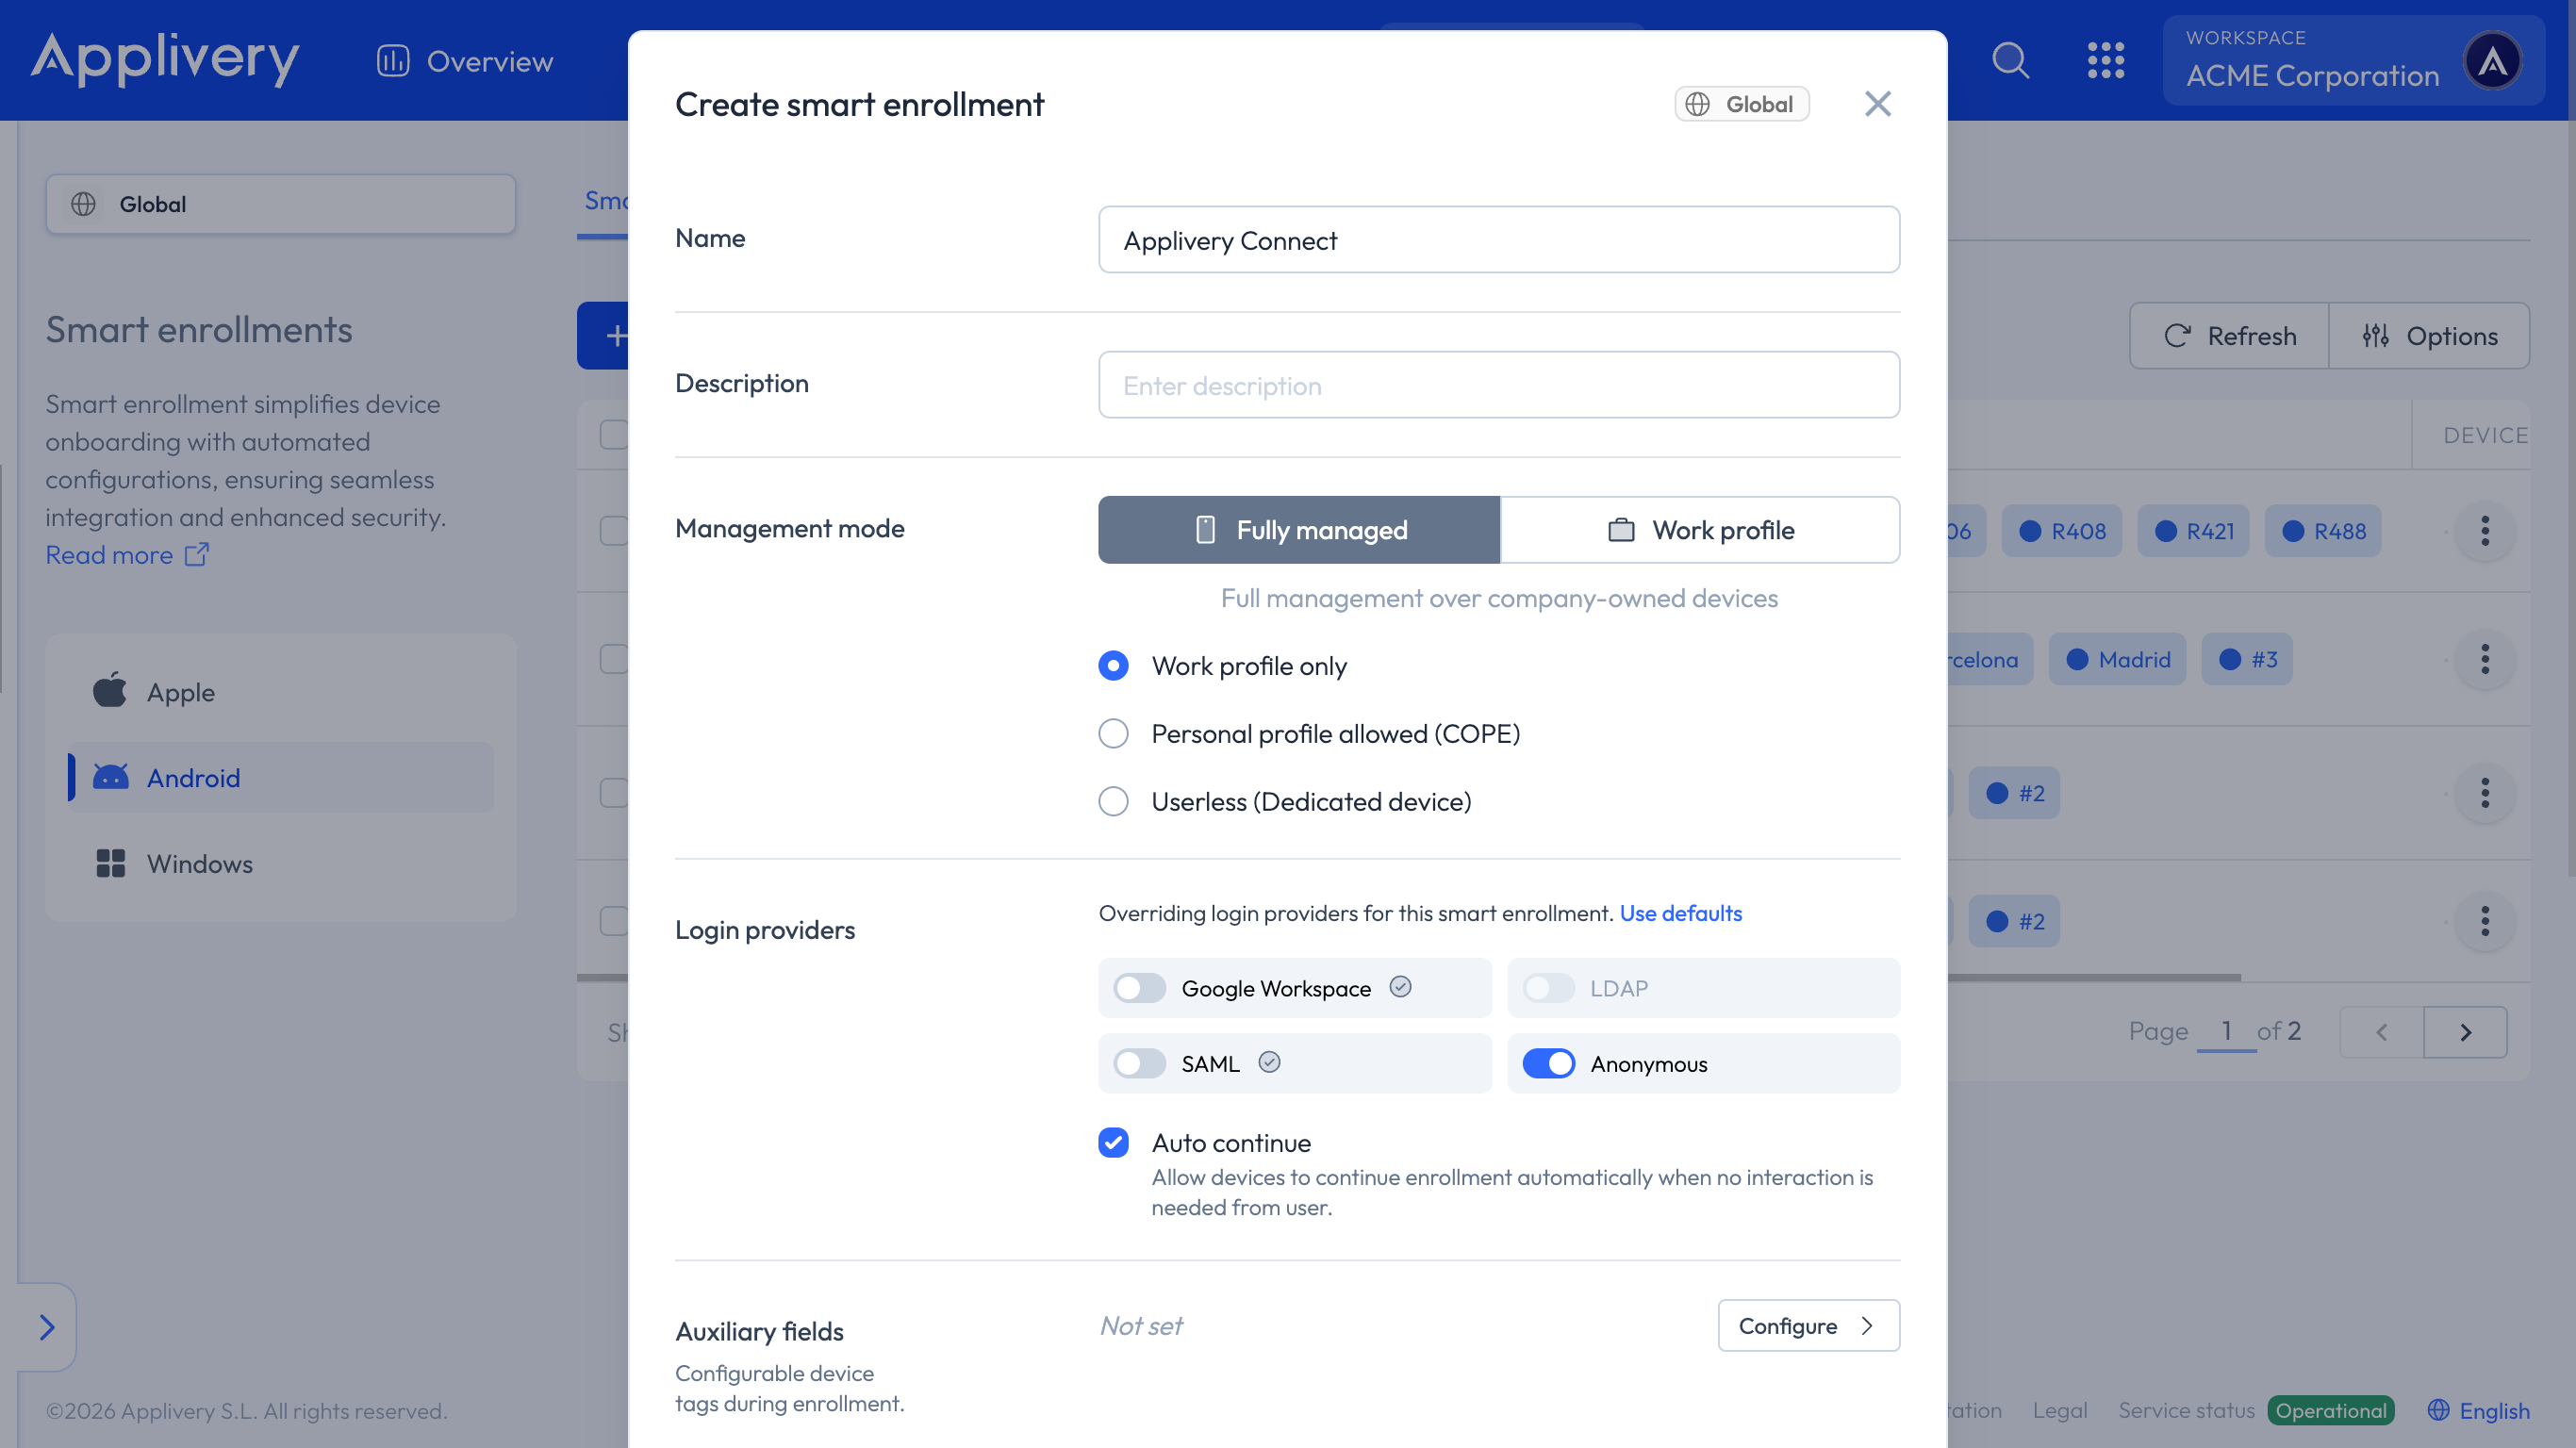
Name: Choose a friendly name for your new Smart Enrollment.
Description: Choose a friendly description for your new Smart Enrollment.
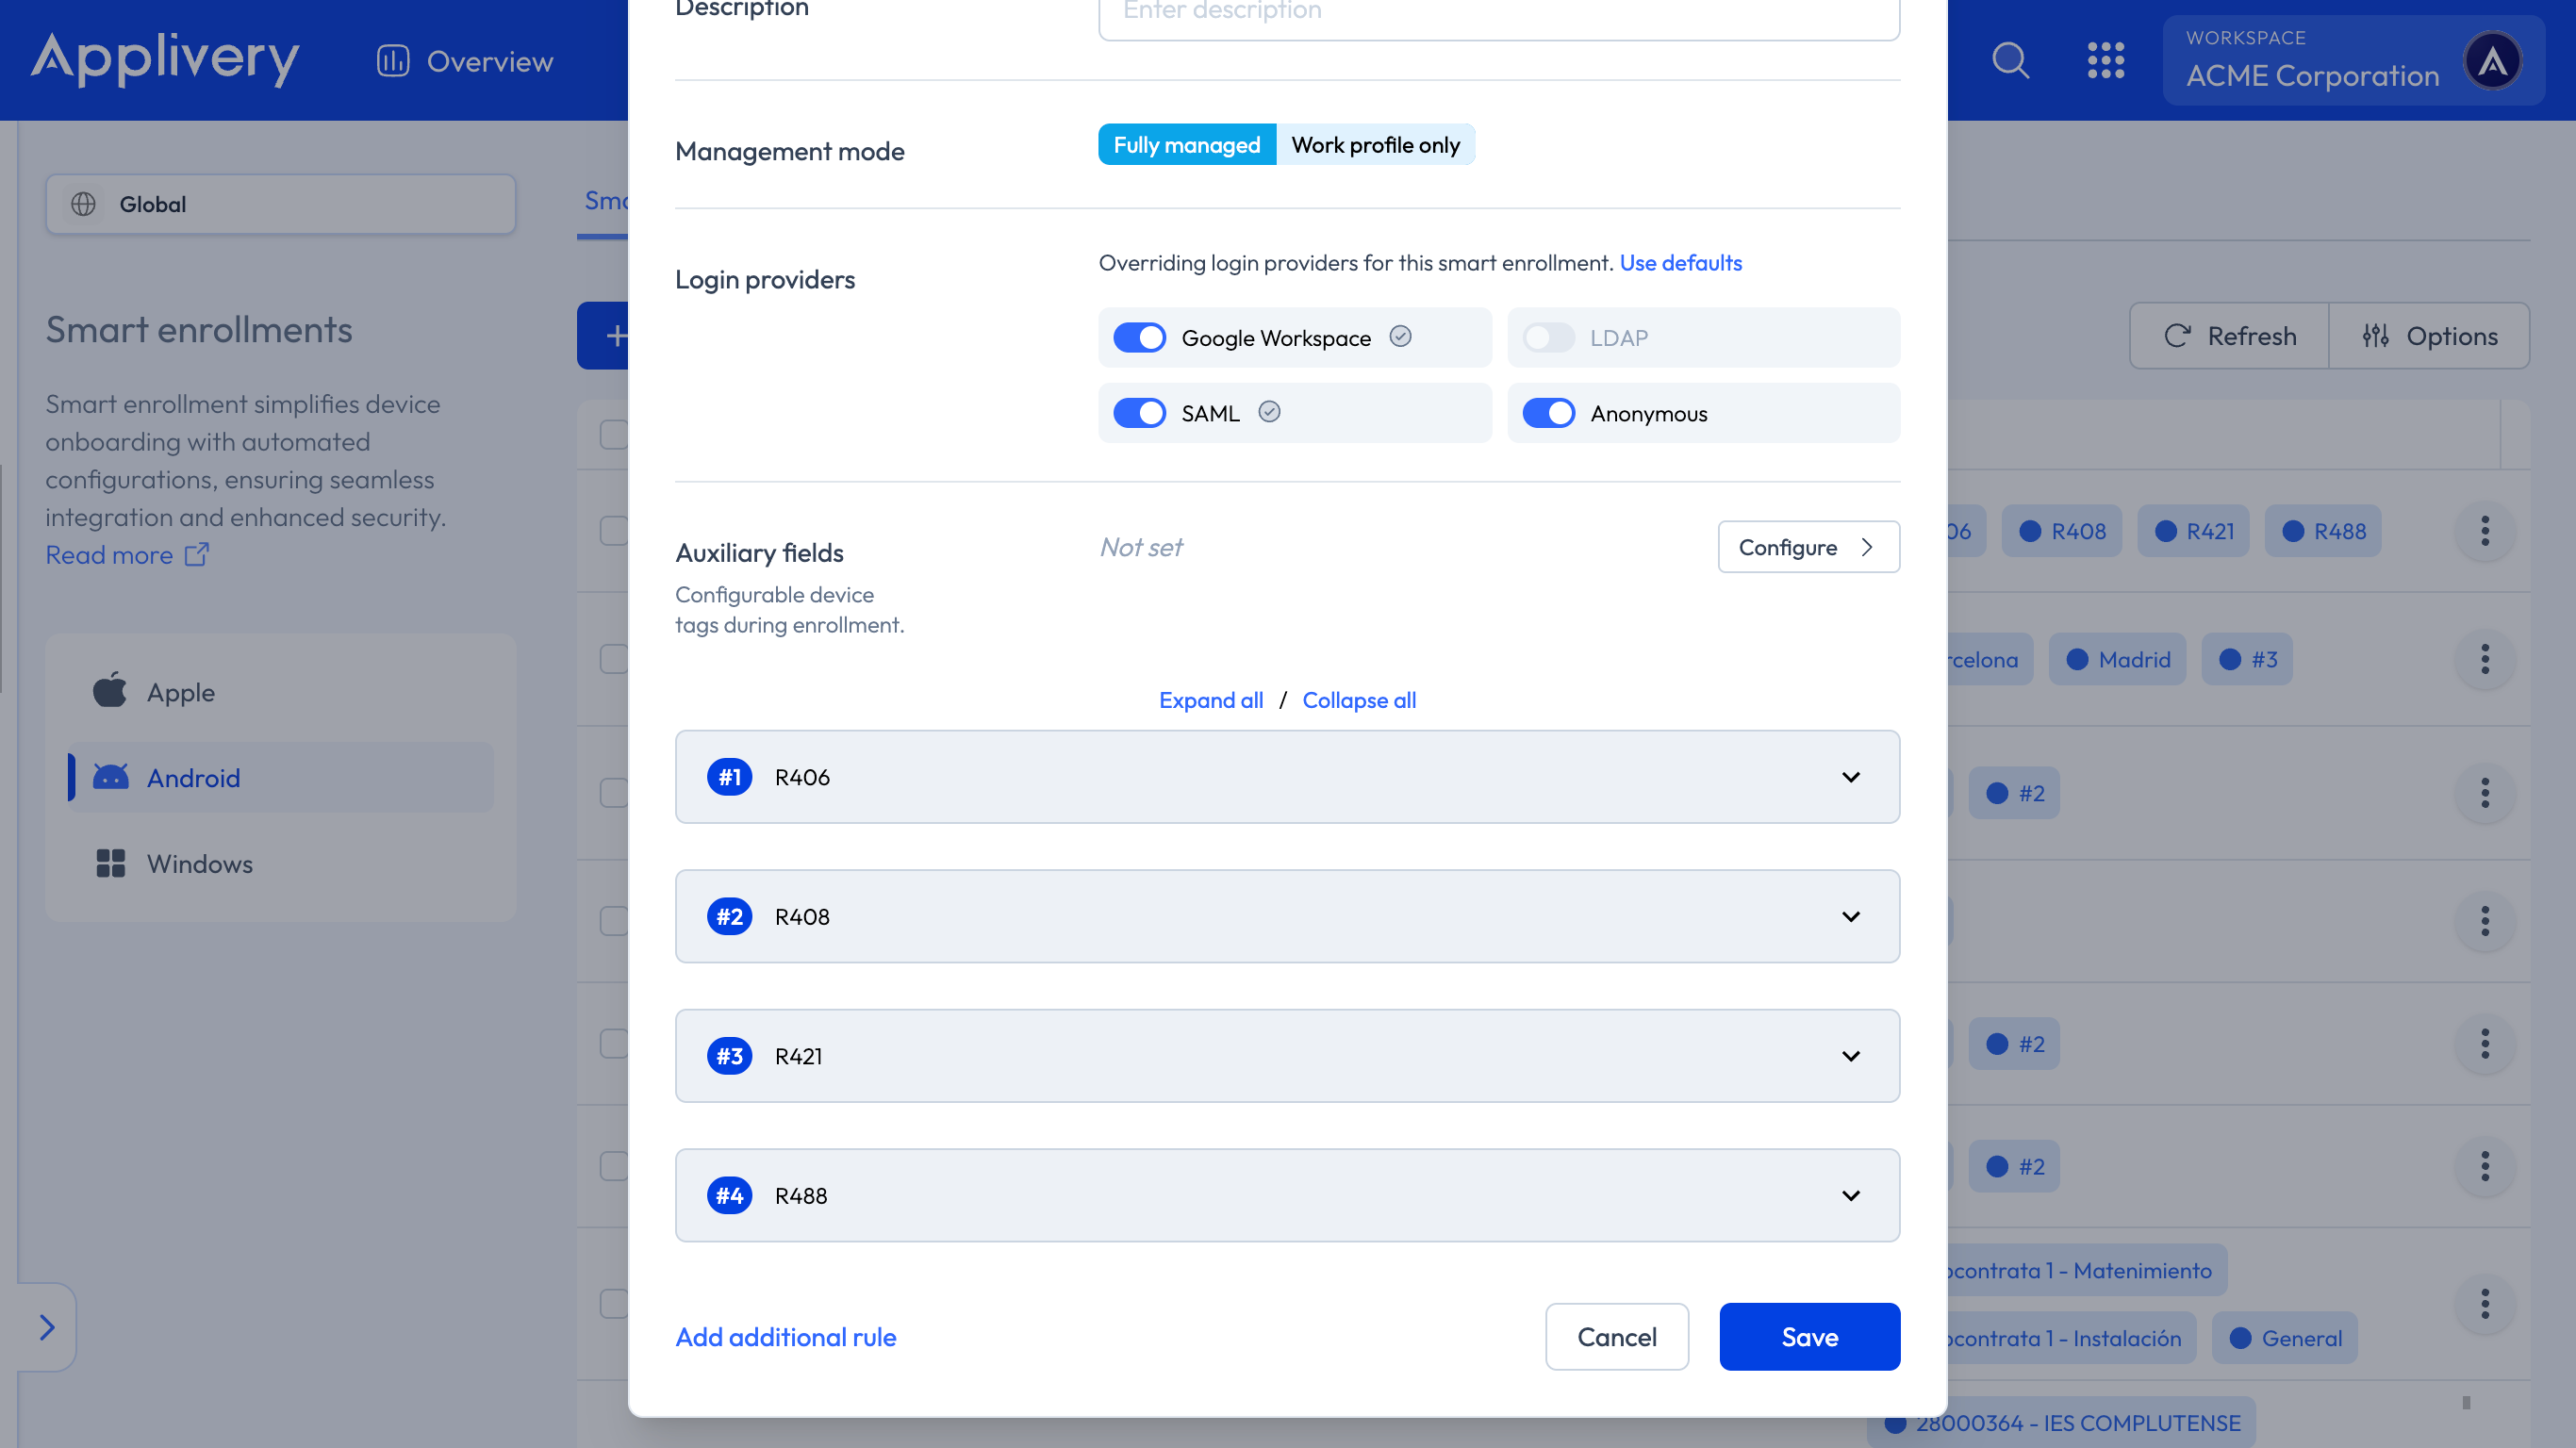
Management mode: Specify the Device Management method to be applied during this Smart Enrollment process.
Login providers: The SSO providers configured at the Workspace level will be displayed. However, you can also configure the specific integration at the Smart Enrollment level by clicking Override.
Policy: Choose the Policy that will be applied to the Device from the Policies library. If you still don’t have any pre-defined Policies, just type a name, and a new empty Policy will be created.
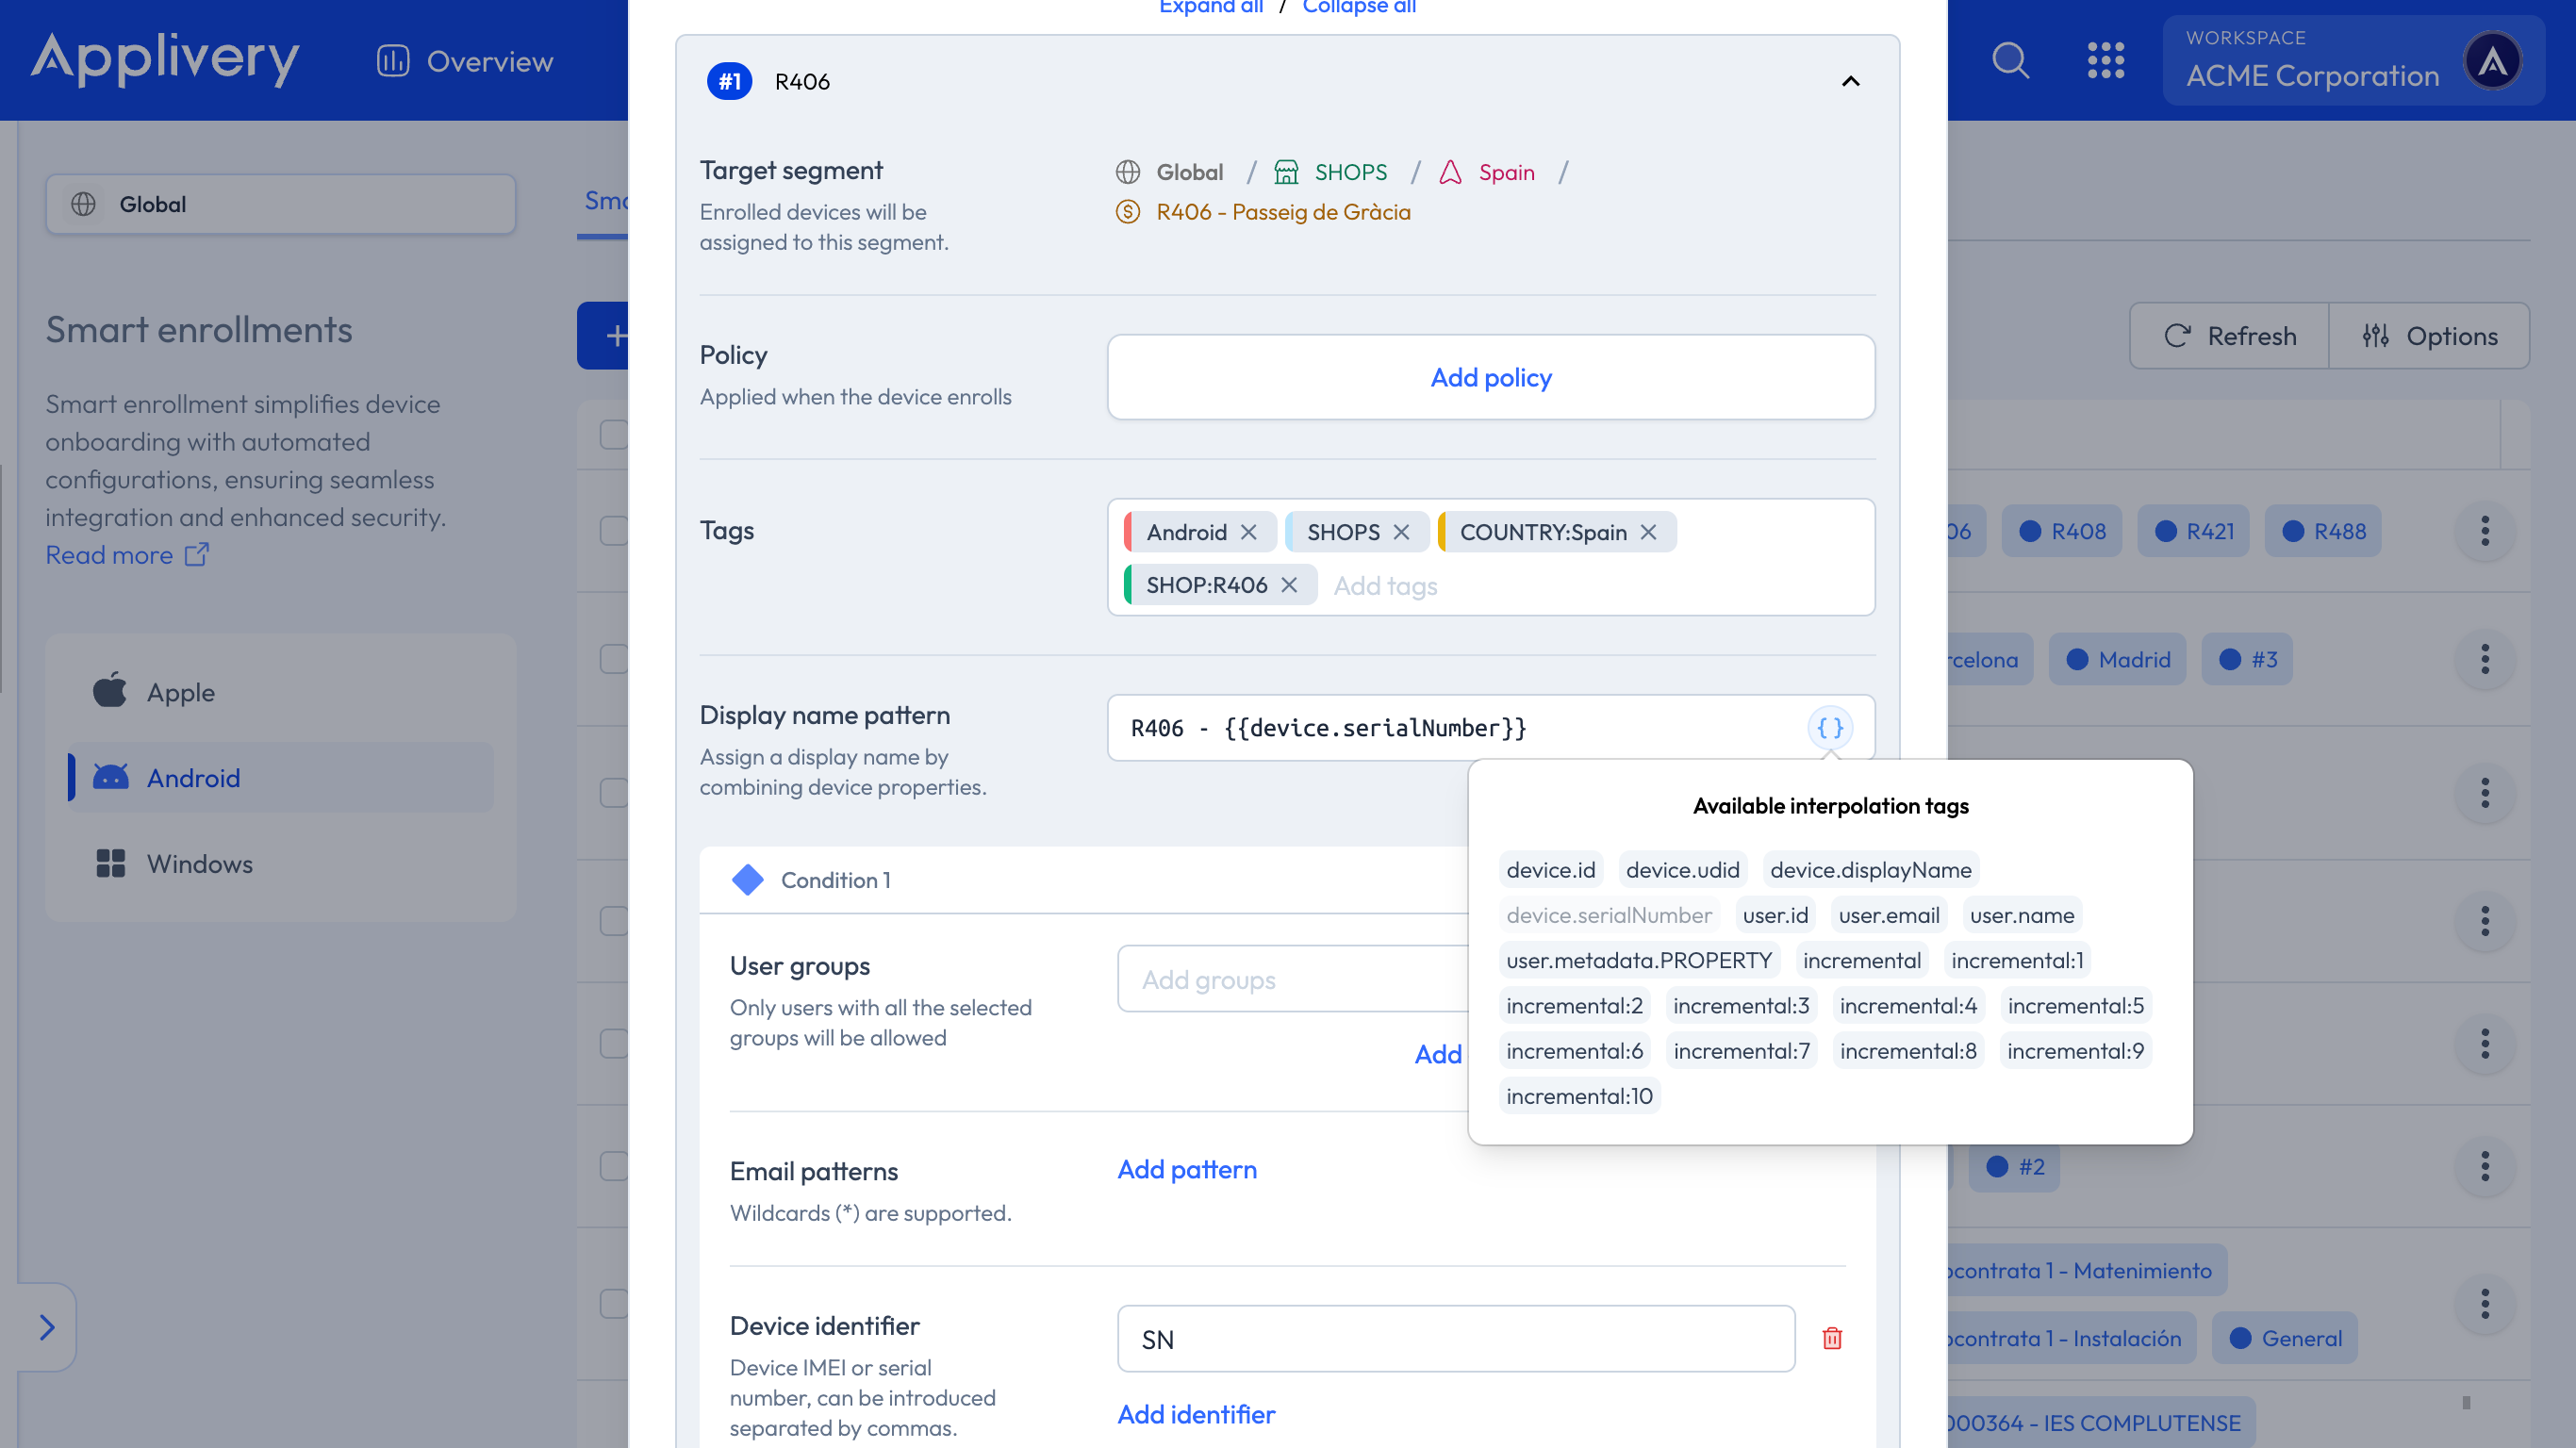
Tags: Used for filtering and grouping.
When the login provider is configured as Anonymous, you can enable the Auto-continue option, which allows Devices to continue enrollment automatically when no user interaction is required.
- Auxiliary fields: By filling out this form, you will be able to configure device tags during enrollment.

- Display name pattern: Assign a display name by combining Device properties.
If you click Save at this point, you will have finished setting up your basic Smart Enrollment and will be able to start enrolling Devices.
By using Auxiliary fields, you can define a flexible enrollment structure that adapts to the organizational characteristics of your company. This allows users to enroll their Devices according to specific requirements, while enabling administrators to apply different configurations based on these selections.
These Auxiliary fields can be used to generate Device tags during enrollment, which function as conditional parameters. You can create as many fields as needed and later associate them with the corresponding Policies for each scenario.
After continuing, the user will be presented with the dropdown menus defined in the Auxiliary fields, based on the organization’s requirements.
Once the required fields are selected, the user will authenticate using the method enabled by the organization, and the appropriate Policies will be applied according to the assigned tags.
The Device will then complete the enrollment and apply the configurations in the background.
Now that you have your basic Smart Enrollment configured, you can add Conditions (5) and Rules (6) that will make it smarter.
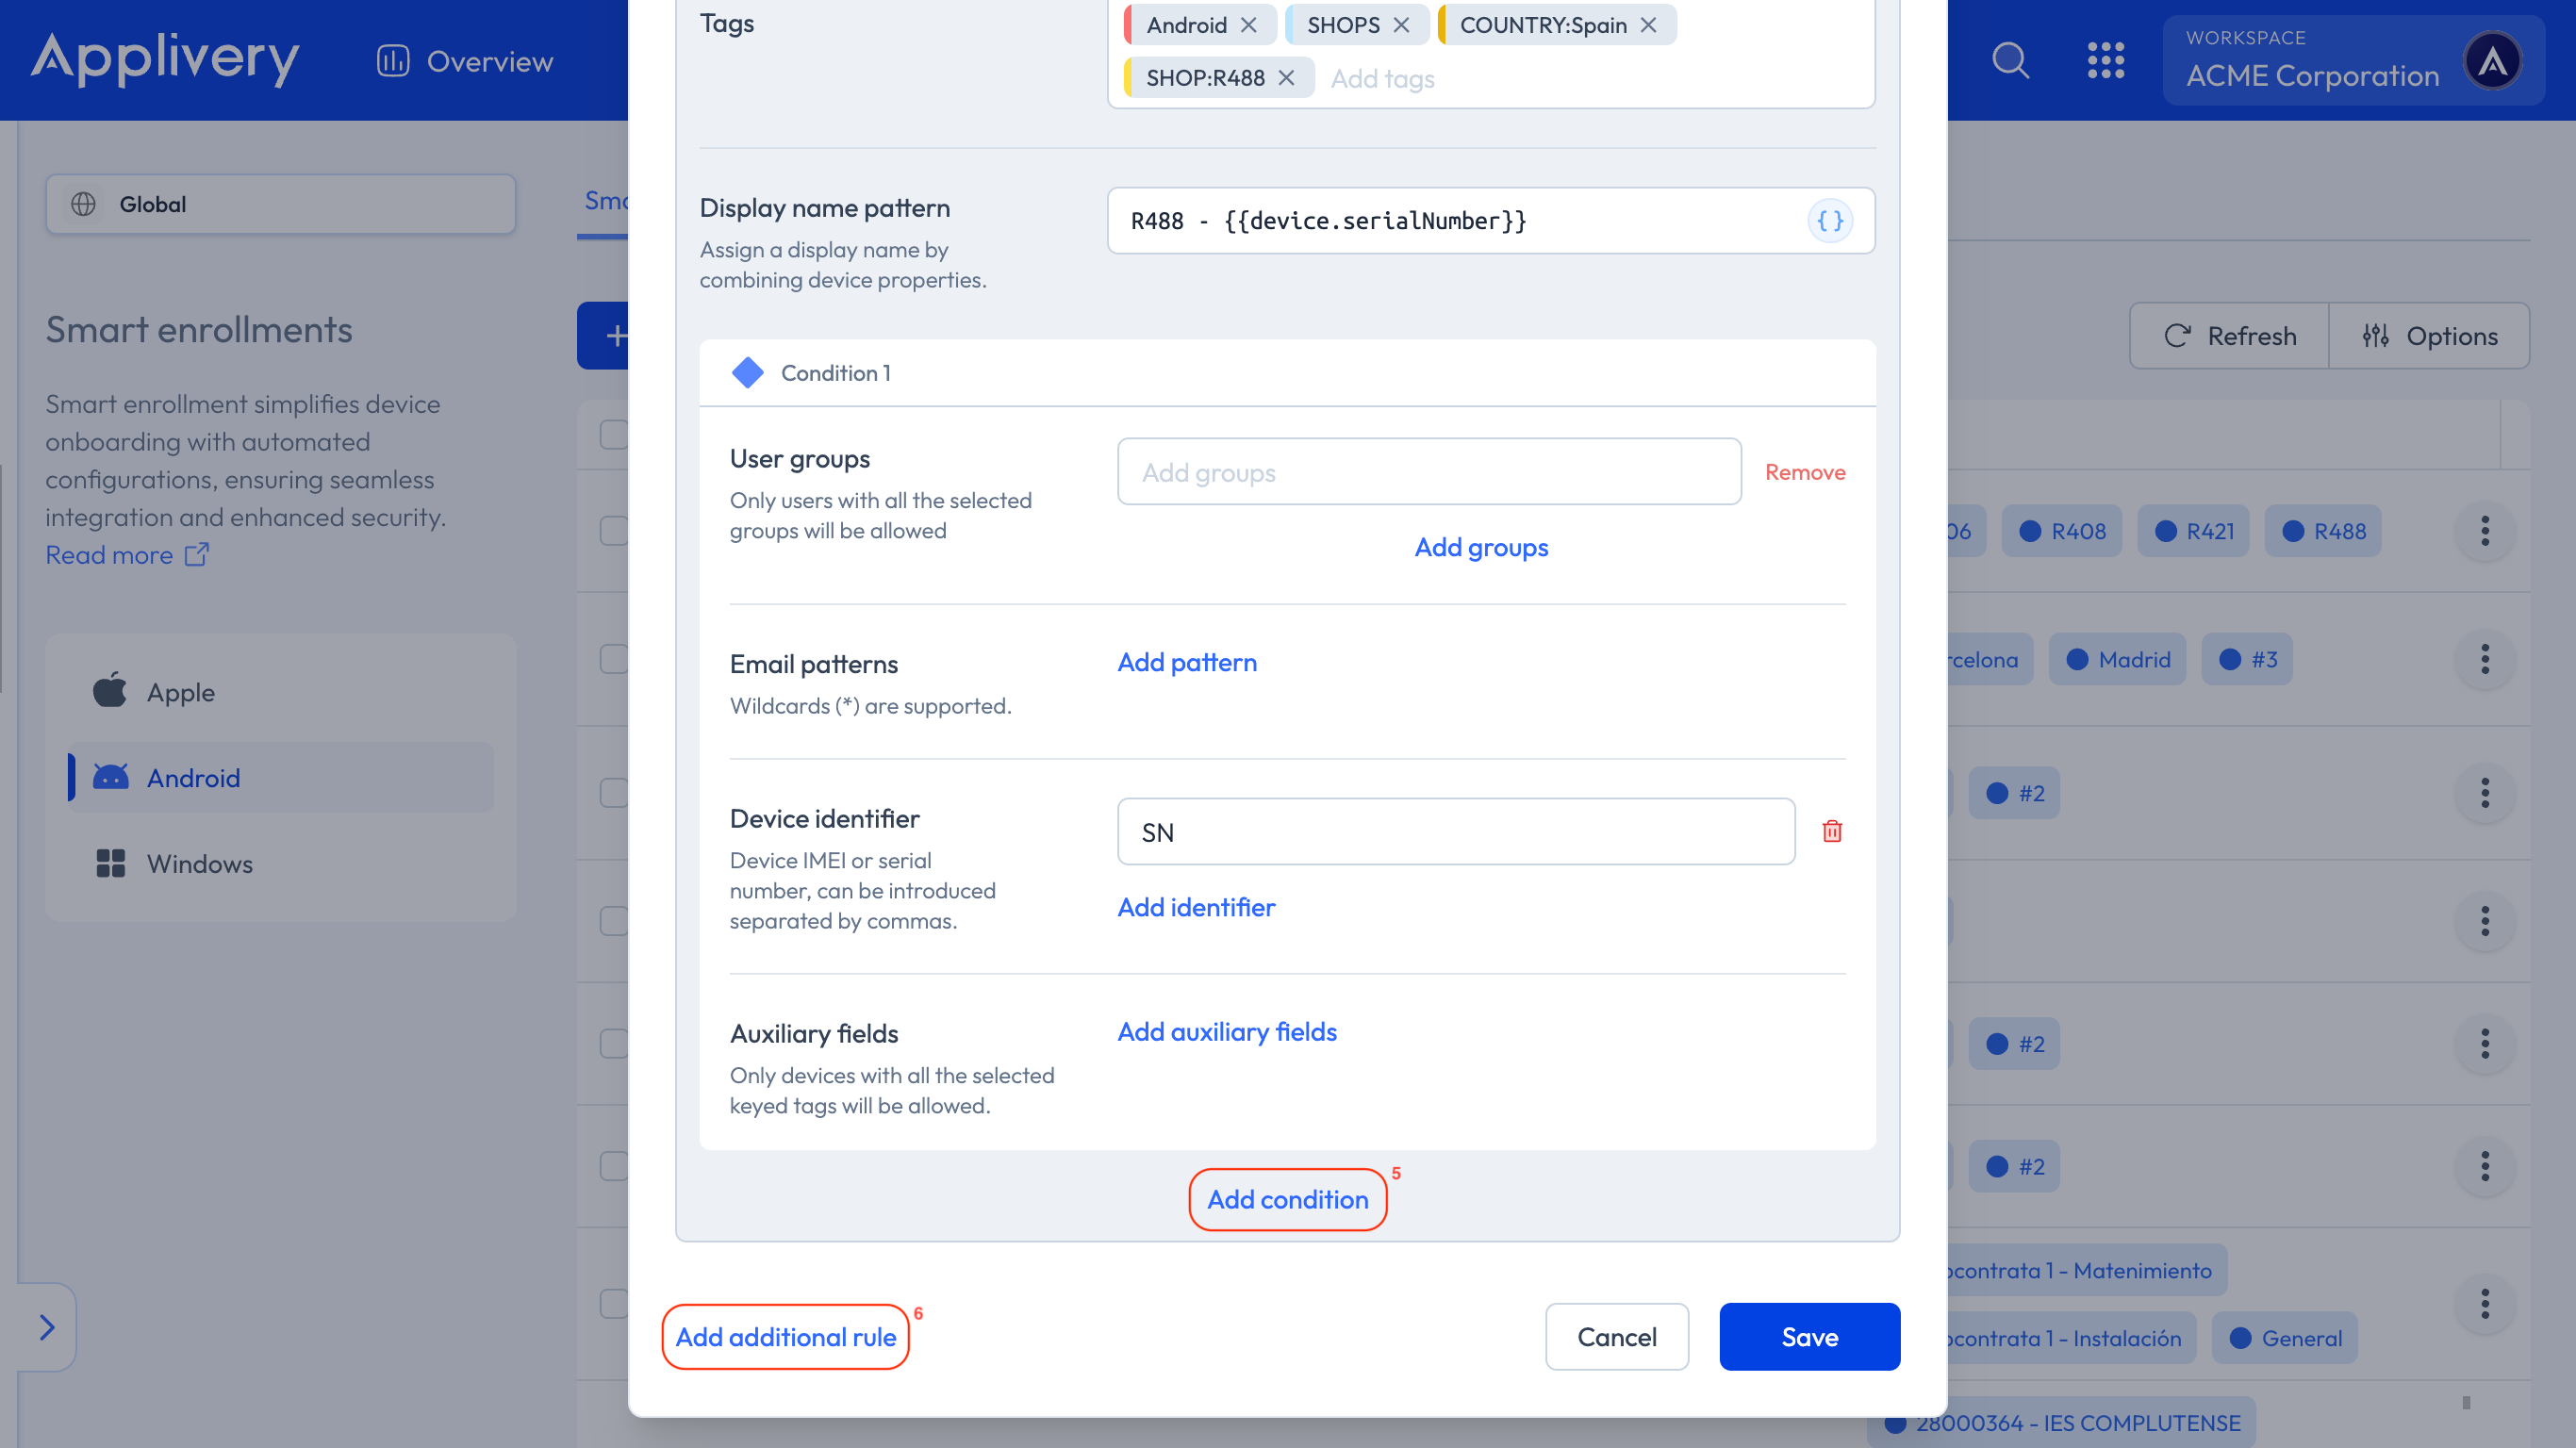
Use the Add condition option to enable enrollment limits based on user information (such as email patterns or groups) and Device information (IMEI, Serial number, and auxiliary fields).
You can use conditional operators to make it as complex as you need.
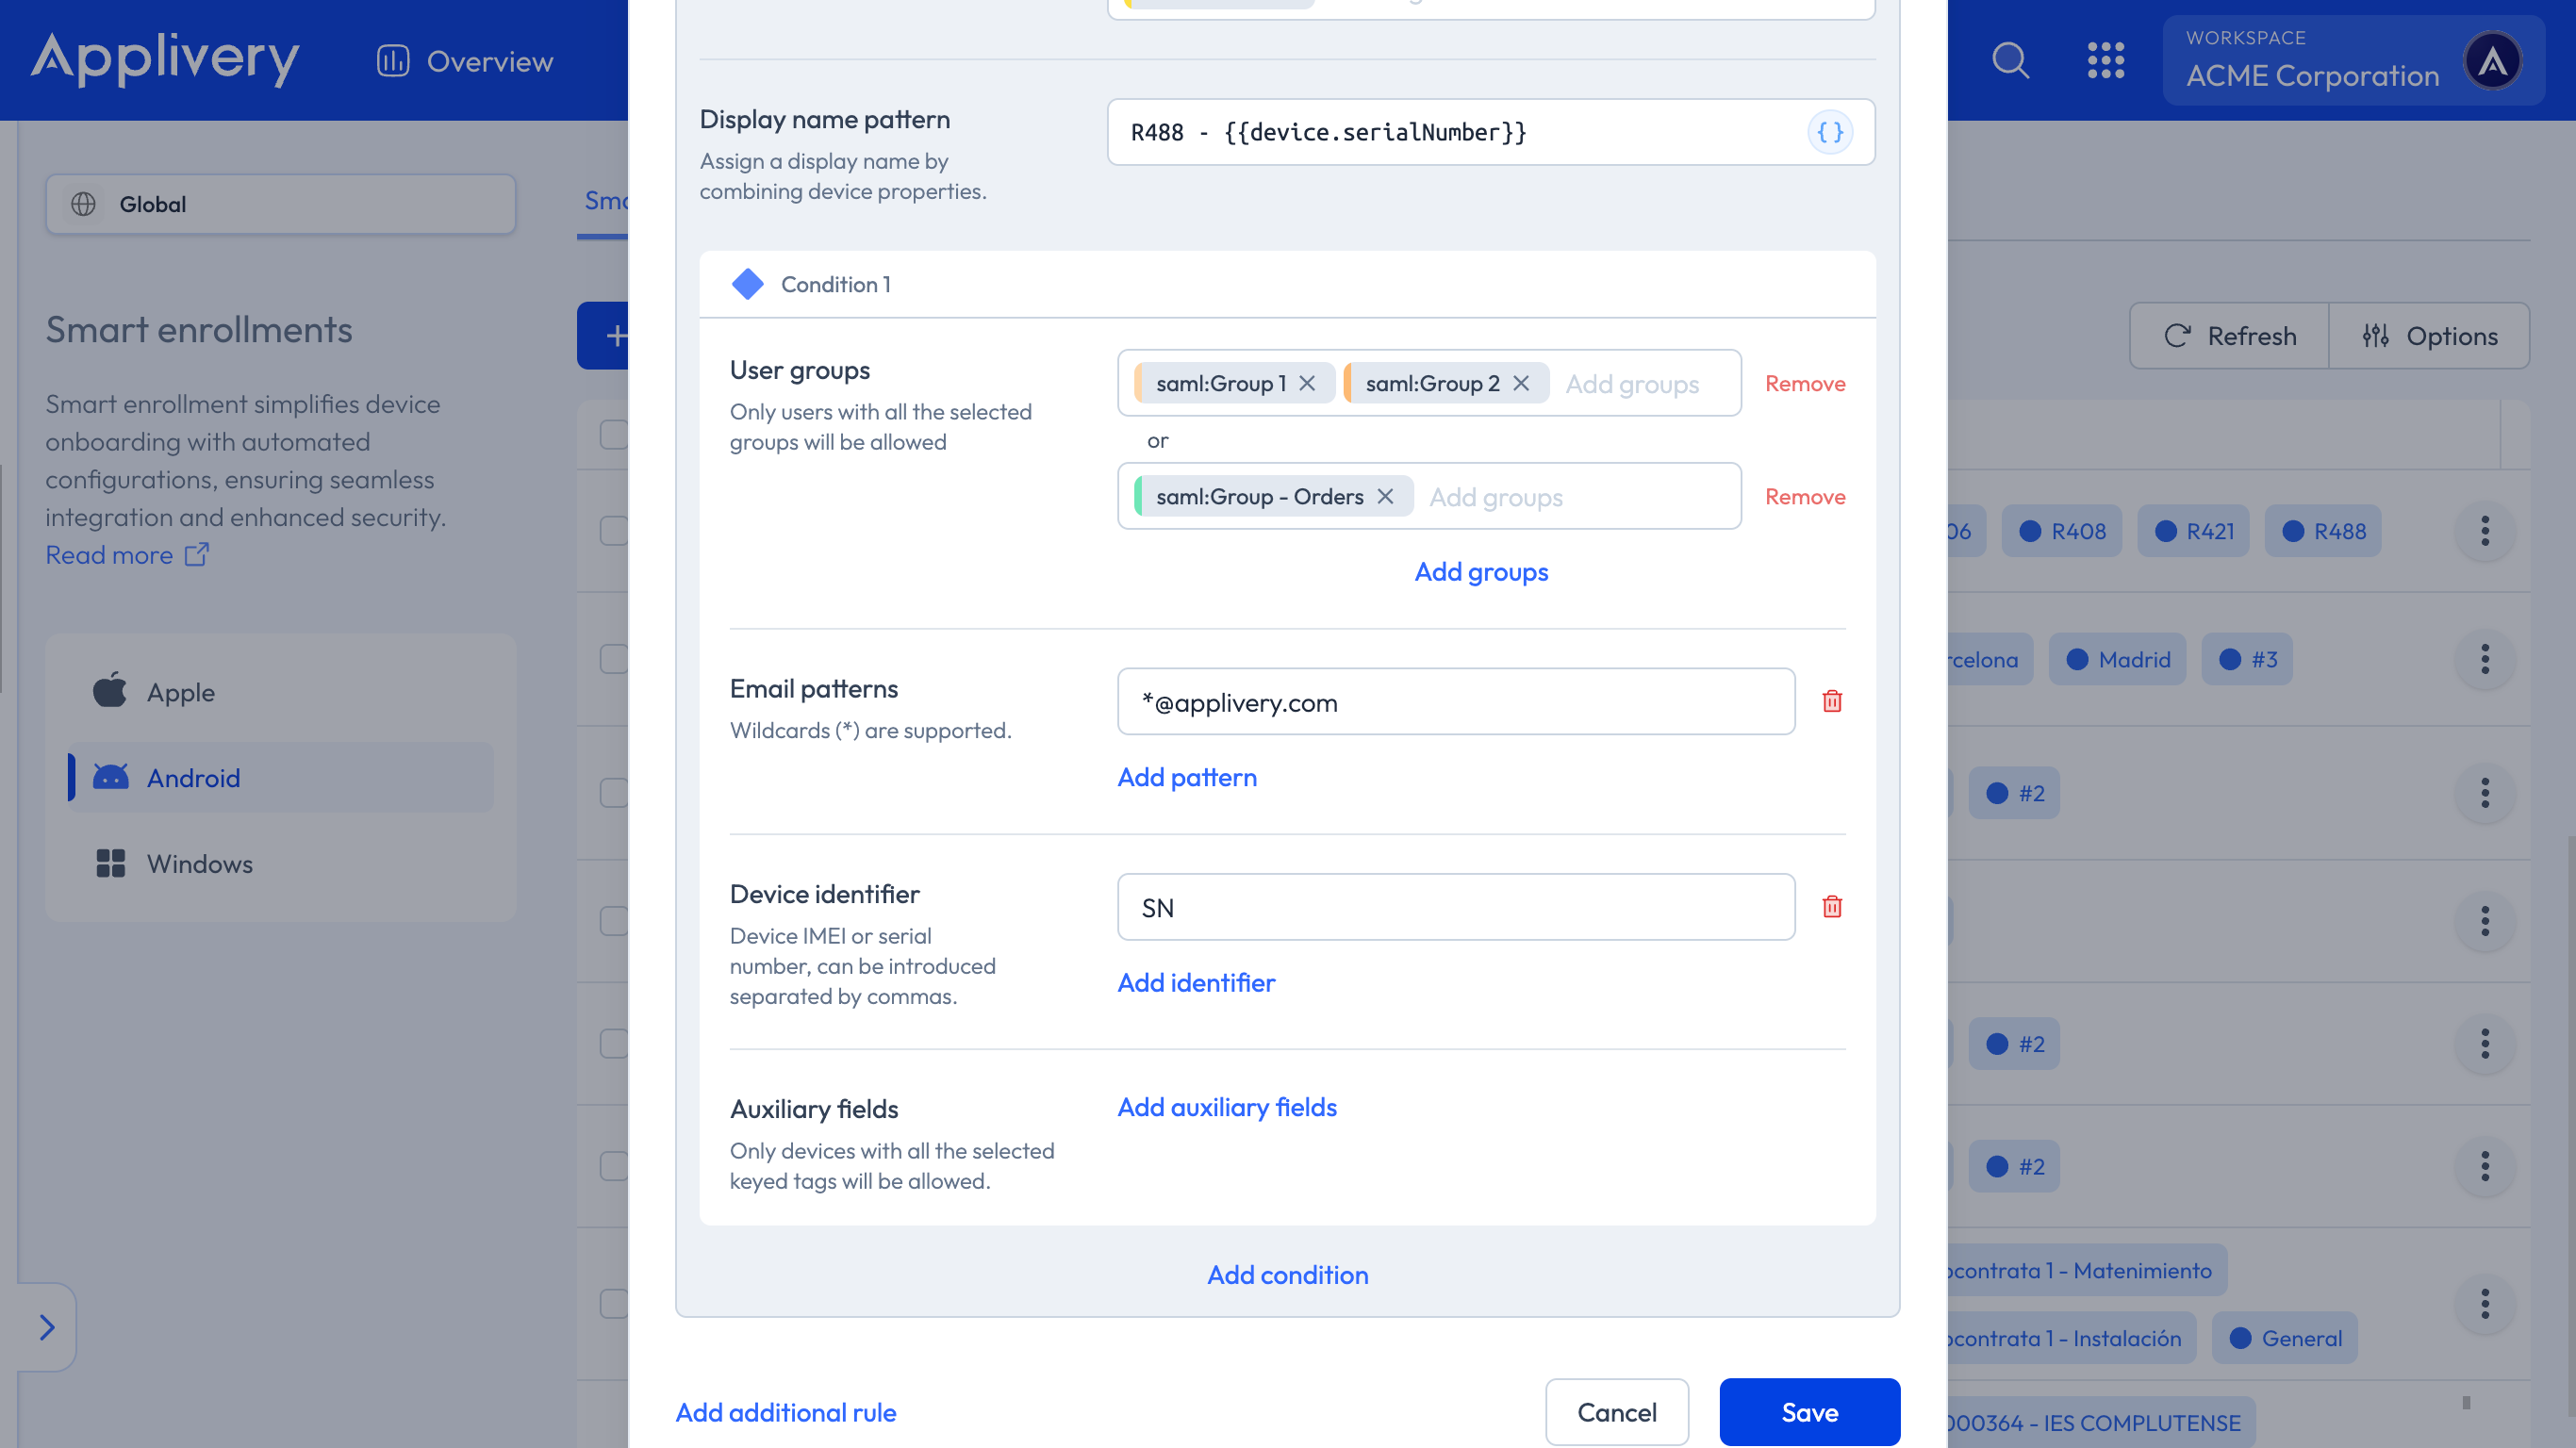
You can also use the Add additional rule option to create groups of conditions, each of them with a target Policy. As you will see, each group of conditions will also have as many Conditions as you need.
Once done, click Save.
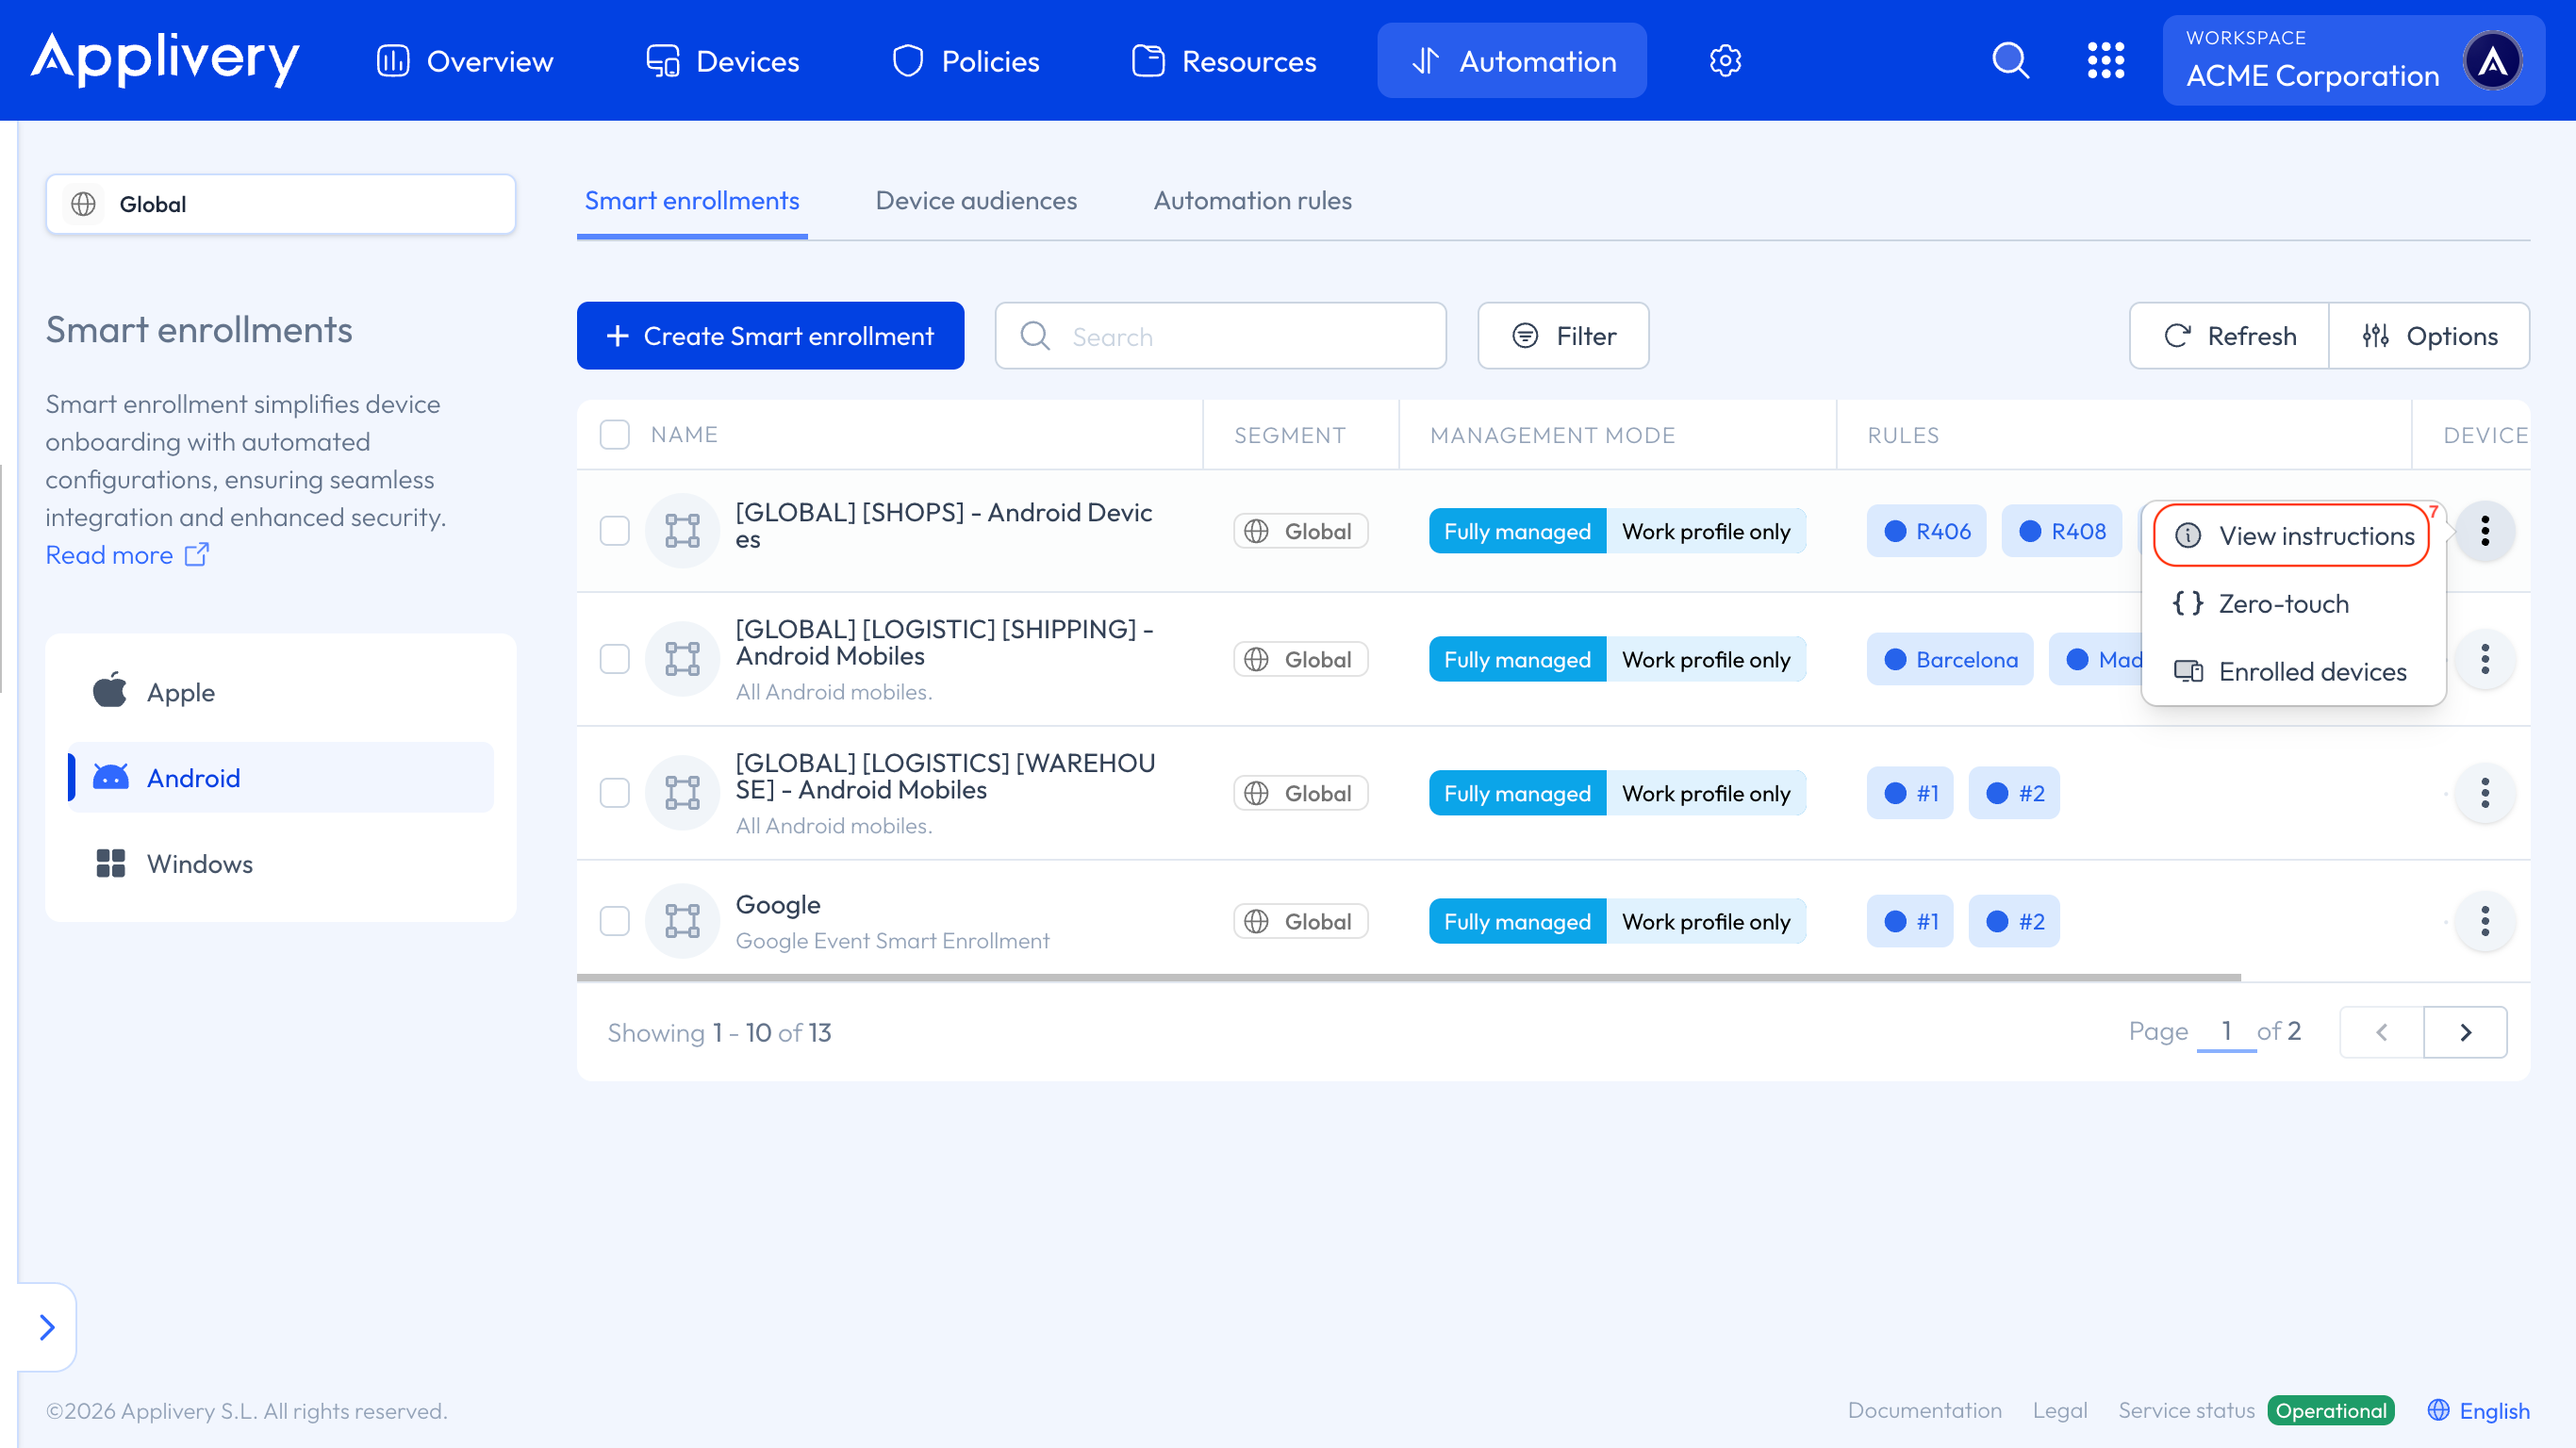
To complete the process, you will need to assign Smart Enrollments to your Android Devices.
Simply click on the vertical dots next to any of your Smart Enrollments and select View instructions (7).
This action will grant you access to the instructions side panel, where you can easily follow the provided steps.