CheckPoint Harmony Mobile integrates seamlessly with Applivery to deliver advanced mobile threat defense and comprehensive Device security. This solution offers real-time malware detection, phishing protection, and network security monitoring, ensuring that corporate Devices are continuously safeguarded from emerging threats.
With Harmony Mobile and Applivery integration, administrators gain a unified console to monitor Device risk levels, categorize Devices dynamically into groups based on threat severity, and apply tailored security Policies accordingly. The integration supports Zero-touch deployment, enabling the automatic installation and activation of the Harmony Mobile Protect App across large fleets without user intervention.
In the Applivery Dashboard
Once in the Applivery Dashboard, go to your Workspace Settings (1) from the top dropdown menu, then open Integrations in the left-hand menu and enable Check Point Harmony Mobile (2).

To begin the integration, type or paste the Portal Account ID from the Harmony Mobile Portal. You can find this by going to Settings > General > Account ID. Once you’ve entered it, click Next step.
Applivery will display all the information you need to enable the integration on the Harmony Mobile Portal.
In the Harmony Mobile Portal
Go to Settings, select Integrations from the left-hand menu, and add a new integration (you can temporarily select Hexnode until Applivery appears as an option).
Alternatively, you can access it directly from this link. In the integration form, enter a Display Name of your choice, and fill in the Server Address, Username, and Password provided in your Applivery dashboard.
Once done, click Verify, and after successful verification, click Next to continue.

Once the groups finish loading, those associated with your Devices will be added automatically. Note that in Harmony Mobile, groups correspond to tags in Applivery, so tags must be assigned to Devices in Applivery for them to appear in the Harmony Mobile group list.
The Android Enterprise groups field in the UEM integration is used to manage and protect Android Devices that include both Work and Personal Profiles, allowing you to apply different Policies to each profile. This configuration is particularly useful when working with UEM solutions that support Android Enterprise. For more details, you can refer to the Using Android Enterprise with Harmony Mobile guide.

Next, copy the token provided in the final step of the integration and paste it into the corresponding field in the Applivery Dashboard.

Once this is completed, your Devices will start appearing in the Devices section of the Harmony Mobile Portal. Keep in mind that until a Device is fully provisioned, its information may appear empty.
Configuration for Android Devices
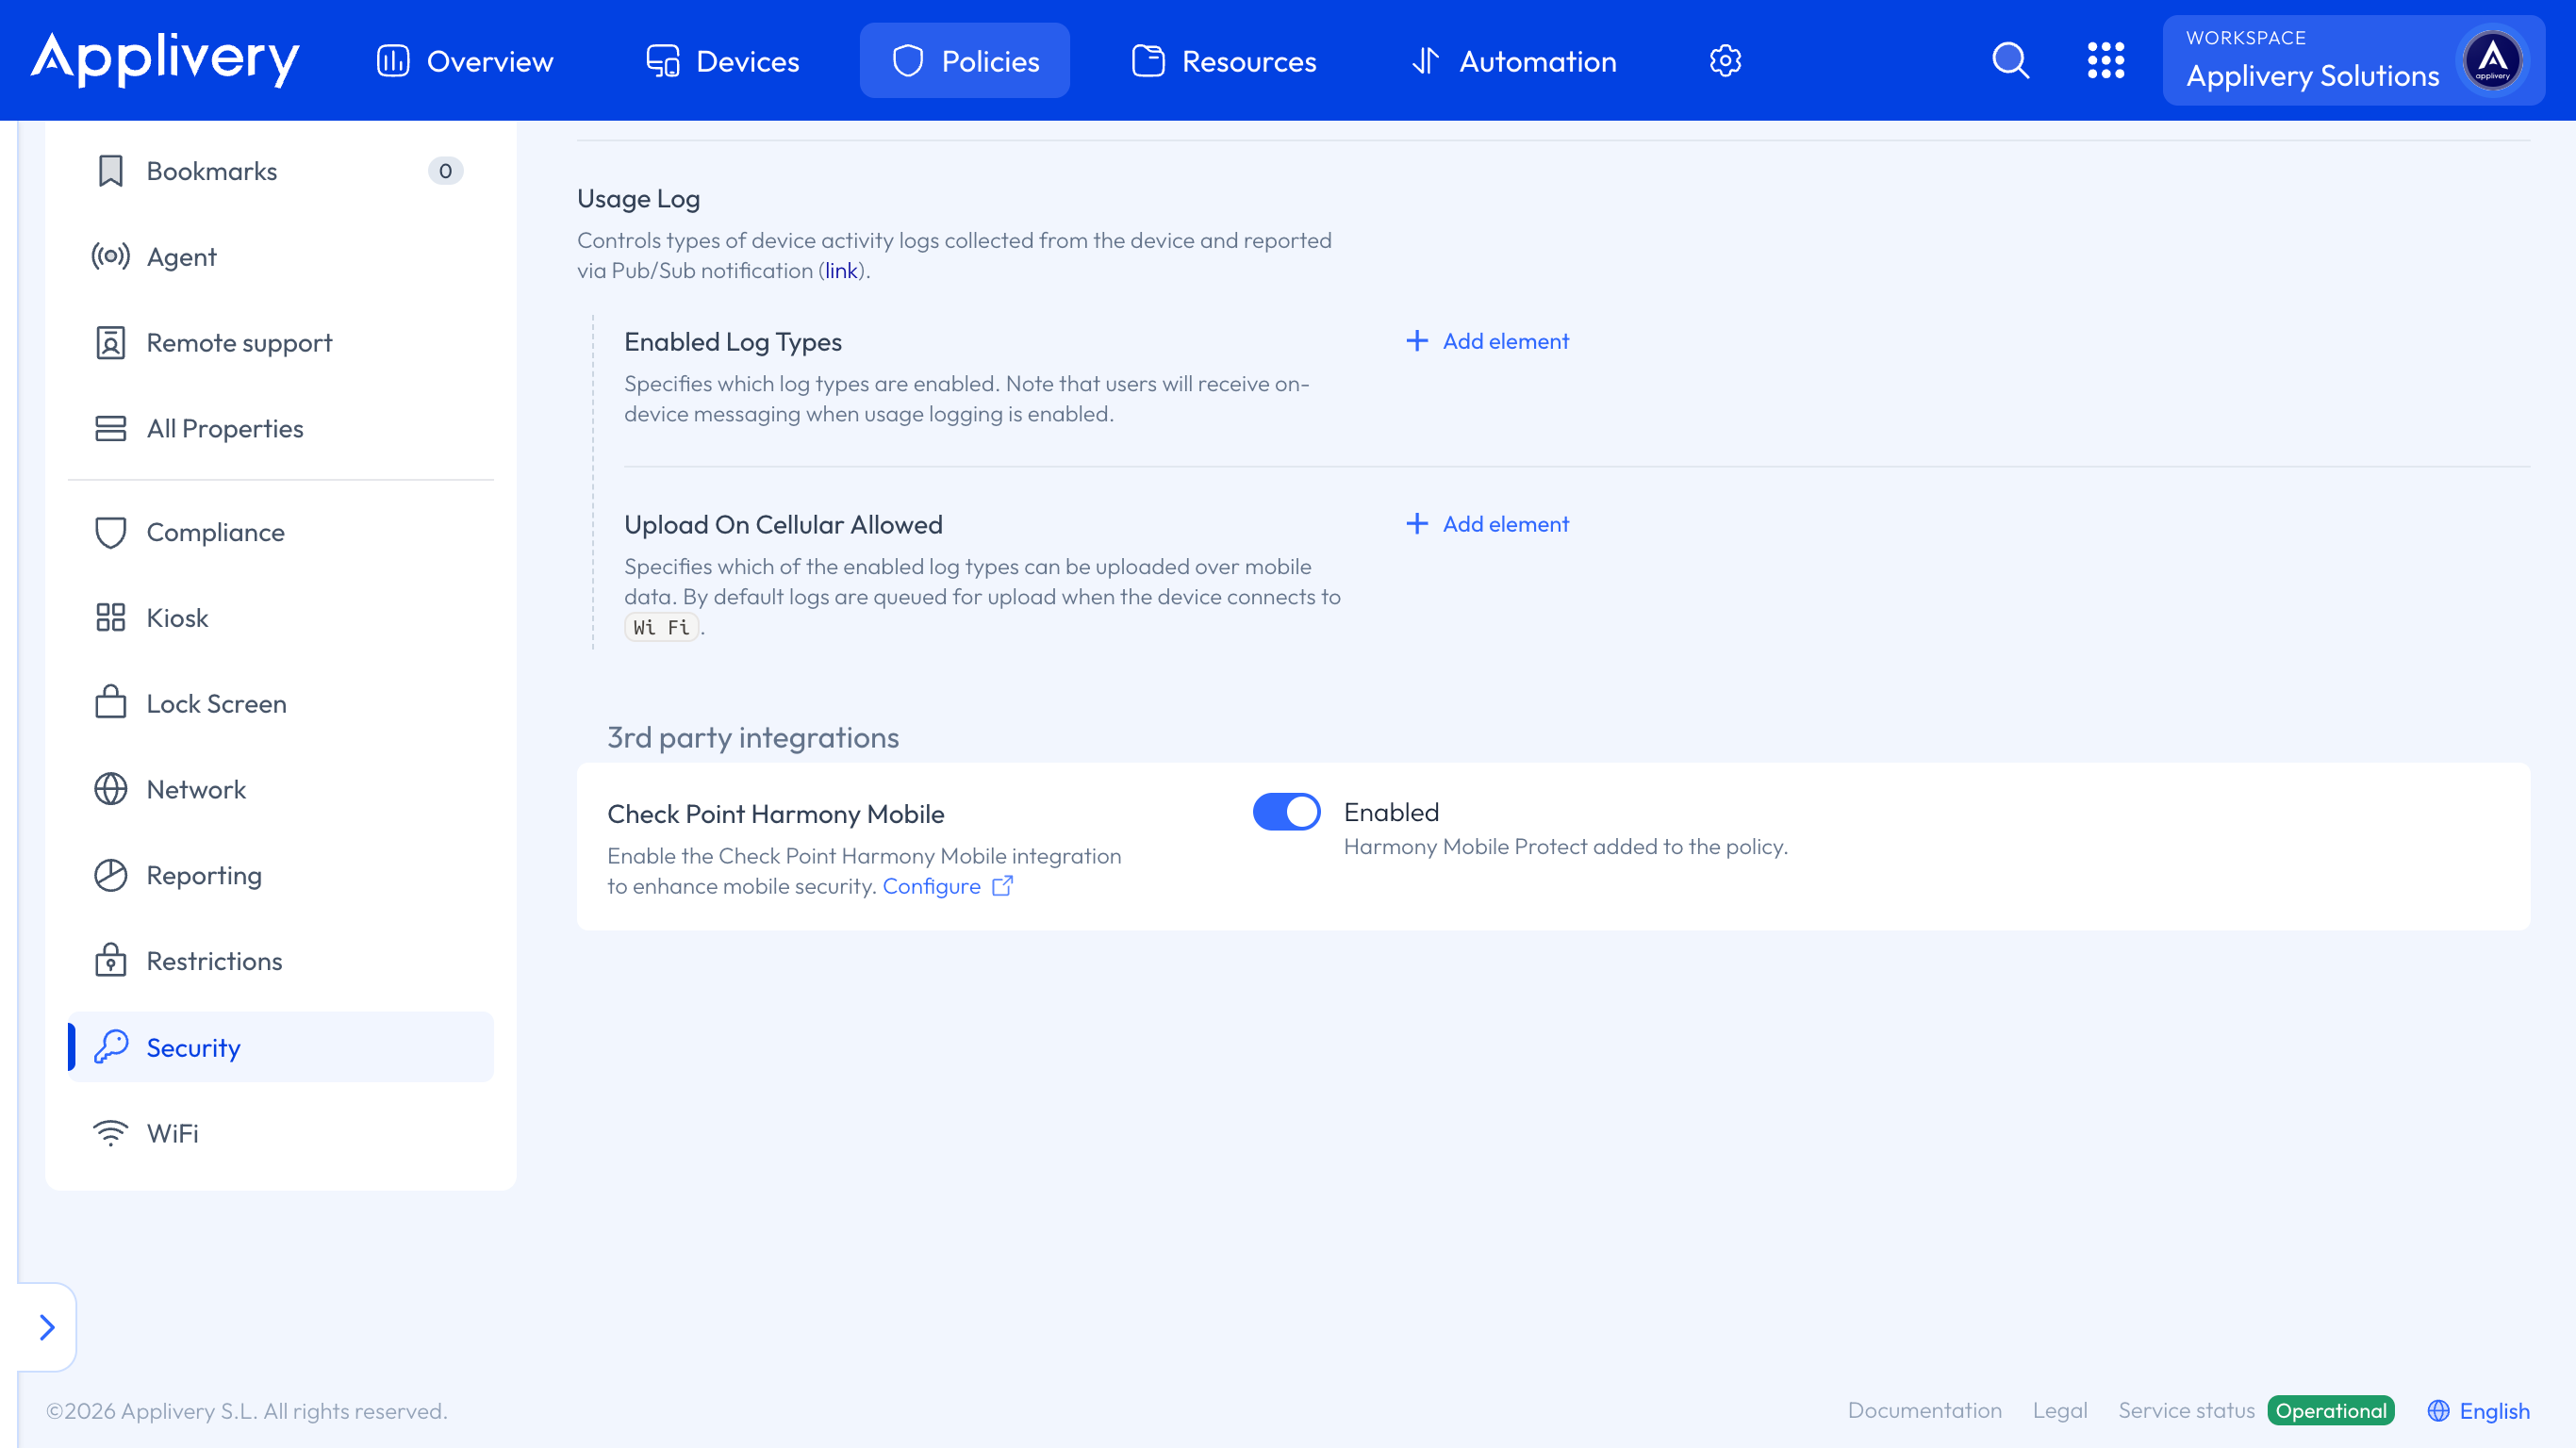
In the Applivery Dashboard, go to any of your Policies. From the left side menu, open the Security section and enable Check Point Harmony Mobile.
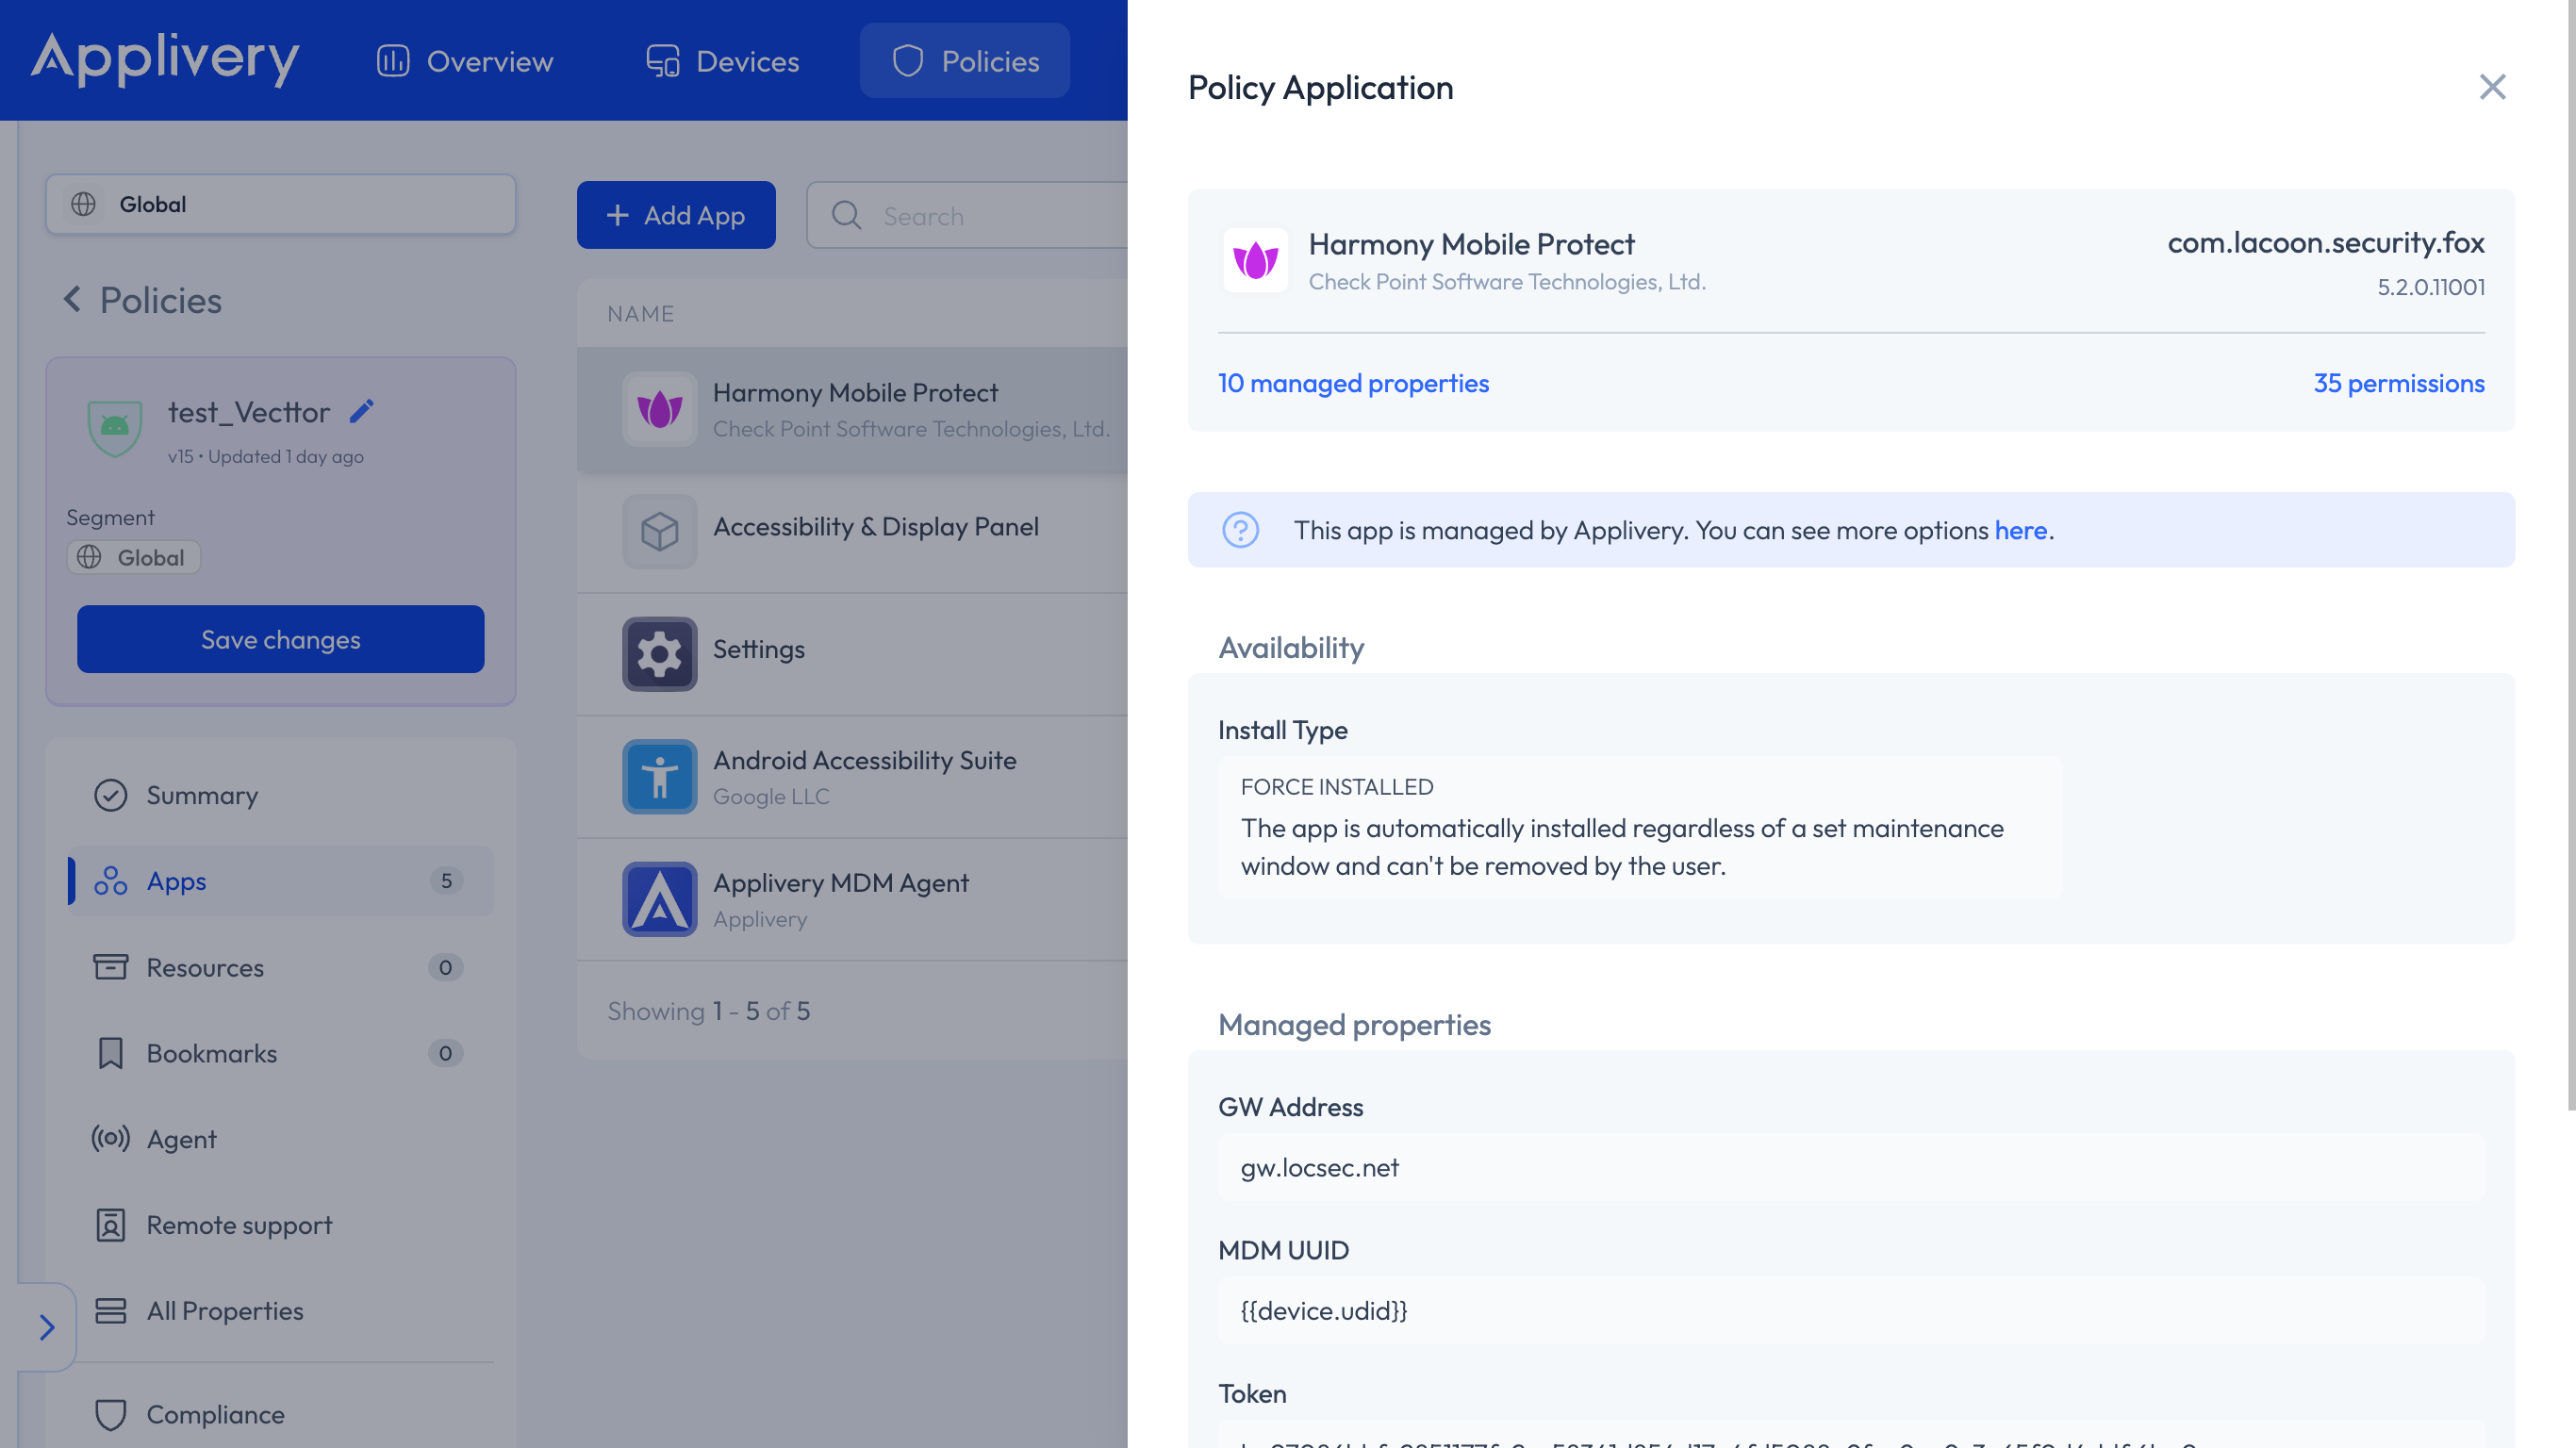
Next, go to the Apps section and click the + Add App button.
Add the Harmony Mobile Protection App. Once selected, its managed properties will automatically appear. The following values will be displayed:
The MDM UUID (using interpolations, retrieved from the Device’s network summary under UDID).
The GW Address and Infinity Portal Account ID (both found in the Harmony Mobile Portal settings).
The Token, which you’ll get from the last step of the integration, is usually added automatically.
Finally, open the App on the Device and complete the setup process. Once the integration is active, any new alerts will appear in the portal as they occur.
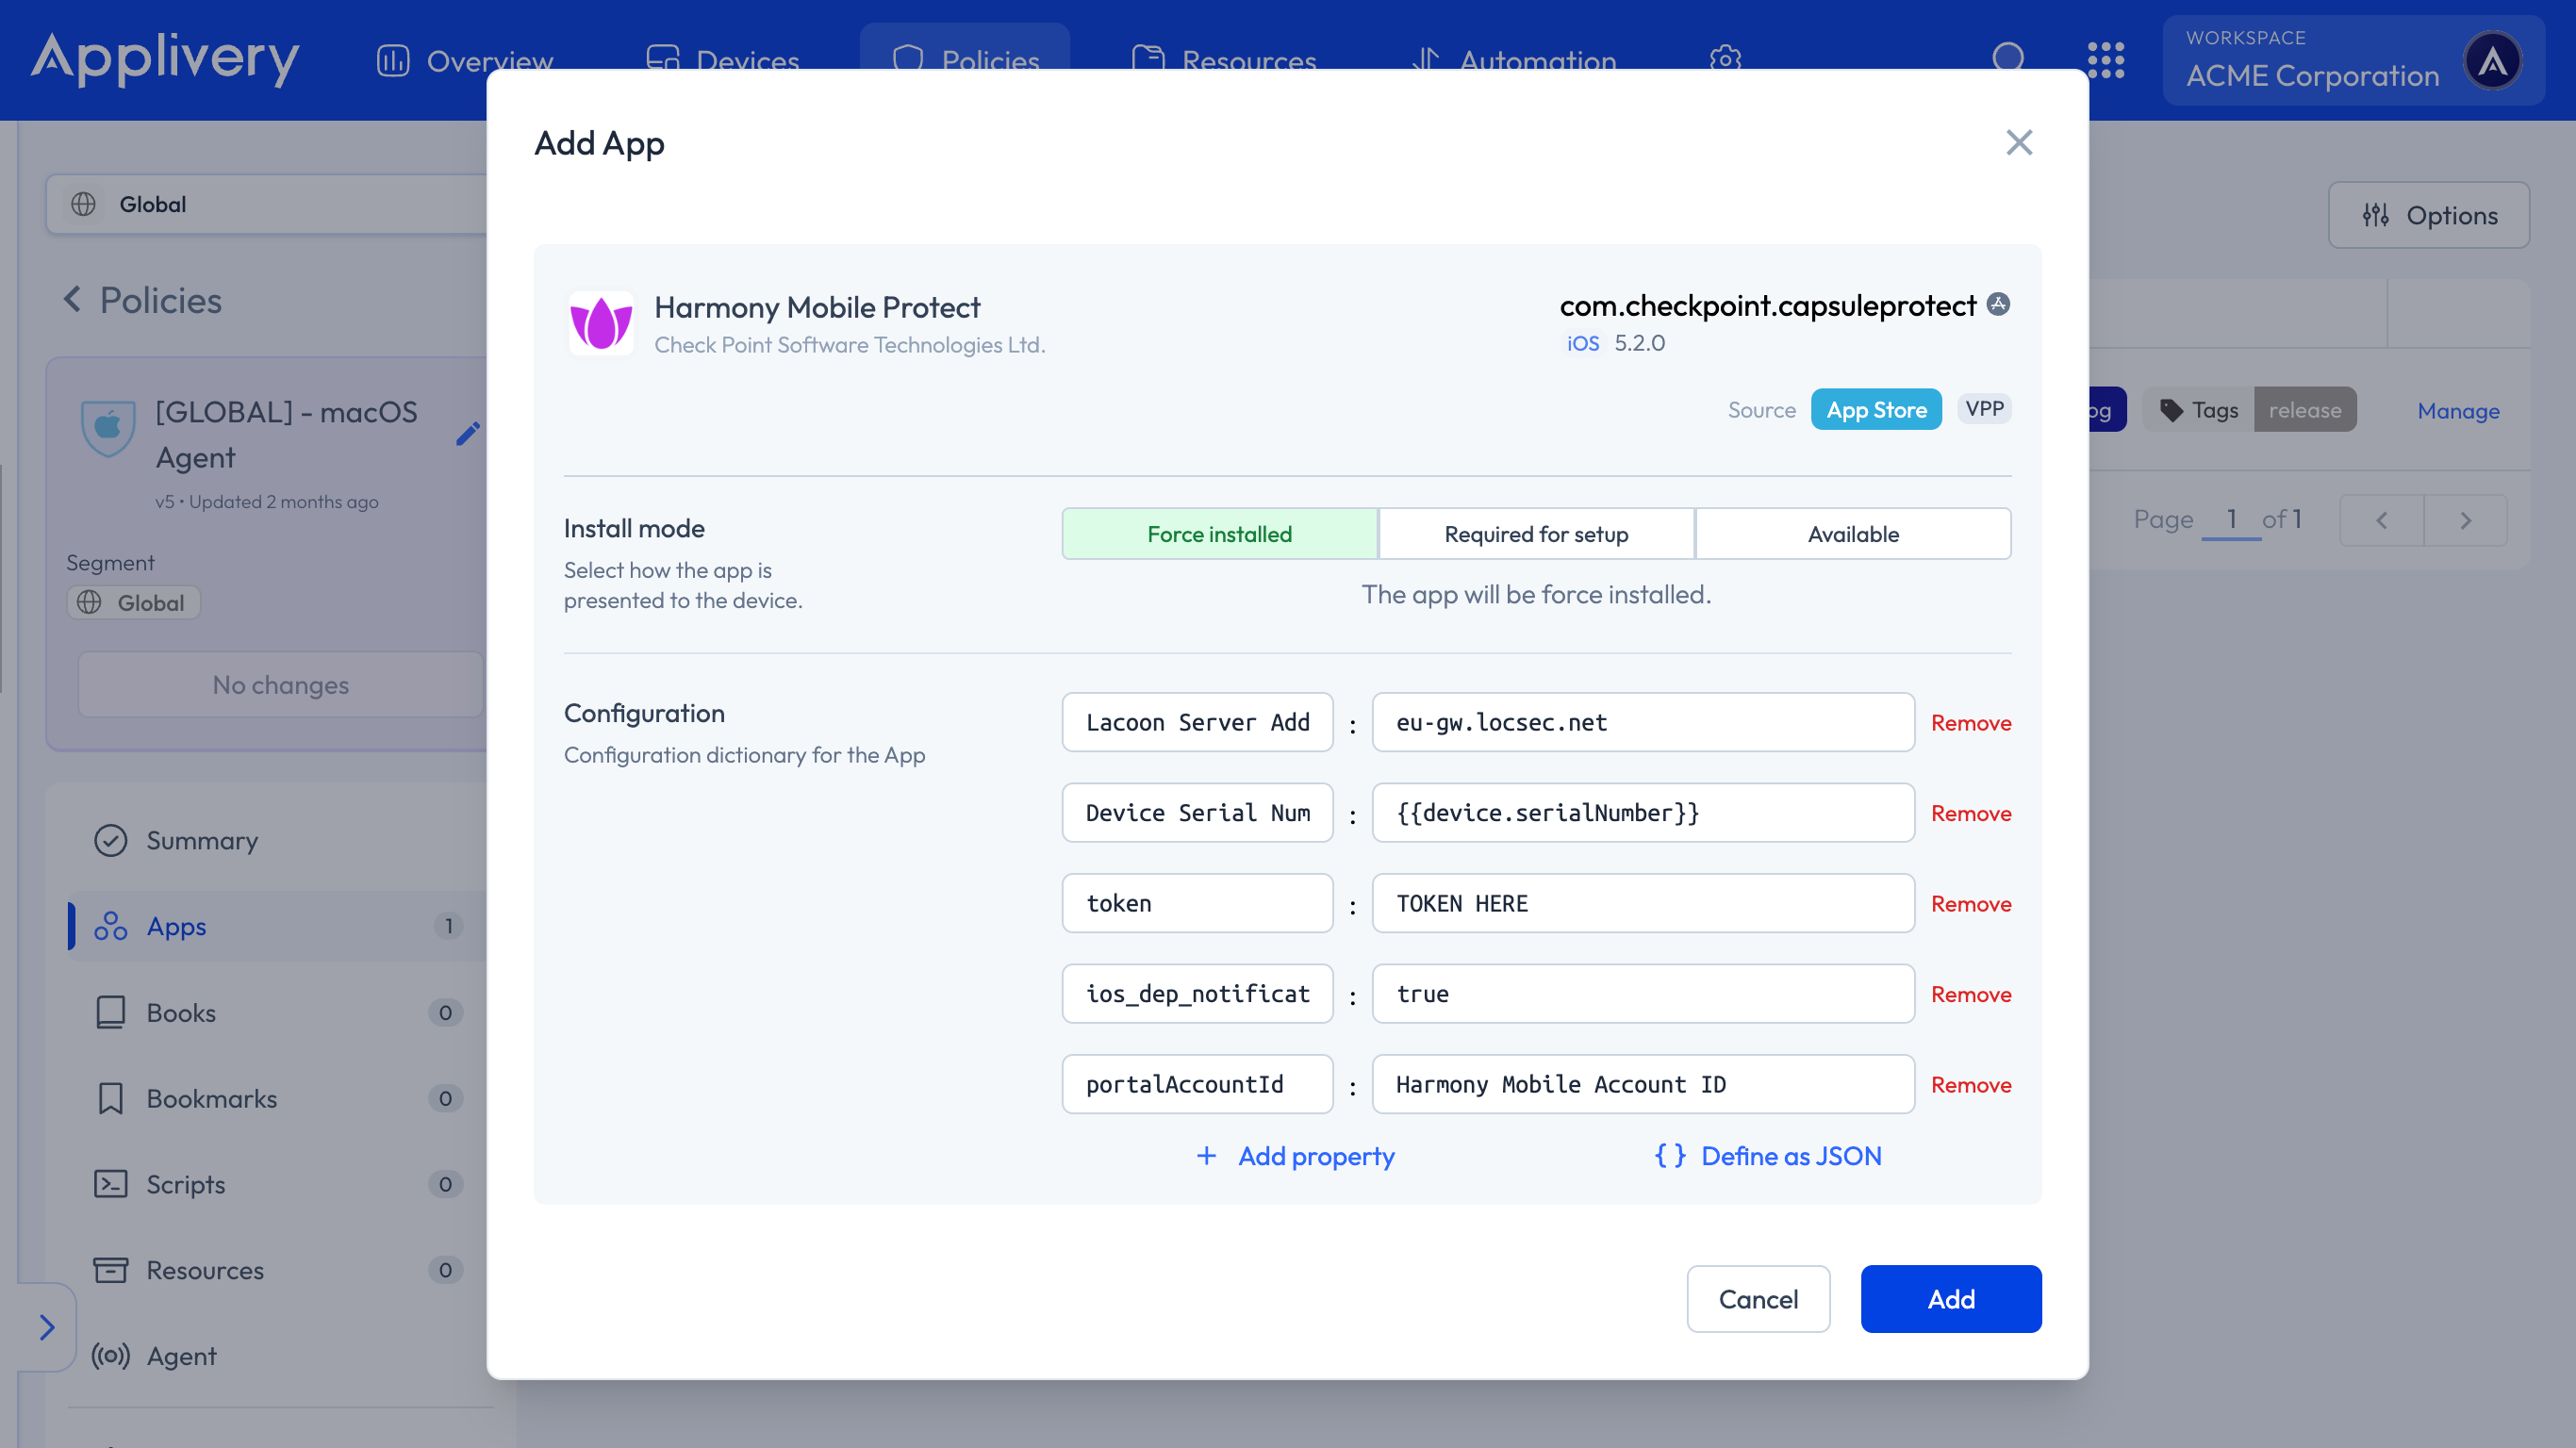
Configuration for Apple Devices
The process works similarly. Add the Harmony Mobile Protection App to your Policy, ensuring that you have enough VPP licenses available, and configure all required parameters in the configuration field, adjusting each one as needed:
Lacoon Server Address:eu-gw.locsec.net.Device Serial Number:{{device.serialNumber}}.token: Use your token here.ios_dep_notification_permission:true.portalAccountId: Harmony Mobile Account ID.