
Apple Device Enrollment Program (also known as DEP) is a tool integrated into Apple Business that allows organizations to fully automate the enrollment process of Apple Devices in MDM solutions like Applivery. In the beginning, it was focused on new Devices, but starting with iOS 11, it now supports enrolling already purchased Devices as well. DEP helps organizations enable supervision, MDM enrollment, skip setup steps, and many other features.
How to Configure Apple Device Enrollment Program (DEP) in Applivery
Applivery provides seamless integration with the Apple Volume Purchase Program (VPP) for purchasing app and book licenses and installing company-private Apps to manage Apple Devices running iOS and macOS.
There are some prerequisites that you must take into consideration:
You already own an Apple Business-approved account for your organization.
You have an active Applivery Apple Device Management license.
Sign in to the Applivery Dashboard, navigate to the Settings (1) section, and locate the Apple DEP (2) section in the left-hand menu. Then click the Download Public Key (3) button.
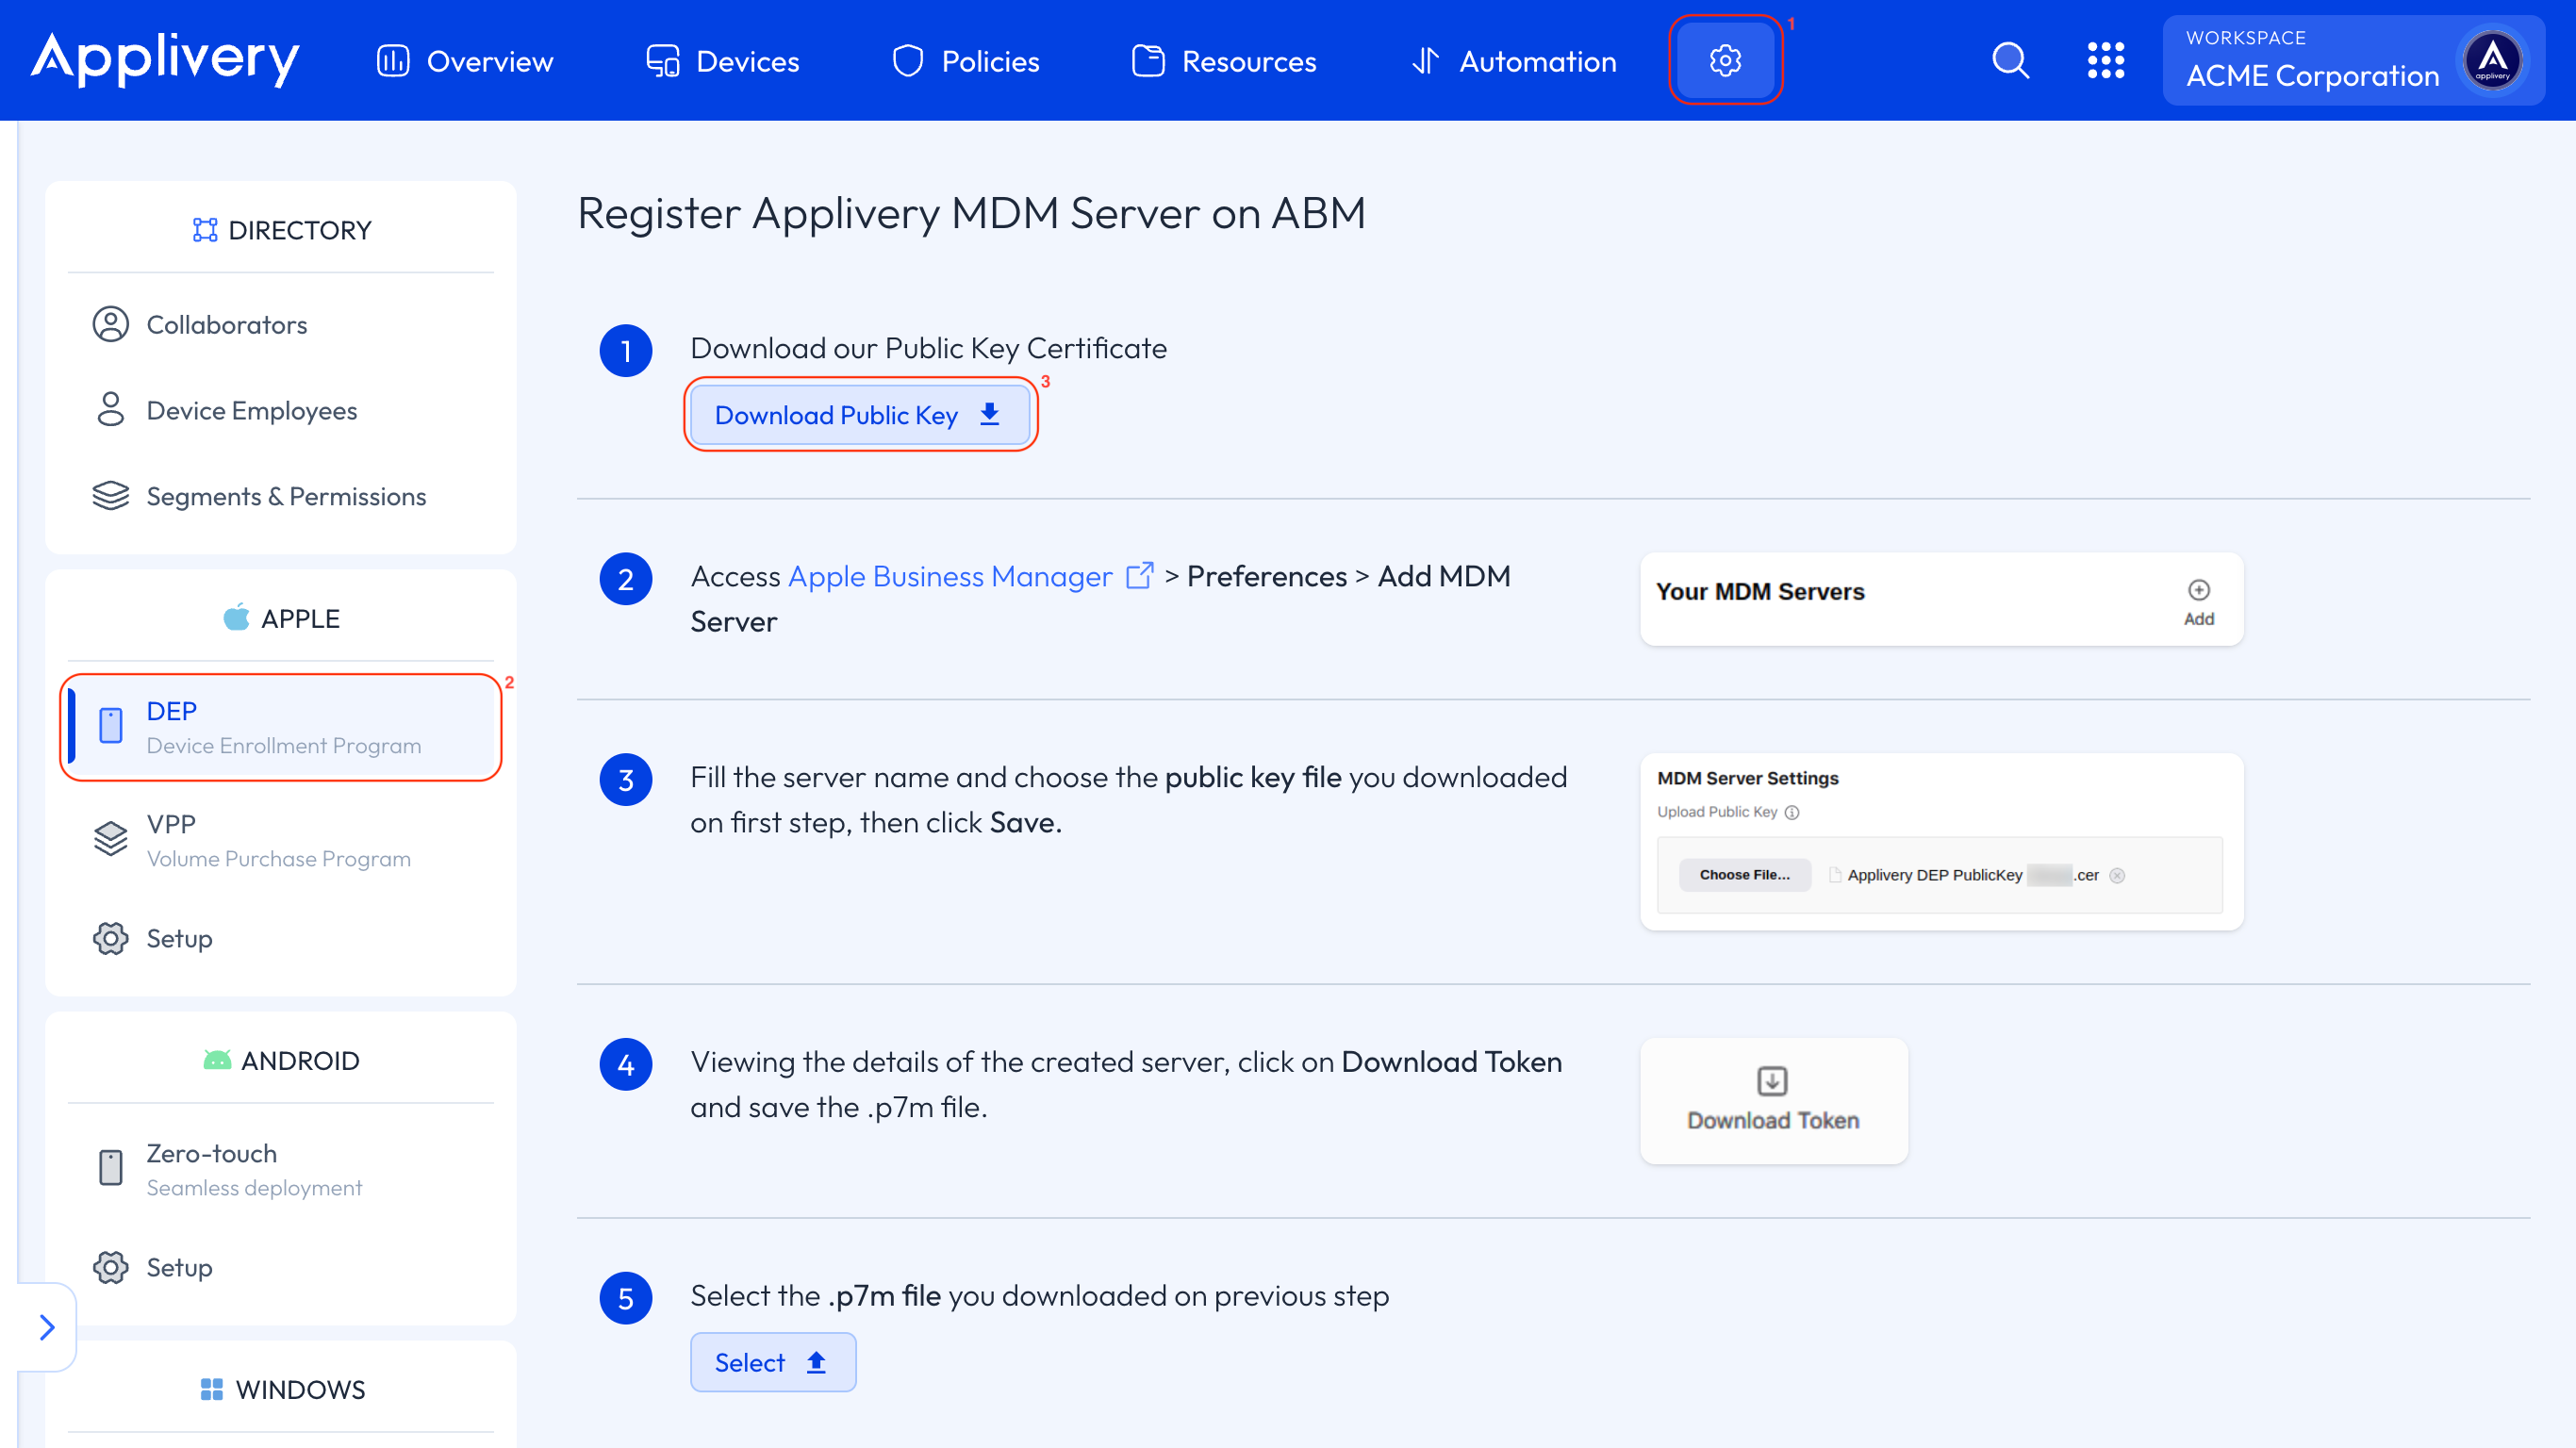
A file called Applivery DEP PublicKey (ORG NAME).cer will be downloaded.
Sign in to Apple Business as a user who has the role of Administrator or Content Manager.
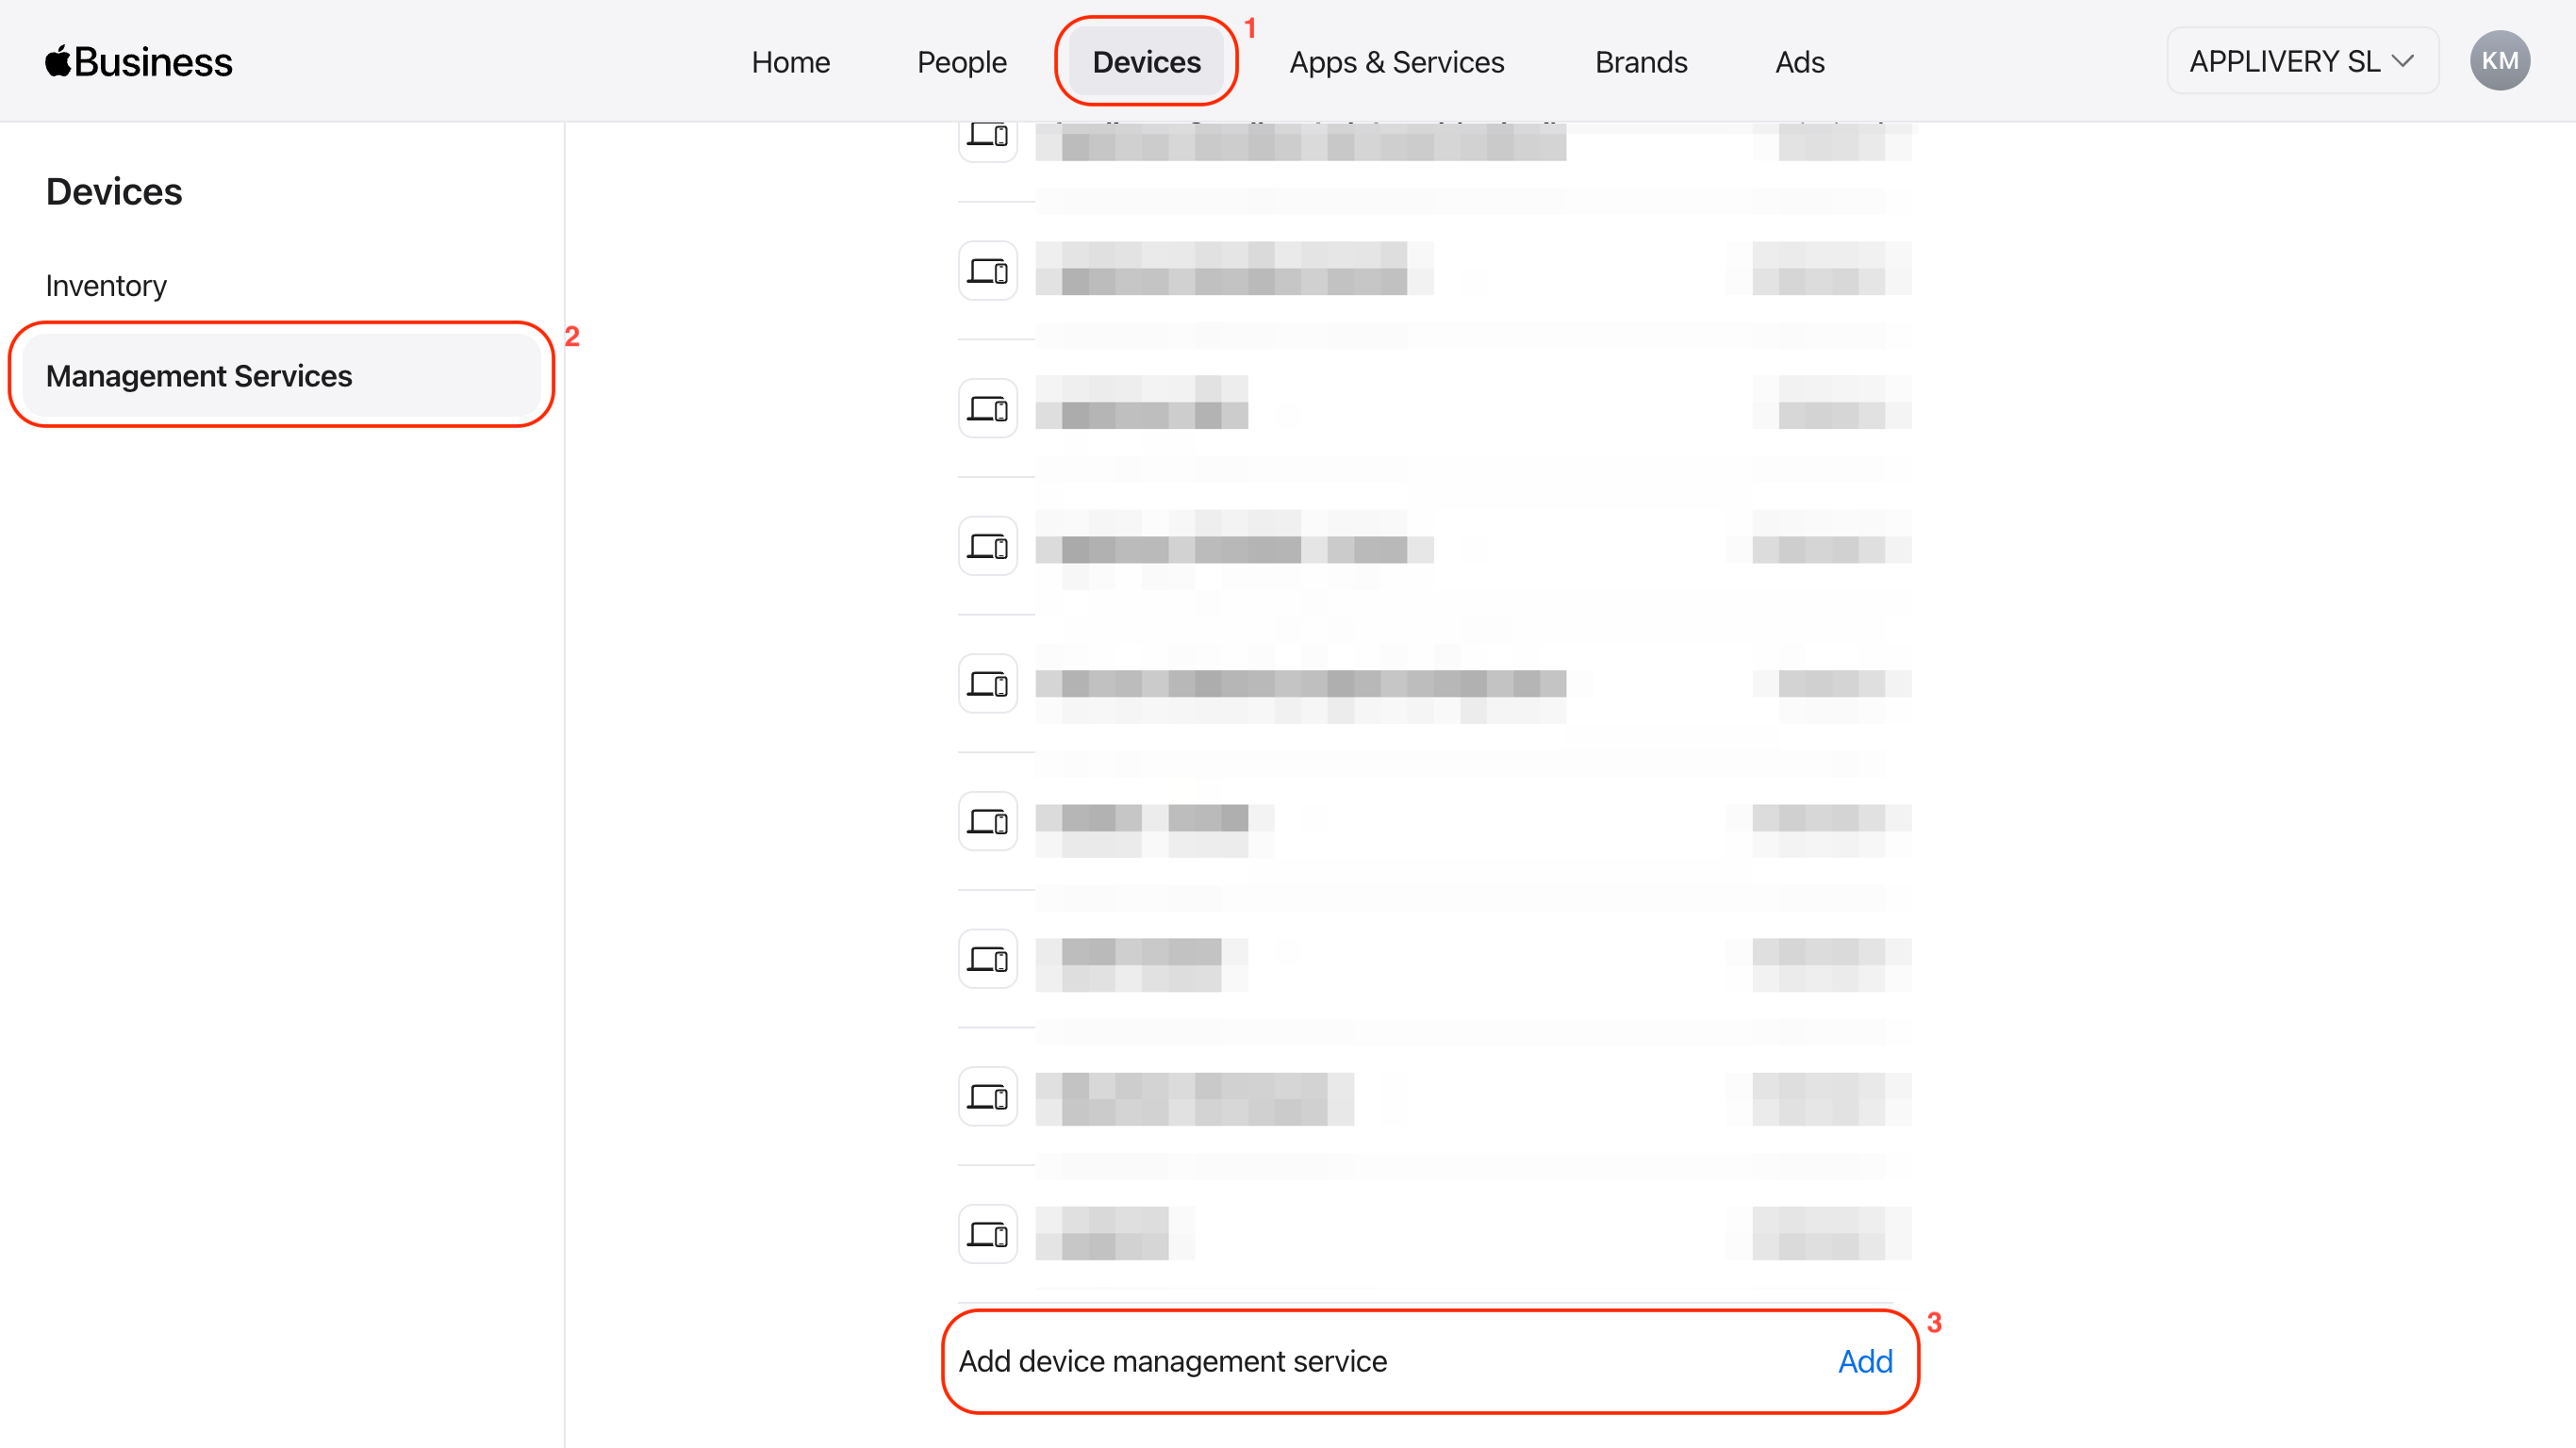
Click on Devices (1) and select Management Services (2) from the left-hand menu.
Click on the Add button under Add device management service (3).
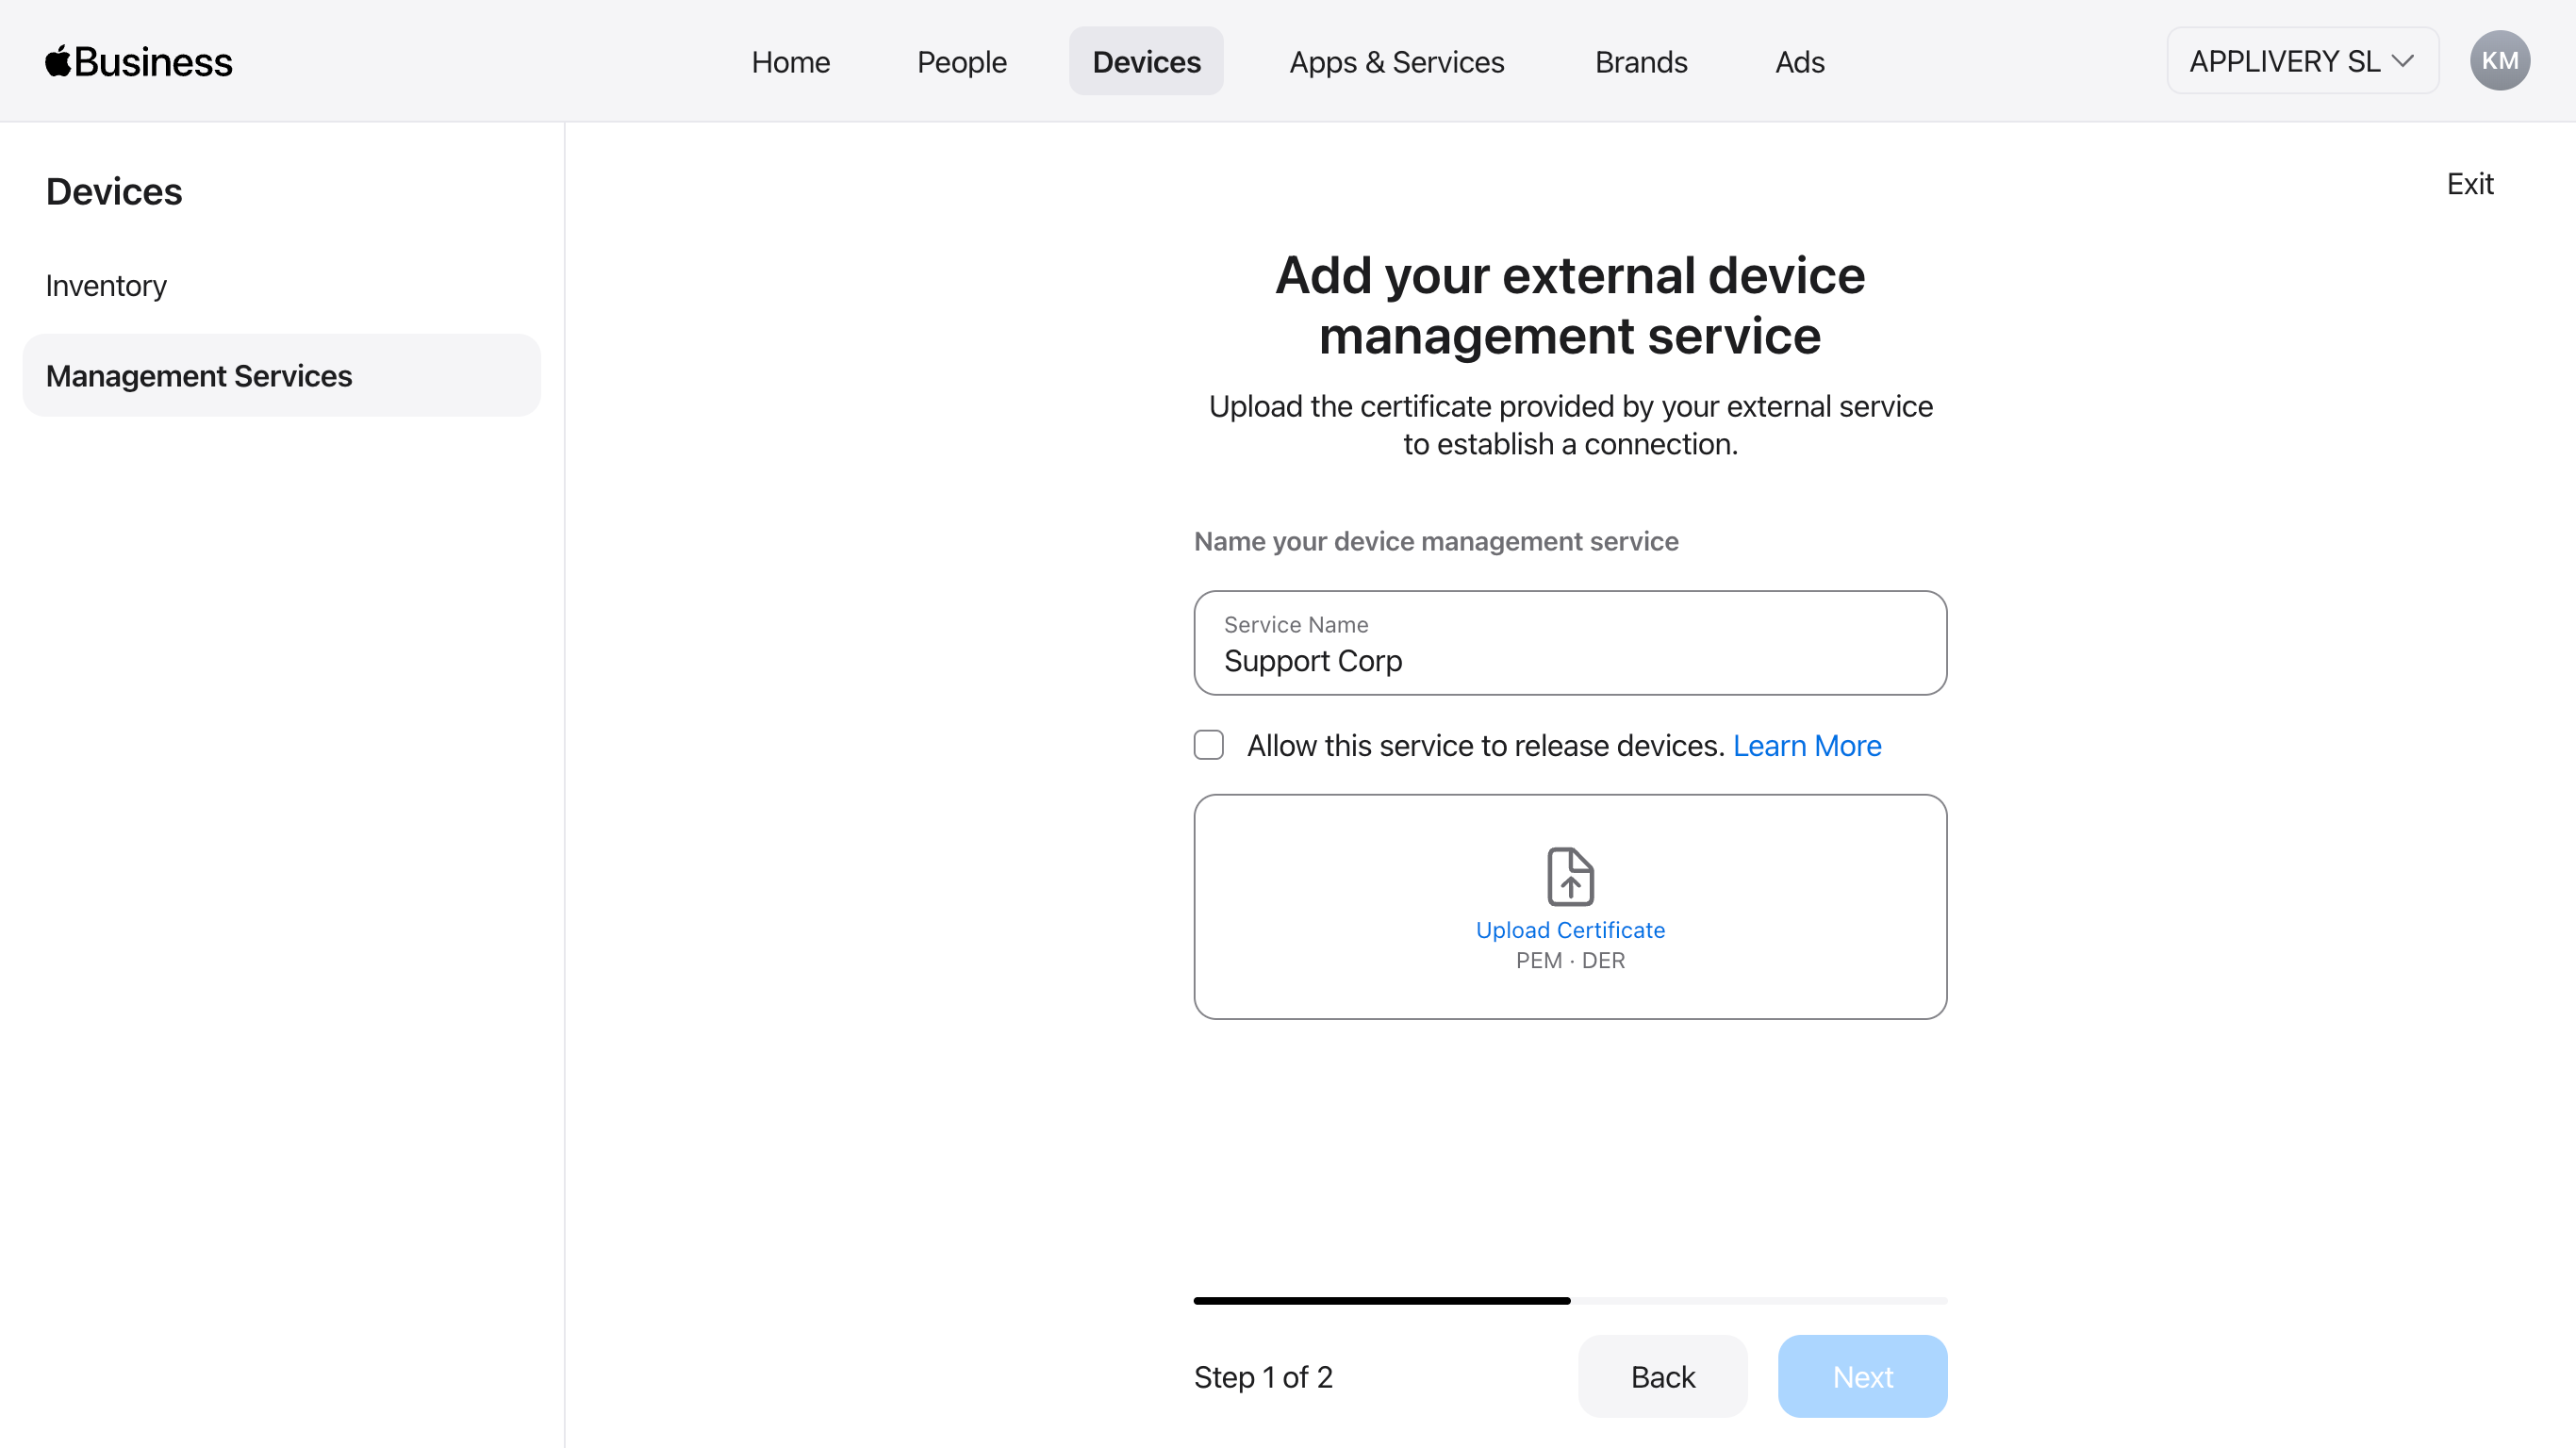
Select the Connect external device management option, then name the new MDM server, check Allow this service to release devices, and click Upload Certificate. Finally, select and upload the .cer file you downloaded in Step 1.
Then click Next.
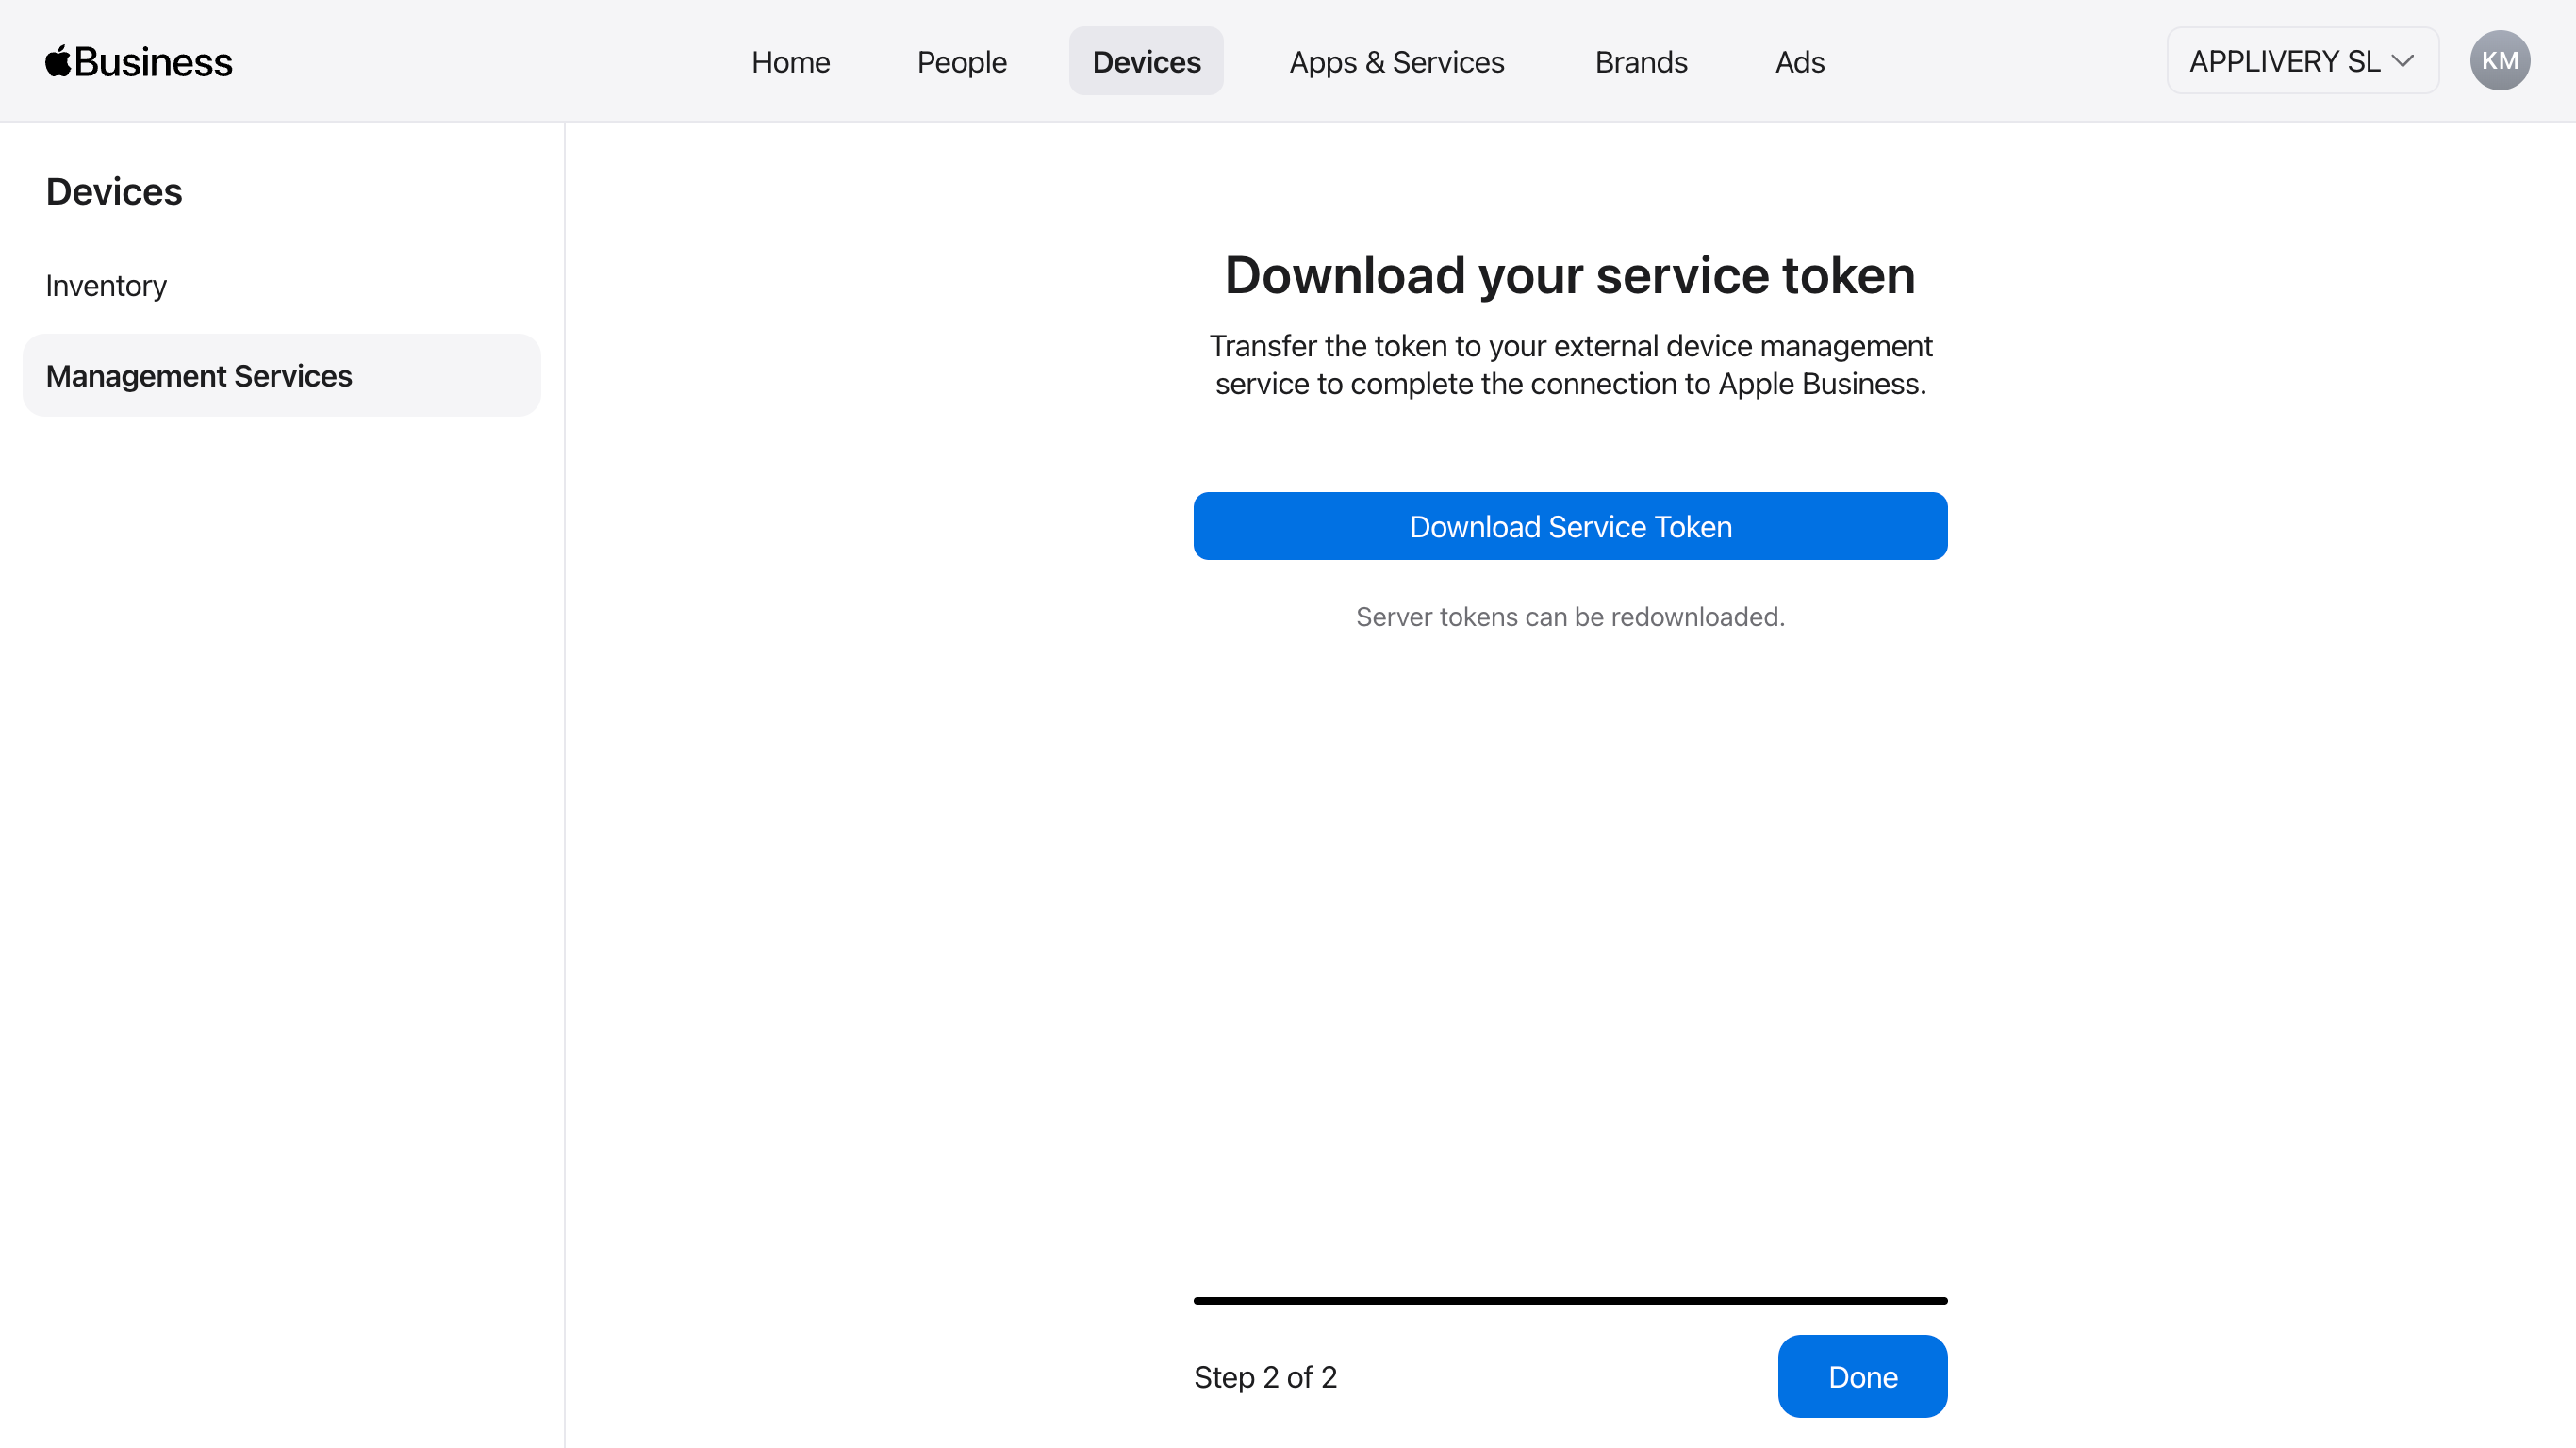
In the next step, you’ll be able to download the token, and a .p7m file will be downloaded.
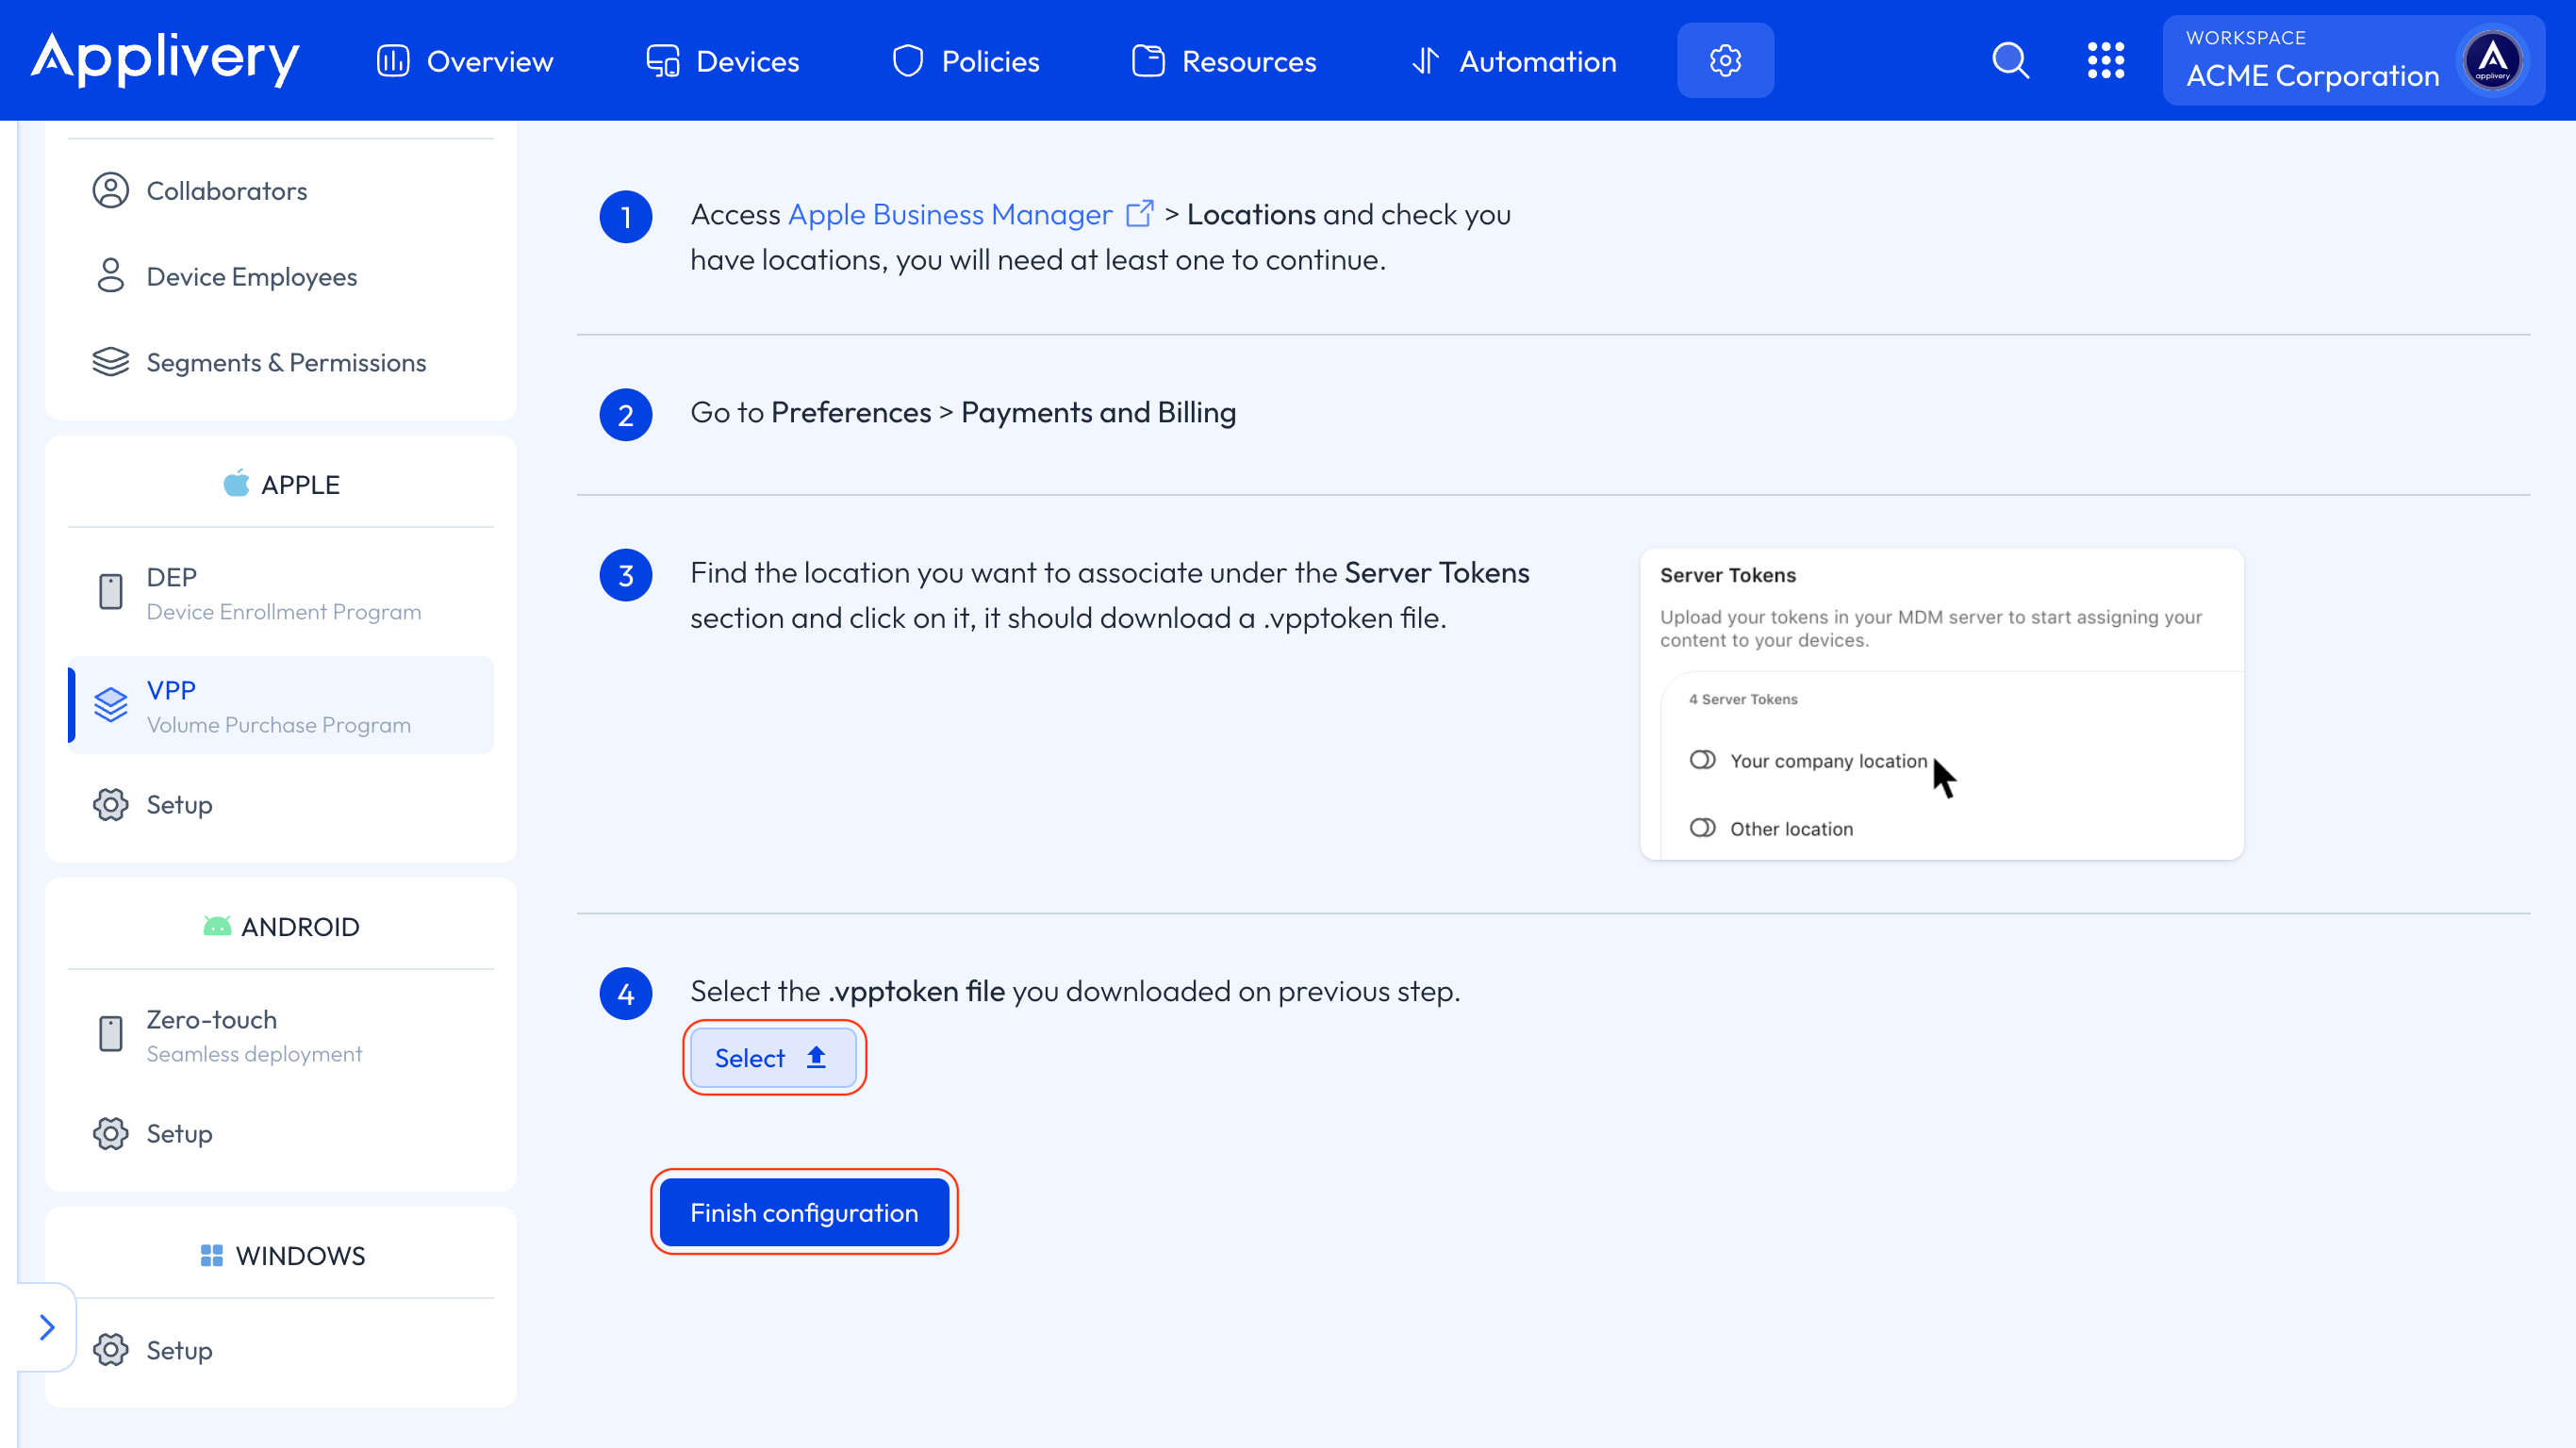
Now, get back to the Applivery Dashboard and scroll down until step 5 of the setup process. Click the Select button and upload the .p7m file you downloaded from Apple Business in the previous step. Then click Finish configuration.
DEP profiles define how new Devices will be enrolled in Applivery MDM and the initial configuration of those Apple Devices. They allow you to configure setup screens, multi-user, or supervision mode, besides other features. Let’s get started! Click on DEP profiles.
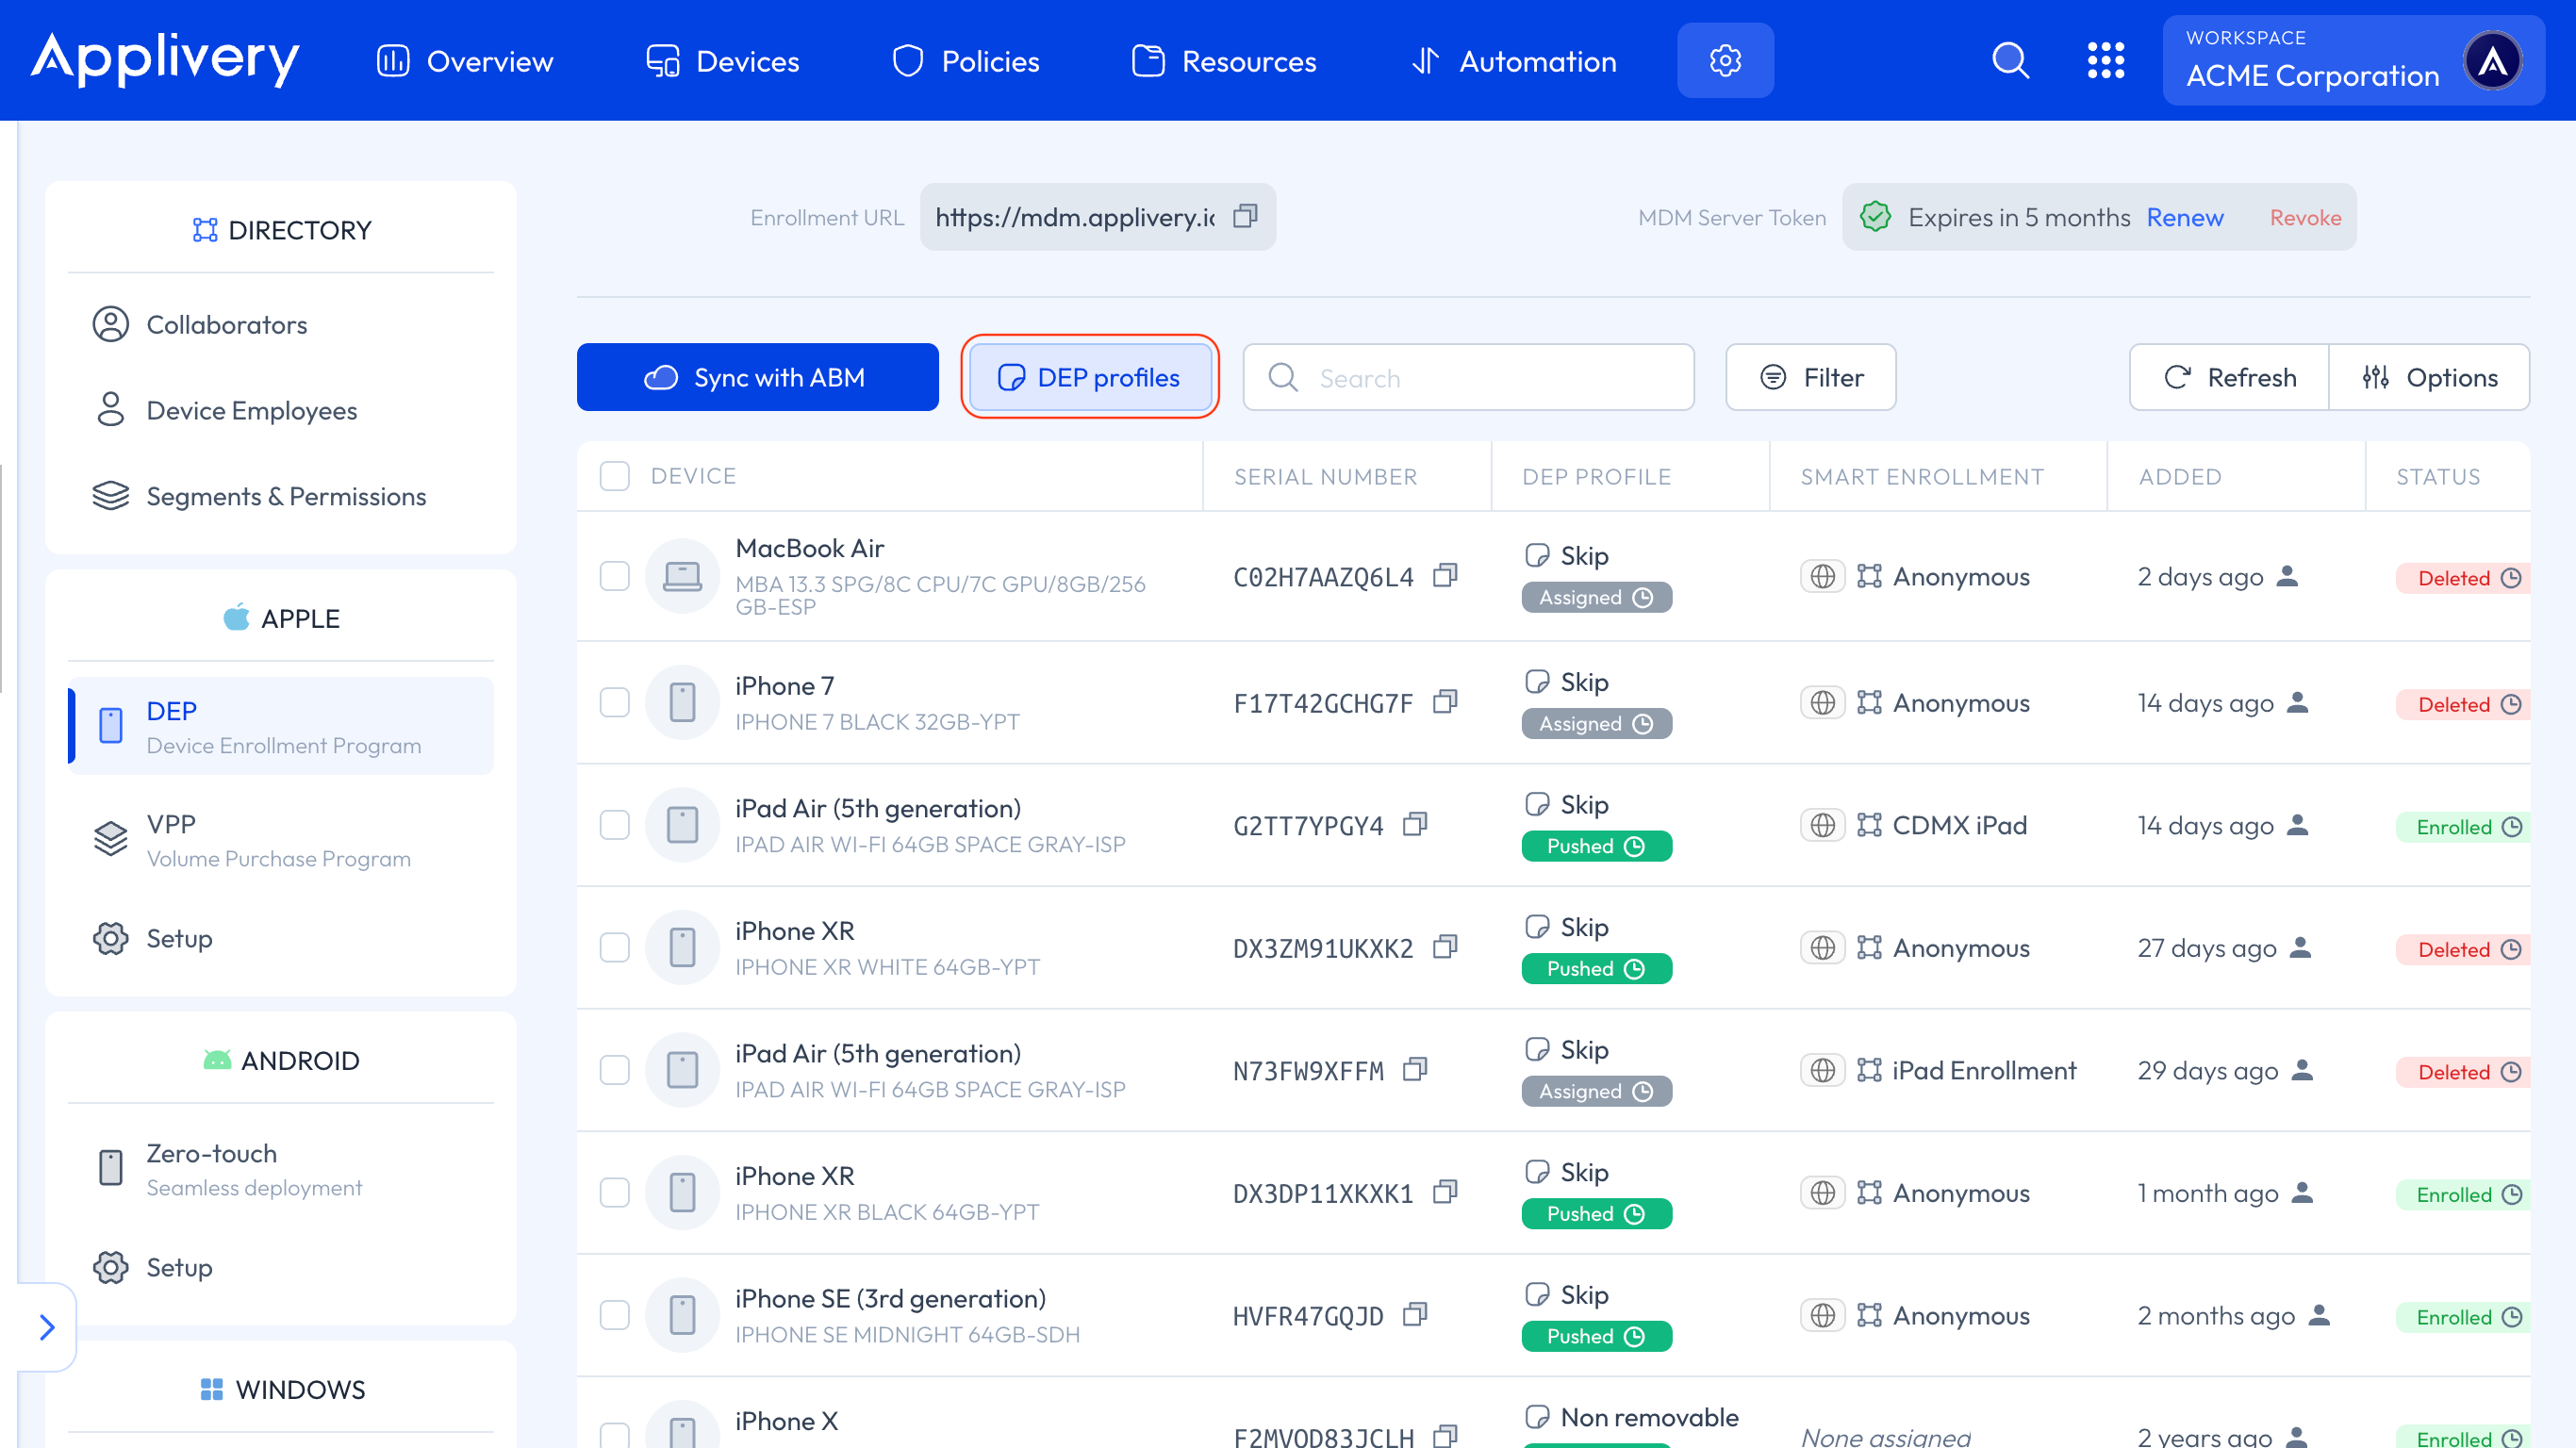
A modal view will open, providing you with the following options:
View all existing DEP profiles.
Create a new DEP profile.
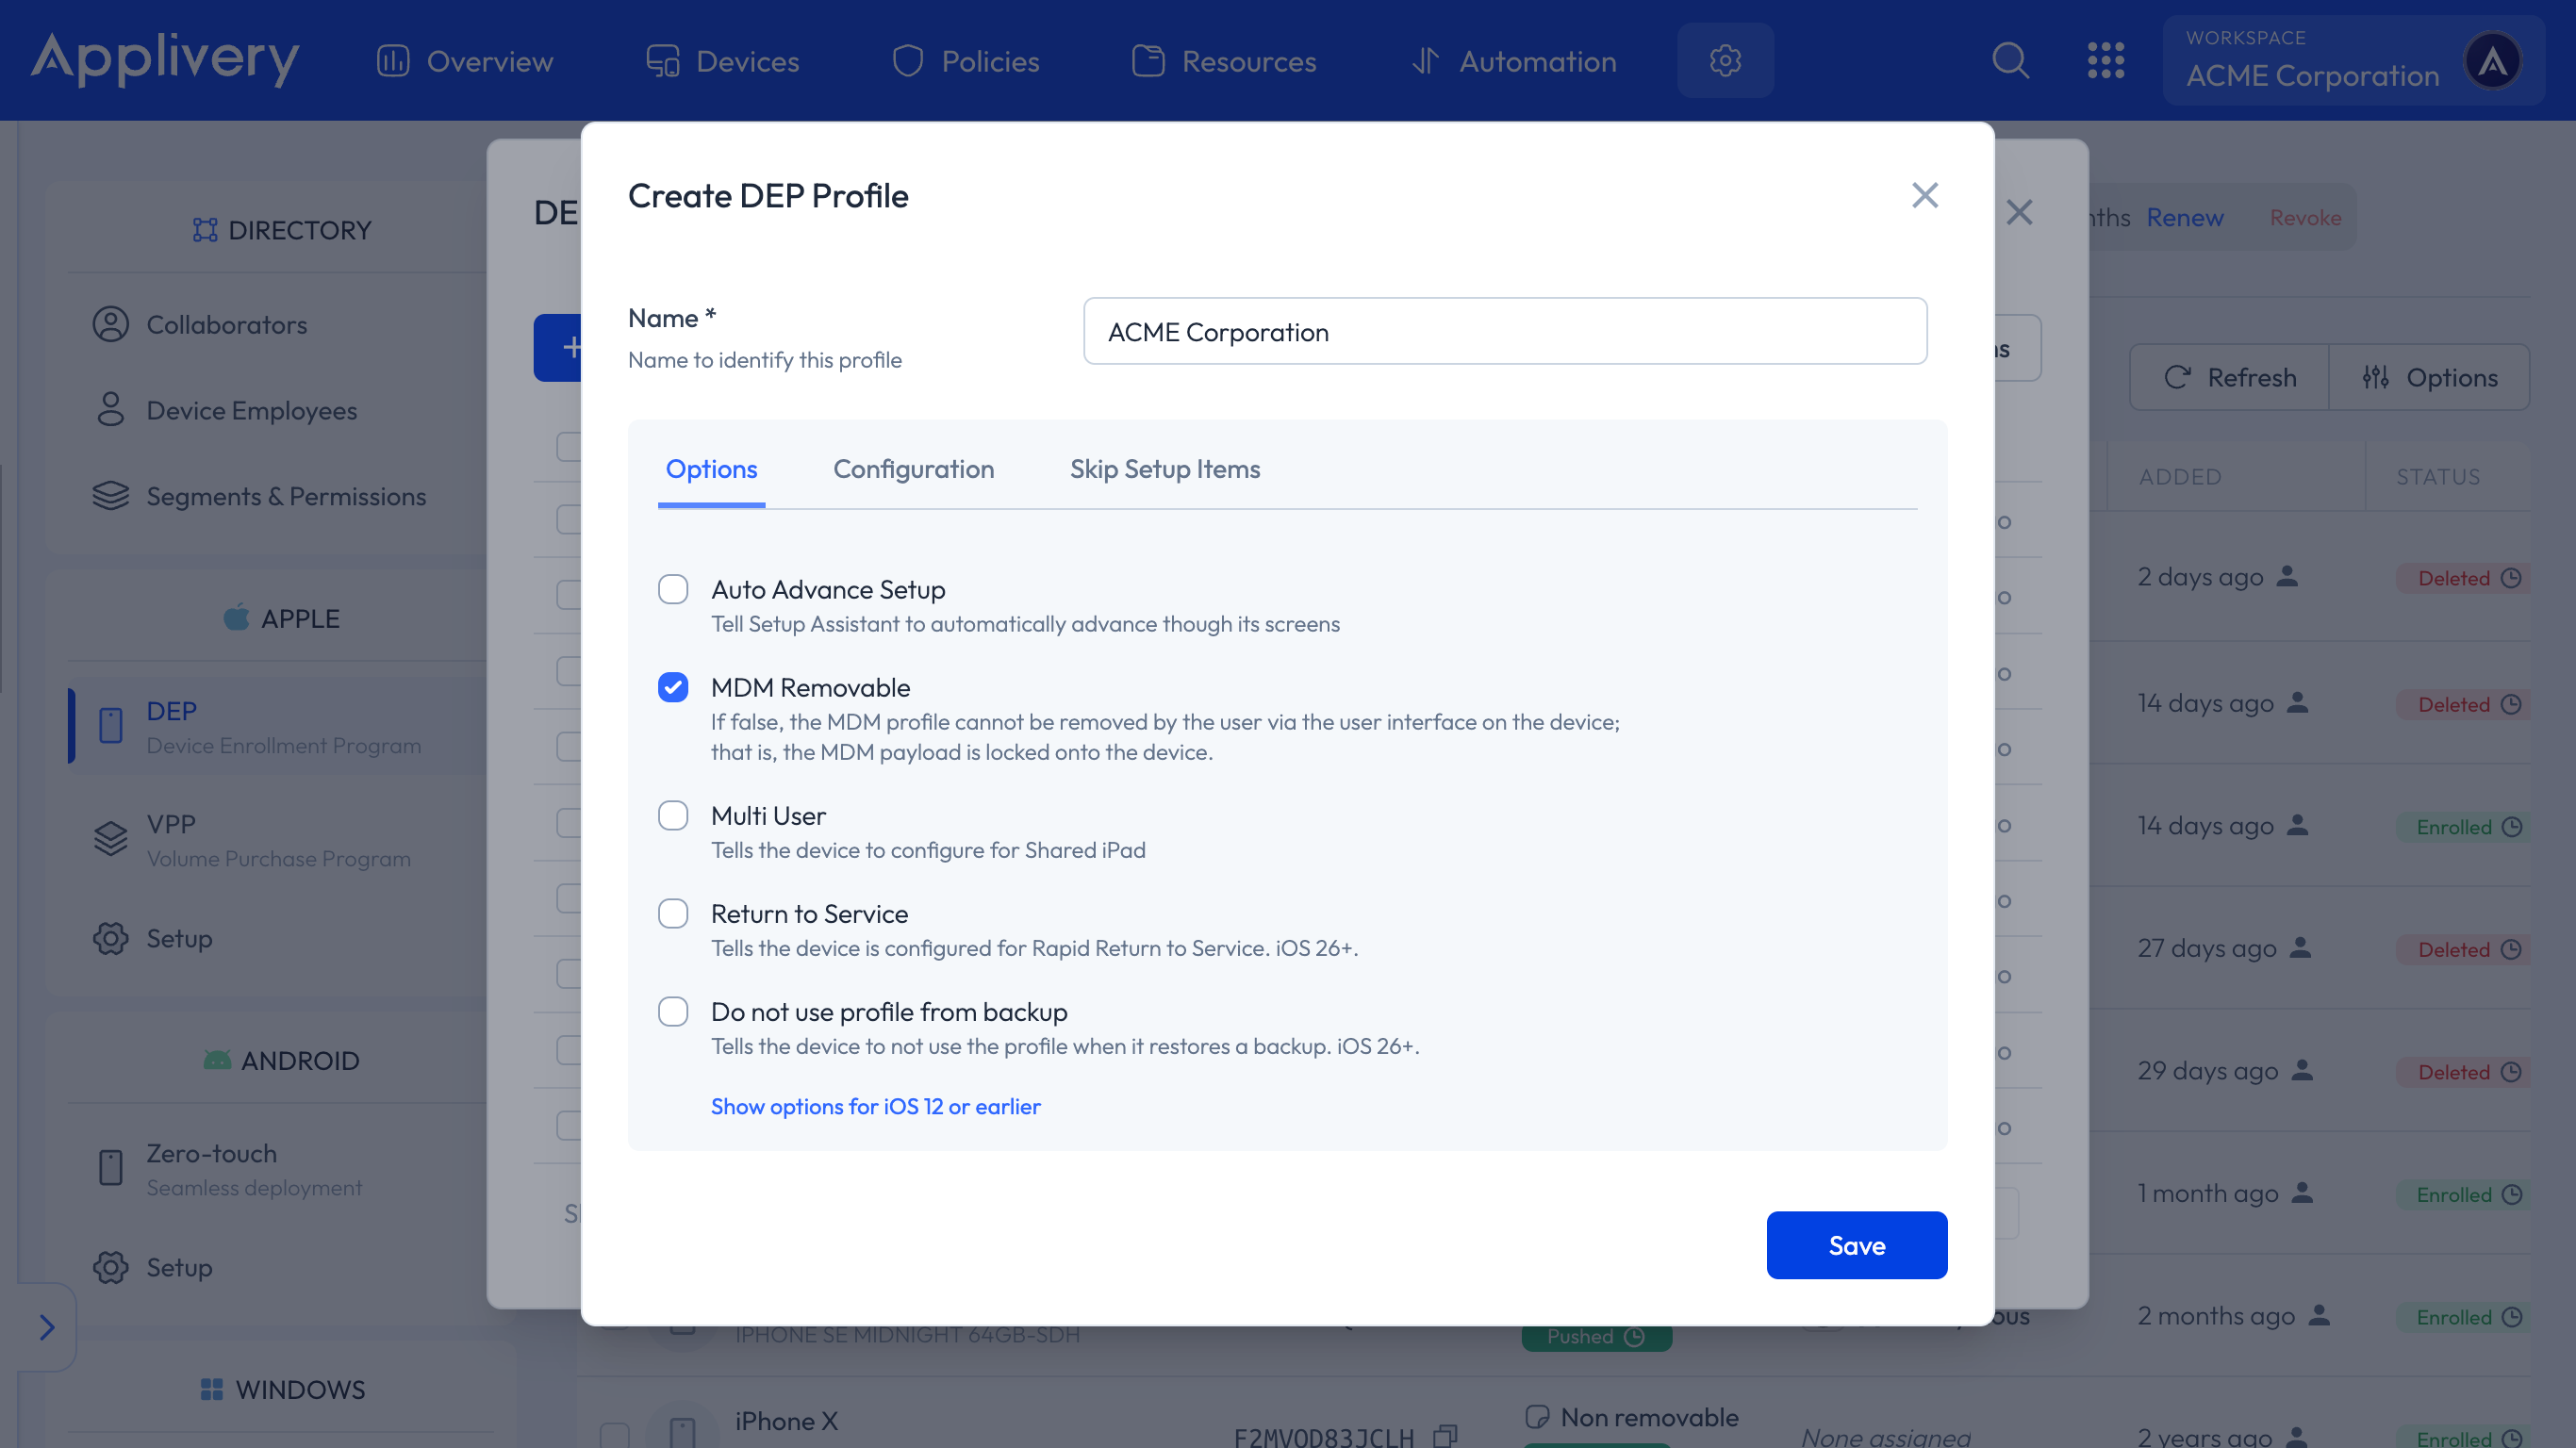
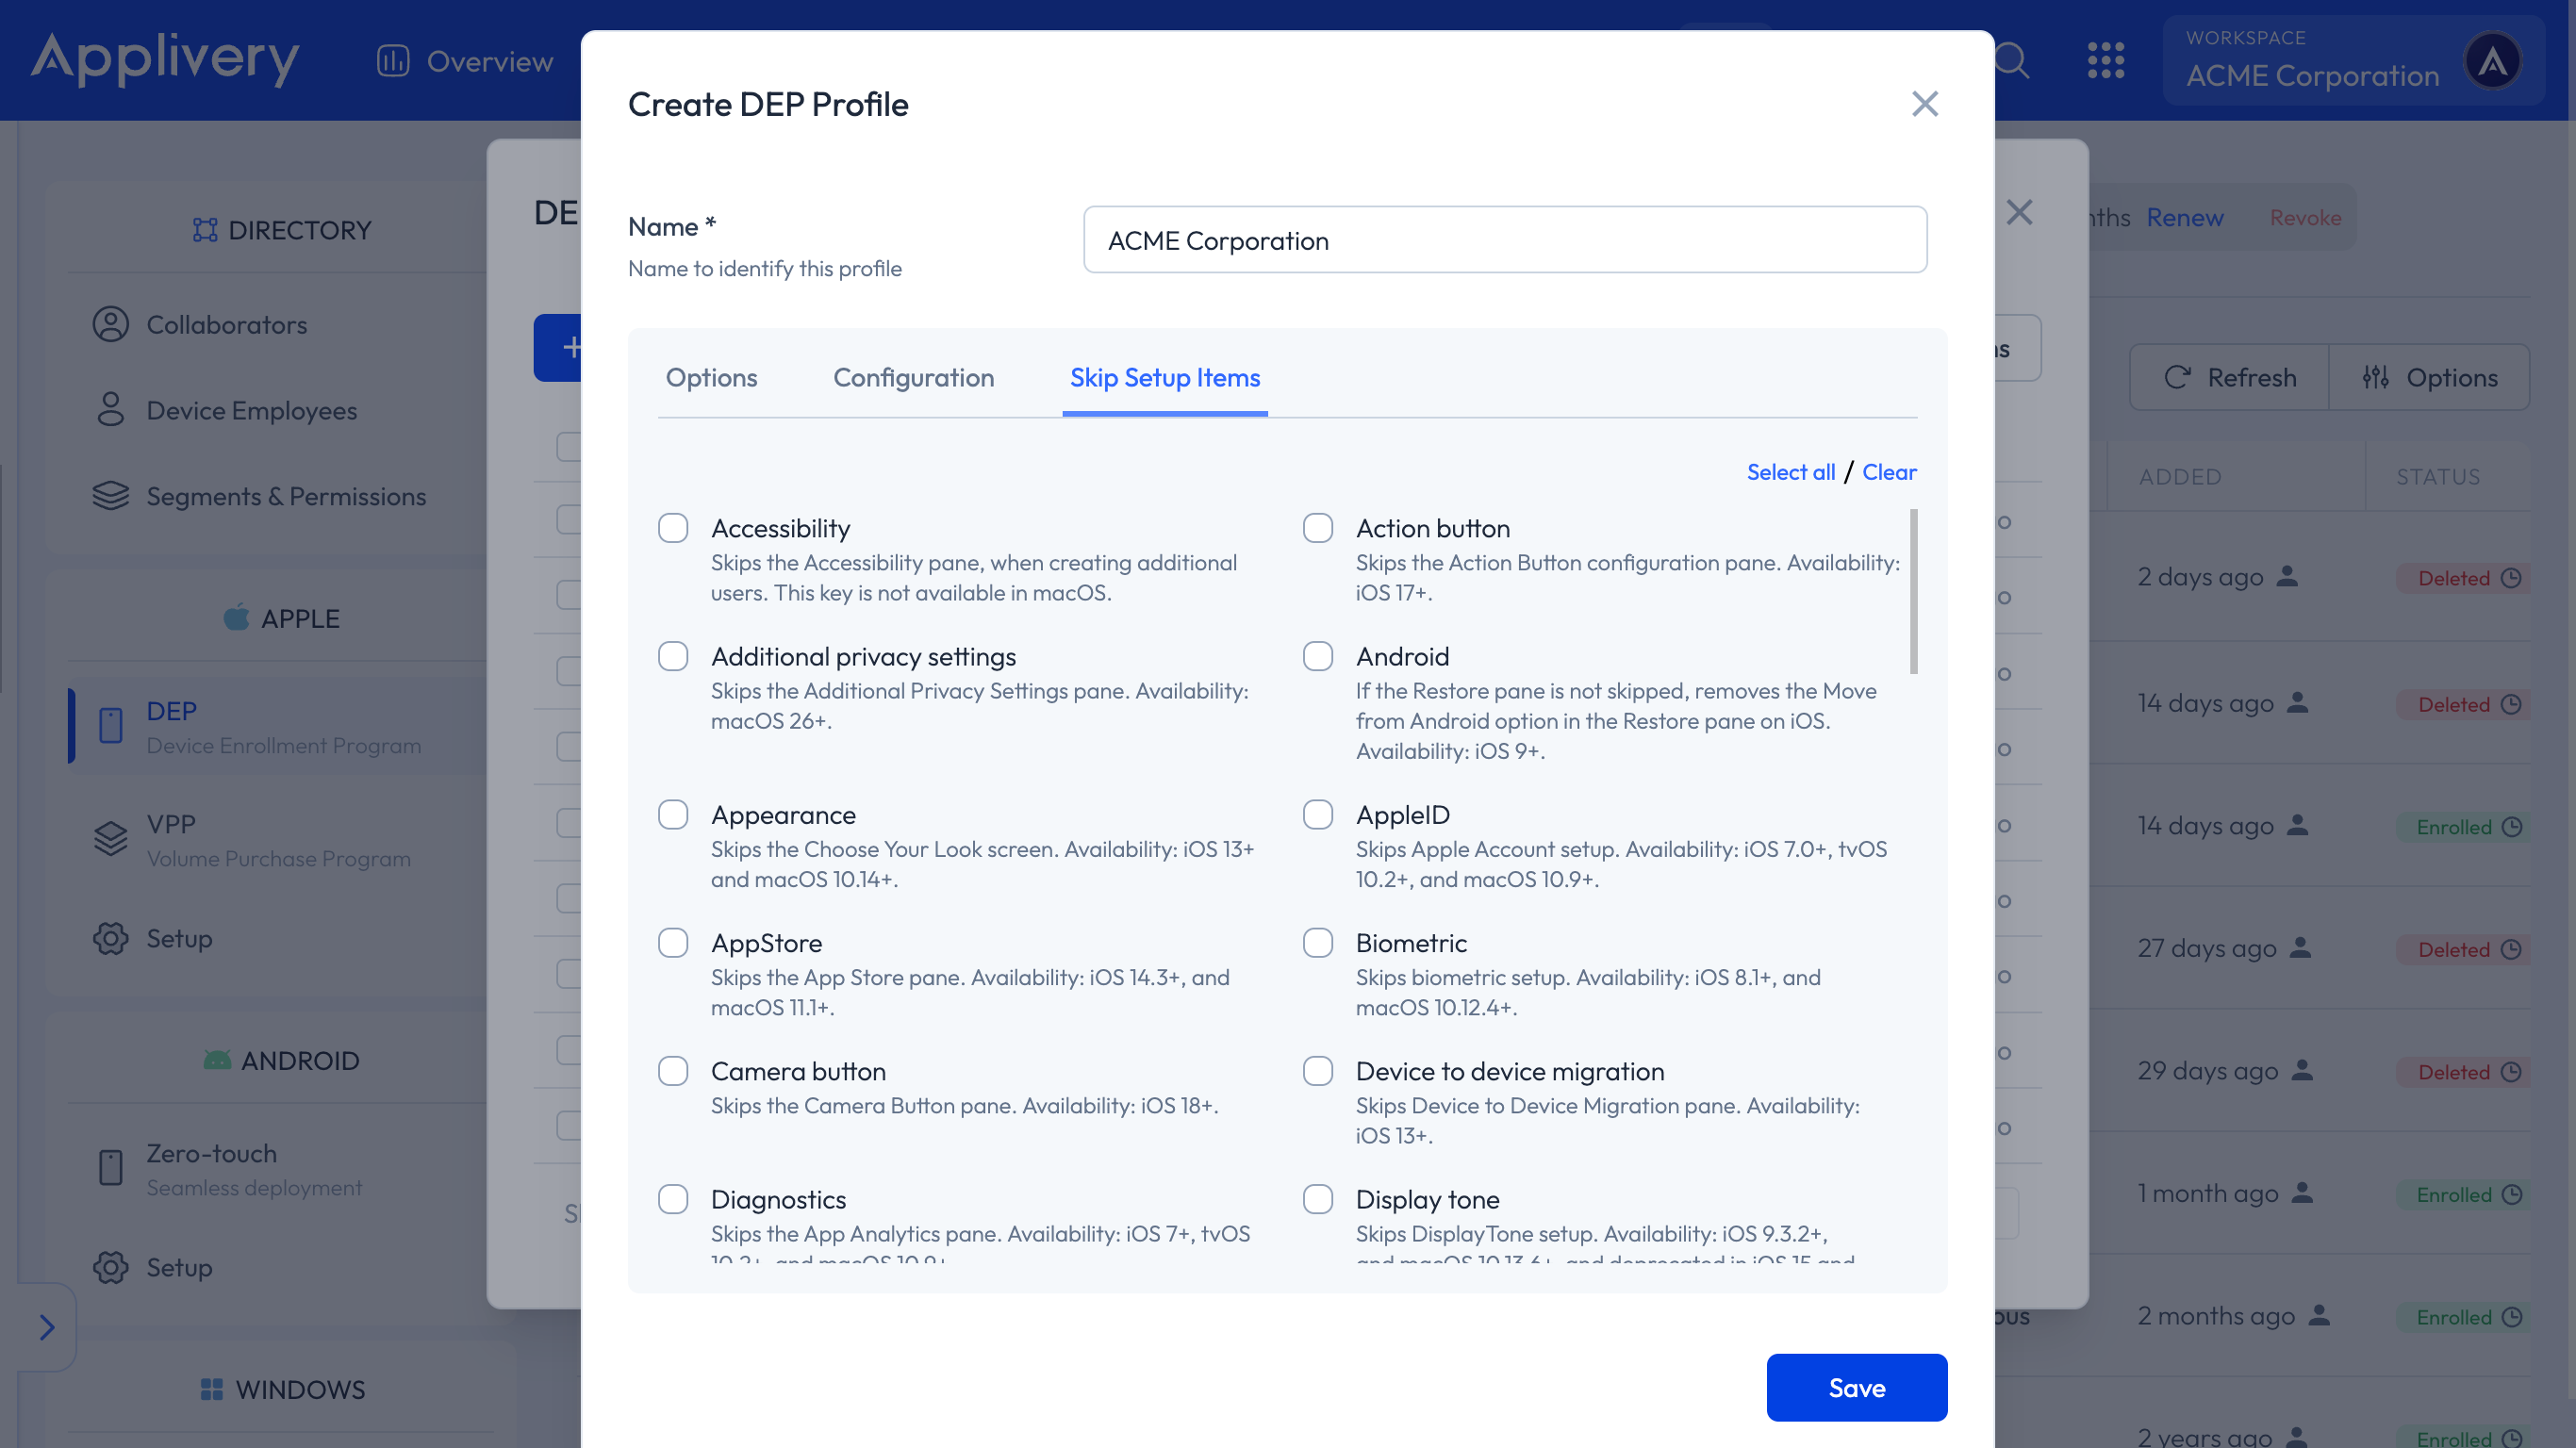
Then click the + Create DEP Profile button. As you create the profile, you can assign it a Name for future reference and select the desired enrollment options.
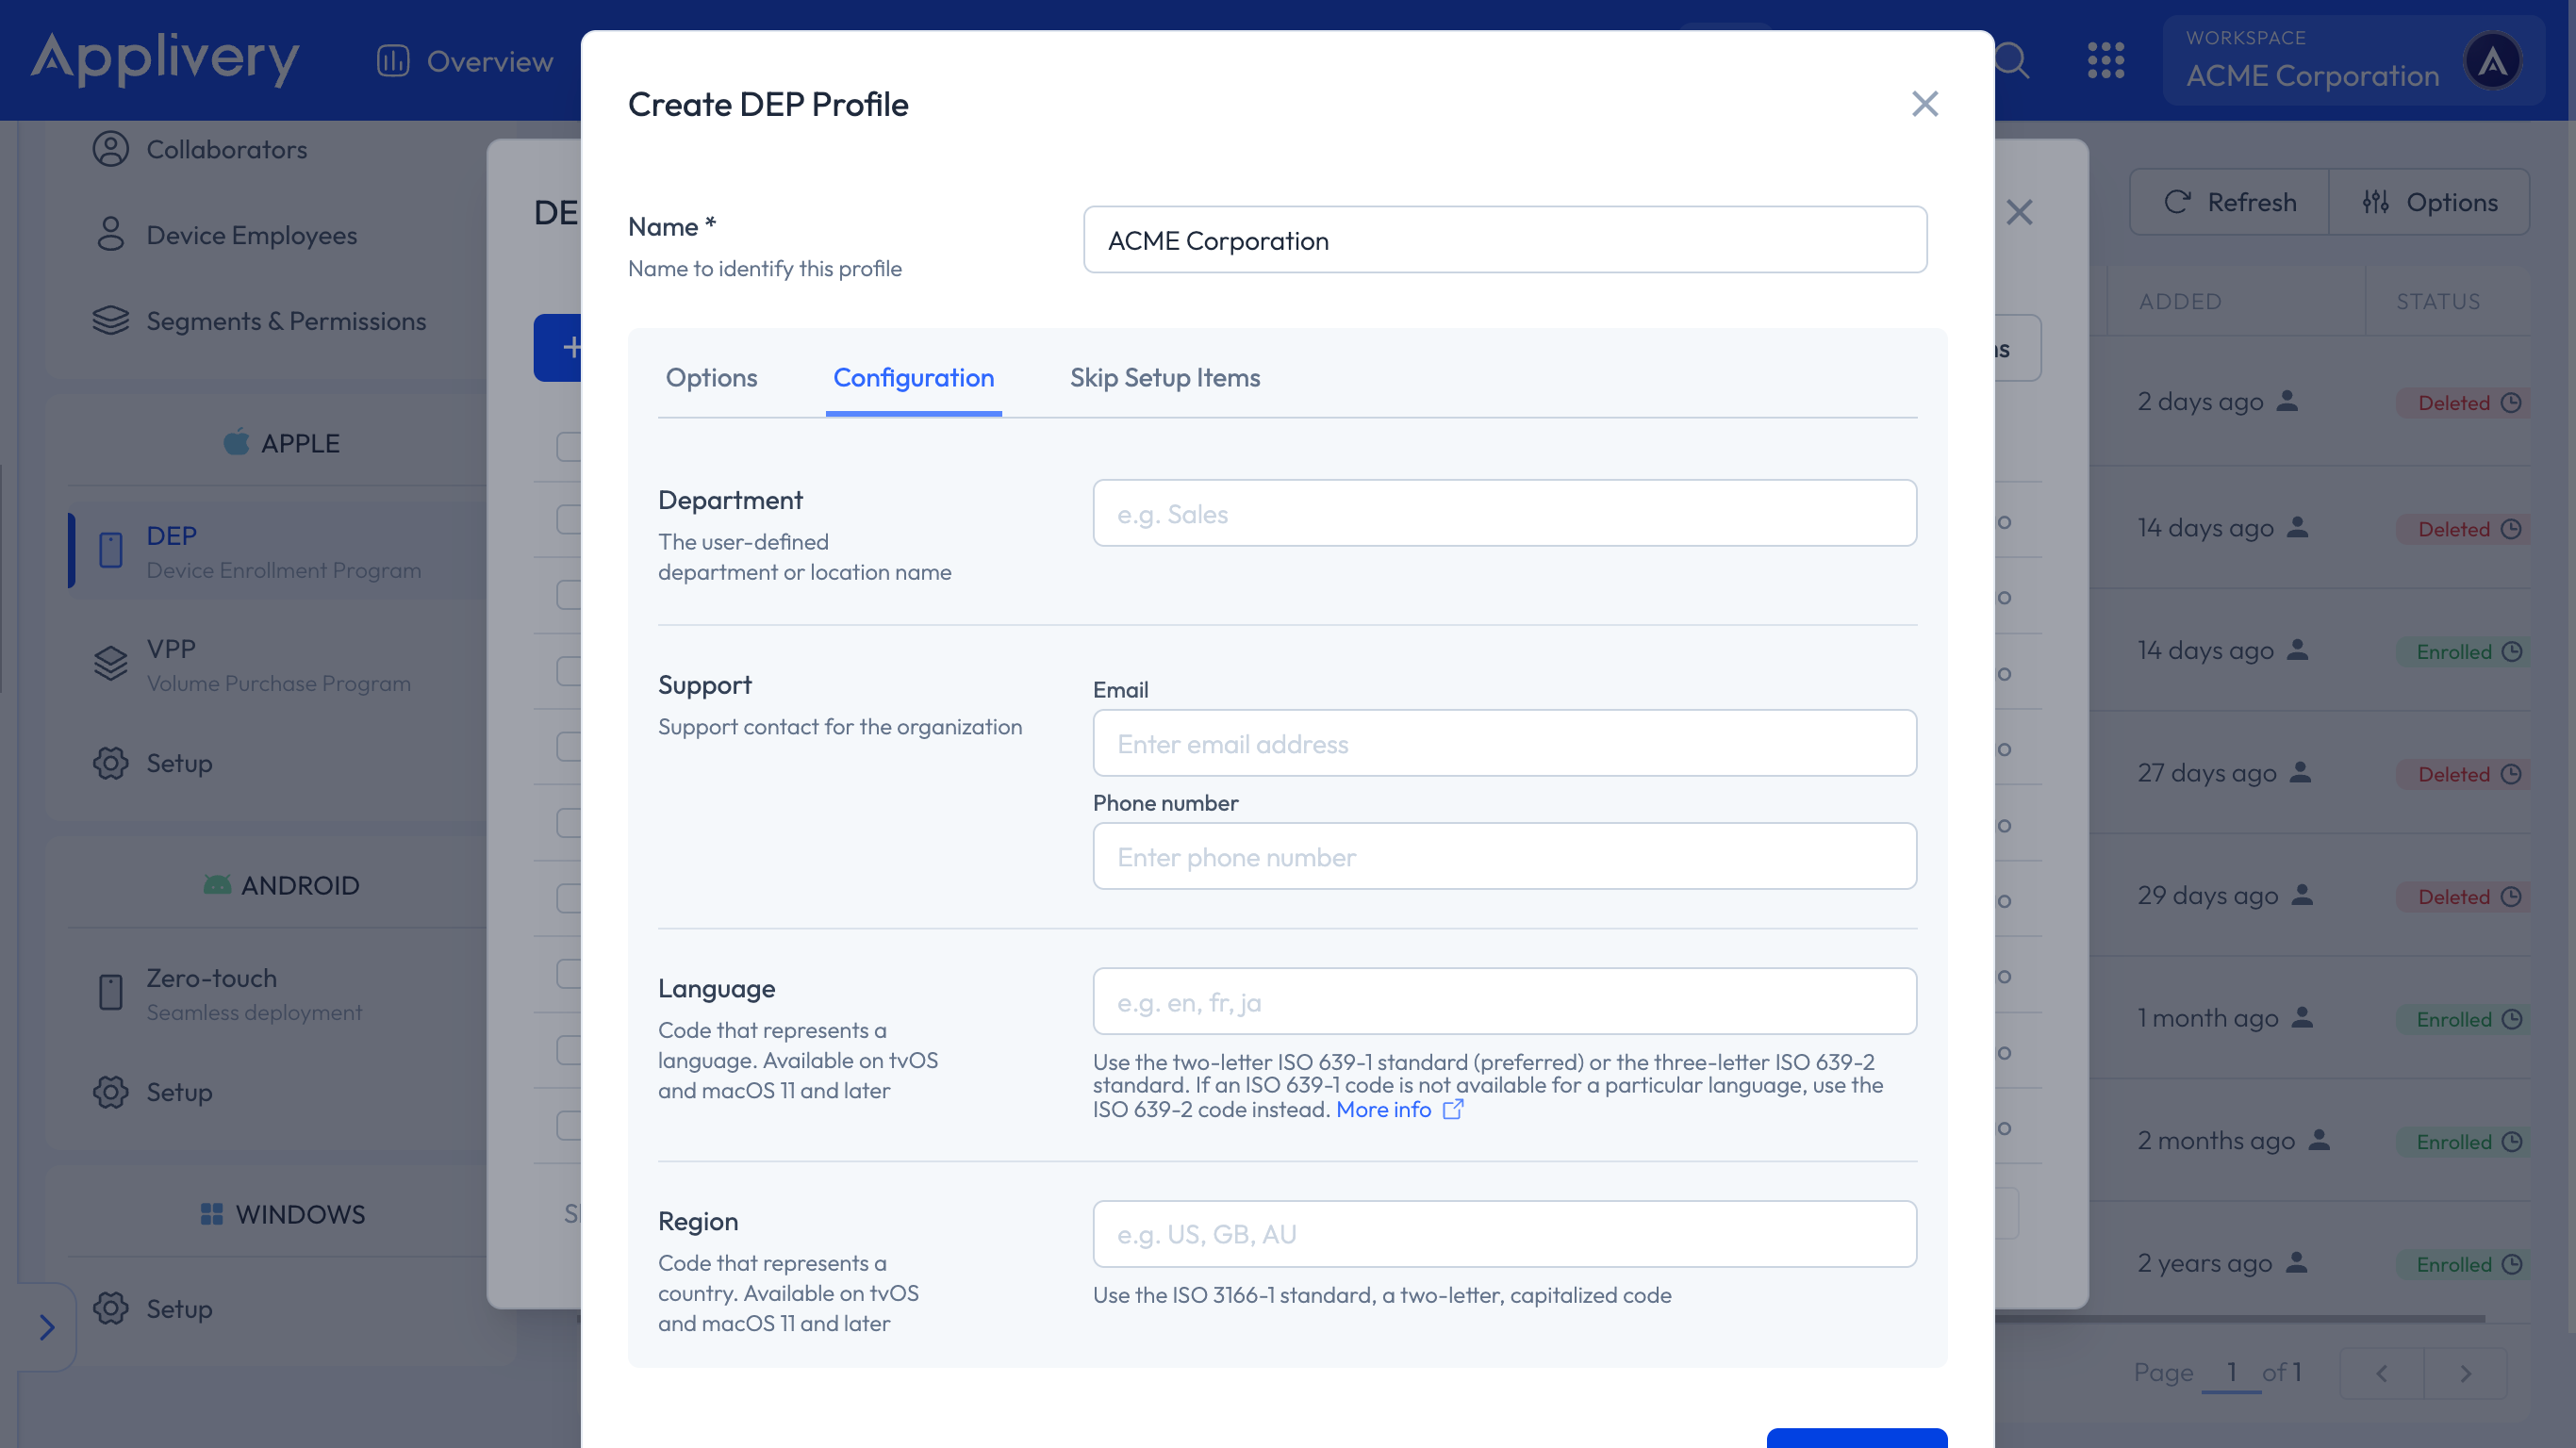
Optionally, you can also specify additional information for the profile, such as the Department, support contact information, language, or region.
Last, you can select the setup steps you want to skip during device provisioning. By default, all of them will be unselected so that the standard setup process is displayed. Once ready, click the Save button to finish.
The new DEP profile will be added to the list and will be ready to be assigned to new Devices.
Now that your Applivery account and Apple Business account are connected, you can Sync them to retrieve all the new Devices that have been added to Apple Business and configure them.
Just click the Sync with Apple Business button to start the syncing process and get the very latest updates from Apple Business.
New Devices will be added to the list below.
Note that the Sync with Apple Business button has been placed here to allow you to manually trigger a syncing process with Apple Business, but this is a process that will be triggered automatically every hour on your behalf.
Now that new Devices are properly synced with Applivery, you can start assigning DEP profiles to those Devices so that they can finally get enrolled into Applivery. Follow these steps:
Under the list of Devices, just click on the Device. A side view will be opened.
Use the Configure button to display the dropdown menu to choose a DEP profile.
Click the Assign button.
Once assigned, the Device will go through the following statuses:
Assigned: The enrollment profile has been assigned to the Device, but not applied to the actual device yet.
Pushed: The enrollment profile has been correctly applied to the Device
Take them into consideration before moving to the next step, since this is an asynchronous process that may take a few minutes depending on Apple’s API.
Now that your Devices have been associated with an Enrollment profile in Applivery, it’s time to start them up:
Turn on your Device for the first time. The Device may ask a few initial setup questions.
Select a Wi-Fi network with internet access, as it is required to complete the Apple DEP check-in process.
Next, the Device will get the DEP profile configuration and will follow the settings you created.
Once the setup process is completed, the Device will appear under the Devices section in the Applivery Dashboard.
If the device was turned on and set up before being added to Apple Business, it will have missed the DEP check-in at first boot. The standard fix is a factory reset: go to Settings > General > Reset and select Erase all content and settings.
For macOS devices, if you need to avoid wiping them, there is an alternative — see Trigger DEP Enrollment on a Mac Already Set Up.