
As businesses grow, so does the need to manage and secure data on Devices. Managing content files on macOS Devices is vital to maintaining productivity and security within an organization.
File management in macOS allows you to upload files defining their location and attributes, assigning them to the system, all users, or the current user. With this configuration, you can distribute books, set up a wallpaper, or deploy certificates.
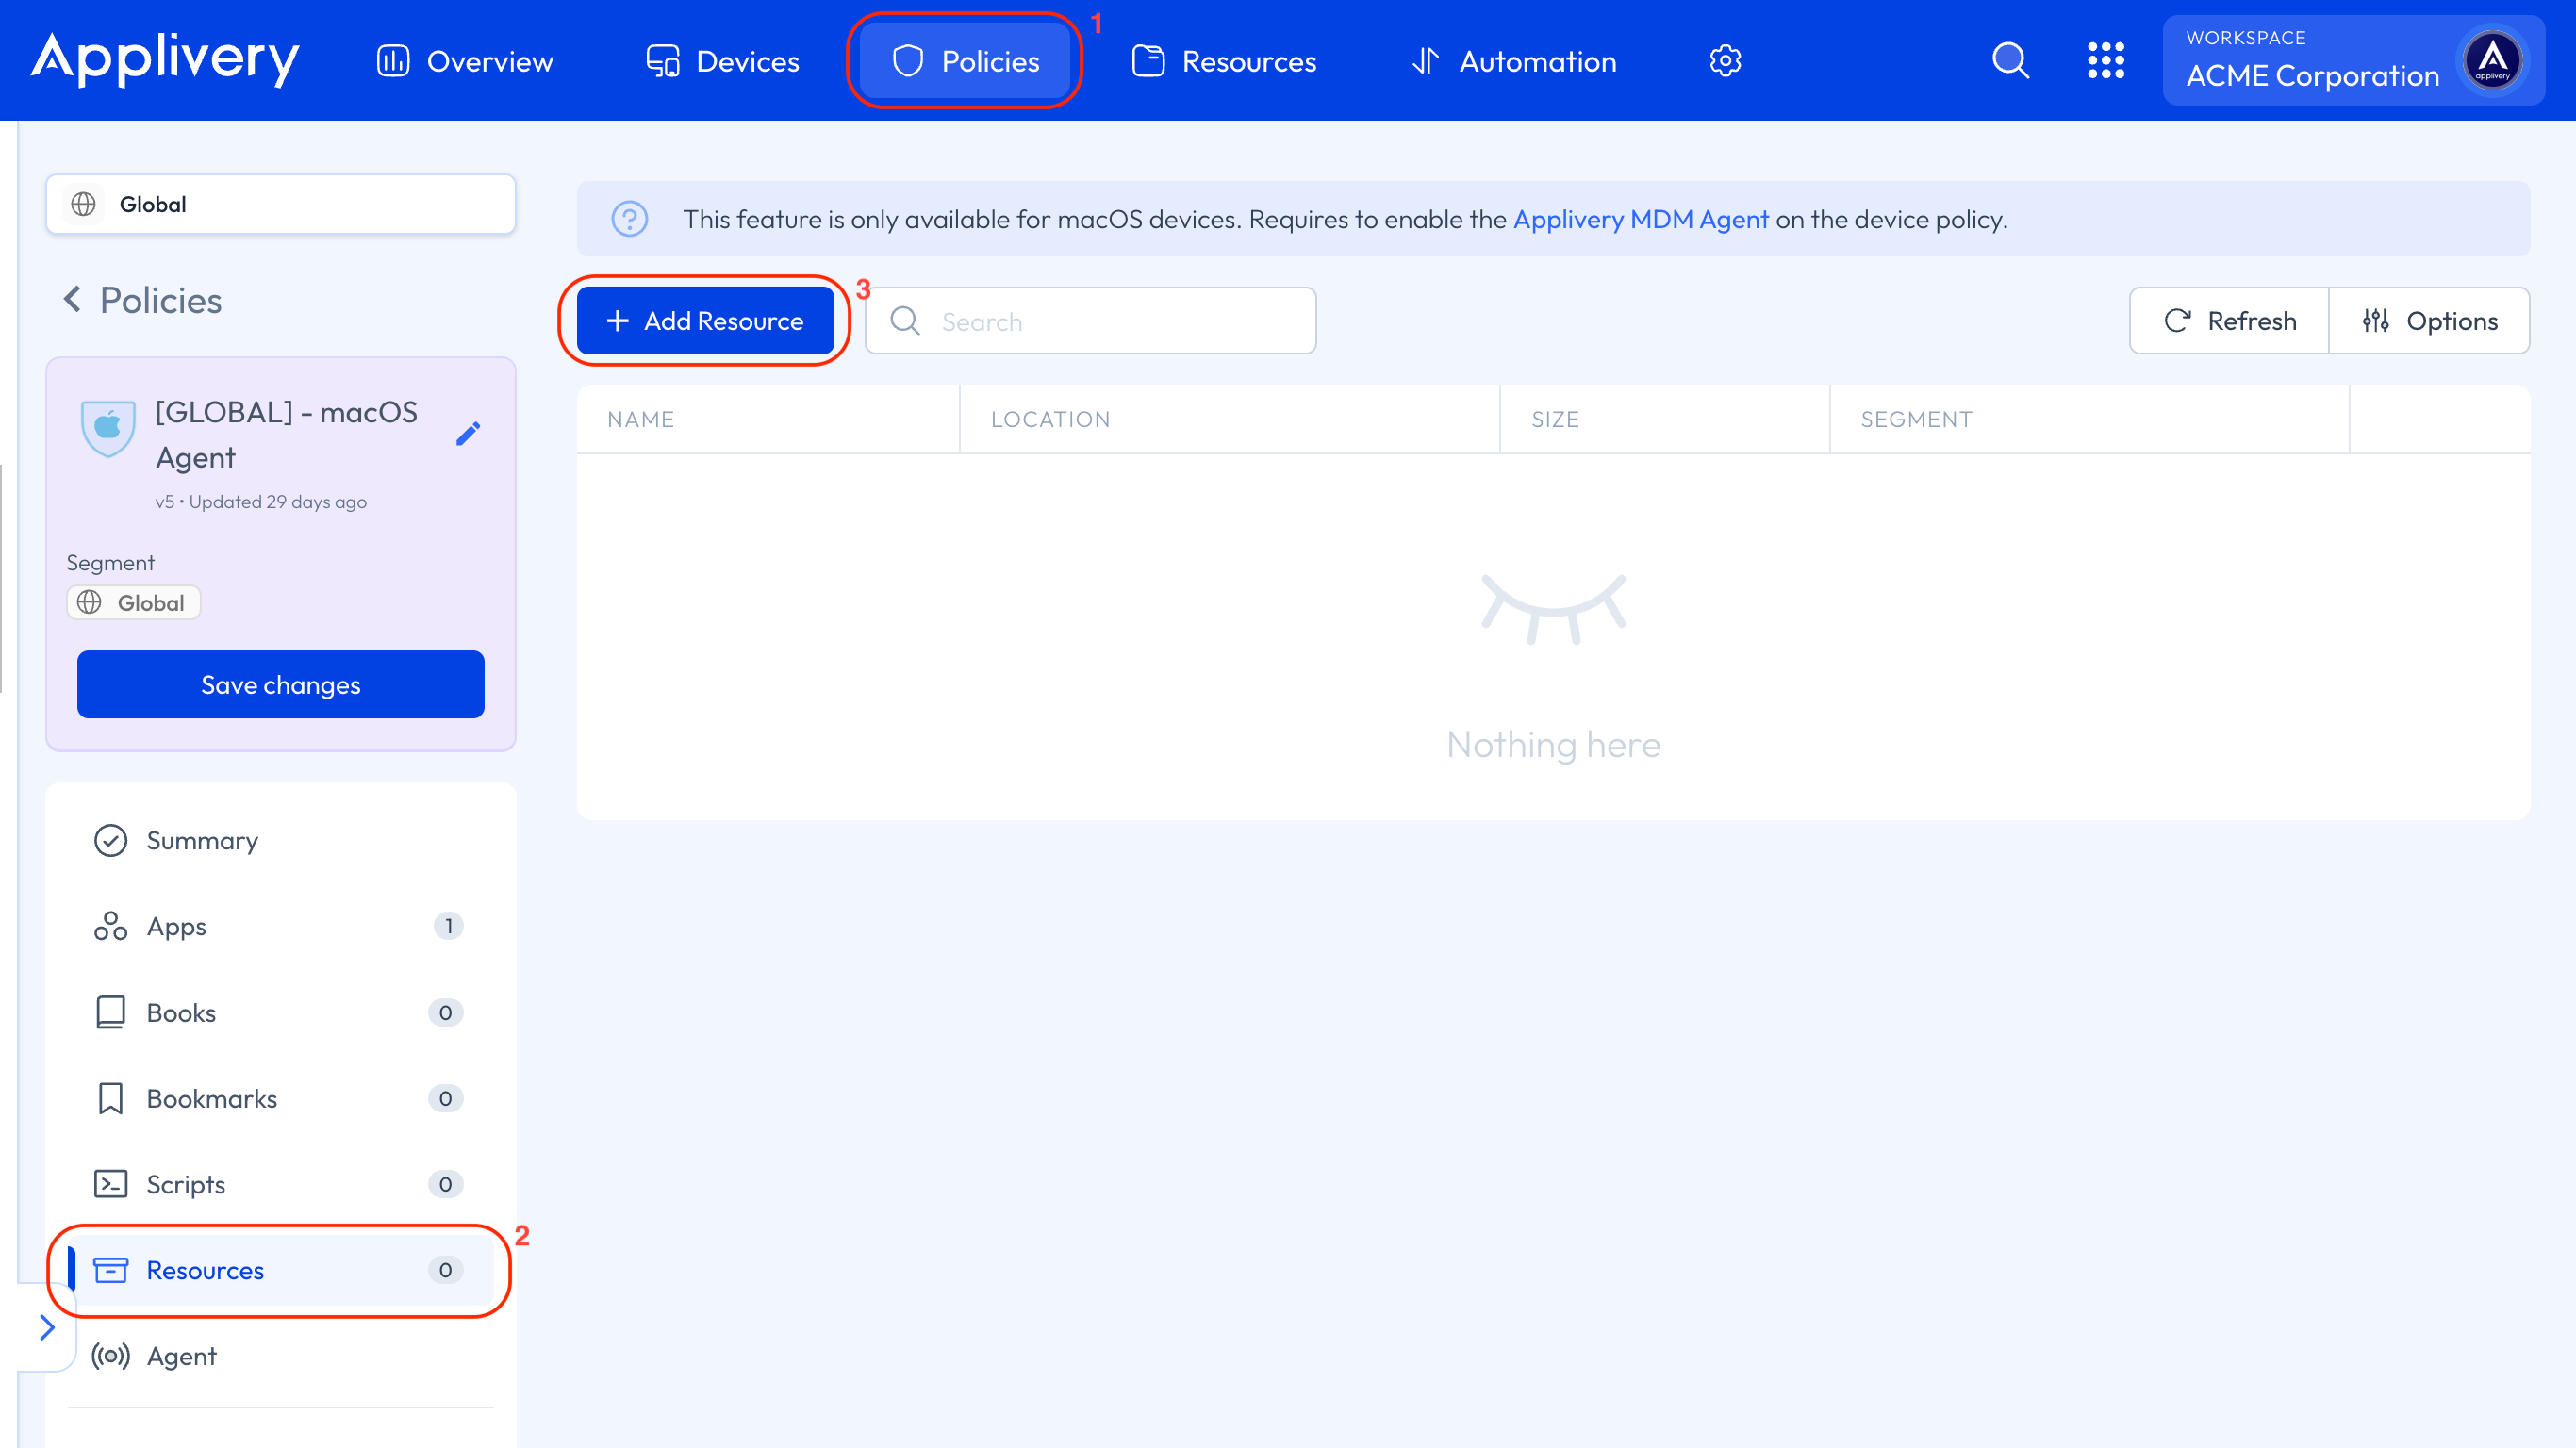
To use this feature, ensure that the Applivery macOS Agent is enabled. You can learn more about it here.
Once in the Applivery Dashboard, go to any of your Policies (1) or create a new one. From the left-hand menu, click on the Resources (2) section, then click the + Add Resource button (3).
A modal view will be displayed, allowing you to select the type of file you want to add to the Policy:
Books: in
.epubor.pdfformat.Certificates: in
.p12,.pemor.derformat.Images: in
.pngor.jpgformat.
You can choose to upload the selected file either from the Resources section or from your Device.
Next, you can select both the Scope and the Location where the file will be saved. Once you choose the scope, in the Location field, you can either use the recommended location or define it yourself:
Primary user: The file will be saved for the current user and will be only accessible to them. The recommended path will be
~/AppliveryAssets.All users: The file will be saved in a shared folder accessible to all users. The recommended path will be
/Users/Shared/AppliveryAssets.System: The file will be stored in a protected path accessible only by root. The recommended path will be
/var/root/AppliveryAssets.
File checks are performed every 10 minutes. If the file is not found, has changed in size, or has different attributes, it will be re-downloaded, overwriting the previous version.