
In certain corporate environments, it may be necessary to restrict access to specific Wi-Fi networks—whether to enhance security, prevent interference from unauthorized networks, or ensure that Devices connect to the correct one. Below is a simple step-by-step guide on how to allow or block access to a particular Wi-Fi network from managed Devices.
Configuring a Wi-Fi Policy
Once in the Applivery Dashboard, navigate to Policies (1).
Choose the specific Android Policy you wish to modify.
From the left-hand menu, click on the Network section.
In the Device Connectivity Management settings, select either Allowlist or Denylist under Wi-Fi SSID Policy Type (2), within the Wi-Fi SSID Policy section.
Allowlist: Only the specified Wi-Fi networks will be allowed.
Denylist: The specified Wi-Fi networks will be blocked.
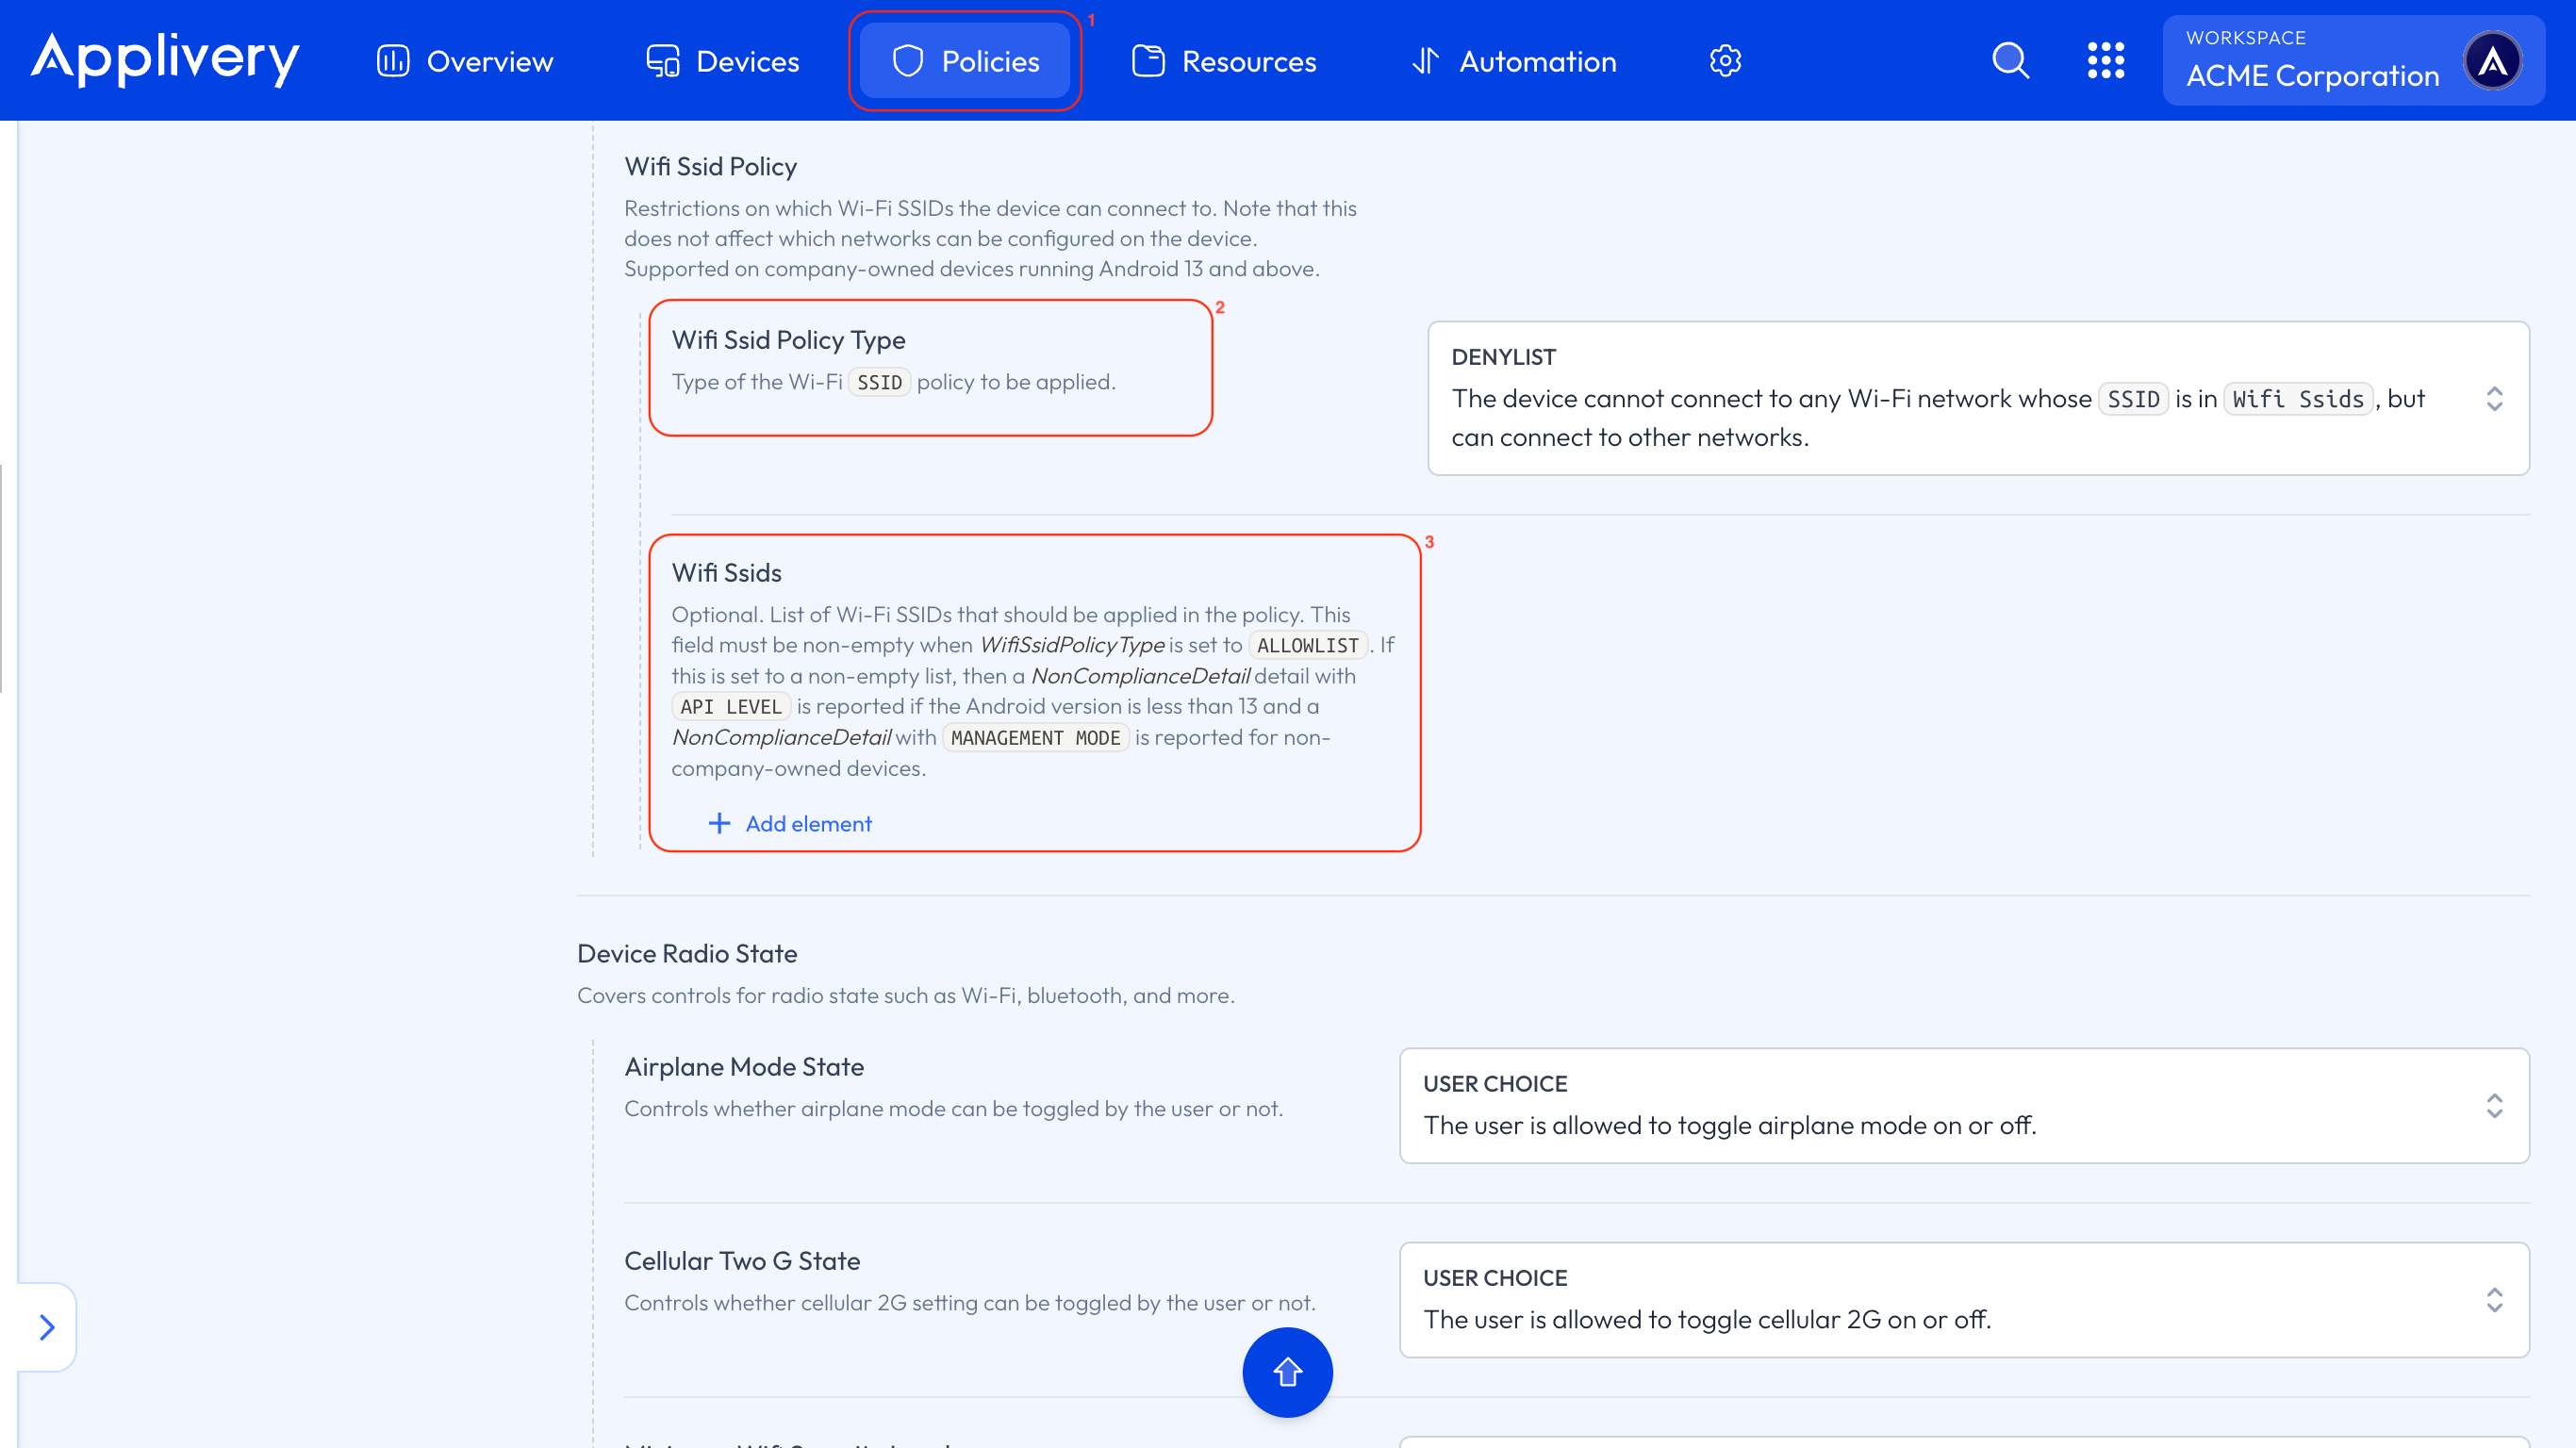
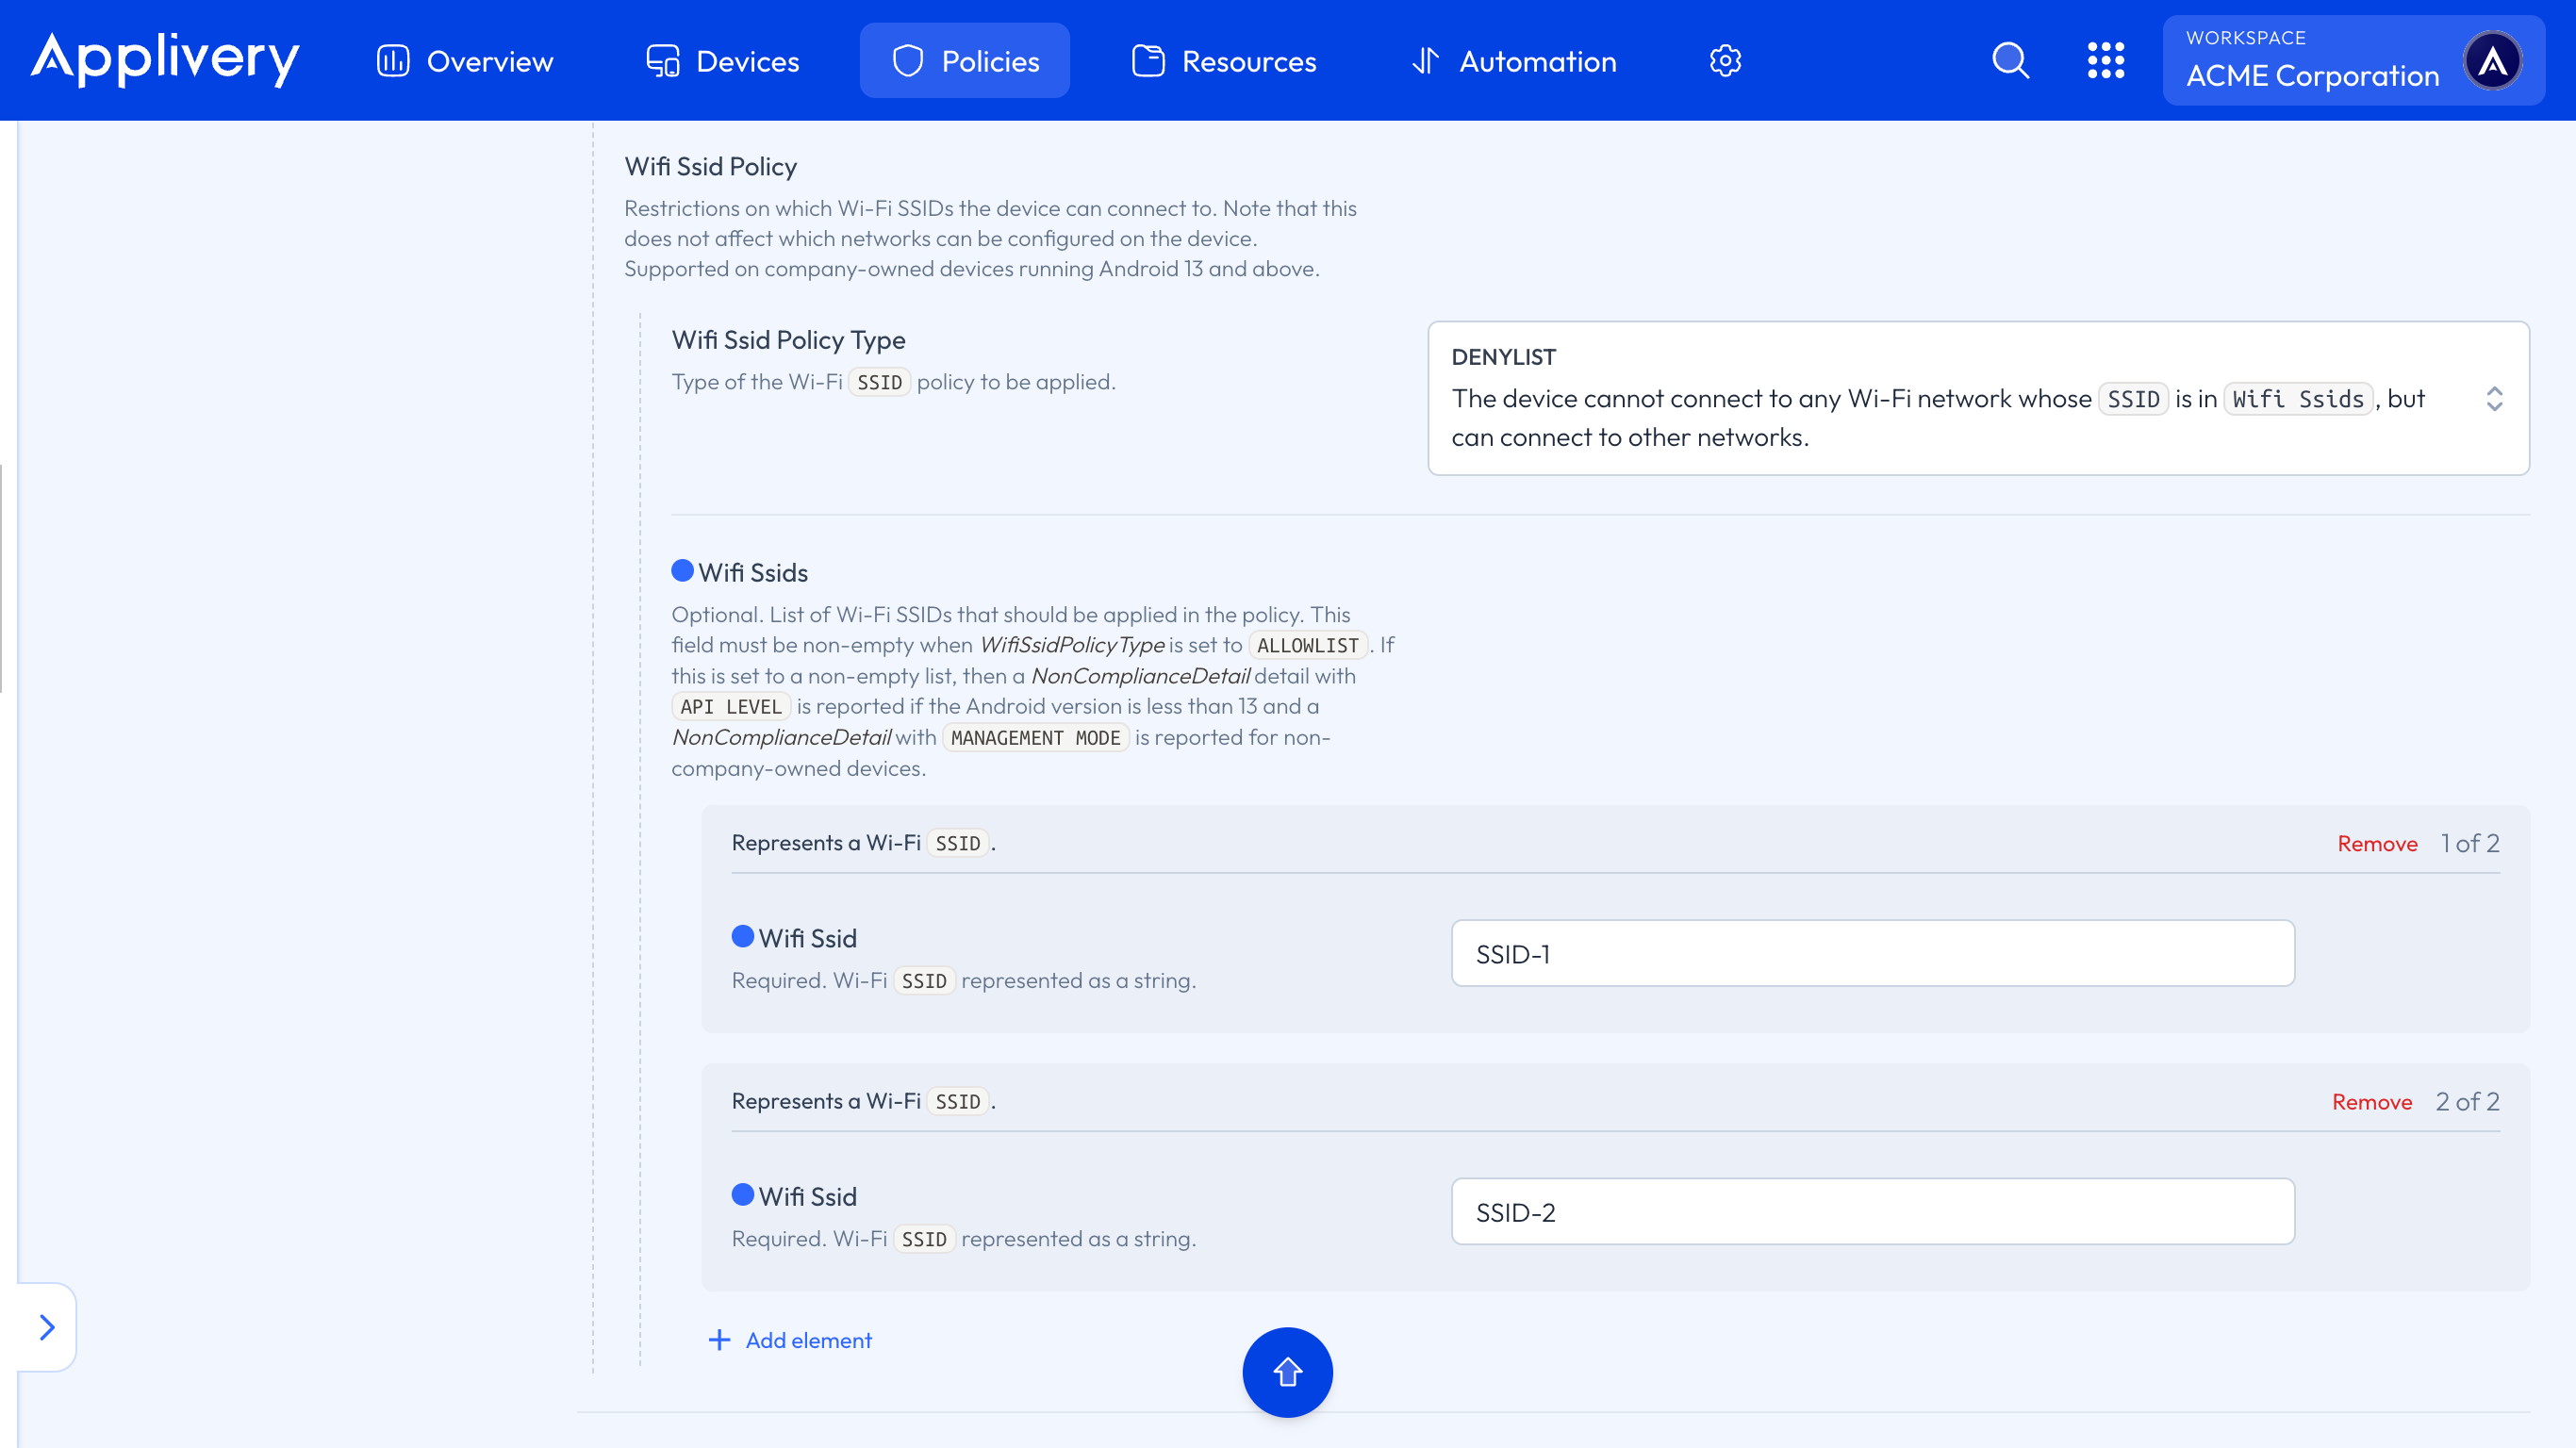
To specify the Wi-Fi network you want to allow or block, click + Add element under the Wi-Fi SSIDs (3) configuration. A form will appear where you can enter the SSID of the specific network. You can add as many SSIDs as needed. Once you’re done, simply save your changes by clicking Save changes in the Policy view.
Restricting access to specific Wi-Fi networks is a simple yet effective way to control device connectivity within your organization. Implementing these rules helps maintain a more secure, stable, and policy-aligned network environment.
Regularly review and update your Wi-Fi Policies to ensure they remain effective and aligned with your organization's security needs.