
Escrow Buddy is a lightweight utility designed to securely escrow FileVault Recovery Keys to your MDM. When managing macOS Devices with Applivery, using Escrow Buddy simplifies compliance with disk encryption Policies and ensures Recovery Keys are safely stored and accessible when needed.
Requirements
Before deploying Escrow Buddy on macOS Devices through Applivery, make sure you have the following:
Escrow Buddy package (
.pkg).Post-installation script.
FileVault is enabled in the Device policy.
FileVault Recovery Key Rotation Script.
1 Applivery license for App Distribution.
Escrow Budy configuration
To deploy Escrow Buddy using Applivery, you will need to upload the compressed App package (.zip) to your App Distribution section and configure it with a post-installation script.
First, download the Escrow Buddy .pkg installer from the GitHub repo.
Once downloaded, compress the .pkg file by right-clicking on it and selecting Compress, which will generate a .zip file.
Next, log in to the Applivery Dashboard and navigate to the App Distribution section. From there, follow the steps outlined in our documentation:
To ensure that the FileVault Recovery Key is properly escrowed and remains valid over time, we recommend using a monitoring script that runs regularly, such as once every 7 days. This script, when applied to the Policy and scheduled accordingly, will help detect any issues with the current FileVault Key. If a problem is identified, the script will automatically remove the invalid key, generate a new one, and escrow it securely into the Device inventory within Applivery.
Next, head to the Device Management section and select Resources (1). Select the Scripts (2) section from the left-hand menu and click on the + Create Script button (3).
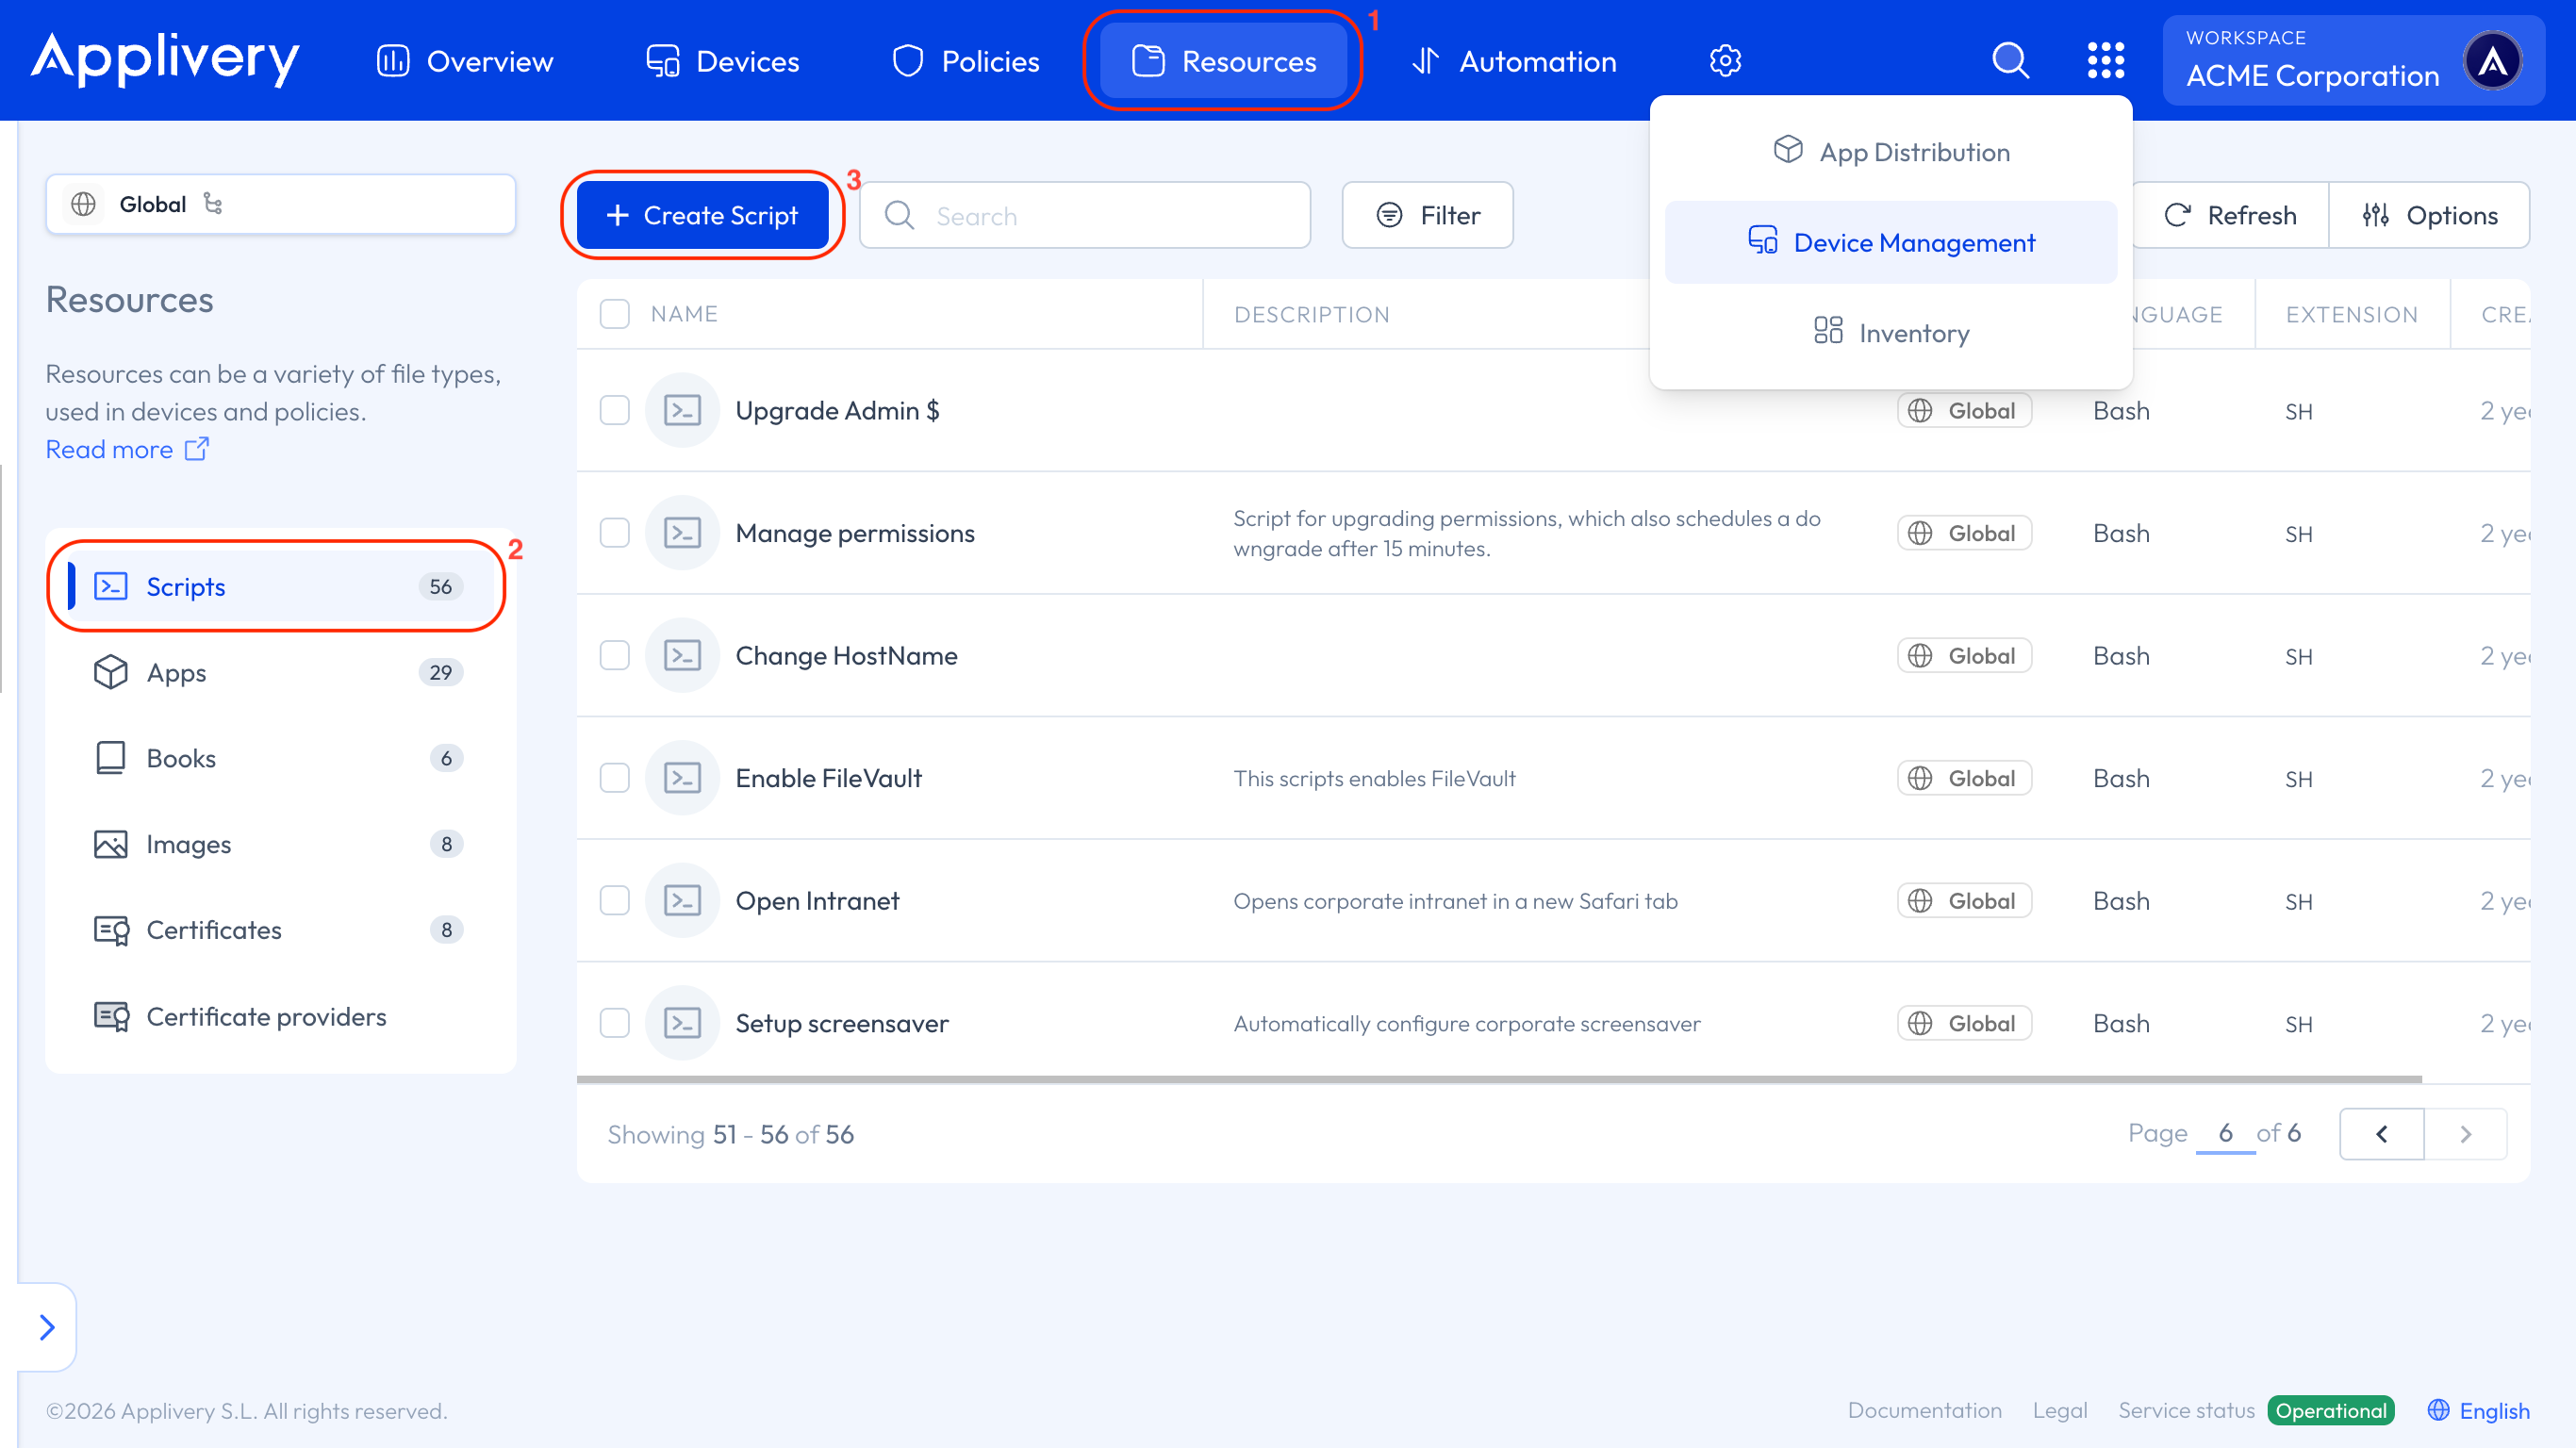
Copy the provided bash script, and Create (4) it as Rotation FileVault Key Script.
#!/bin/bash
defaults write /Library/Preferences/com.netflix.Escrow-Buddy.plist GenerateNewKey -bool true
exit 0
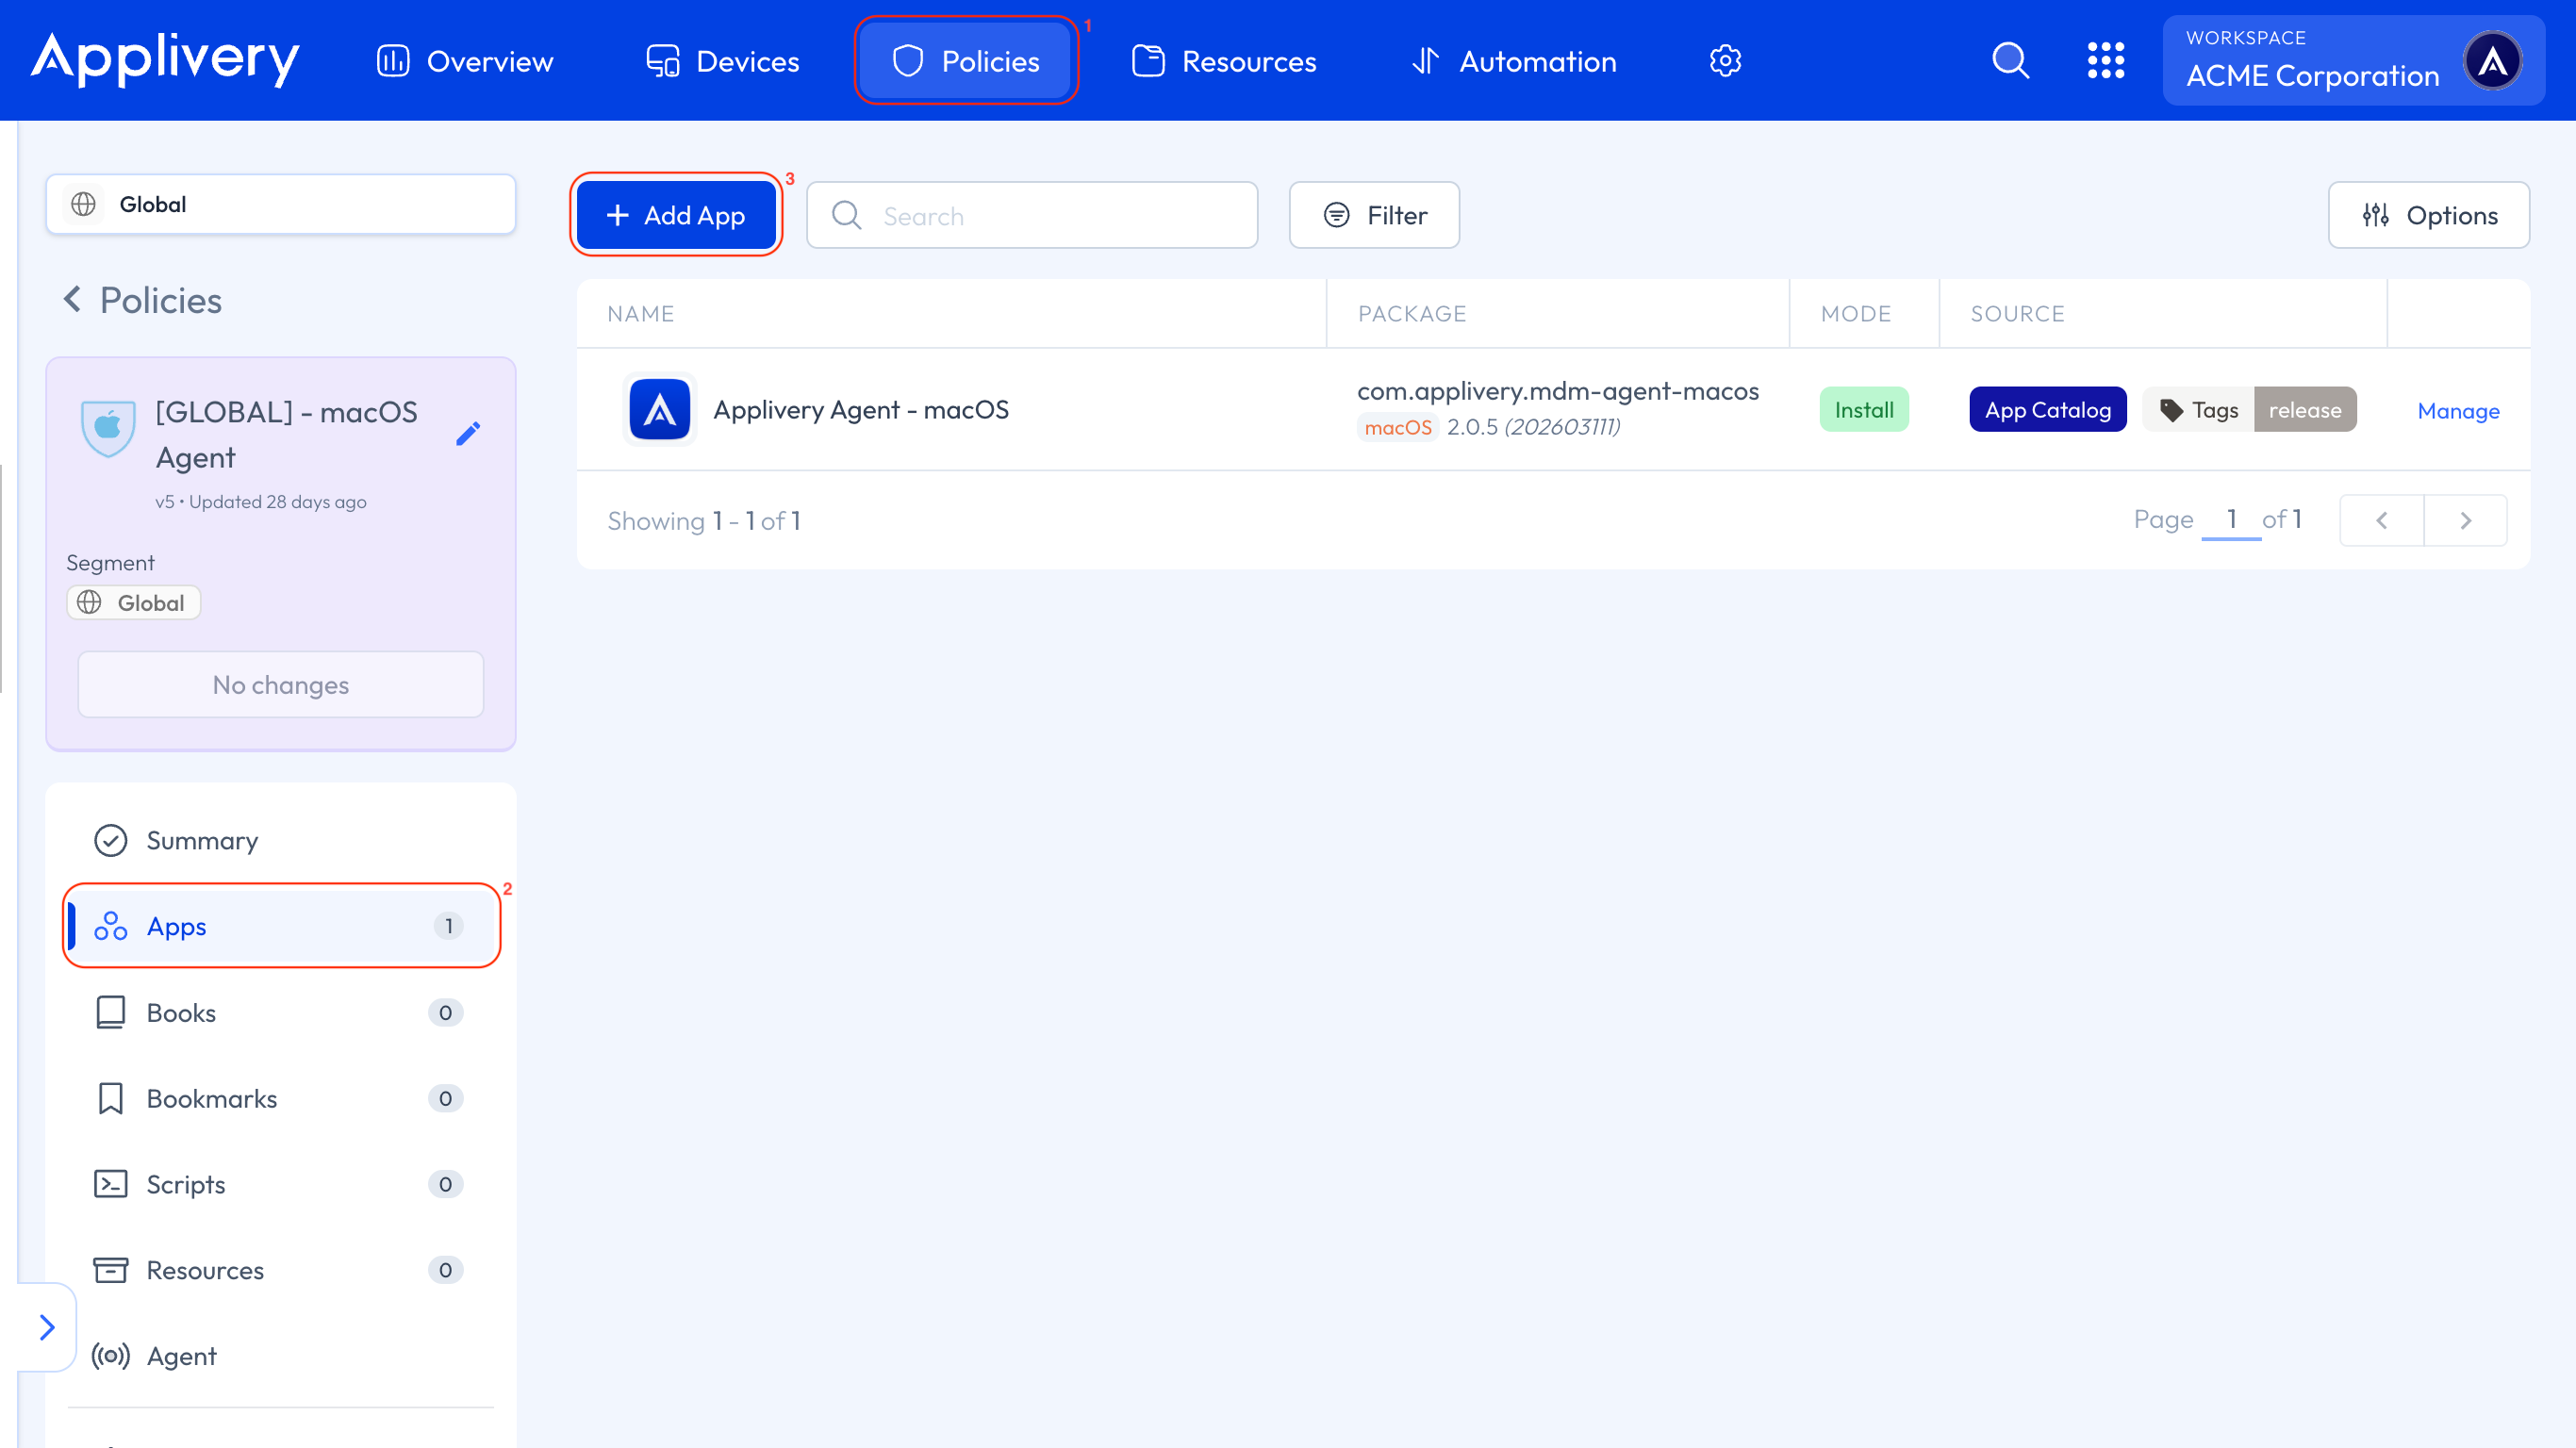
Now, head to any of your Policies (1) or create a new one. From the left-hand menu, select the Apps (2) section and click the + Add App (3) button.
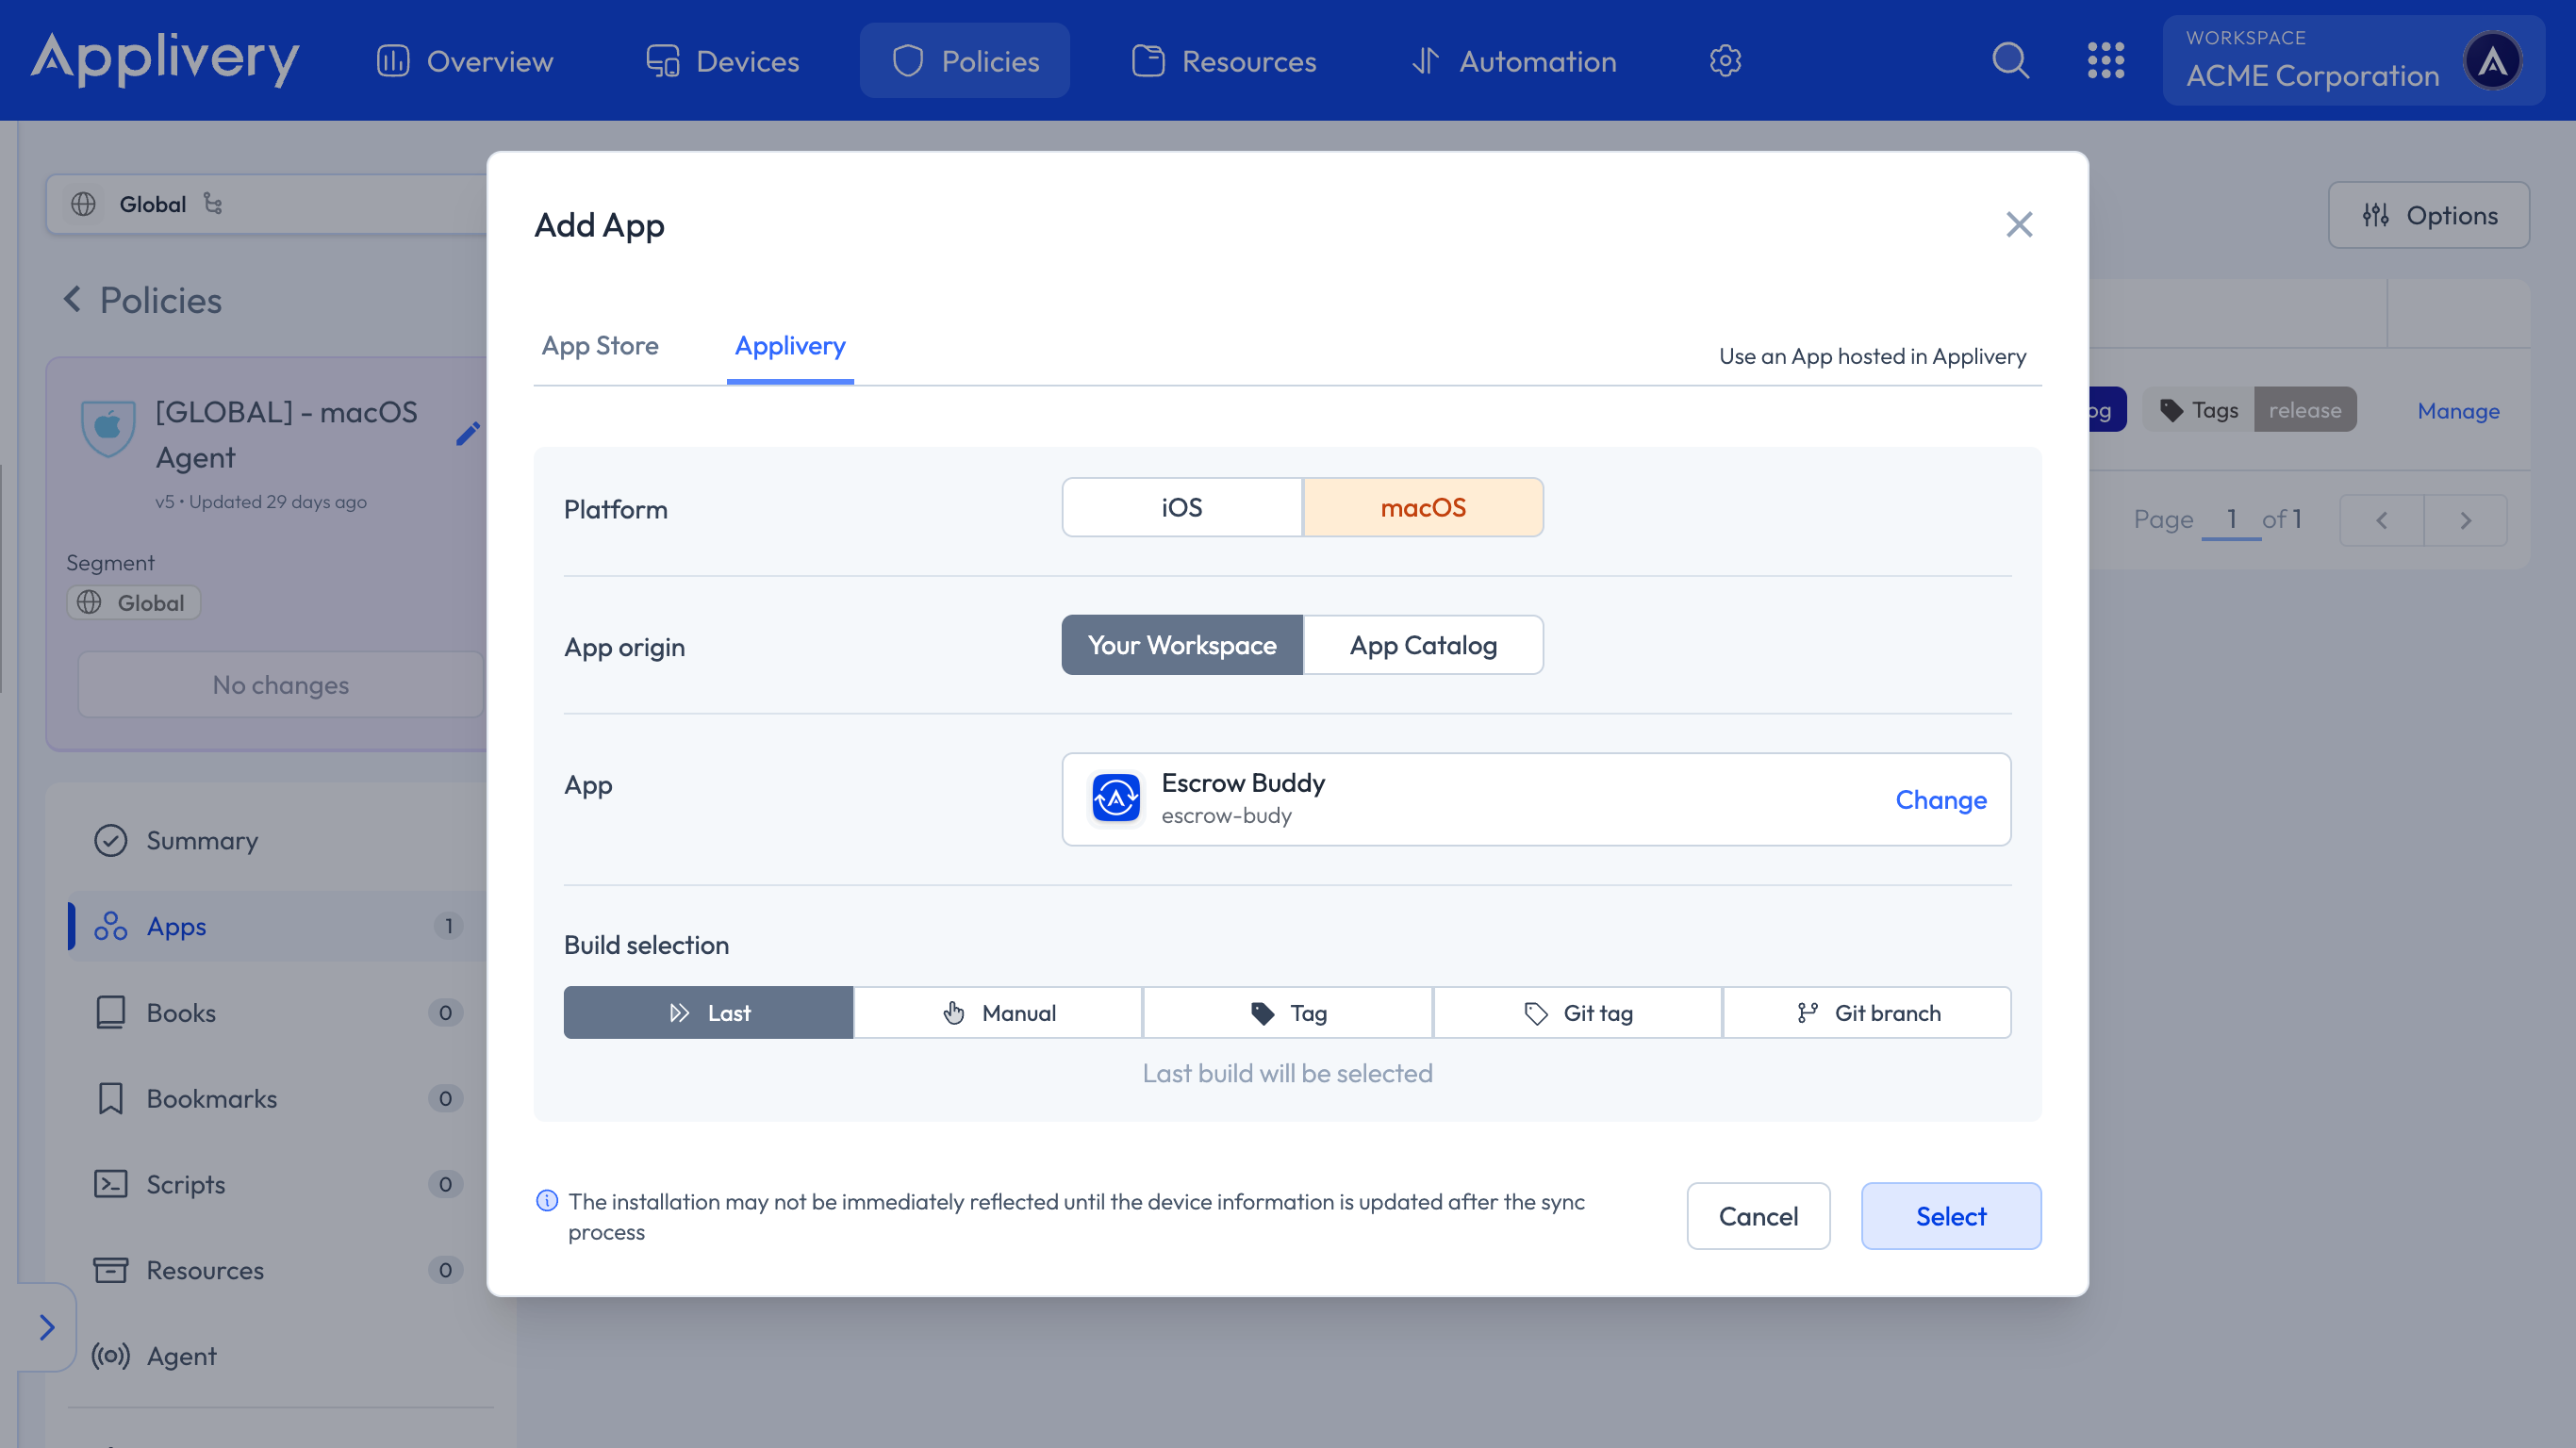
In the modal view, navigate to the Applivery tab. Set the platform to macOS, choose Your Workspace as the App origin, and search for the Escrow Buddy App you previously created. For the Build selection, choose Last to ensure the latest version is always deployed.
Continue to the next step and select Force Install as the install mode. In the Configuration section, select Post-install and paste your script.

#!/bin/bash

APP_NAME="Escrow Buddy.app"
APP_BUNDLE_ID="com.netflix.Escrow-Buddy"
APP_PATH="/Applications/${APP_NAME}"

# Create the app structure with appropriate permissions
sudo mkdir -p "${APP_PATH}/Contents/MacOS"
sudo mkdir -p "${APP_PATH}/Contents/Resources"

# Verify if the structure was created successfully
if [[ ! -d "${APP_PATH}/Contents/MacOS" ]]; then
    echo "Error: Could not create the application structure"
    exit 1
fi

# Create Info.plist file
sudo tee "${APP_PATH}/Contents/Info.plist" > /dev/null <


	CFBundleIdentifier
	${APP_BUNDLE_ID}
	CFBundleName
	Escrow Buddy
	CFBundleVersion
	1.0.0
	CFBundleShortVersionString
	1.0.0
	CFBundleExecutable
	EscrowSecurityAlert
EOF

# Create an empty executable with appropriate permissions
sudo touch "${APP_PATH}/Contents/MacOS/${APP_NAME}"
sudo chmod +x "${APP_PATH}/Contents/MacOS/${APP_NAME}"

# Verify that the app exists
ls -ld "${APP_PATH}"
Next, we need to configure the Policy to enable FileVault on the Devices. To do this, follow the steps outlined in our documentation under the Recovery Key Management – Auto section.
Once FileVault is properly enabled, it’s important to add the Rotation FileVault Key Script to ensure that any invalid or missing FileVault recovery keys are automatically detected and remediated. This guarantees that Applivery always retains a valid, escrowed key for each Device.
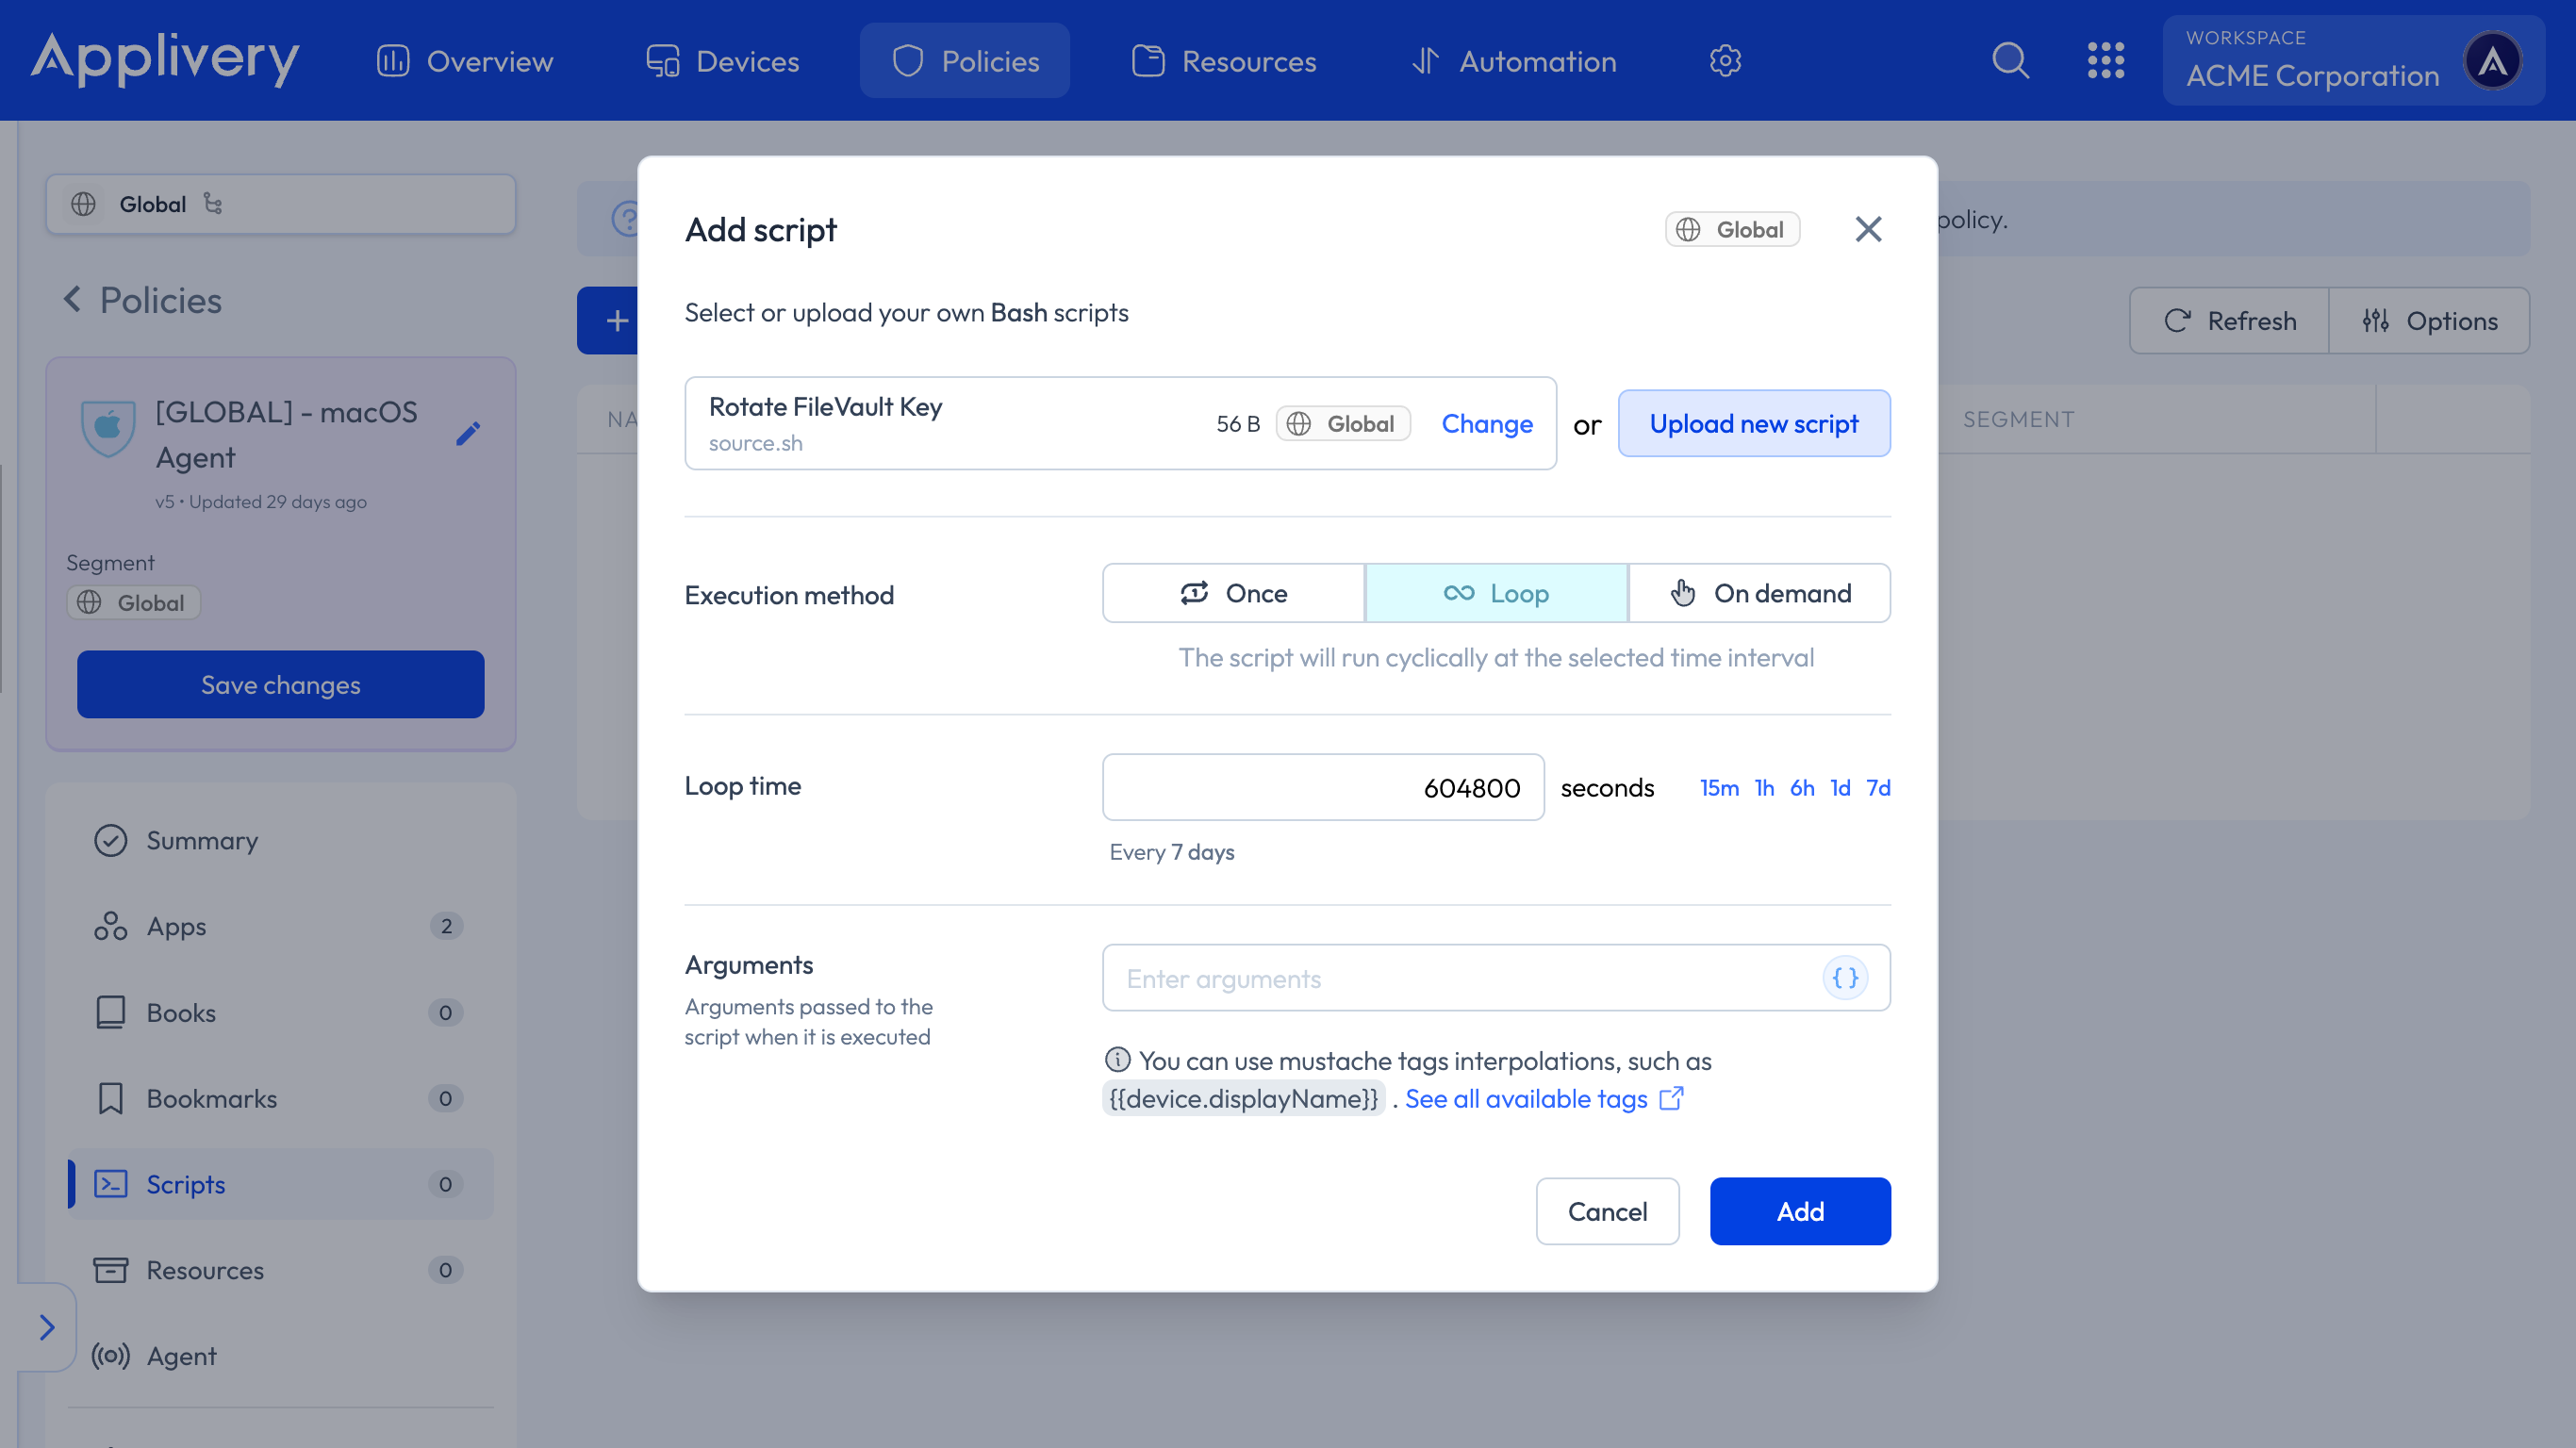
To add the script, navigate to Scripts from the left-hand menu and click on the + Add Script button. Then search for and select the Rotation FileVault Key Script that was previously uploaded to the Resources section. For the Execution method, we recommend choosing Loop and setting the repetition interval according to your organizational needs (e.g., every 7 days).
Finally, click Add to include the script in the Policy and Save changes to deploy it..