
This article will guide you through the process of Web Clip creation and how Applivery’s support streamlines and automates the task of generating shortcuts to websites on Apple Devices.
Web Clips can be added to the Home Screen of both iPhone and iPad Devices, as well as to Mac computers for individual users, offering swift access to favorite web pages or links.
To learn more about this topic, you can find additional information here.
Create and configure Web Clips
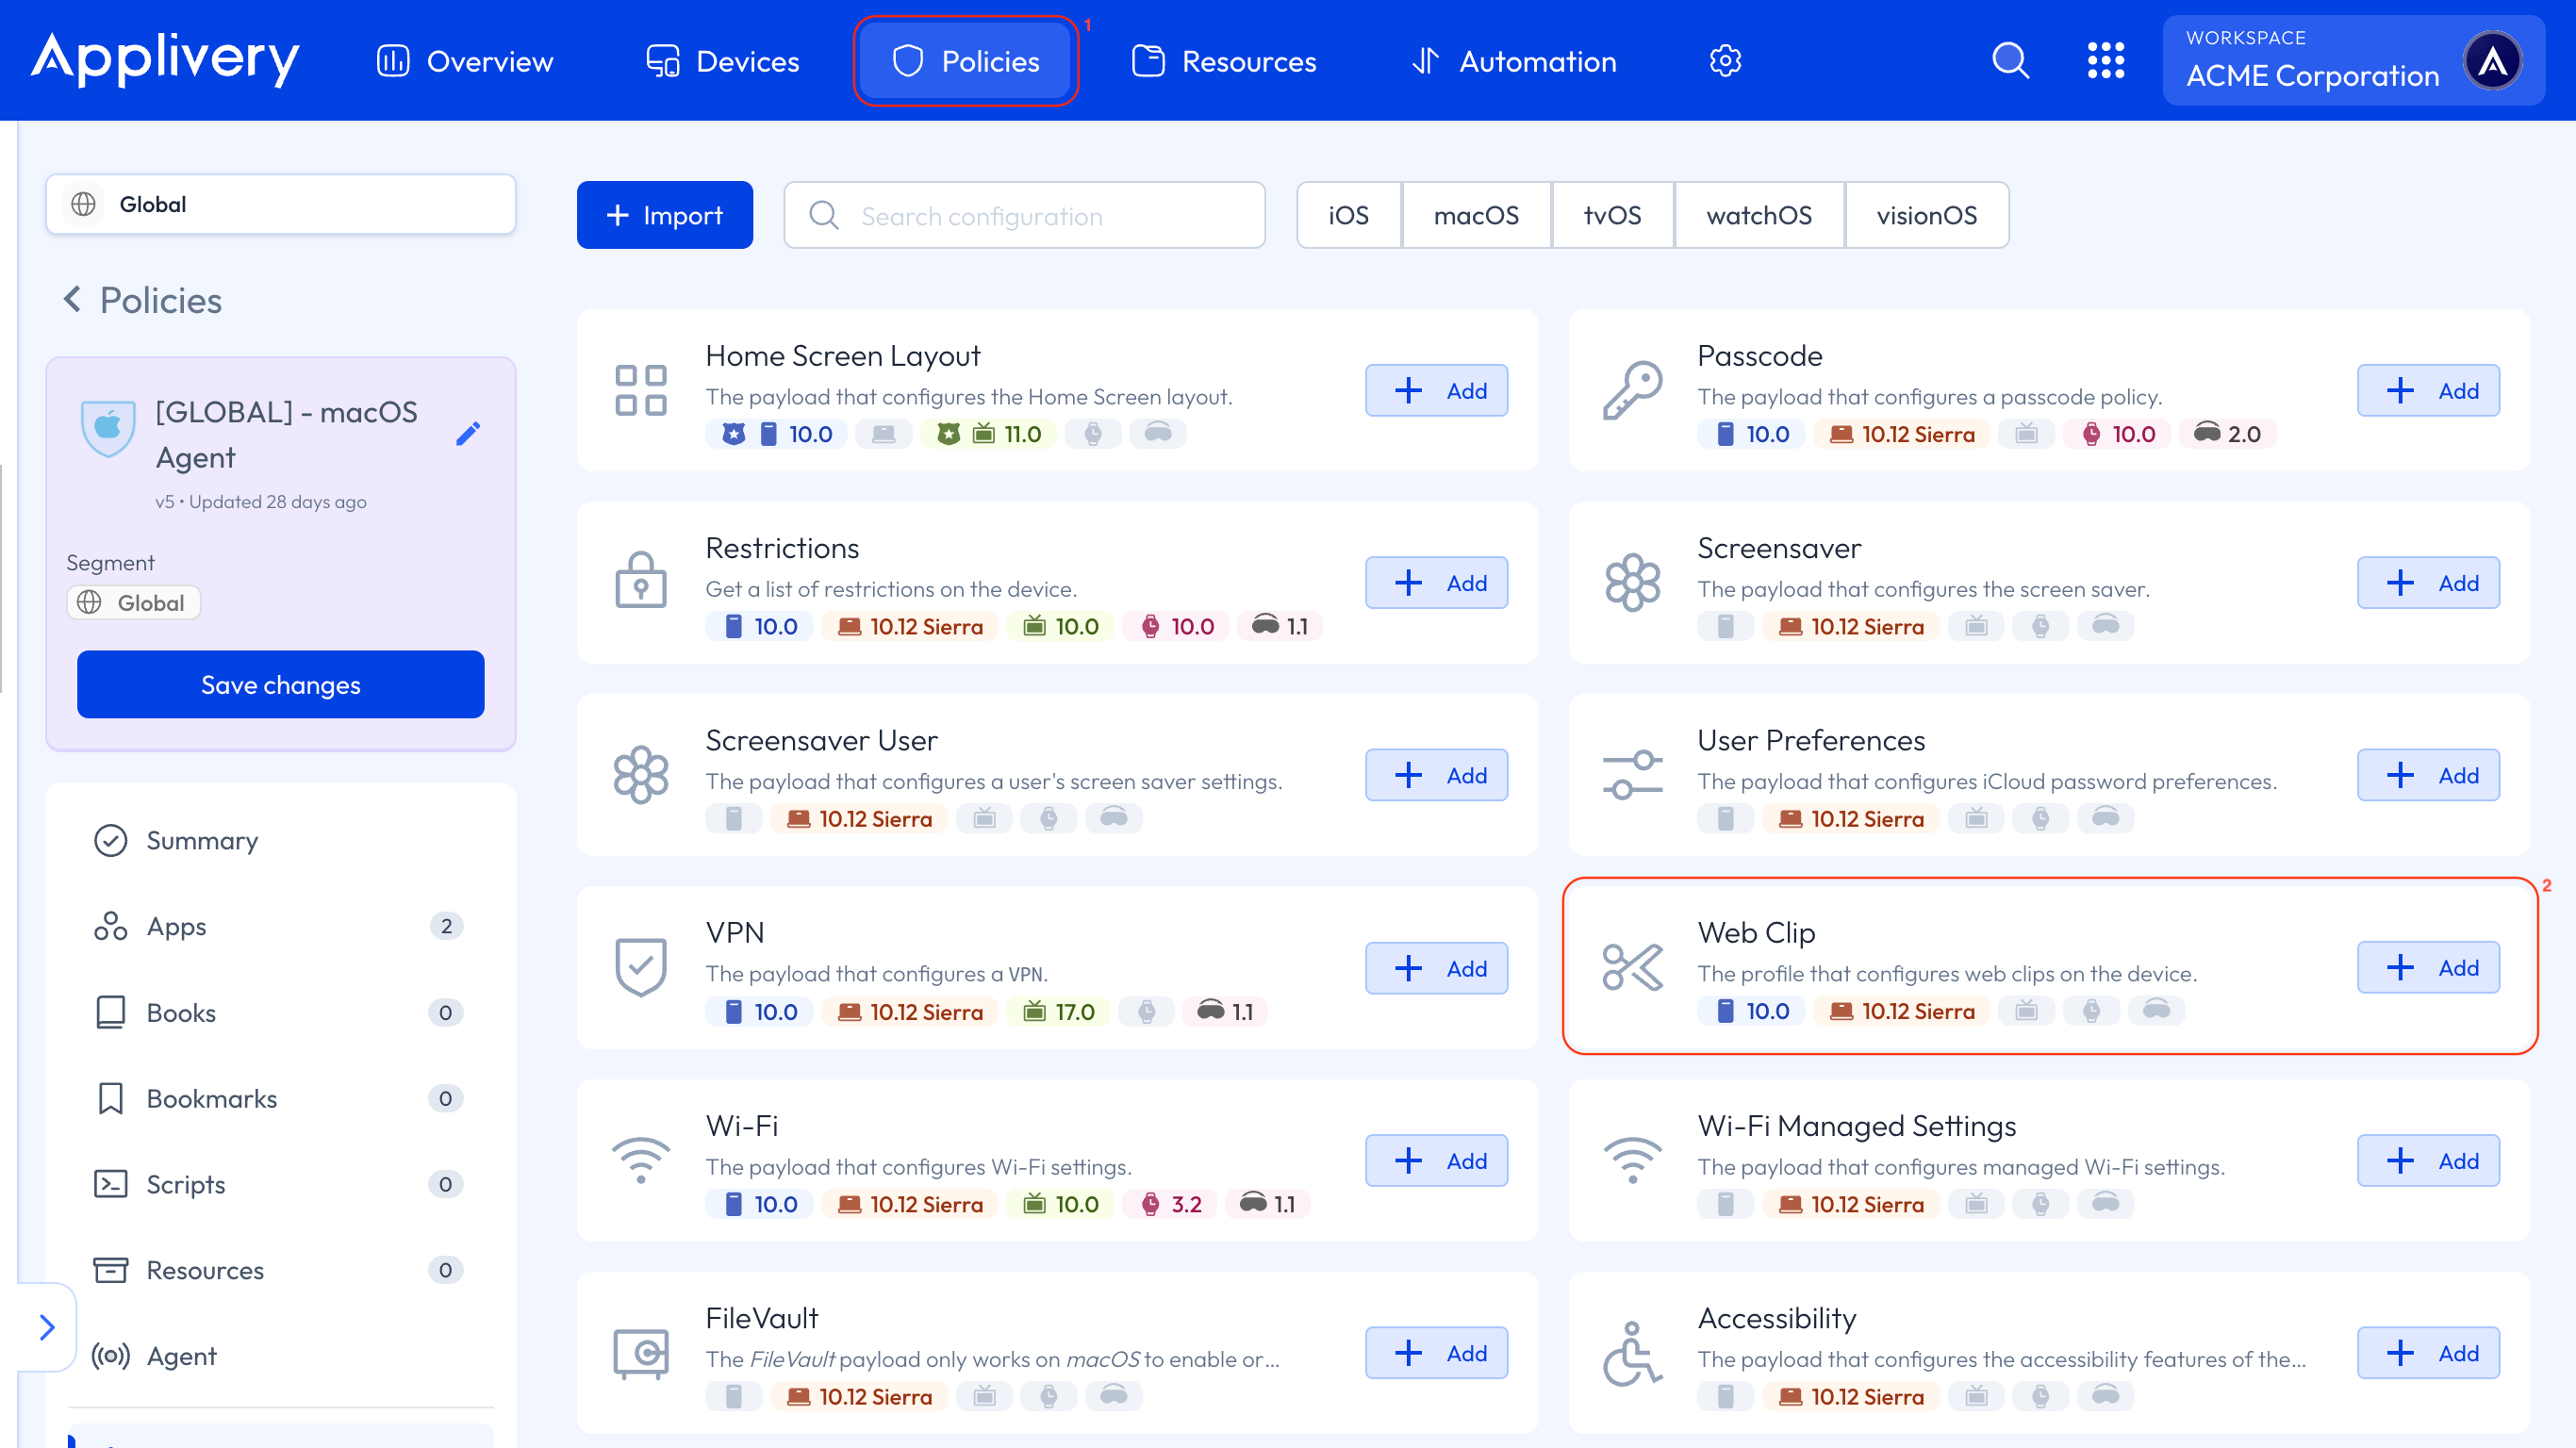
Once in the Applivery dashboard, navigate to any of your Policies (1). From the left side menu, select the + Add configuration section and choose Web Clip (2).
You will need to define mandatory fields such as the label and the weblink URL. Additionally, you can customize the image that will appear on Devices and apply further configuration settings.

Customizing the Home Screen Layout
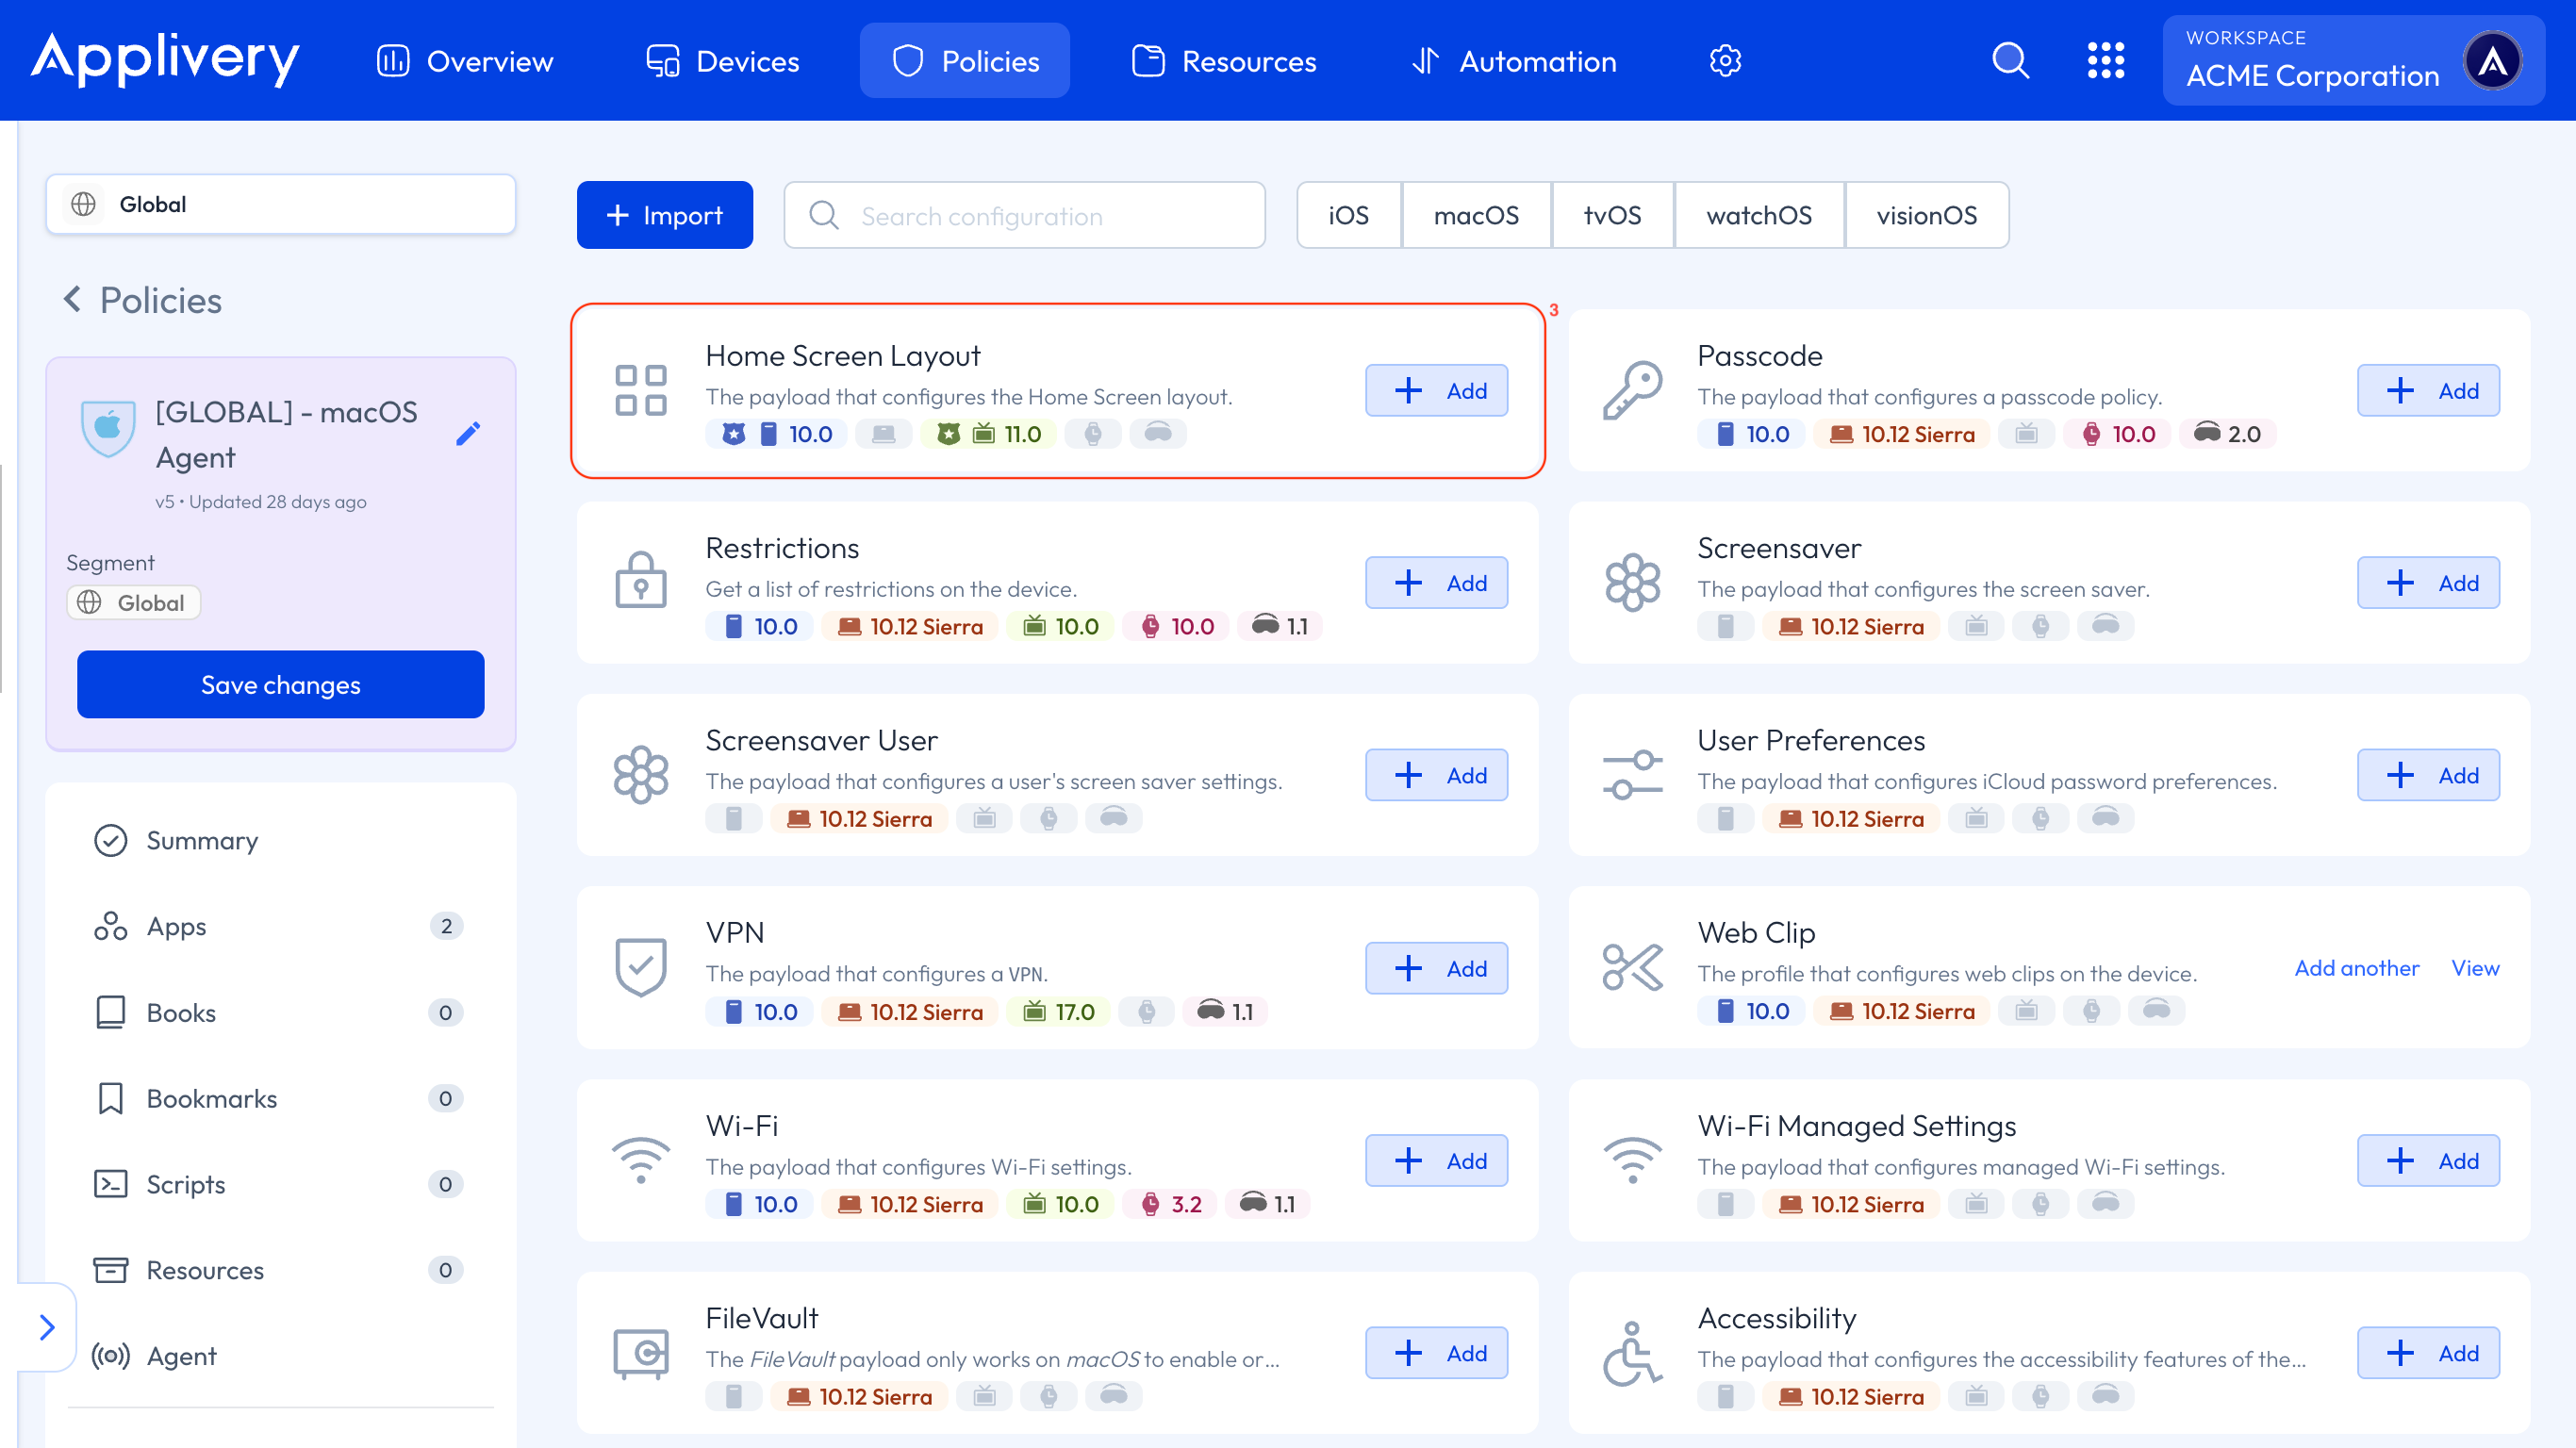
If you do not customize your Device’s Home Screen Layout, Web Clips will be placed on the last screen, using the remaining available spaces following all the installed Apps. Alternatively, you have the option to personalize your Device’s Home Screen Layout by accessing the + Add configuration again and selecting Home Screen Layout (3) for a more tailored arrangement of Web Clips and Apps.
Within this section, you can determine the position on the display to showcase your Web Clip. Click on the + area (4), select the WebClip section (5), and choose a configured Web Clip from the list or create a new one.
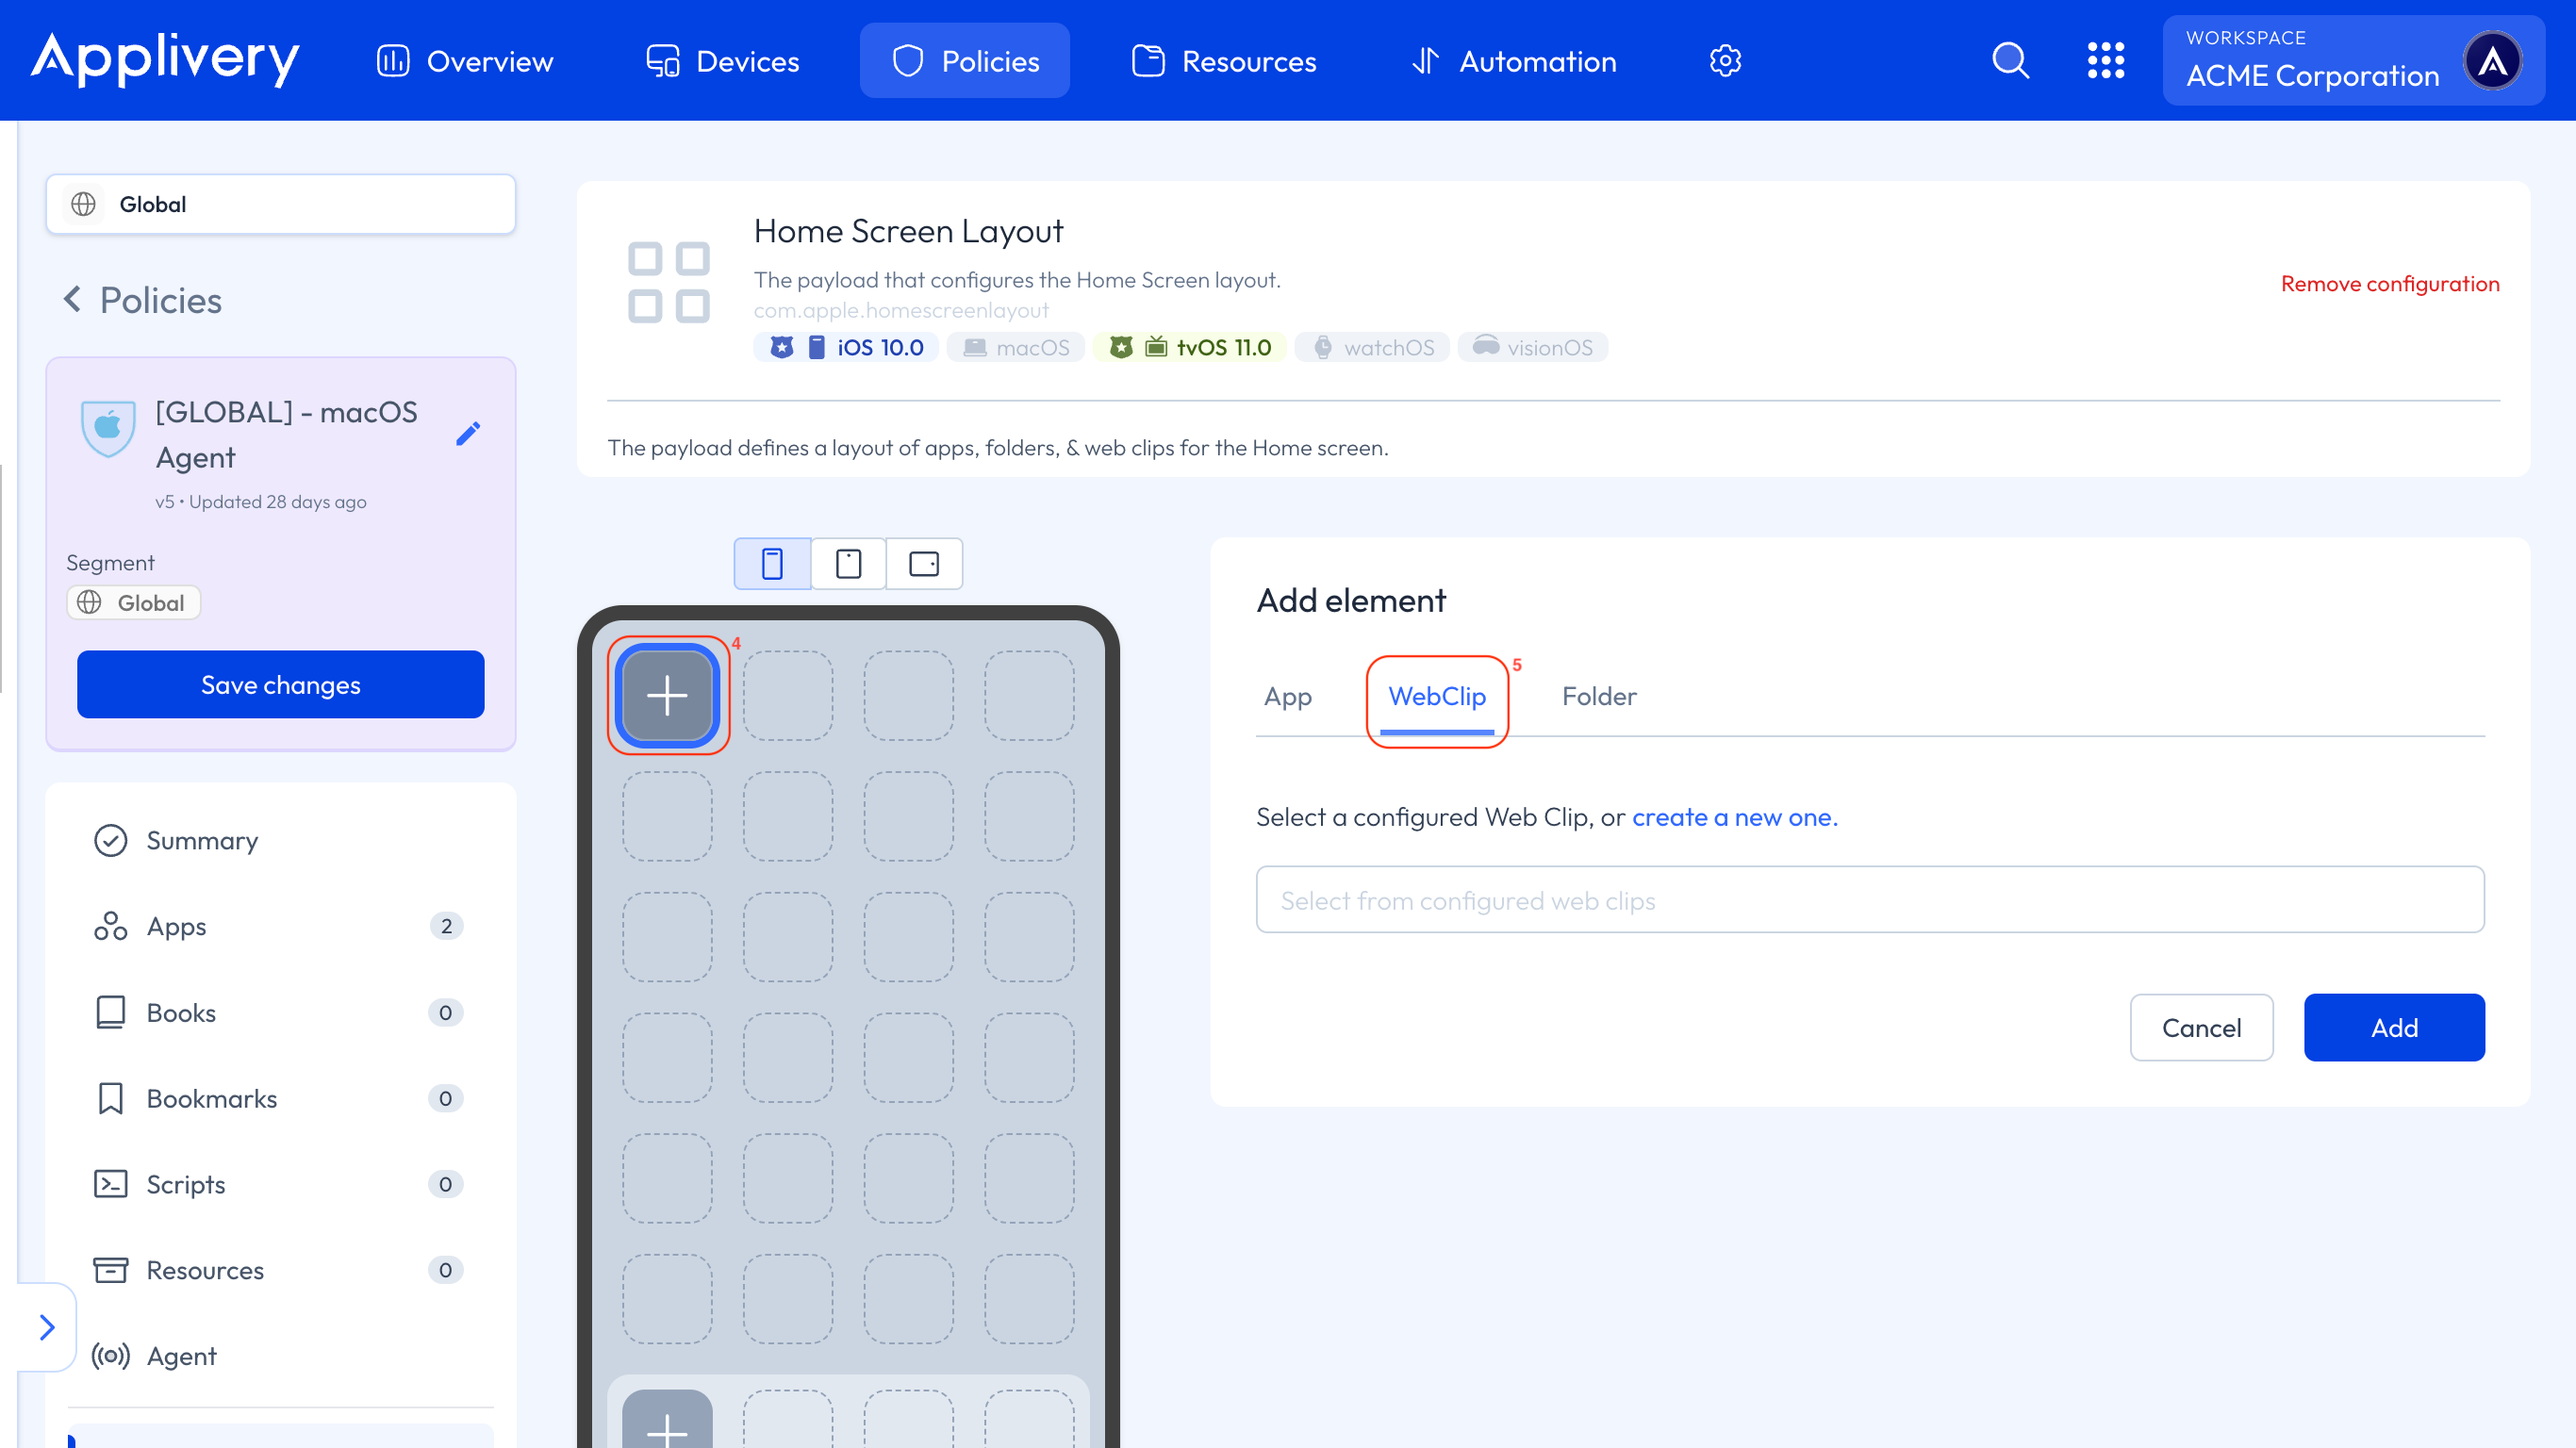
If you want to create a customized arrangement, you can easily rearrange the positions of Apps, Web Clips, or Folders by clicking and dragging an element to your desired location. The remaining Apps will automatically align themselves after these adjustments. Once you’ve added the desired Web Clip, you’ll have the option to edit its properties within this section. If you require to configure additional Web Clips, you can easily generate new ones by selecting create a new one.
Adding Web Clips to the White or Block List
Enabling a White List involves allowing only specific Apps or web clips while restricting access to all others. By creating a White List, you establish a predefined set of trusted and approved sources that users can access without restrictions.
Similarly, enabling a Block List prevents access to specific Apps or web clips while allowing all others, helping you restrict unwanted content without limiting overall device functionality.
To set up either list, follow the steps described in our documentation here.