Manual Enrollment (Profile-based Device Enrollment) is the traditional manual enrollment method for Apple Devices. It works by delivering an MDM configuration profile directly to the Device — either via a link, QR code, or a dedicated enrollment site — which the user then installs from the Device Settings.
It is one of the most flexible enrollment options since it requires no Apple Business setup and works on any iPhone, iPad, Mac, or Apple TV. However, it does not lock the MDM profile to the Device, meaning the user can remove it at any time.
Supervision and Mac: On Mac computers with macOS 11 or later, Profile-based Device Enrollment automatically enforces supervision, which unlocks a significantly broader set of management capabilities compared to iOS and iPadOS Devices enrolled the same way.
This method is suitable for both corporate-owned and personal Devices where Apple Business or DEP is not available. For a fully locked, supervised, Zero-touch deployment, consider using Automated Device Enrollment (DEP) instead.
Requirements
At least one Device Policy created.
The target device must open the enrollment link in Safari (other browsers are not supported for profile installation on iOS/iPadOS).
Manual enrollment (code or QR)
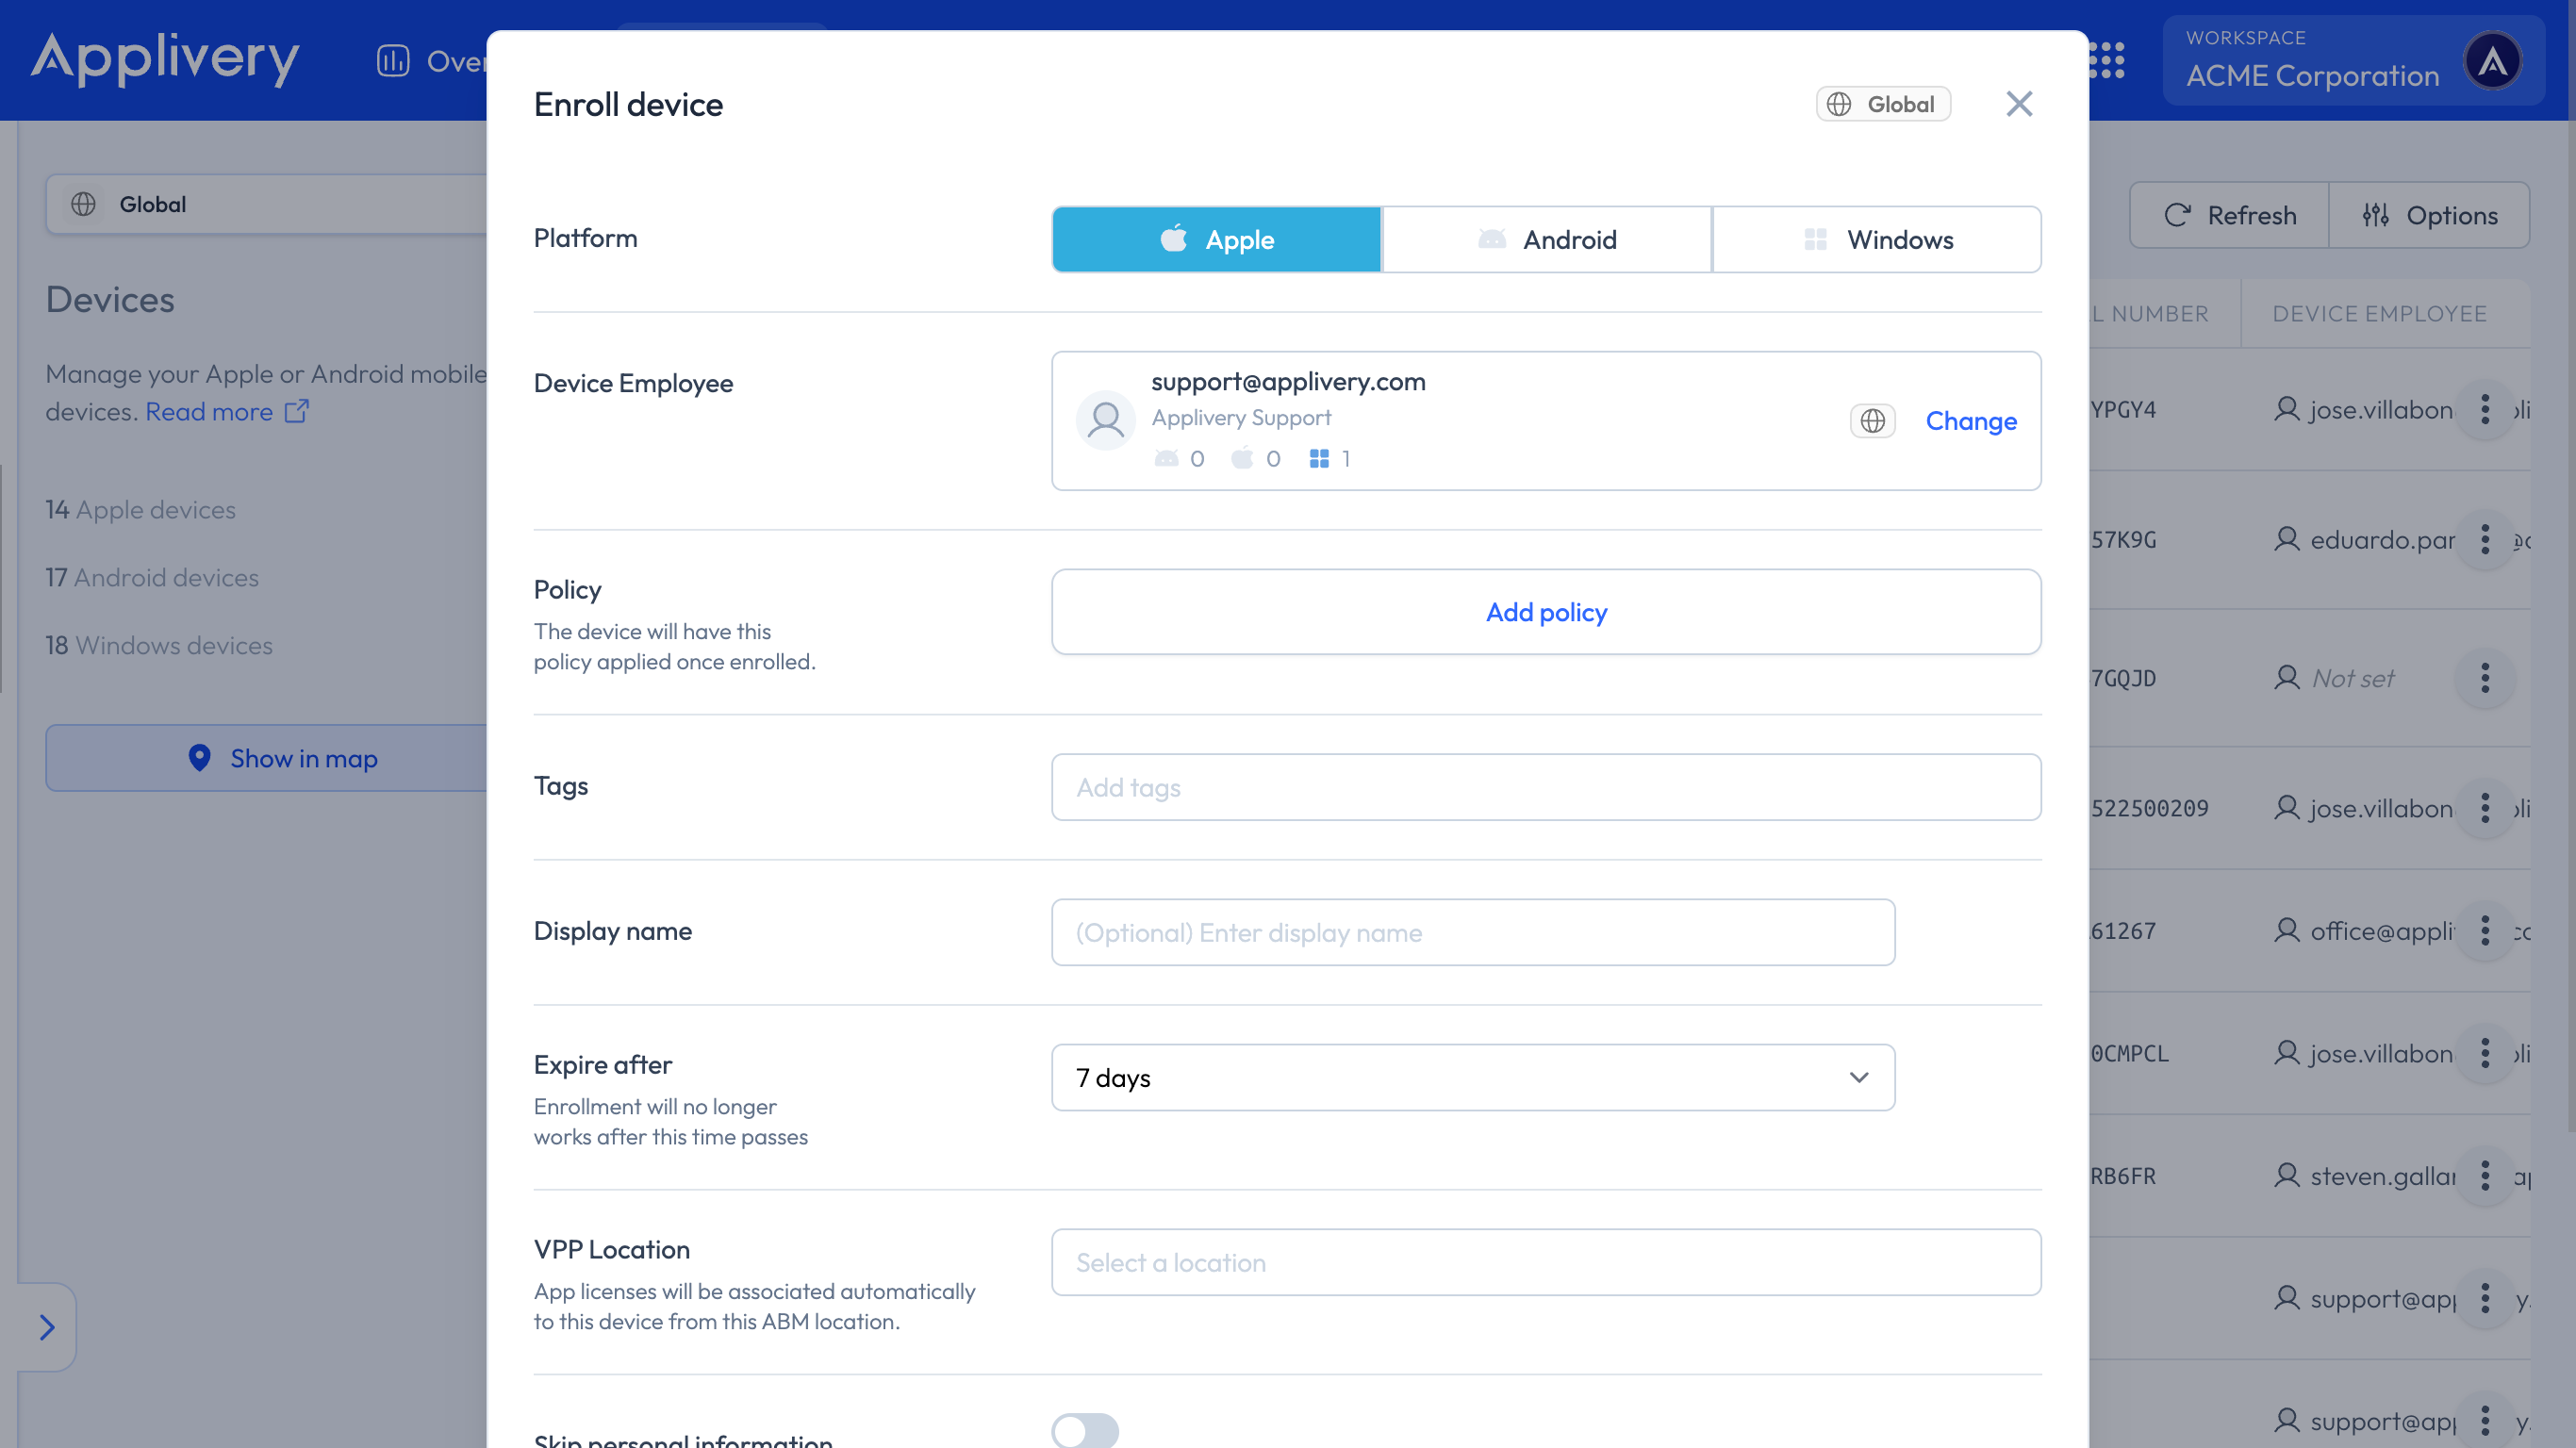
Once in the Applivery Dashboard, navigate to Devices and click + Enroll device. Fill out the form as follows:
Platform: Make sure to choose Apple under Platform.
Device Employee: User who owns the Device. You can create a new employee by introducing the email address.
Policy: Choose the Policy to apply to the Device. You can do so under Policies if you haven’t created it yet. Alternatively, you can create a new Policy here and configure it later.
Tags: Define tags to organize, group, and filter Devices efficiently.
Display name (optional): A friendly name to easily identify the Device among the others.
Expire after: The expiration time of the enrollment token that will be generated.
VPP Location: Define the location to retrieve your VPP-licensed Apps.
Skip personal information: To prevent collecting info about personal Apps and network location
Send instructions email to employee (optional): Choose whether you want to send a notification to the user, including the enrollment instructions that will vary depending on the enrollment mode.
Once the form is submitted, you will be presented with two options to deliver the
enrollment profile to the Device:
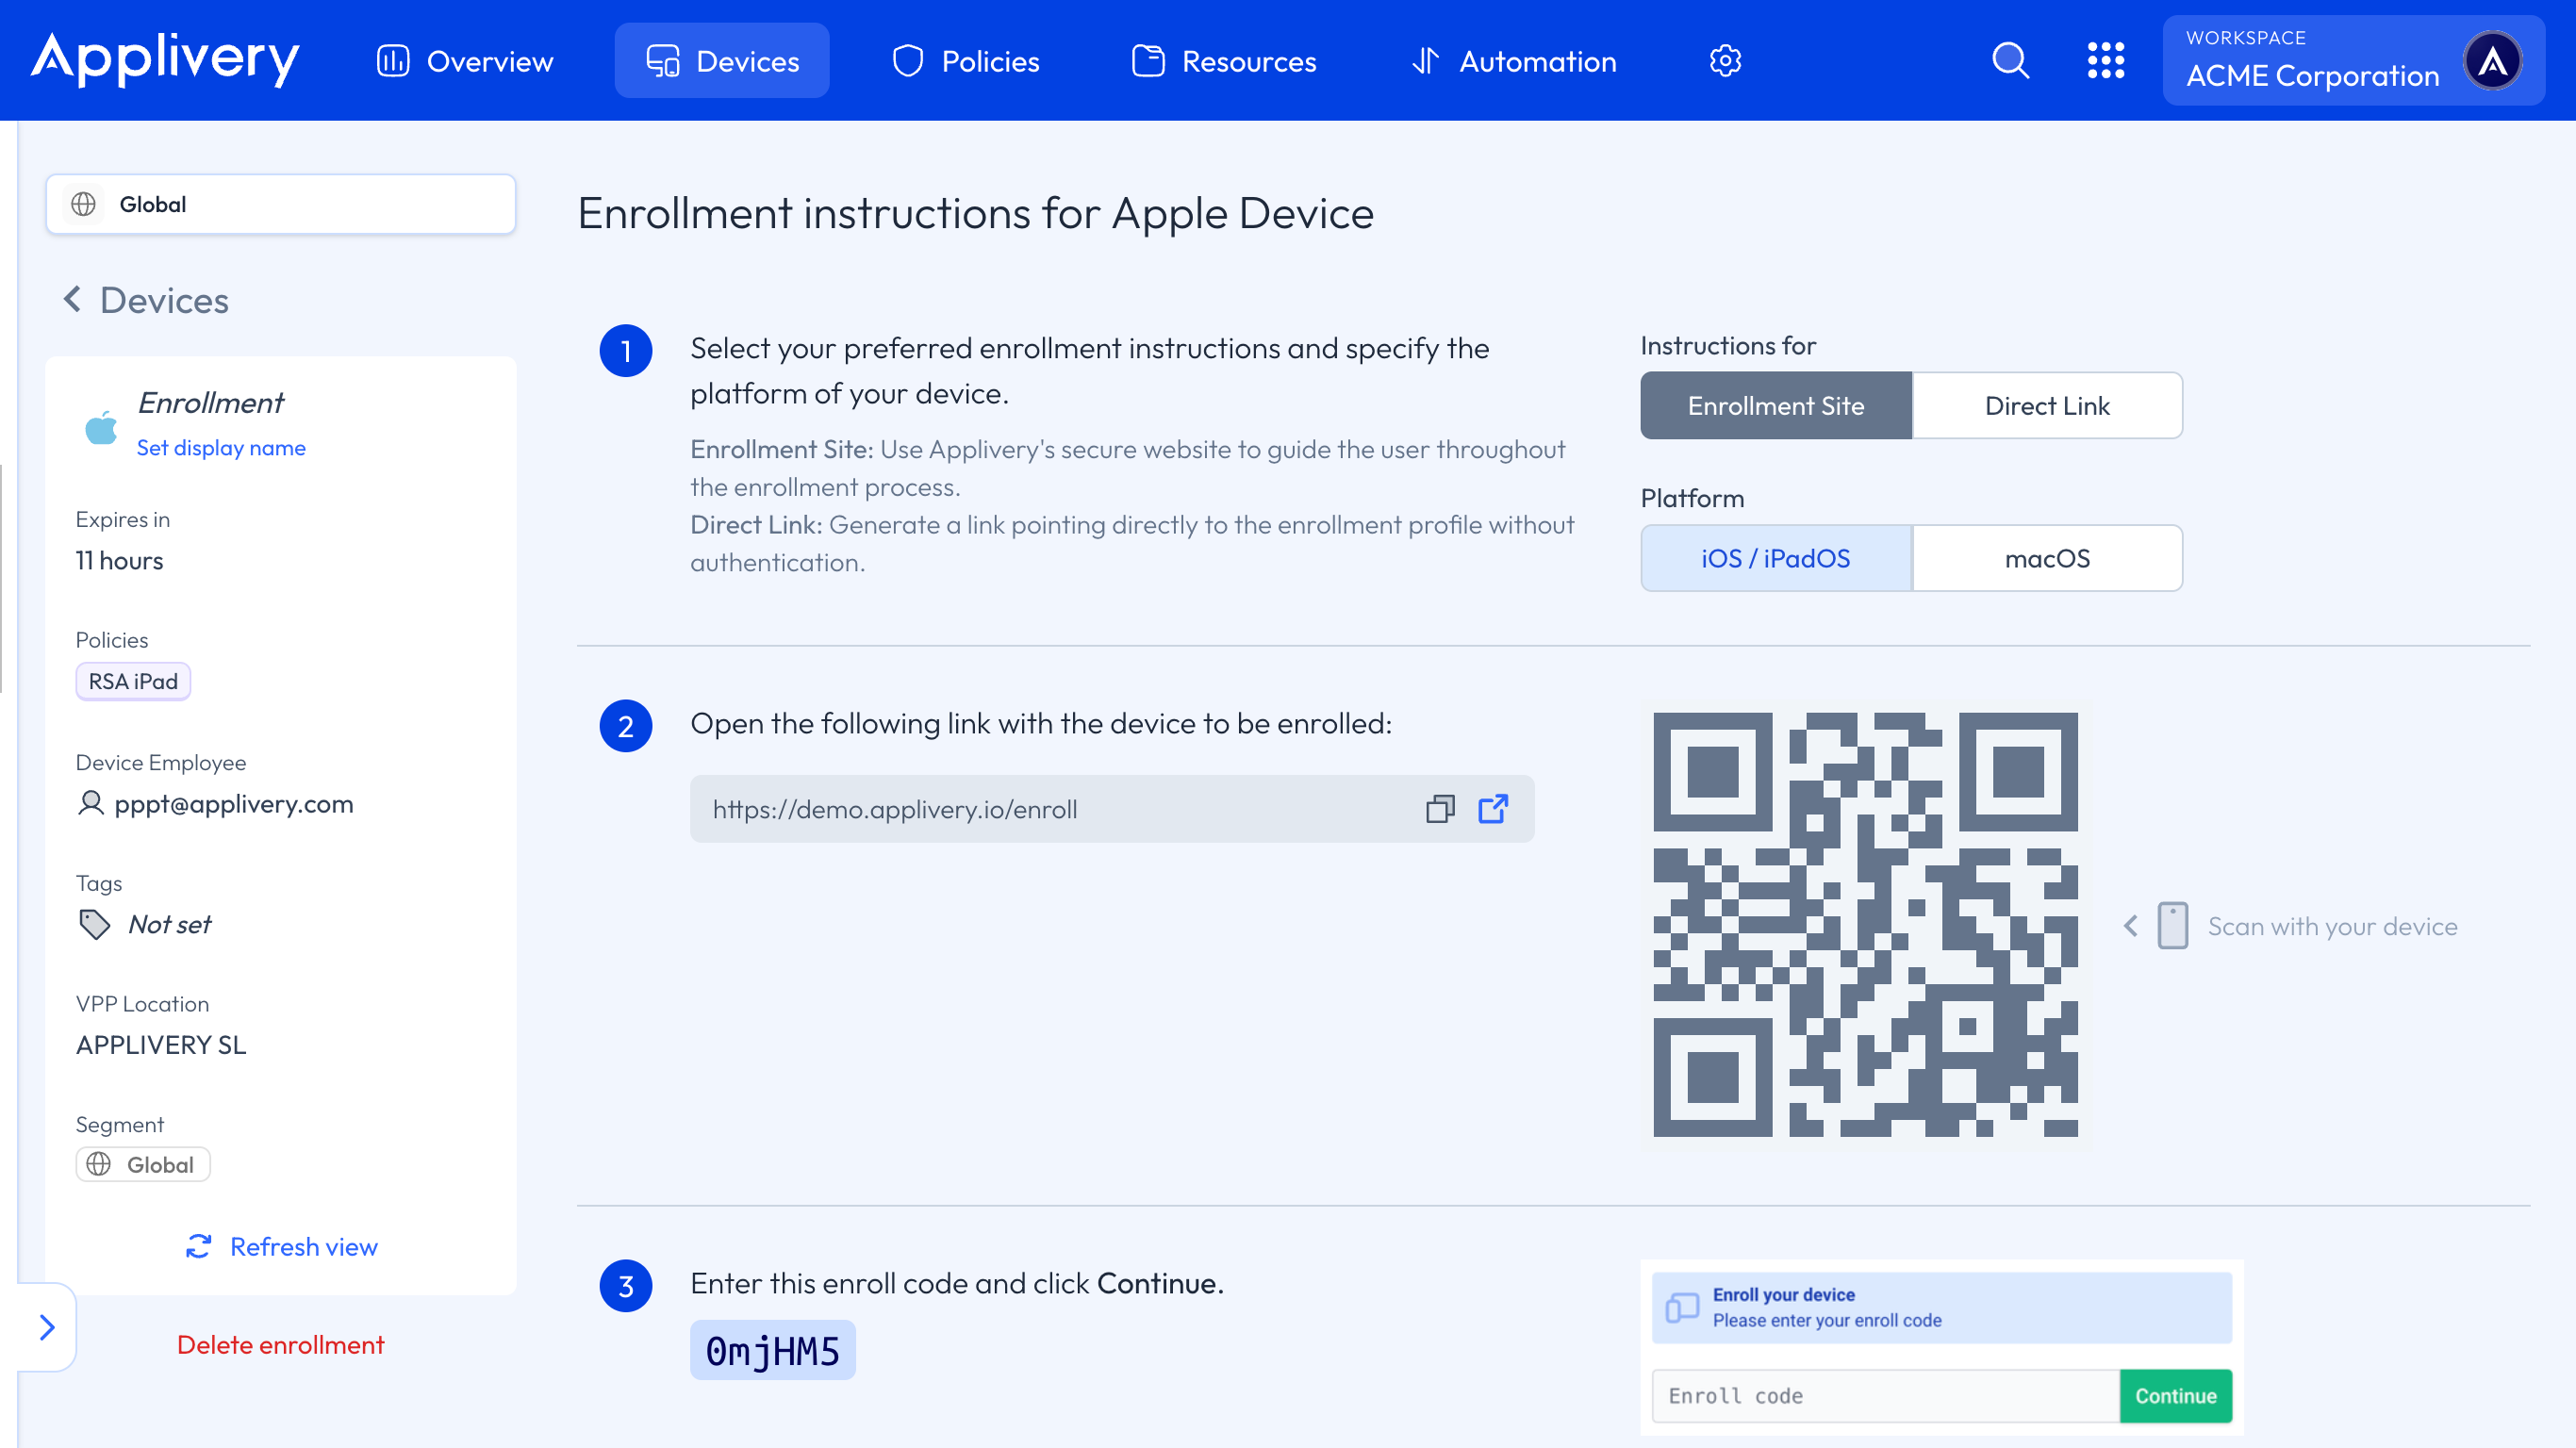
Enrollment site (recommended for shared workflows)
A hosted website that requires the user to enter an enrollment code before downloading
the profile. This adds a layer of security, as the link alone is not enough to enroll.
Share the enrollment URL and enrollment code with the user (or scan the QR code).
The user opens the link in Safari on the target device.
Enter the enrollment code and tap Continue.
Tap Enroll to download the configuration profile.
On the Device, go to Settings > General > VPN & Device Management.
Find Applivery's profile and tap Install.
Back in the Applivery Dashboard, click Confirm enrollment to verify the Device has enrolled successfully. If successful, you will be redirected to the Device details view.
Enrollment link (direct profile download)
A direct URL that immediately downloads the configuration profile when opened. Simpler to share but without the code protection layer.
Share the enrollment link with the user (or scan the QR code).
The user opens the link in Safari on the target device. The profile downloads automatically.
On the Device, go to Settings > General > VPN & Device Management.
Find Applivery's profile and tap Install.
Back in the Applivery Dashboard, click Confirm enrollment to verify the Device has enrolled successfully. If successful, you will be redirected to the Device details view.
Note for macOS: After downloading the profile, users must go to System Settings > Privacy & Security > Profiles to install it, as macOS does not install profiles automatically.
Select your preferred option, along with the Device type you will be enrolling, and then proceed with the steps.