
This is a premium feature that may not be available on your current plan. Check availability on the Applivery pricing page.
Once configured, your organization members will be able to log in to the Applivery Dashboard, App Store, or MDM Portal using their Okta credentials — no separate Applivery password required.
Okta does not support metadata file upload. Unlike other Identity Providers, Okta does not allow importing the Applivery pre-configured SAML Metadata XML file. You must configure the SAML application in Okta manually using the values provided in the Applivery dashboard. This guide covers the exact values to use for each portal type.
If you plan to use a custom domain for your App Store or MDM Portal, configure it in Applivery before starting this guide. Custom domains change the callback URLs, so the order matters.
Prerequisites
Administrator access to your Applivery Workspace.
Administrator access to your Okta Admin Portal.
Your Applivery organization slug — visible in the URL when logged into the Applivery Dashboard (e.g.,
demoinhttps://dashboard.applivery.io/demo/...).If you are using a custom domain, make sure it is configured first in Applivery under the Settings section, then navigate to Store Customization from the left-hand menu.
Applivery acts as the SAML Service Provider (SP). Since Okta requires manual entry, you need to collect two specific values from the Applivery SAML configuration screen.
Once in the Applivery Dashboard, go to your Workspace Settings from the top dropdown menu, then open Login providers in the left-hand menu. Find the SAML row and click Configure for the portal you want to protect — Dashboard, App Store, or MDM Portal.
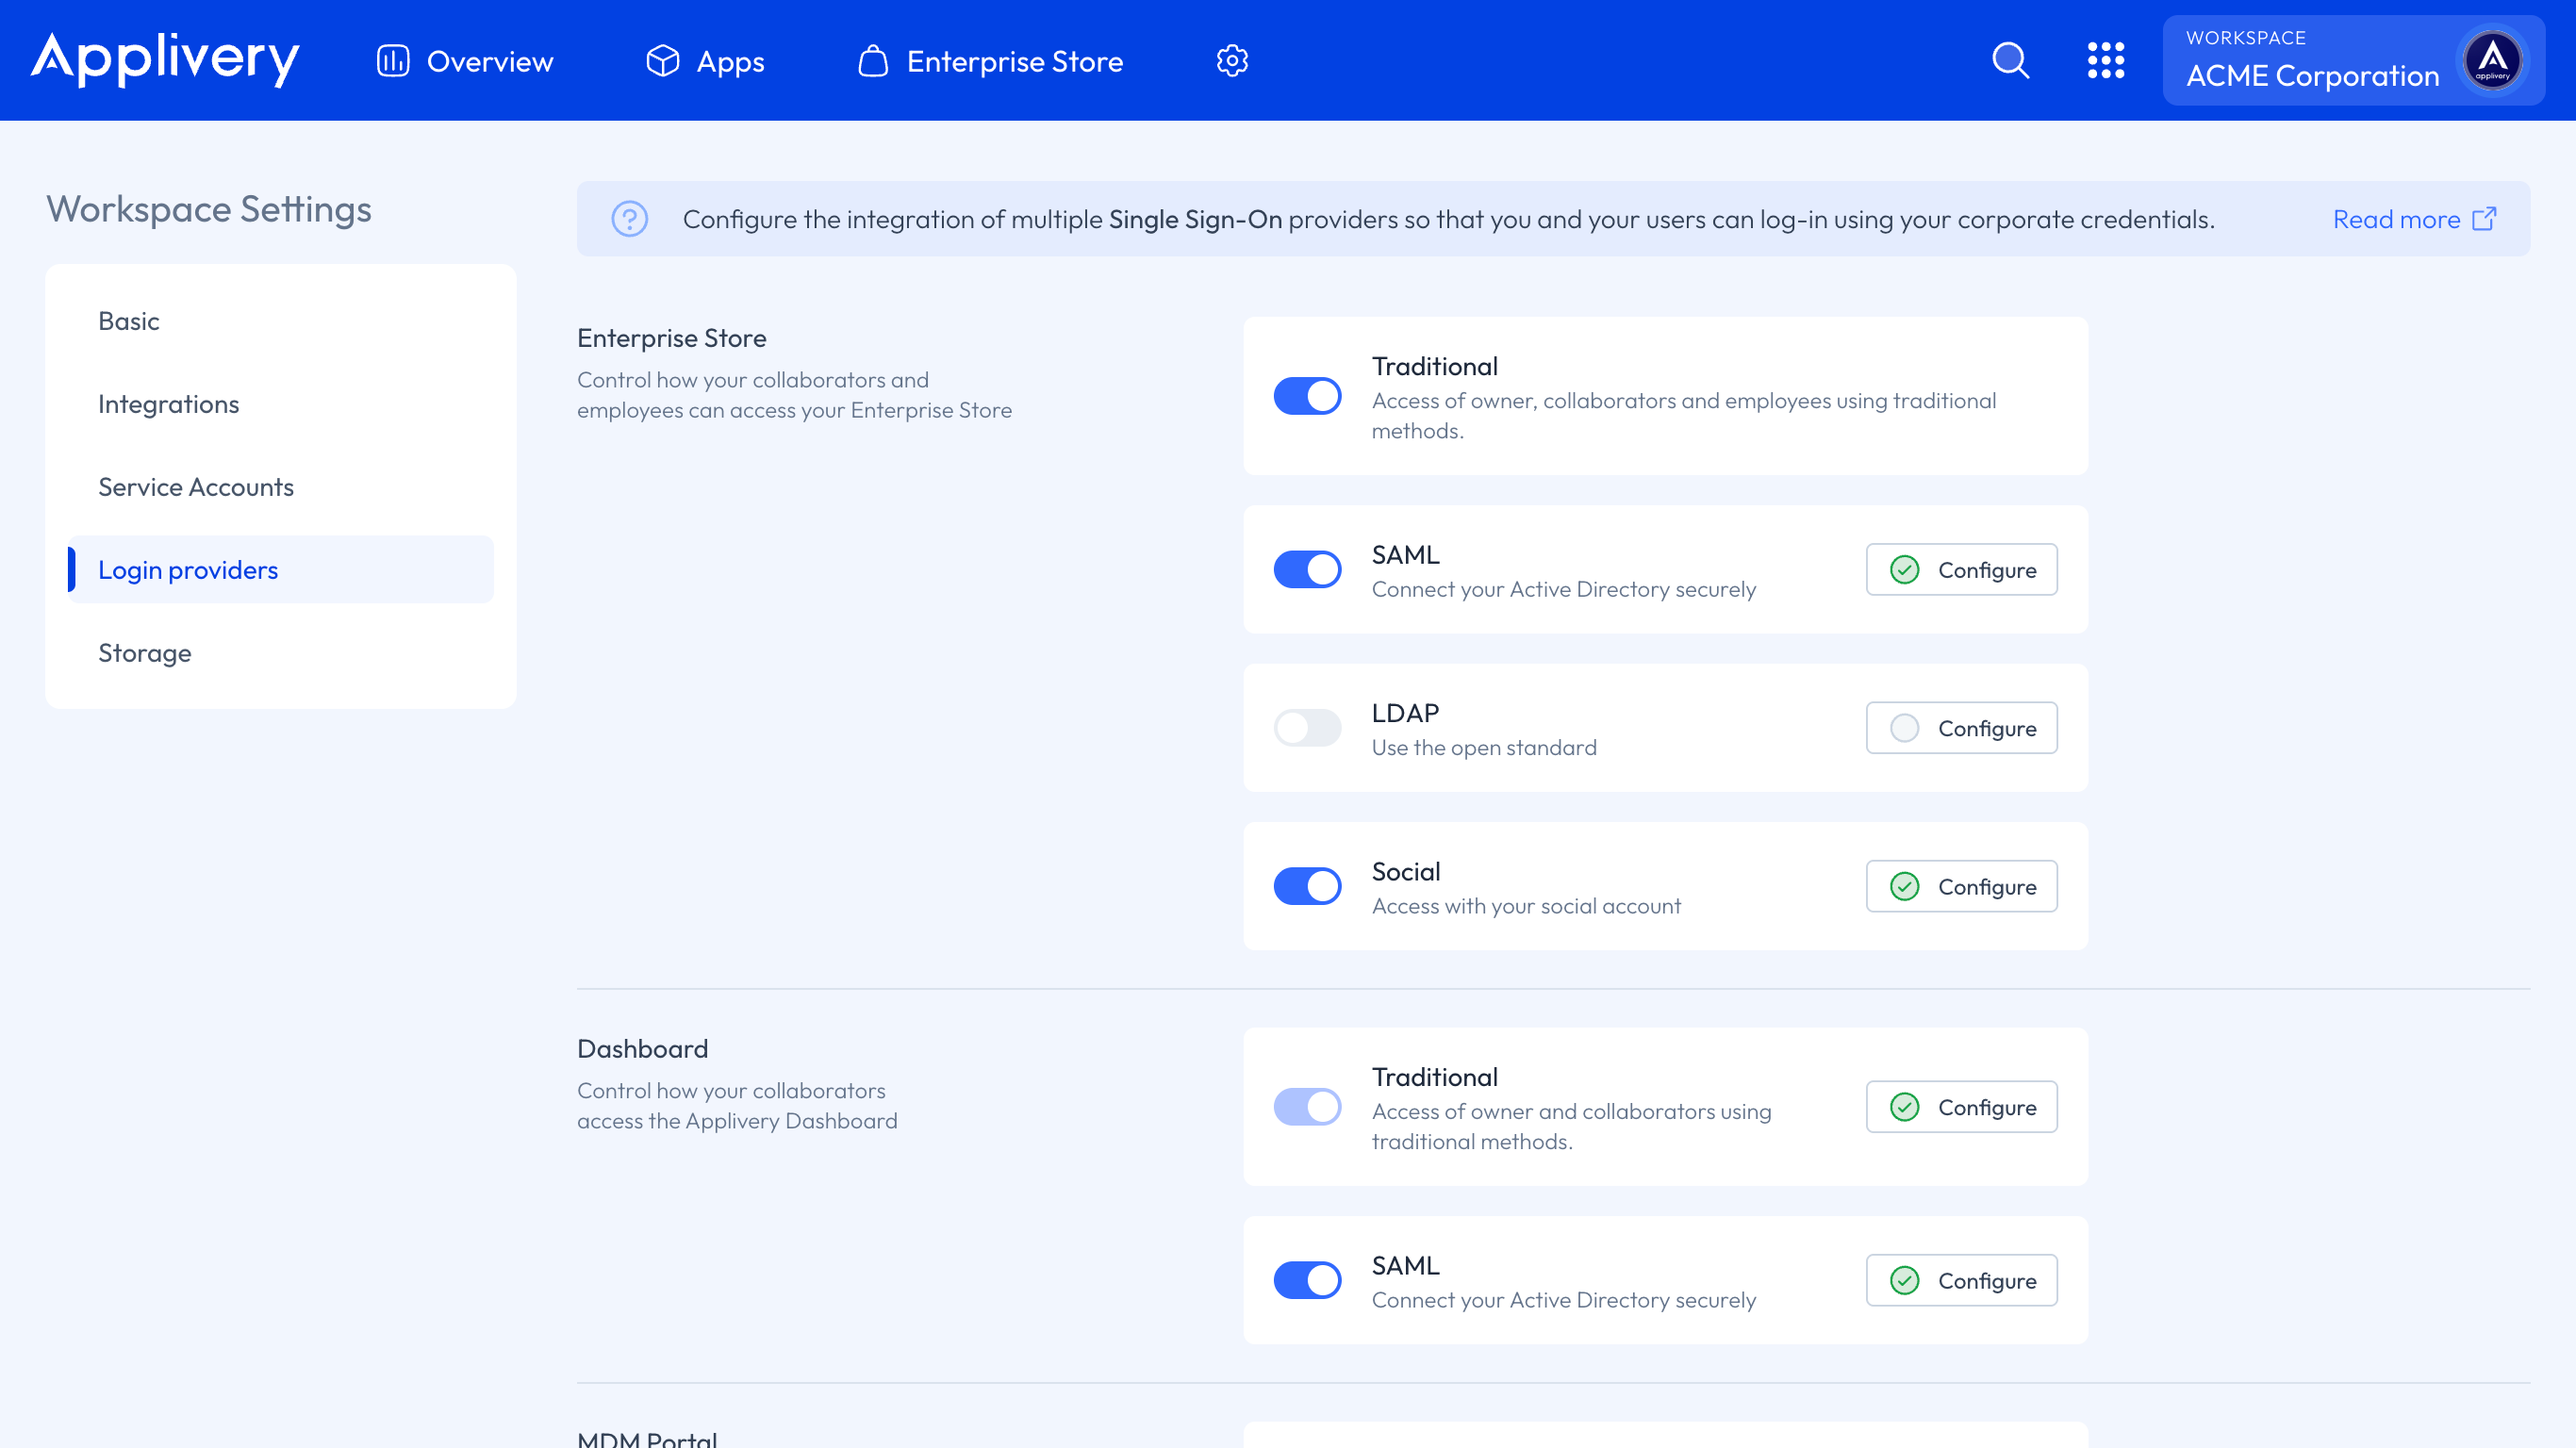
Copy the following values:
Values by portal type
Dashboard
| Field | Value |
|---|---|
| Single Sign-On URL (Callback URL) | https://dashboard.applivery.io/welcome/sso/{organization_slug} |
| Audience URI (SP Entity ID) | https://dashboard.applivery.com/sso/{organization_slug}/metadata.xml |
App Store (Enterprise Store)
| Field | Value |
|---|---|
| Single Sign-On URL (Callback URL) | Your App Store URL: {organization_slug}.applivery.io or your custom domain you.yourcompany.com |
| Audience URI (SP Entity ID) | https://dashboard.applivery.com/sso/{organization_slug}/metadata.xml |
MDM Portal
| Field | Value |
|---|---|
| Single Sign-On URL (Callback URL) | https://mdm-portal.applivery.io/login/{organization_id} |
| Audience URI (SP Entity ID) | https://dashboard.applivery.com/sso/{organization_slug}/metadata.xml |
Replace {organization_slug} and {organization_id} with your actual values, visible in the Applivery SAML configuration screen.
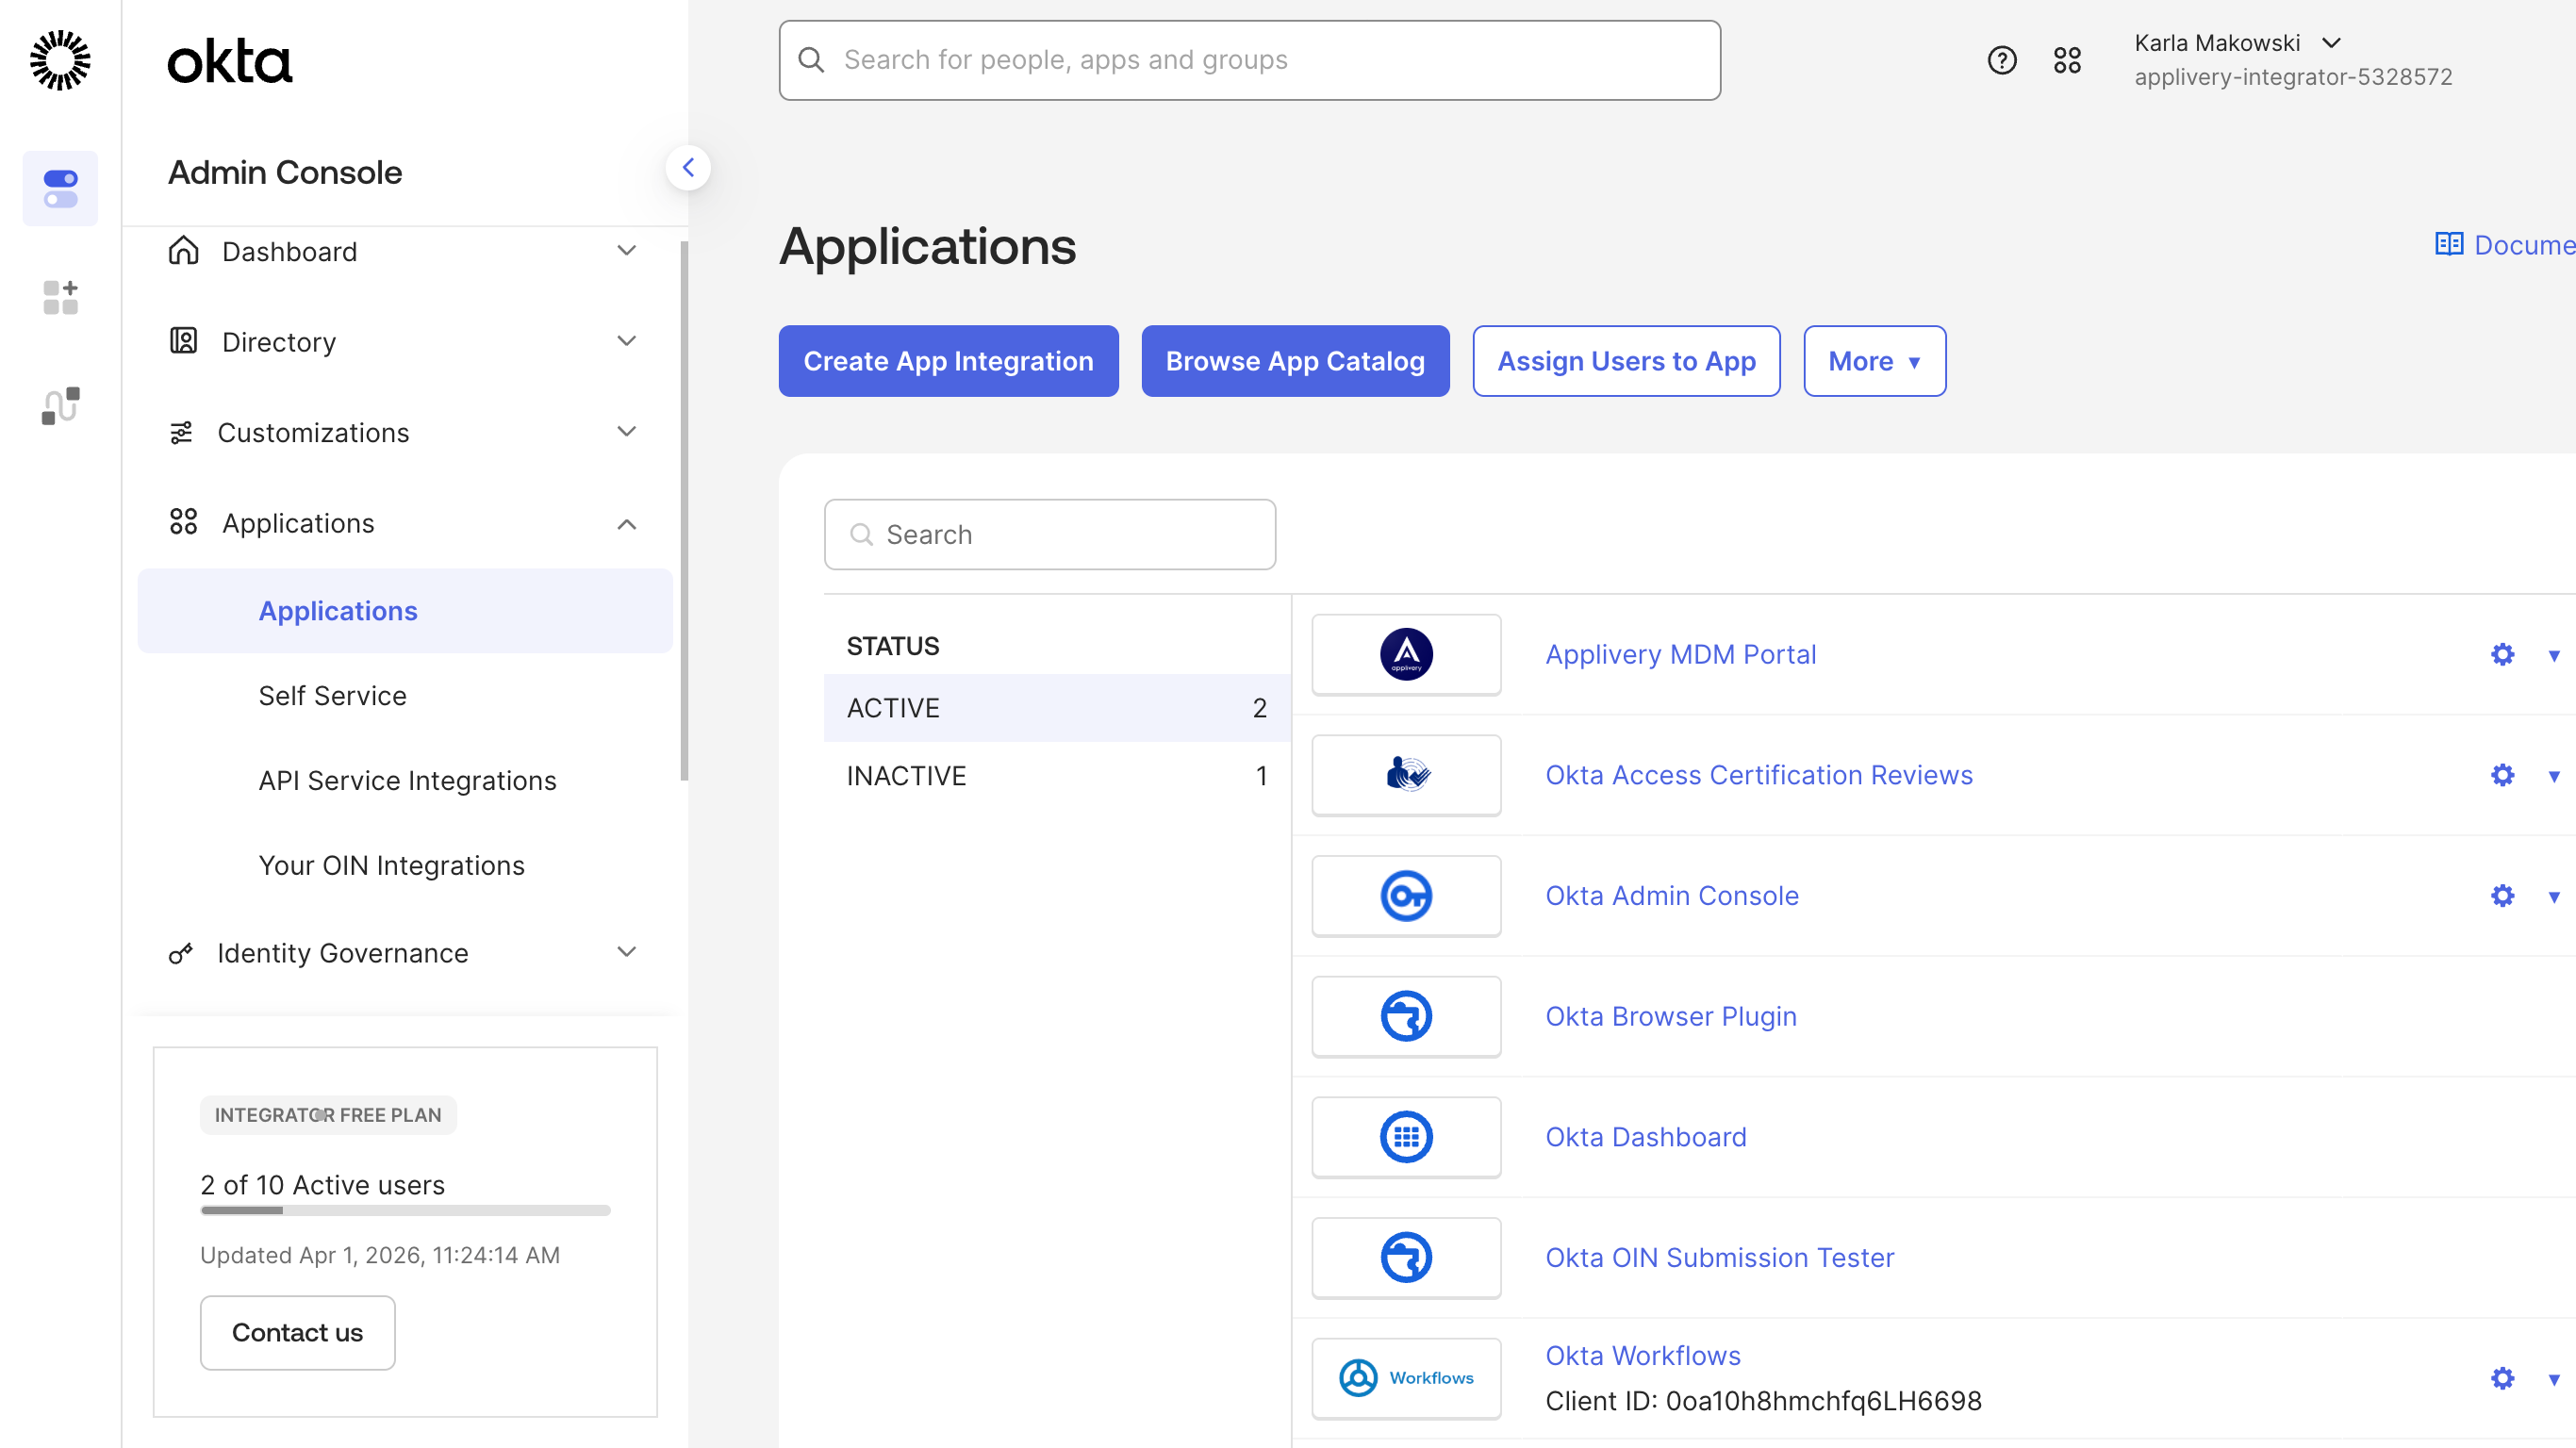
Create a new App Integration
Log in to your Okta Admin Portal, go to Applications (inside Applications), and click the Create App Integration button.
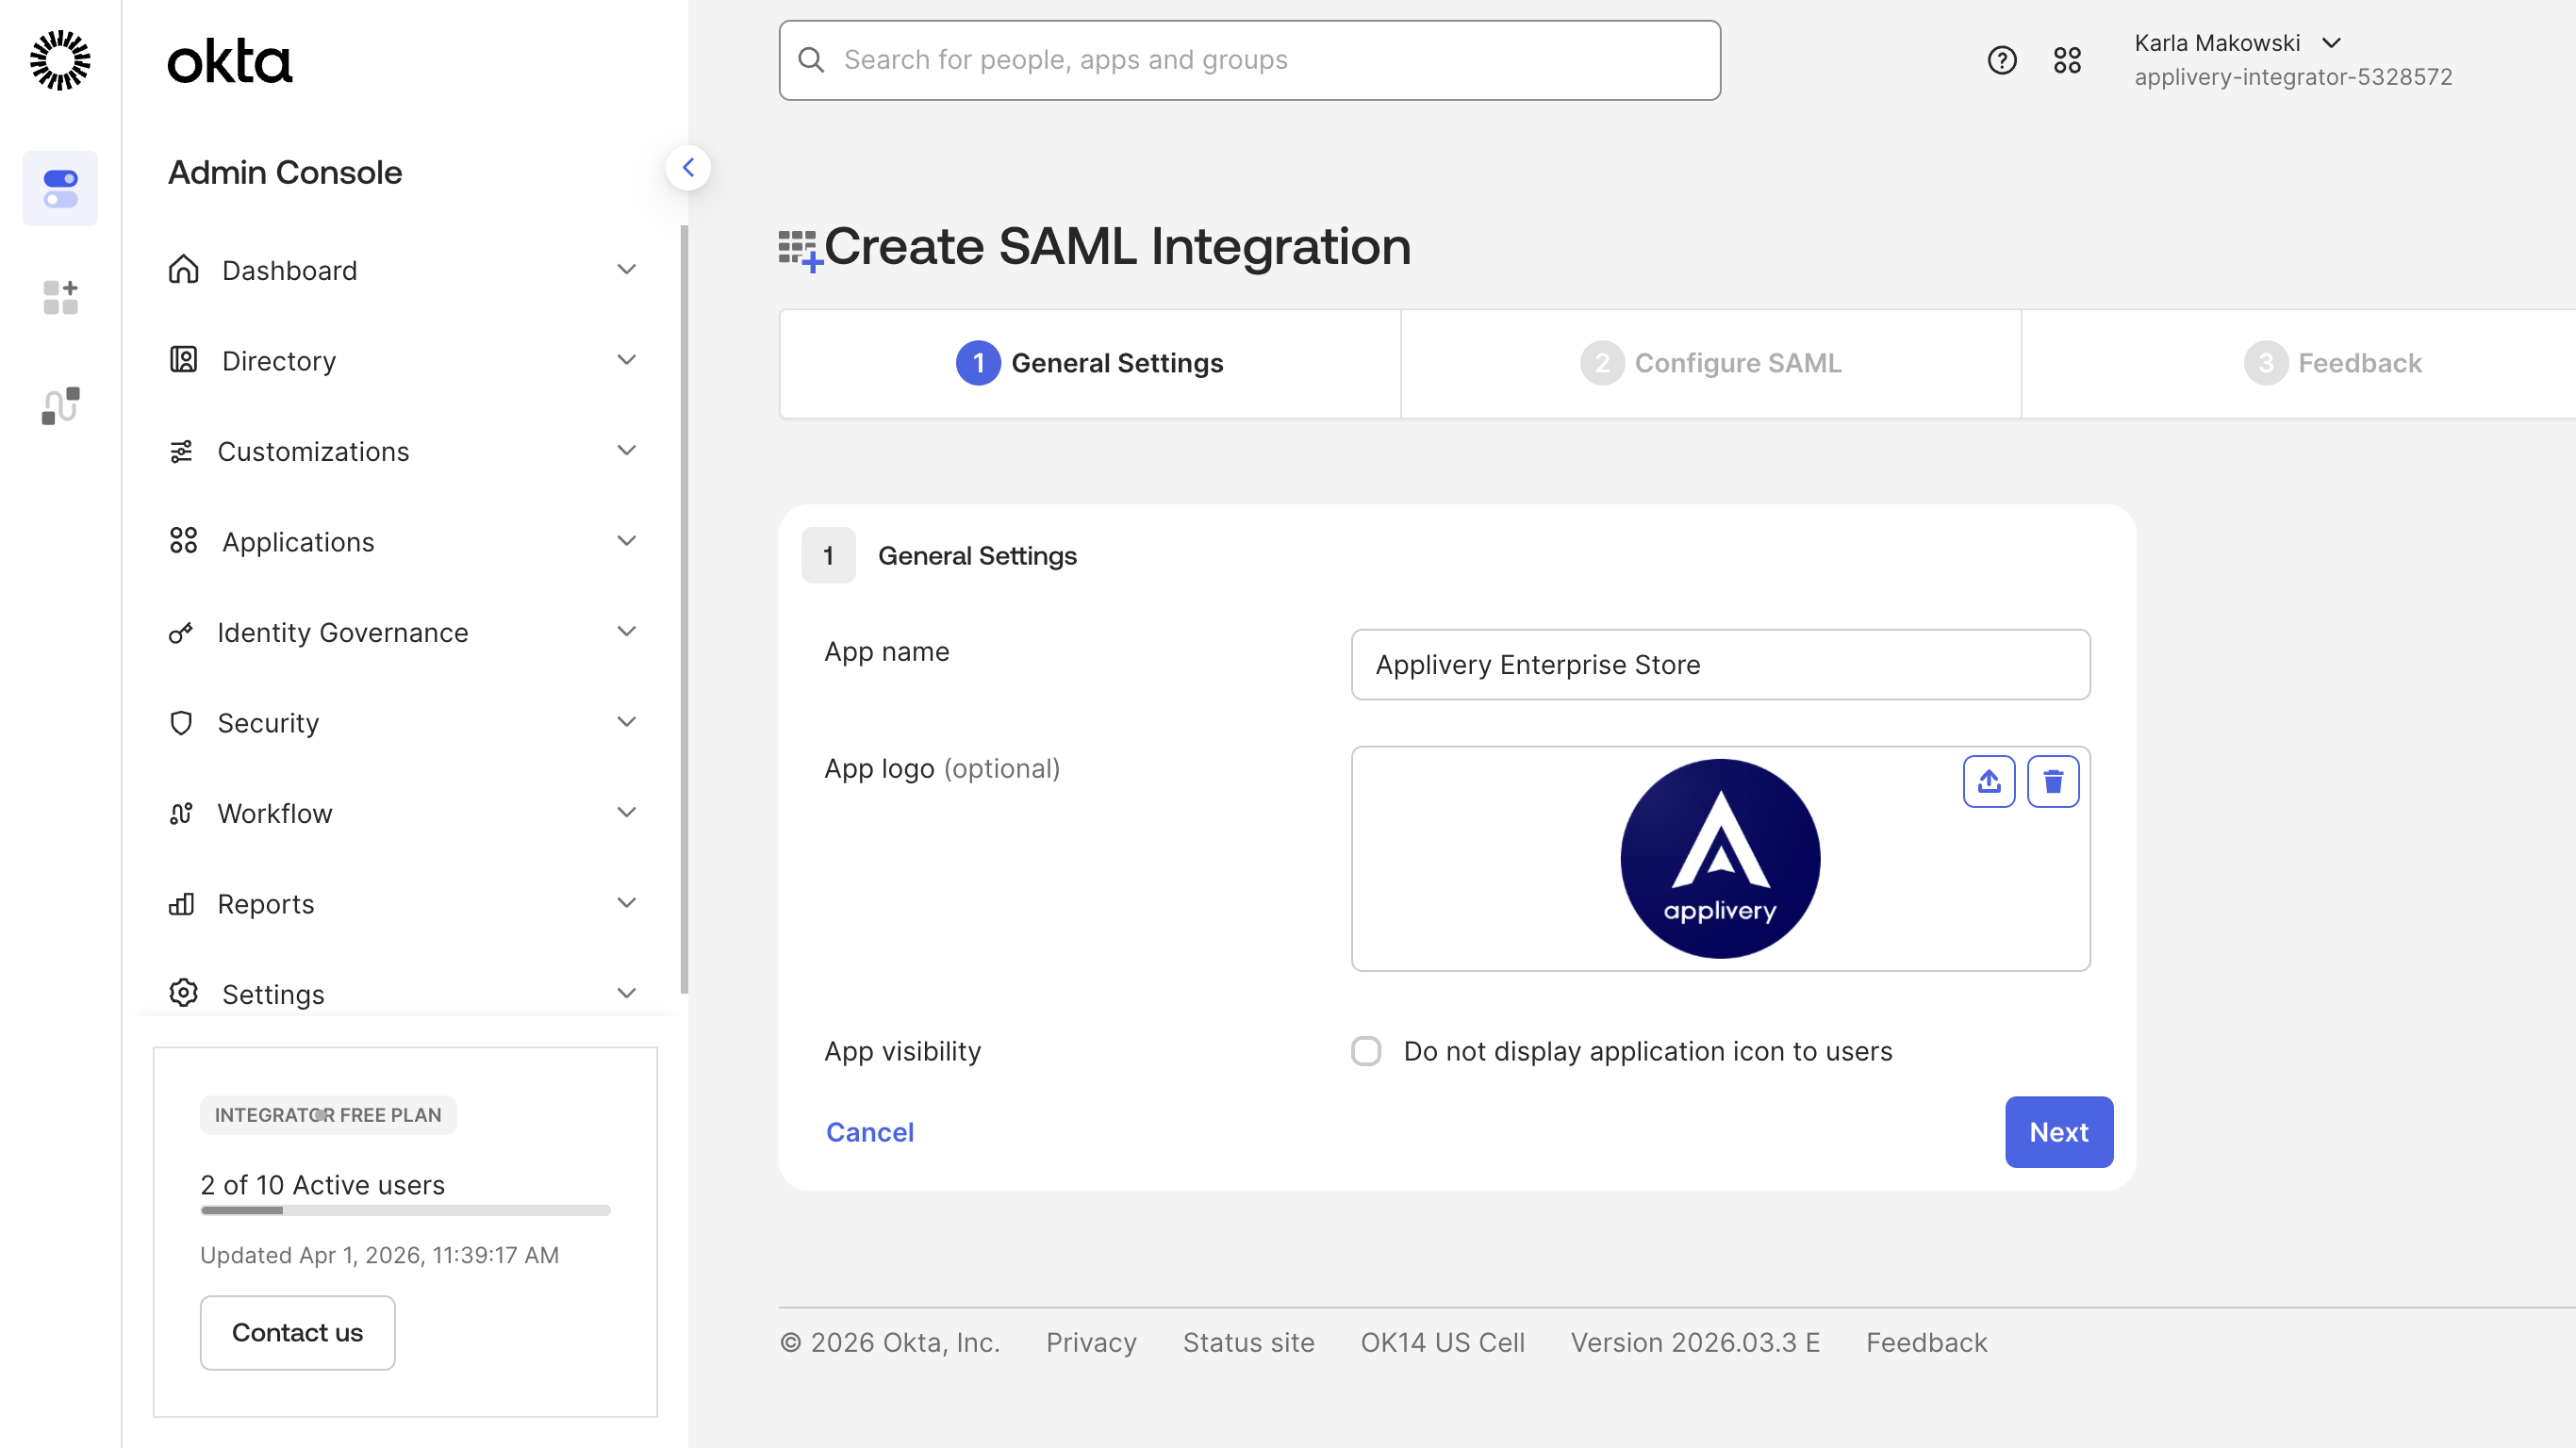
Select SAML 2.0 as the sign-on method, then click Next.
General settings
Enter a name for the application (e.g., Applivery), and optionally upload a logo for easy identification. Then click Next.
Configure SAML settings
Fill in the following fields on the SAML configuration screen:
| Field | Value |
|---|---|
| Single sign-on URL | The Callback URL for your portal from Step 1 |
| Audience URI (SP Entity ID) | The Entity ID for your portal from Step 1 |
| Name ID format | EmailAddress |
| Application username | Email |
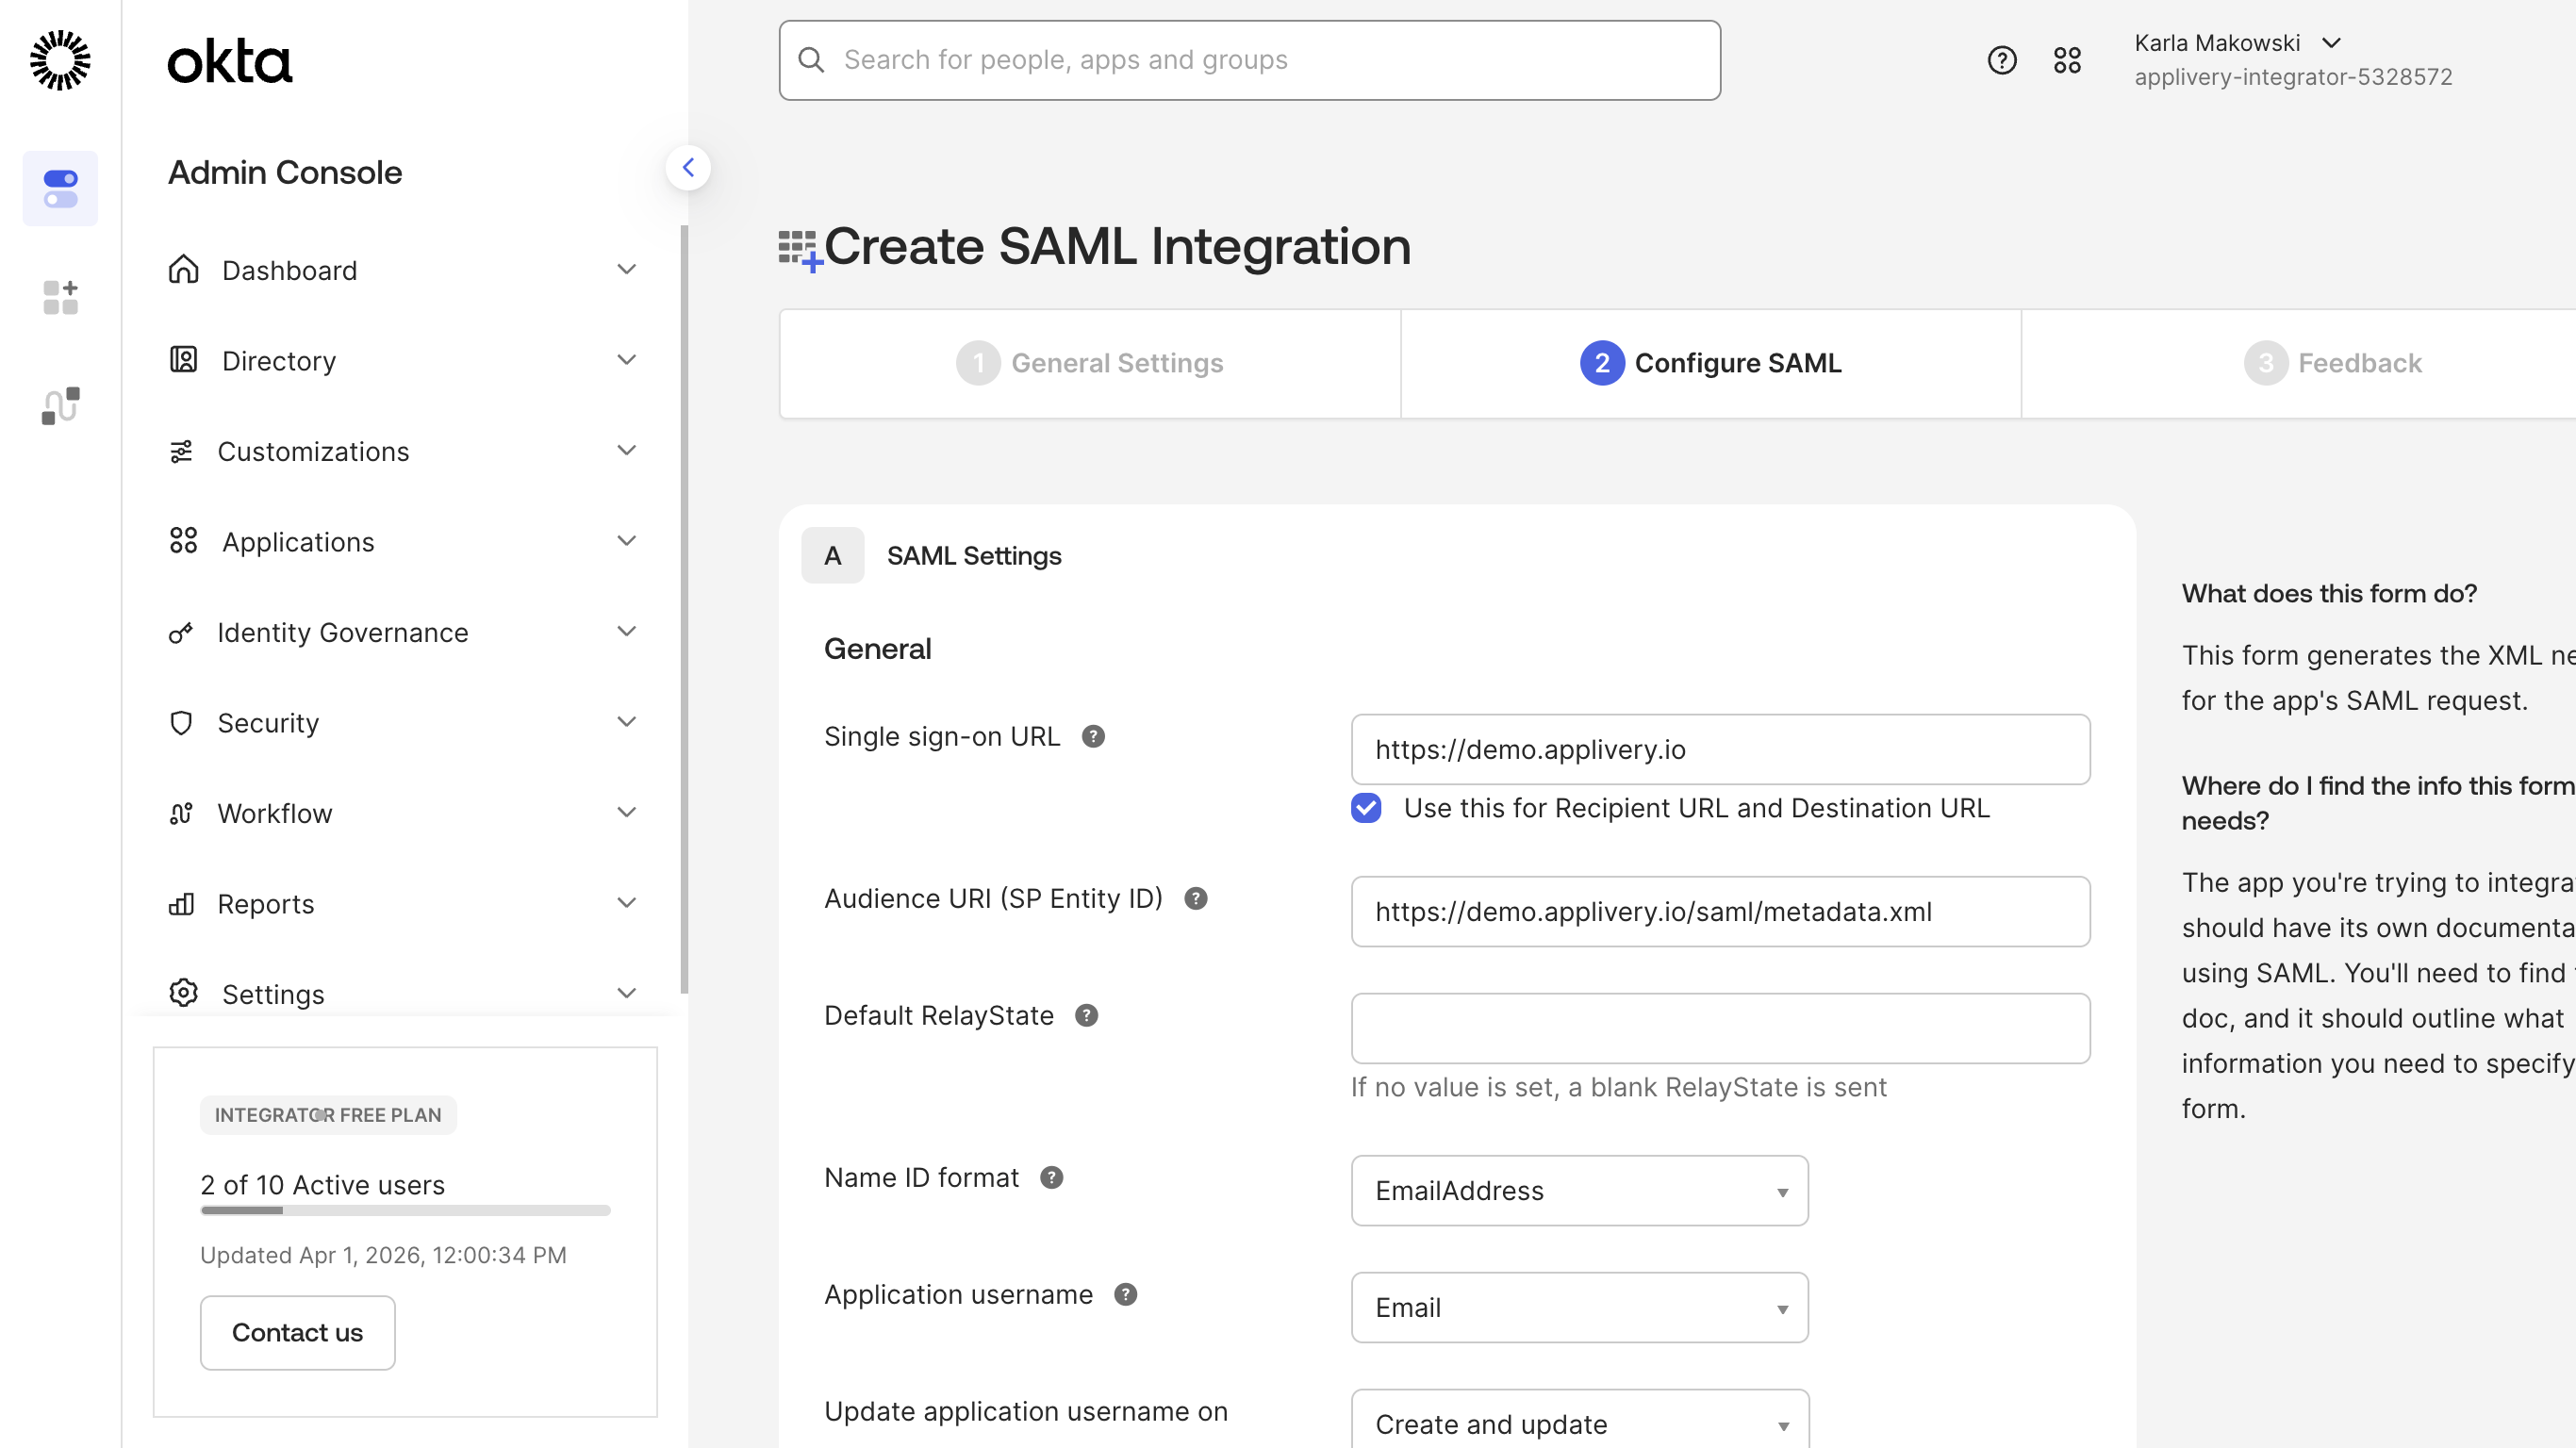
Leave all other fields at their default values.
The Single sign-on URL field must contain the Callback URL (not the general login URL). For example, for the Dashboard portal: https://dashboard.applivery.io/welcome/sso/demo.
Click Next when done.
Configure Group Attribute Statements
To enable Okta groups to be sent to Applivery (required for distribution group filtering and role mapping), you need to configure a Group Attribute Statement.
Scroll down to the Group Attribute Statements section. If it is collapsed, click Show Legacy Configuration → Edit.
Add a group claim with the following settings:
| Field | Value |
|---|---|
| Name | http://schemas.microsoft.com/ws/2008/06/identity/claims/groups |
| Name format | URI Reference |
| Filter | See filter options below |
Filter options — choose based on your needs:
| Option | When to use |
|---|---|
| Starts with + a prefix | Send only groups whose names begin with a specific prefix. Useful for scoping which Okta groups are synced to Applivery. |
Matches regex .* |
Send all Okta groups the user belongs to. |
| Regex with a specific pattern | Send only groups matching a custom regular expression. |
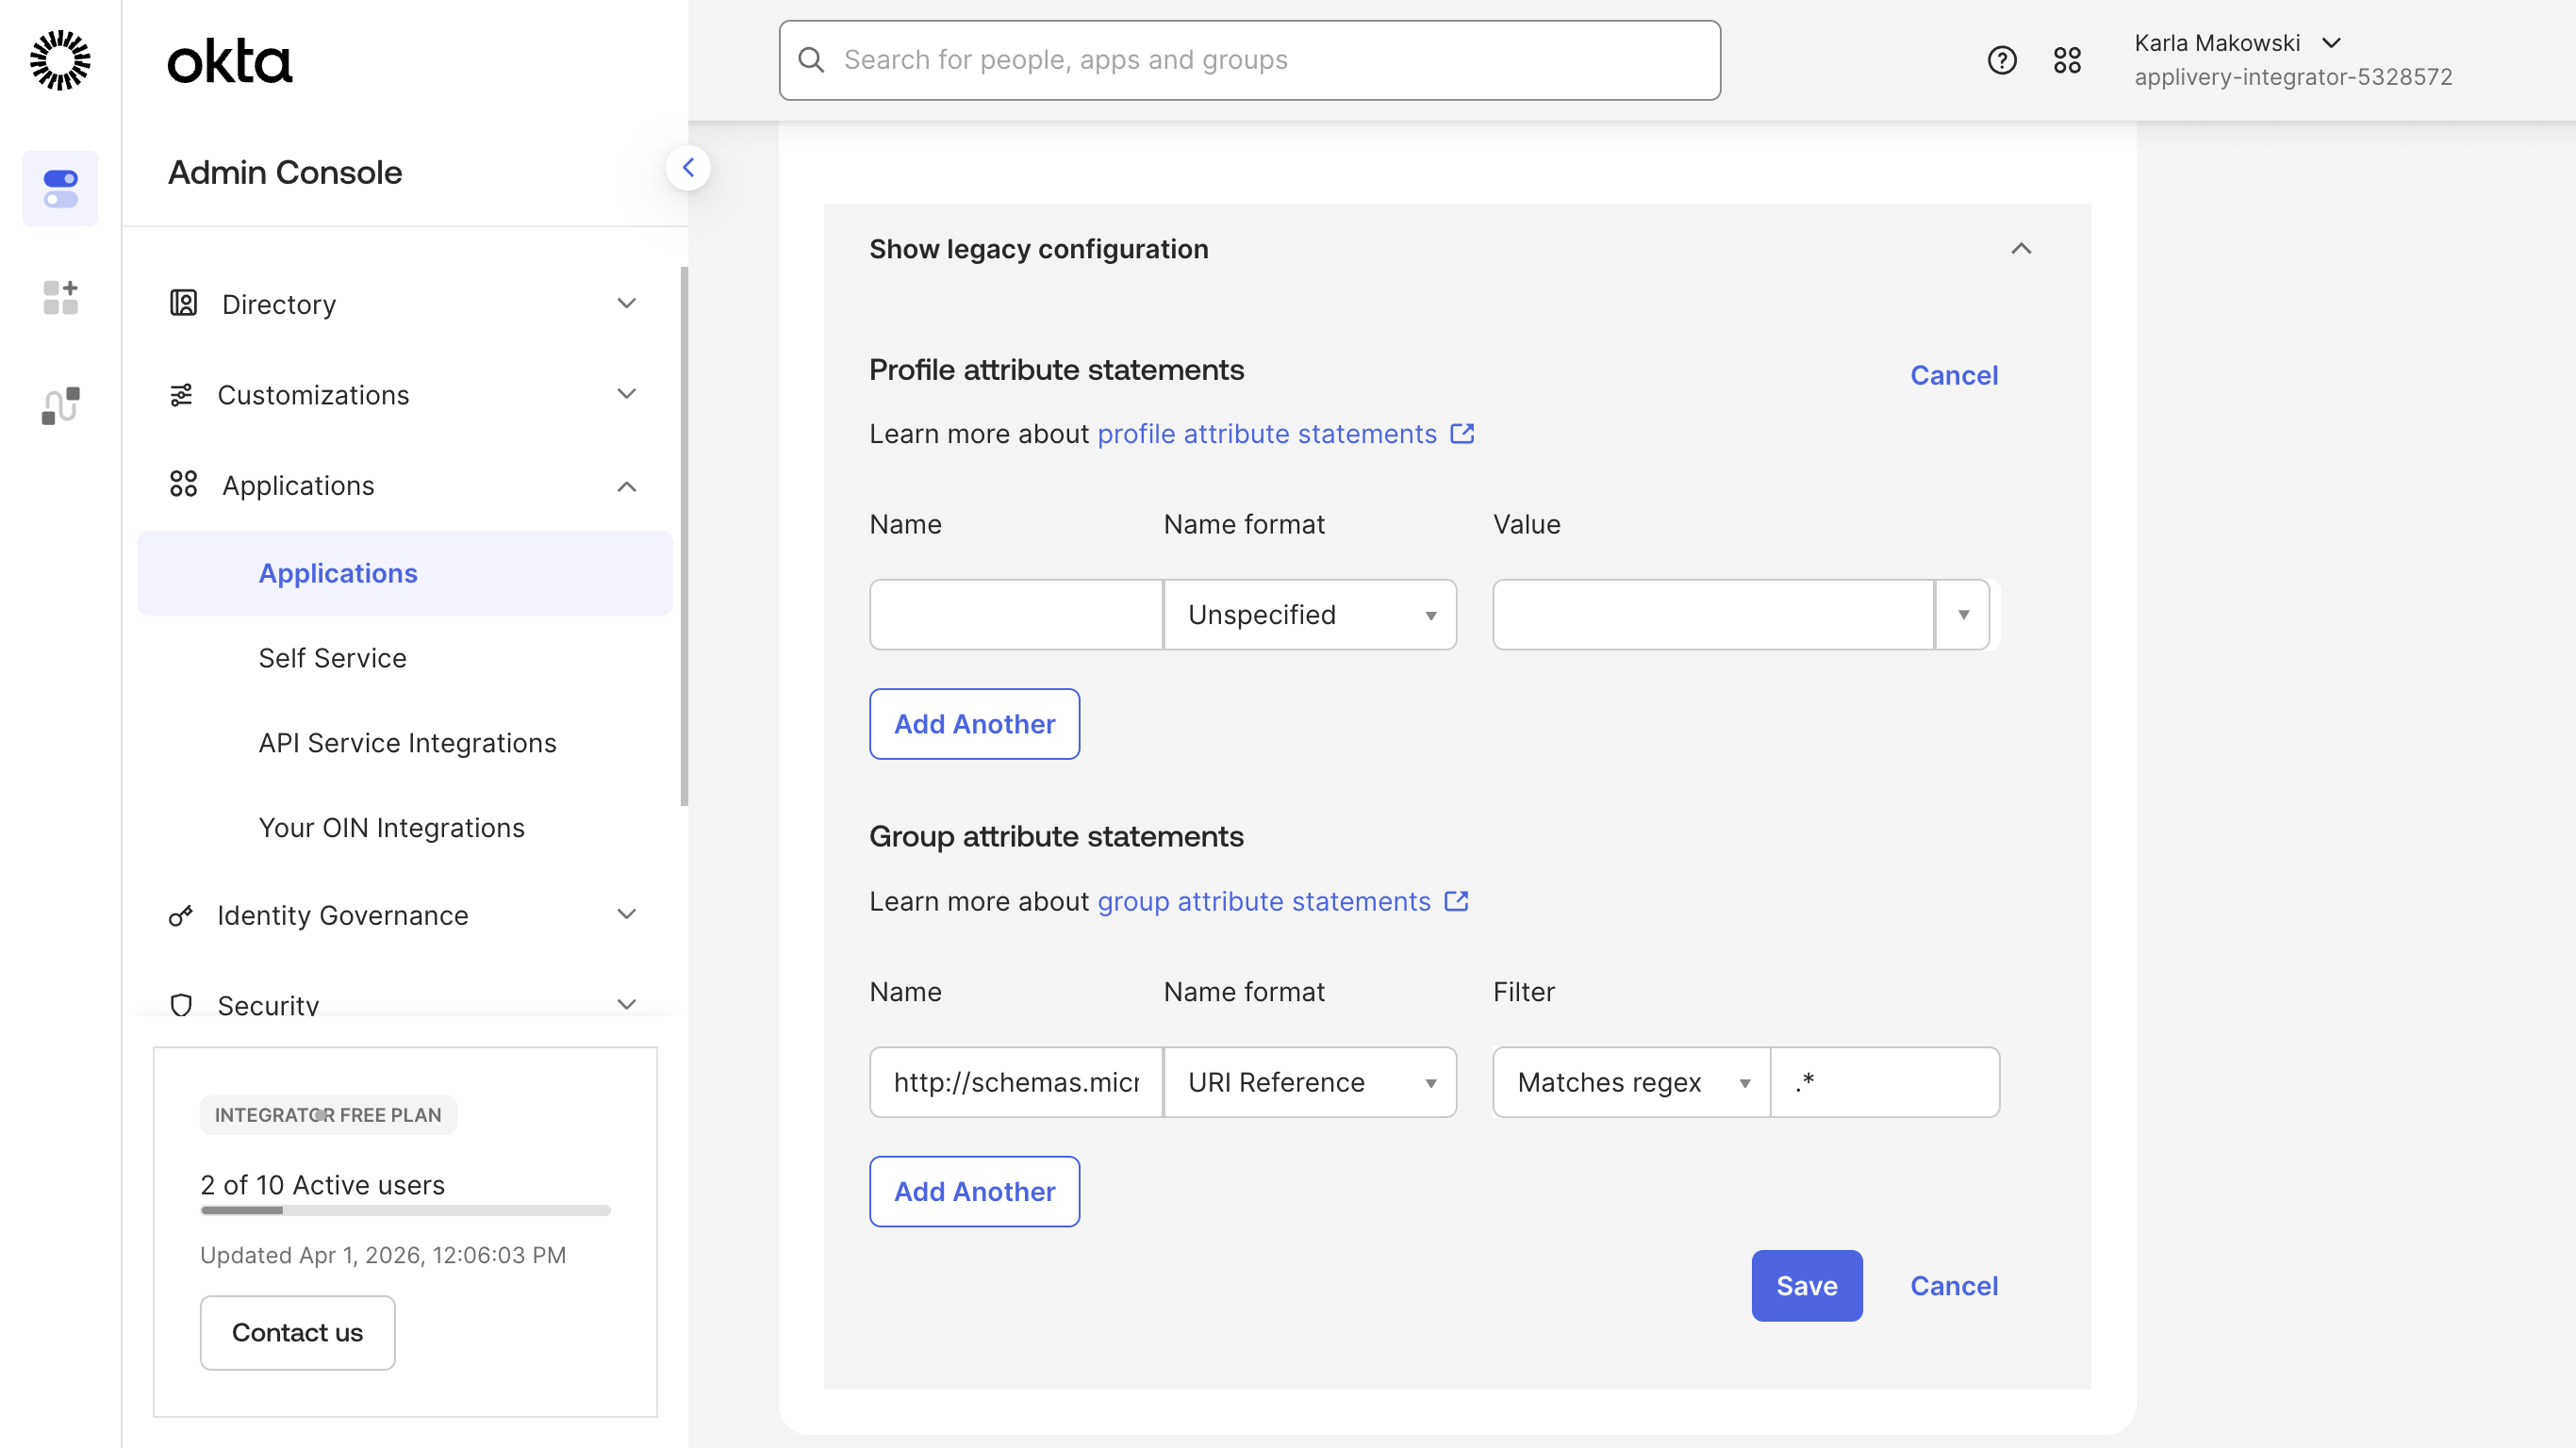
Click Save to apply the attribute statement.
Complete the application setup
Finish the Okta wizard (click Next through any remaining steps). Okta will confirm the application has been created.
Applivery needs Okta's Identity Provider metadata to validate incoming SAML assertions. Inside the newly created application in Okta, go to the Sign On tab, click View SAML Setup Instructions. Next, scroll to the bottom of the page and locate the Identity Provider metadata section. Copy the full XML content and save it as a .xml file (e.g., okta-metadata.xml).

Go back to the Applivery SAML configuration screen for the same portal you started with in Step 1.
Under Step 2 of the Applivery SAML form, upload the Federation Metadata XML file you saved from Okta and click Save. Use the toggle switch to enable the SAML integration for your organization.
Before users can authenticate via SSO, they must be assigned to the Applivery application in Okta.
In your Okta application, go to the Assignments tab. Click Assign and select Assign to People or Assign to Groups, depending on your preferred access management approach. Assign the users or groups who should have access to Applivery and click Done.
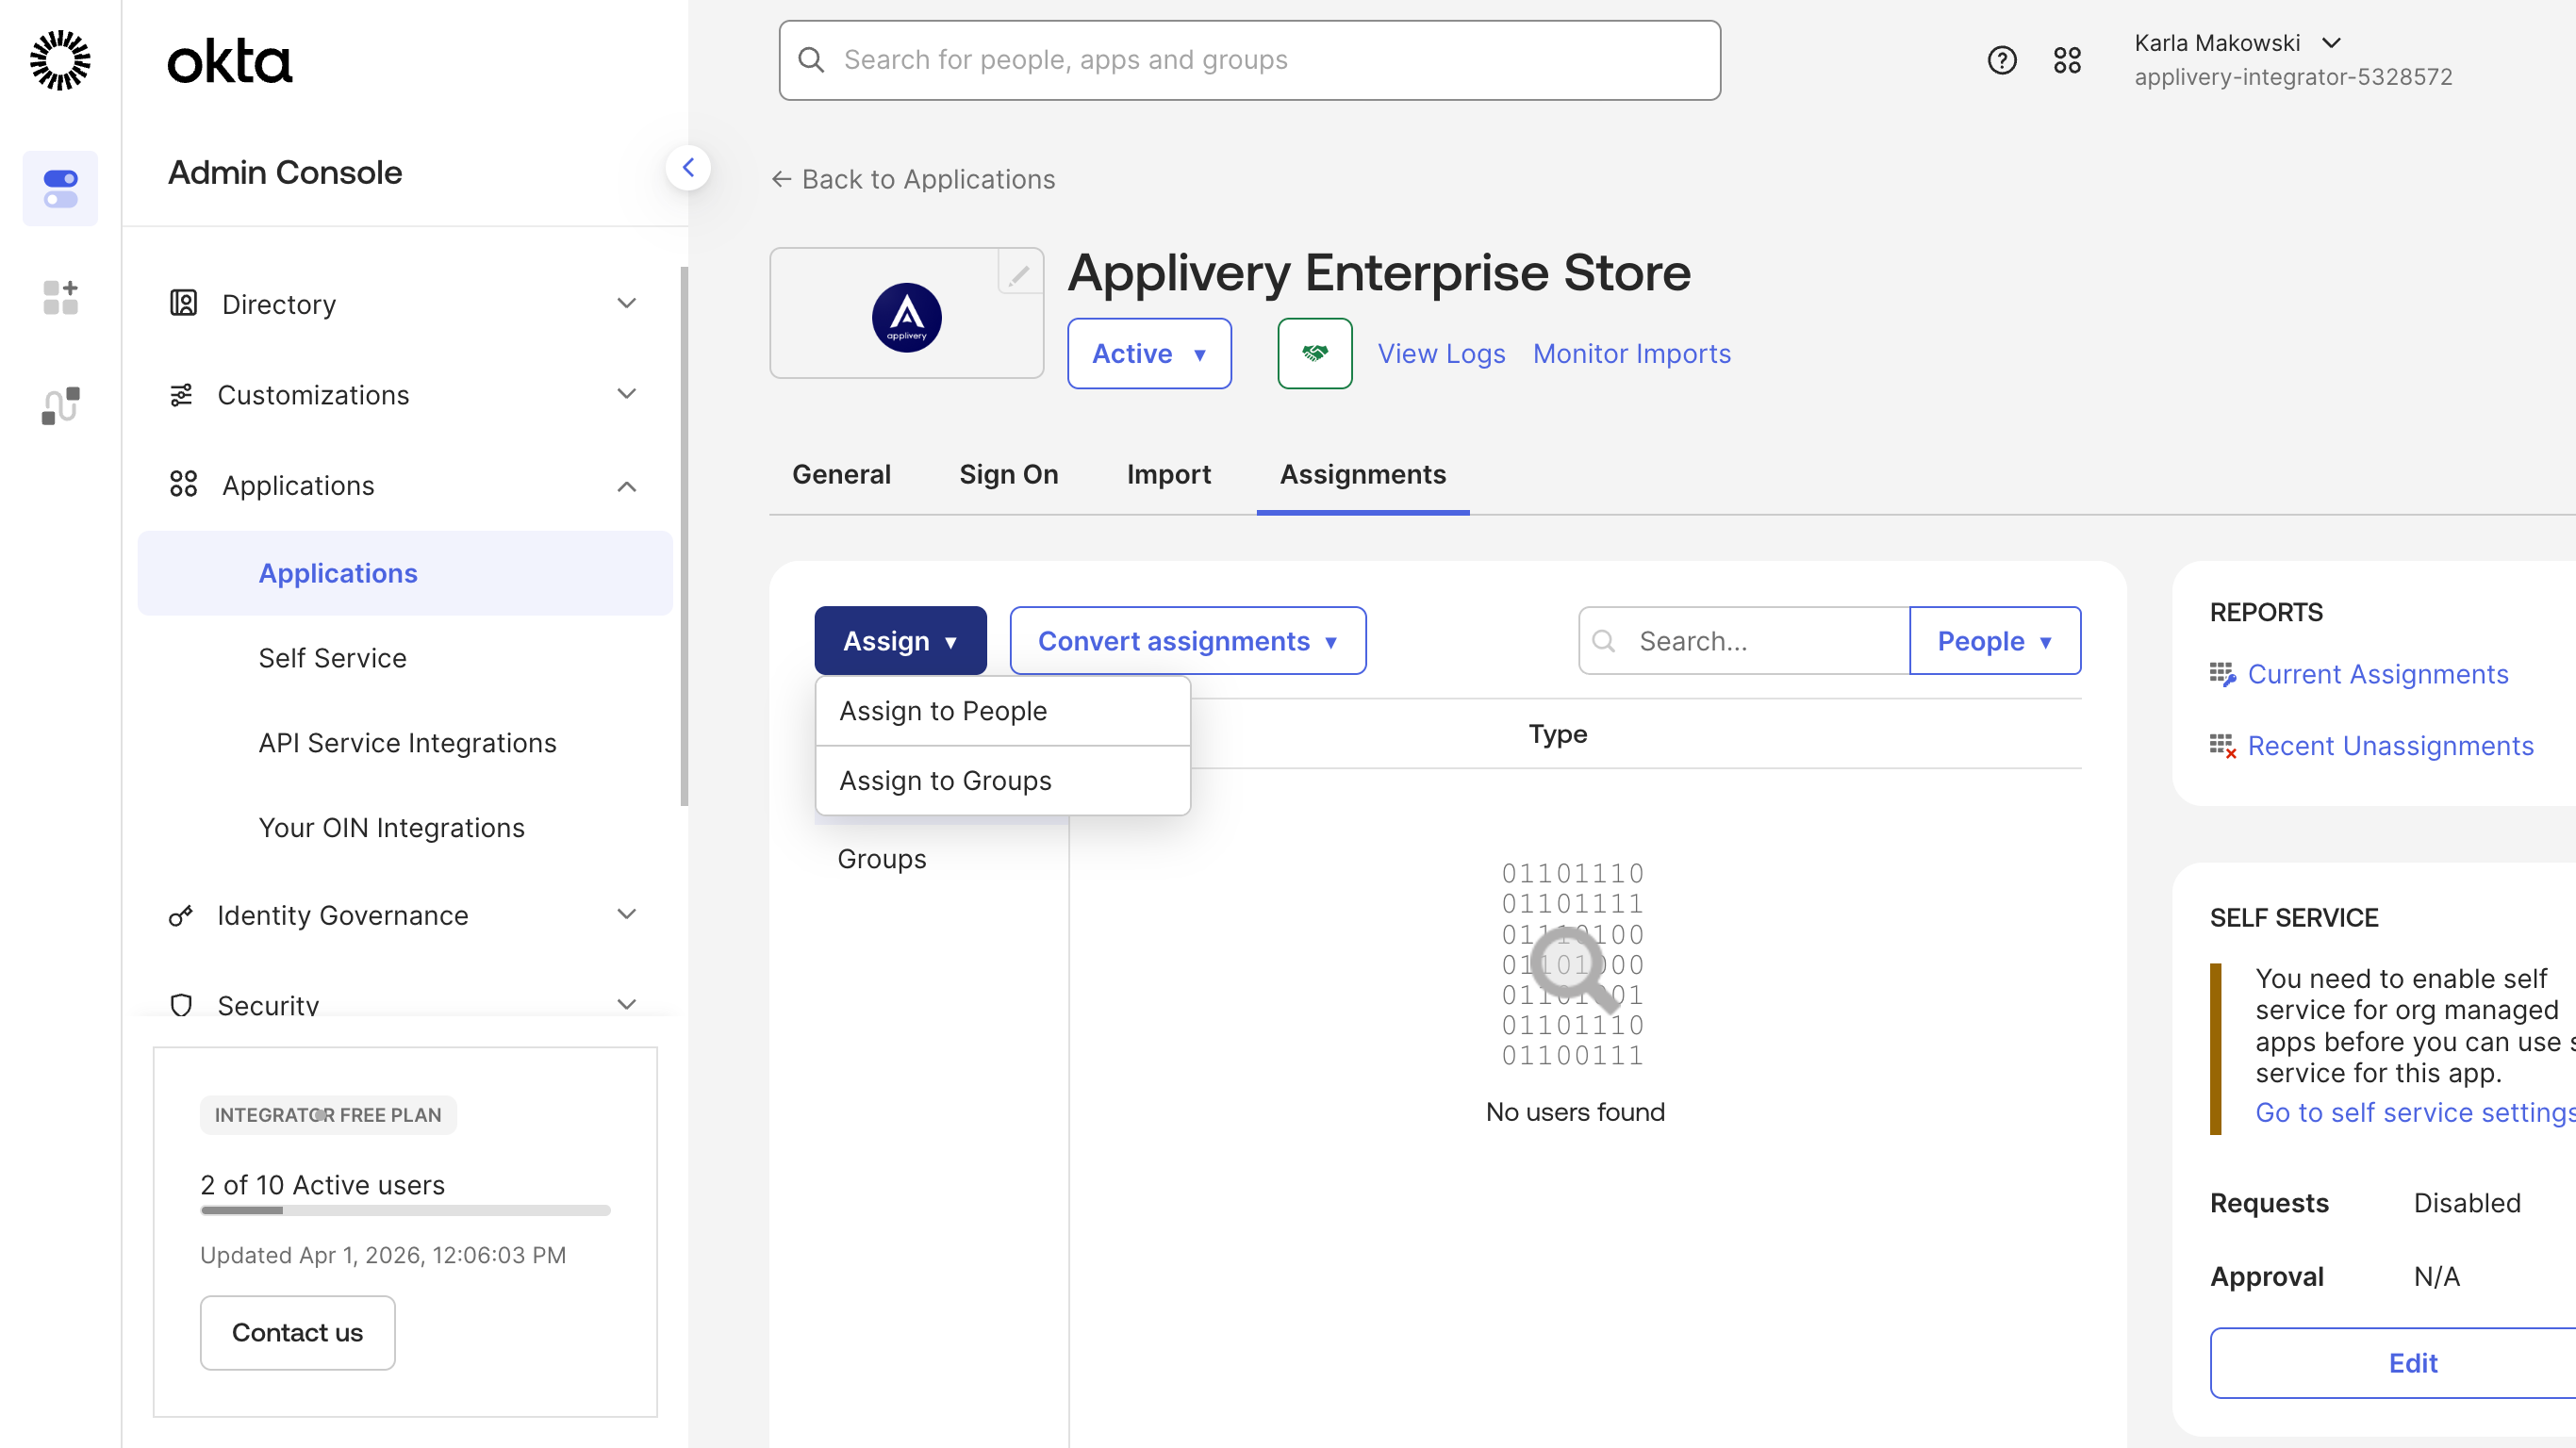
Users who are not assigned to the application in Okta will not be able to log in via SSO, even if the integration is correctly configured.
Once both sides are configured and enabled, test with an assigned user:
Dashboard: Go to https://dashboard.applivery.io/welcome/sso and enter the user's email. You will be redirected to Okta for authentication.
App Store / MDM Portal: Navigate to your App Store or MDM Portal URL. Users with SAML configured will be redirected to Okta for authentication before accessing the portal.
If authentication fails, double-check that the Single Sign-On URL in Okta exactly matches the Callback URL from Applivery (including the organization slug), and that the user is assigned to the application in Okta.