
SentinelOne Agent is an advanced, AI-powered cybersecurity platform designed to provide autonomous endpoint protection across Windows, macOS, and Linux environments. Leveraging a single-agent architecture, SentinelOne unifies prevention, detection, response, and threat hunting capabilities in real time—without relying on cloud connectivity or constant human intervention.
Built for modern security teams, SentinelOne offers robust protection against malware, ransomware, fileless attacks, and zero-day threats by combining behavioral AI, machine learning, and automated remediation. Its powerful EDR (Endpoint Detection and Response) functionality empowers organizations to not only detect and respond to threats rapidly, but also to gain deep visibility into the entire attack lifecycle.
Whether you’re managing a remote workforce or securing enterprise infrastructure, SentinelOne provides scalable, resilient, and easy-to-manage endpoint security tailored for today’s evolving threat landscape.
Important updates
Changes in macOS Sequoia 15
macOS Sequoia 15 introduces a new interface that allows users to view and manage all installed system extensions, including network extensions. This update provides users with greater control over these components.

As an administrator, you may want to prevent users from disabling certain system extensions via System Settings. To support this, macOS Sequoia 15 includes a new key NonRemovableFromUISystemExtensions within the com.apple.system-extension-policy payload.
By specifying the SentinelOne Network Monitoring extension in this payload, users will still be able to view the extension details—but they won’t be able to modify or disable it.
The NonRemovableFromUISystemExtensions key is not supported in macOS Ventura 13 or macOS 14 Sonoma. Therefore, it’s recommended to create a separate configuration profile specifically for macOS Sequoia 15 and later. This ensures that when users upgrade to Sequoia, the correct restrictions are automatically applied and enforced.
Requirements
To successfully deploy SentinelOne on macOS through Applivery, make sure you have the following:
SentinelOne Agent package (
.pkg).SentinelOne Token.
Activation Script (for agent licensing).
Full Disk Access policy (via configuration profile).
Custom
.mobileconfigprofile.System Extensions.
1 Applivery license for App Distribution.
To deploy SentinelOne using Applivery, you will need to upload the compressed app package (.zip) to your App Distribution section and configure it with a post-installation activation script.
First, download the SentinelOne .pkg installer from your SentinelOne dashboard and make sure to copy your organization’s token, as you’ll need this later for the activation script.
Once downloaded, compress the .pkg file by right-clicking on it and selecting Compress, which will generate a .zip file.
Next, log in to the Applivery Dashboard and navigate to the App Distribution section. From there, follow the steps outlined in our documentation:
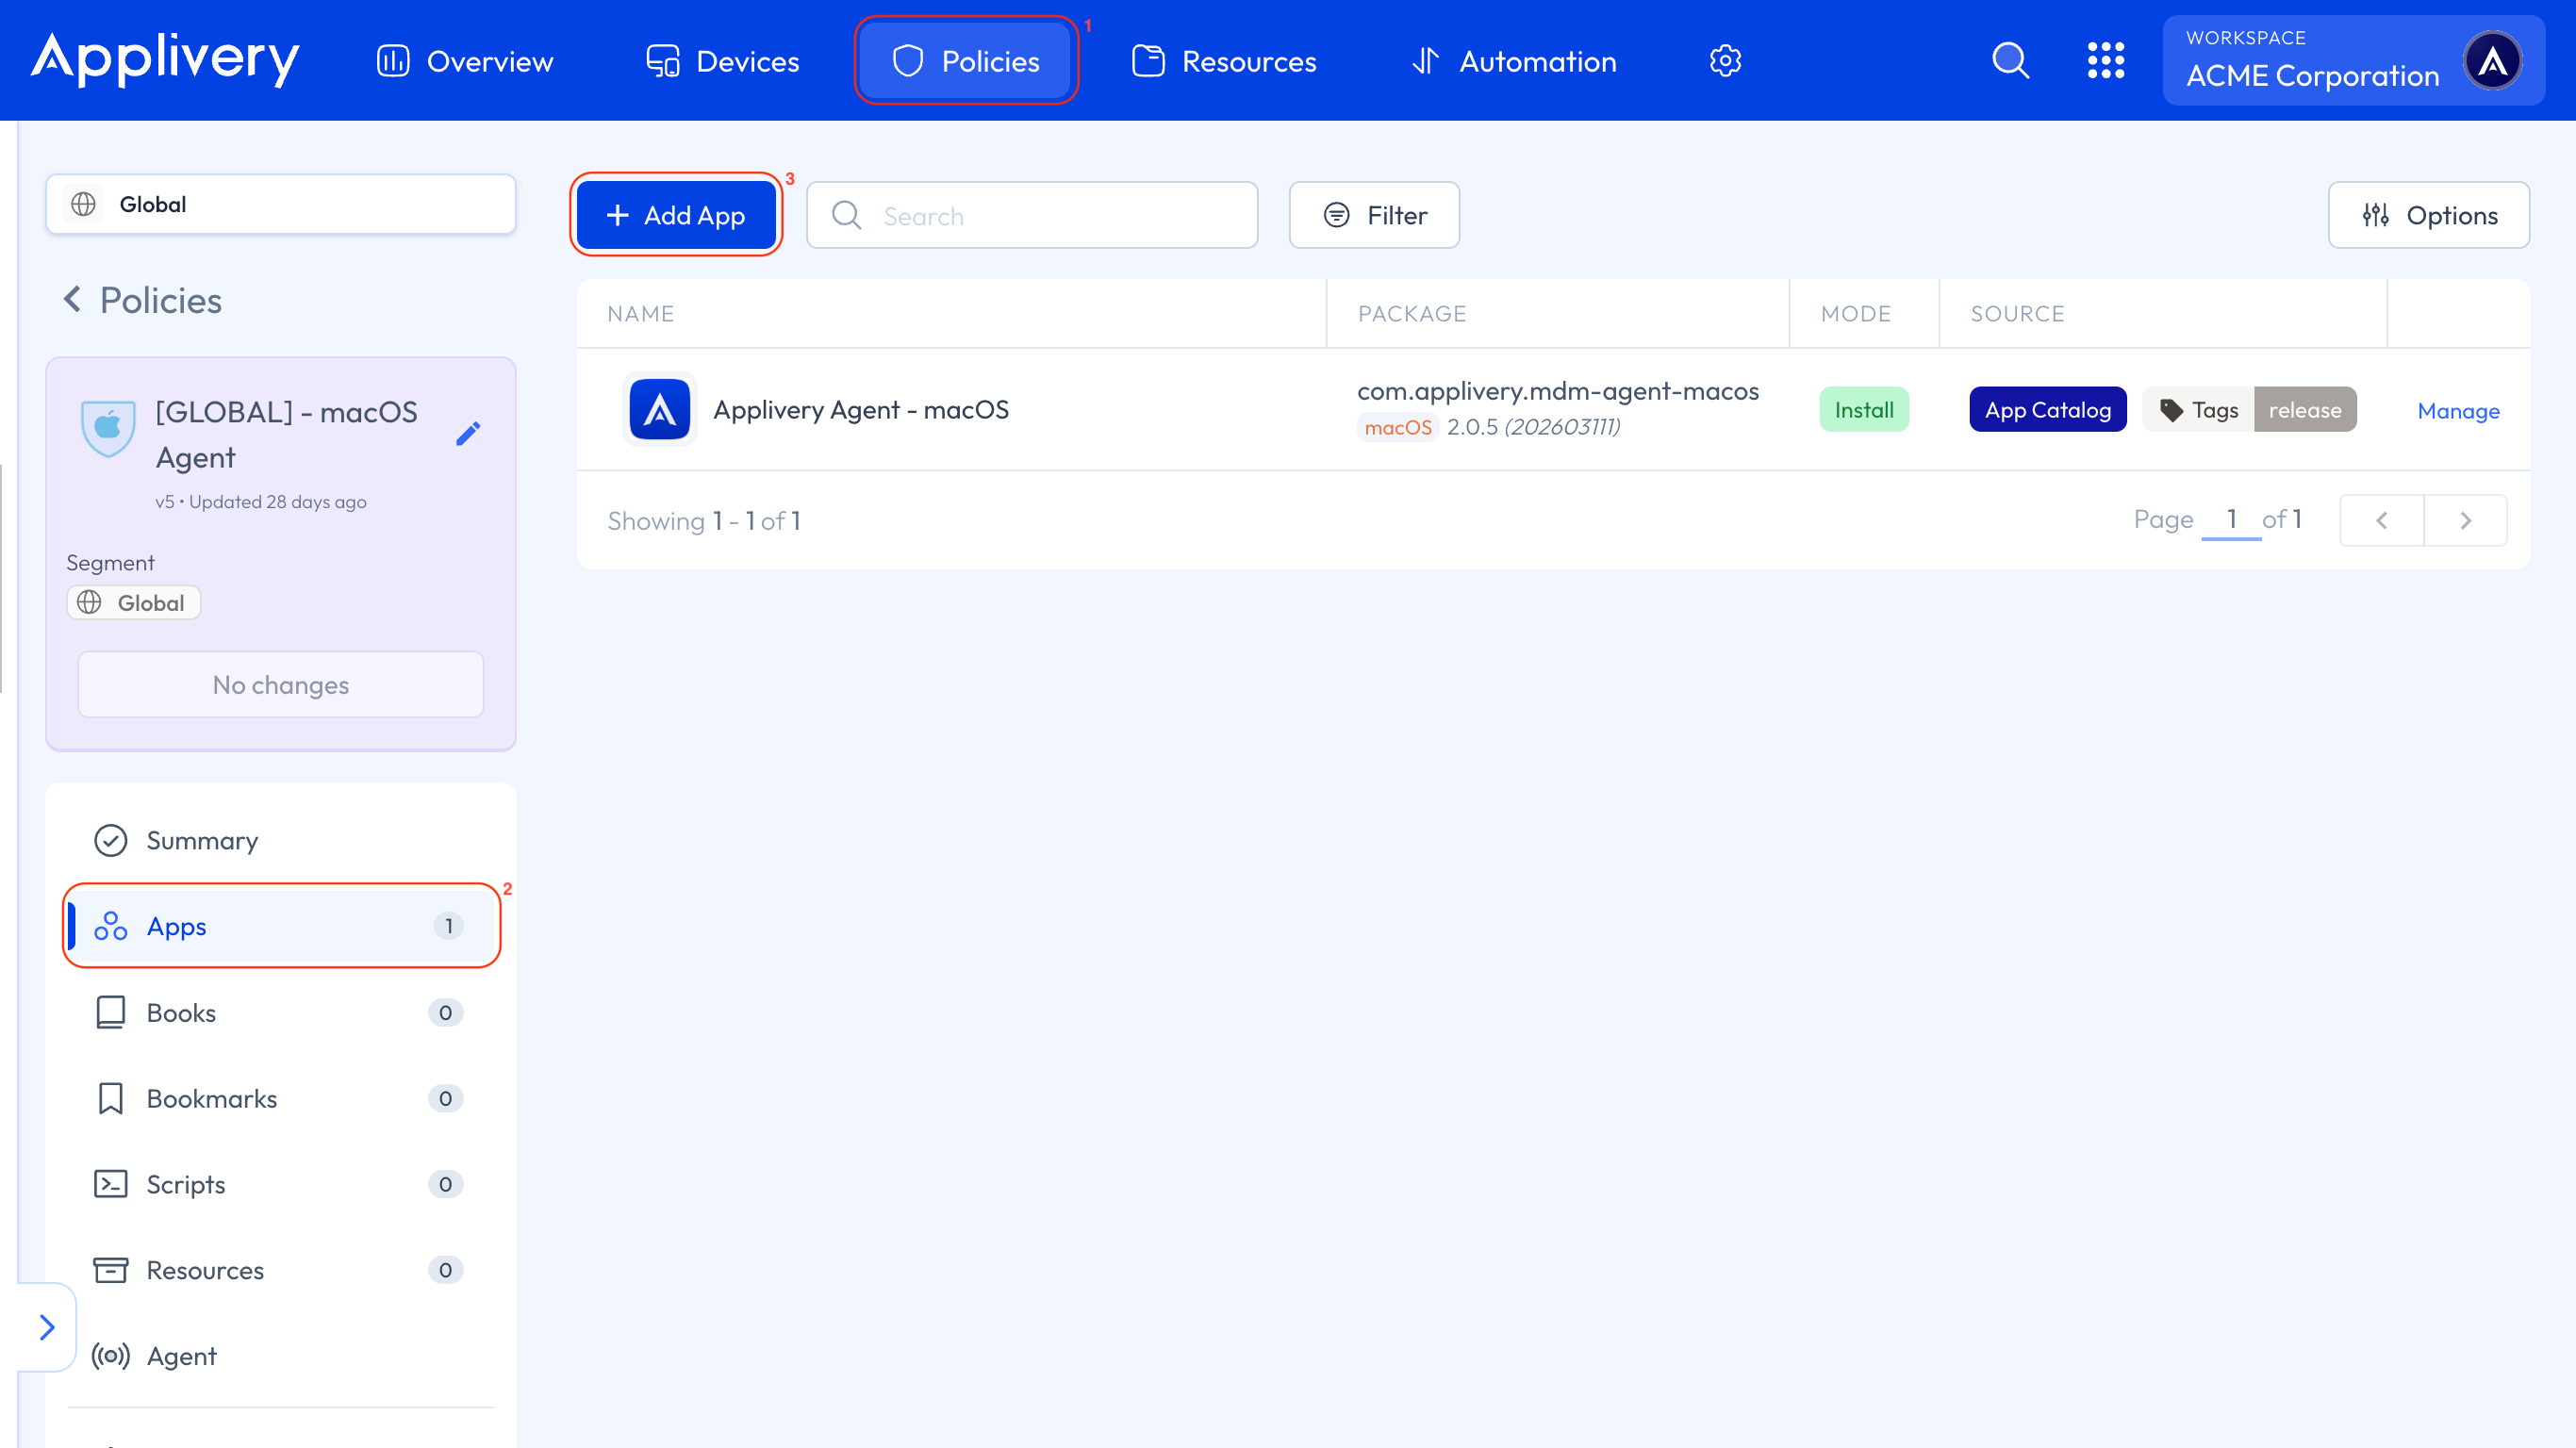
Head to the Device Management section and go to any of your Policies (1) or create a new one. From the left-hand menu, select the Apps (2) section and click the + Add App (3) button.
In the modal view, navigate to the Applivery tab. Set the platform to macOS, choose Your Workspace as the App origin, and search for the SentinelOne App you previously created. For the Build selection, choose Last to ensure the latest version is always deployed.
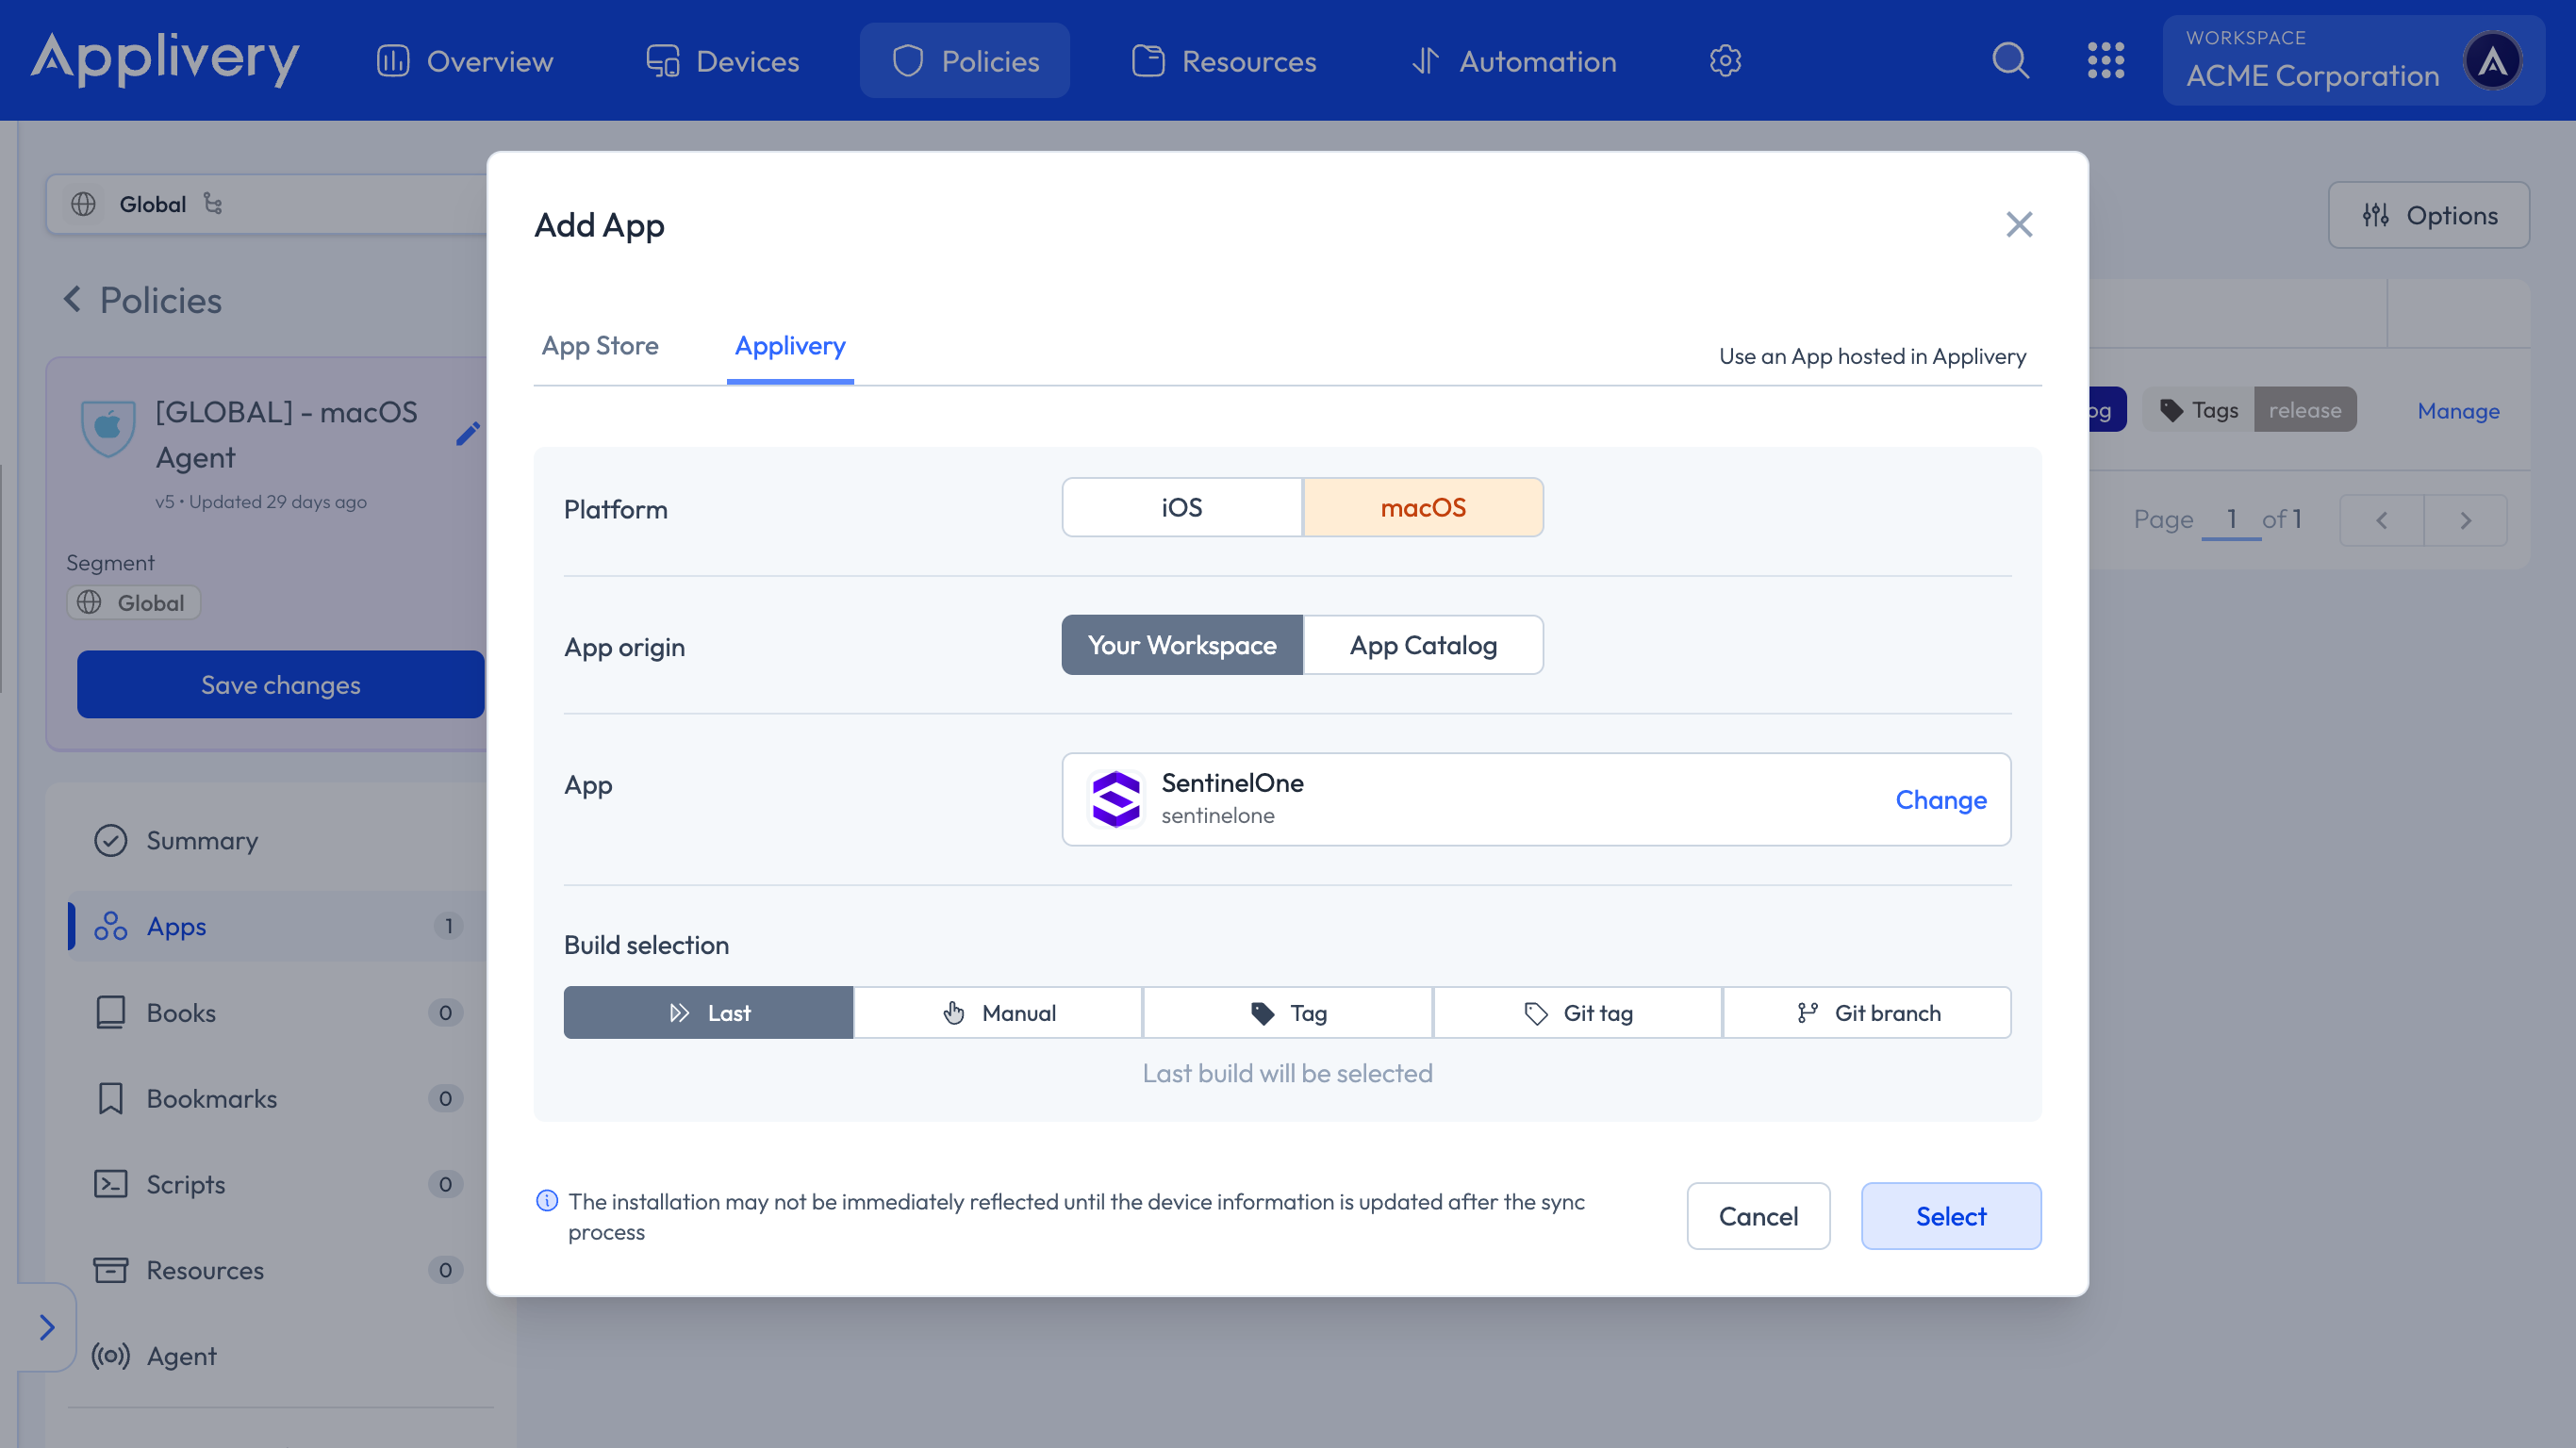
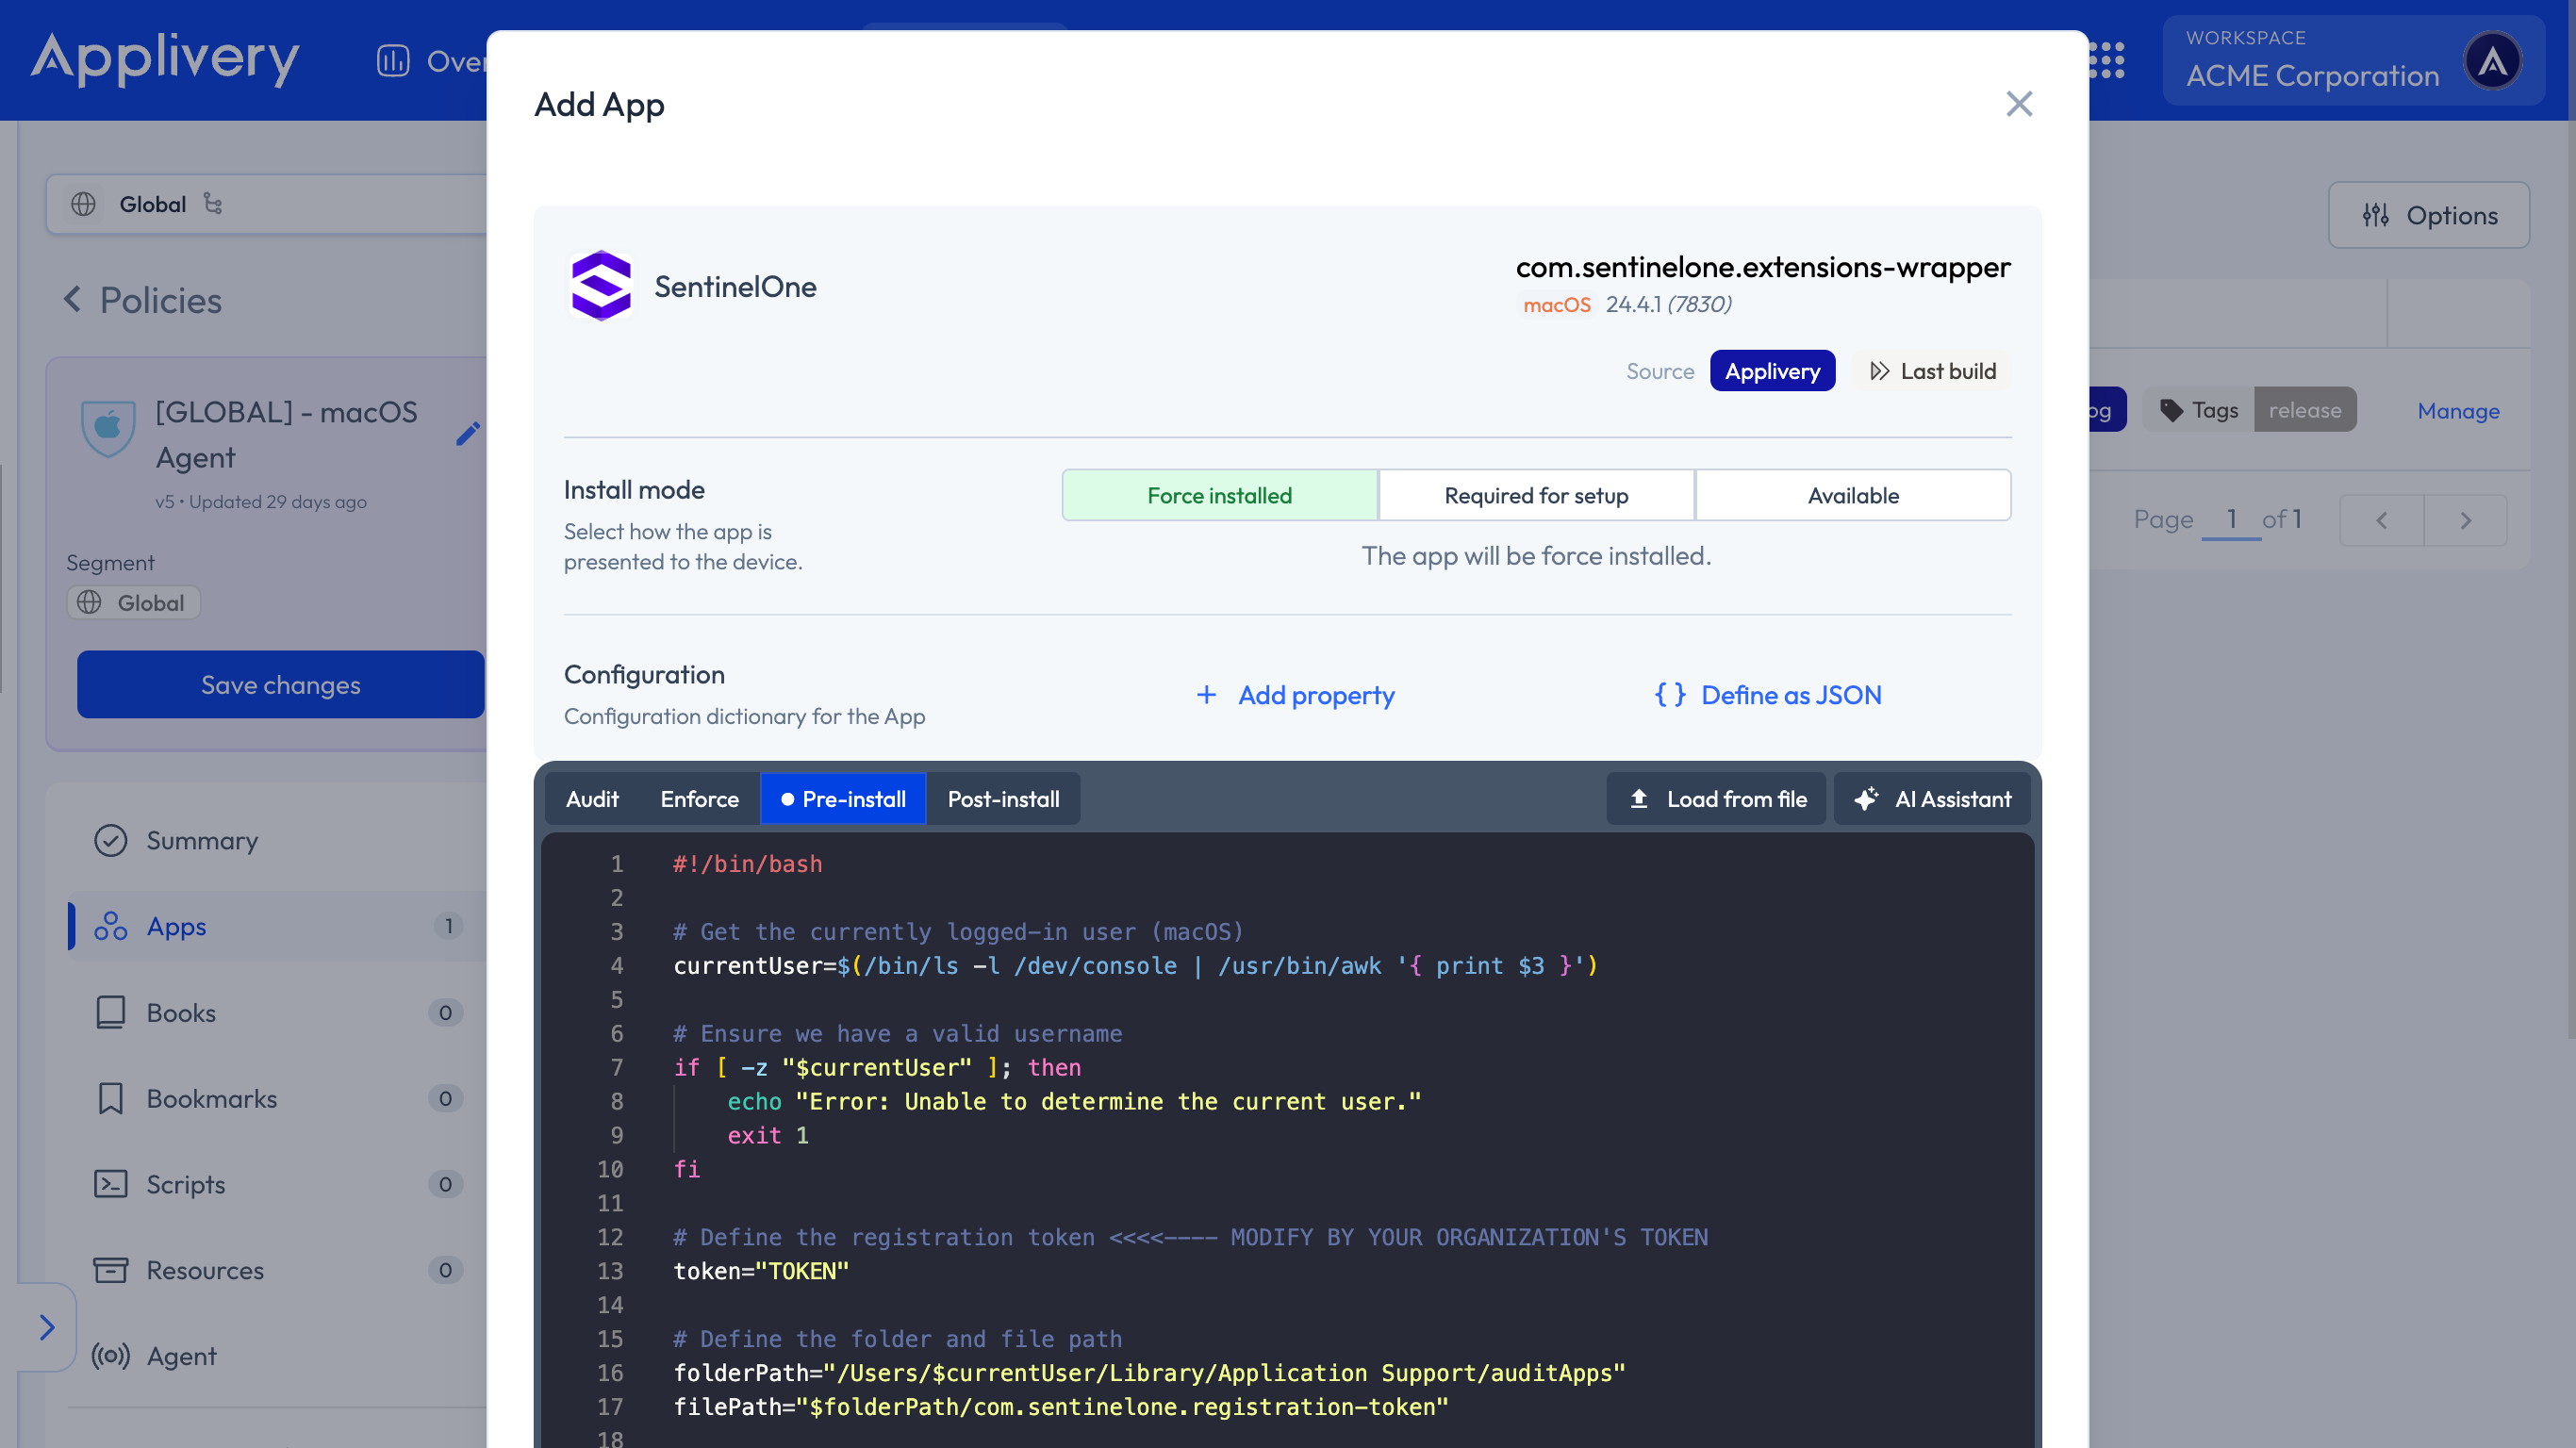
Continue to the next step and select your preferred install mode—Force Install, Required for setup, or Available—depending on your deployment strategy.
In the Configuration section, select Pre-install and paste your Activation Script, making sure to replace the placeholder values with the organization’s token.
#!/bin/bash

# Get the currently logged-in user (macOS)
currentUser=$(/bin/ls -l /dev/console | /usr/bin/awk '{ print $3 }')

# Ensure we have a valid username
if [ -z "$currentUser" ]; then
    echo "Error: Unable to determine the current user."
    exit 1
fi

# Define the registration token <<<<---- MODIFY BY YOUR ORGANIZATION'S TOKEN
token="TOKEN"

# Define the folder and file path
folderPath="/Users/$currentUser/Library/Application Support/auditApps"
filePath="$folderPath/com.sentinelone.registration-token"

# Ensure the auditApps folder exists and set proper permissions
if ! sudo mkdir -p "$folderPath"; then
    echo "Error: Failed to create directory $folderPath"
    exit 1
fi

if ! sudo chown "$currentUser" "$folderPath"; then
    echo "Error: Failed to change ownership of $folderPath"
    exit 1
fi

if ! sudo chmod 700 "$folderPath"; then
    echo "Error: Failed to set permissions on $folderPath"
    exit 1
fi

# Write the token to the file and set proper permissions
if ! echo "$token" | sudo tee "$filePath" > /dev/null; then
    echo "Error: Failed to write the token to $filePath"
    exit 1
fi

if ! sudo chown "$currentUser" "$filePath"; then
    echo "Error: Failed to change ownership of $filePath"
    exit 1
fi

if ! sudo chmod 600 "$filePath"; then
    echo "Error: Failed to set permissions on $filePath"
    exit 1
fi

# Open the token file with nano for manual editing as the regular user
if ! sudo -u "$currentUser" nano "$filePath"; then
    echo "Error: Failed to open $filePath in nano"
    exit 1
fi

# Check if sentinelctl exists before executing
if ! command -v /usr/local/bin/sentinelctl &> /dev/null; then
    echo "Error: sentinelctl command not found."
    exit 1
fi

# Register the token with SentinelOne
if ! sudo -u "$currentUser" /usr/local/bin/sentinelctl set registration-token -- "$token"; then
    echo "Error: Failed to register the token with SentinelOne."
    exit 1
fi

# Exit successfully
echo "Registration token successfully written and applied."
exit 0
To ensure the proper functioning of the App after installation, we must grant it Full Disk Access permissions. Within the Policy, select +Add Configuration from the left-hand menu, then choose Privacy Preferences Policy Control.
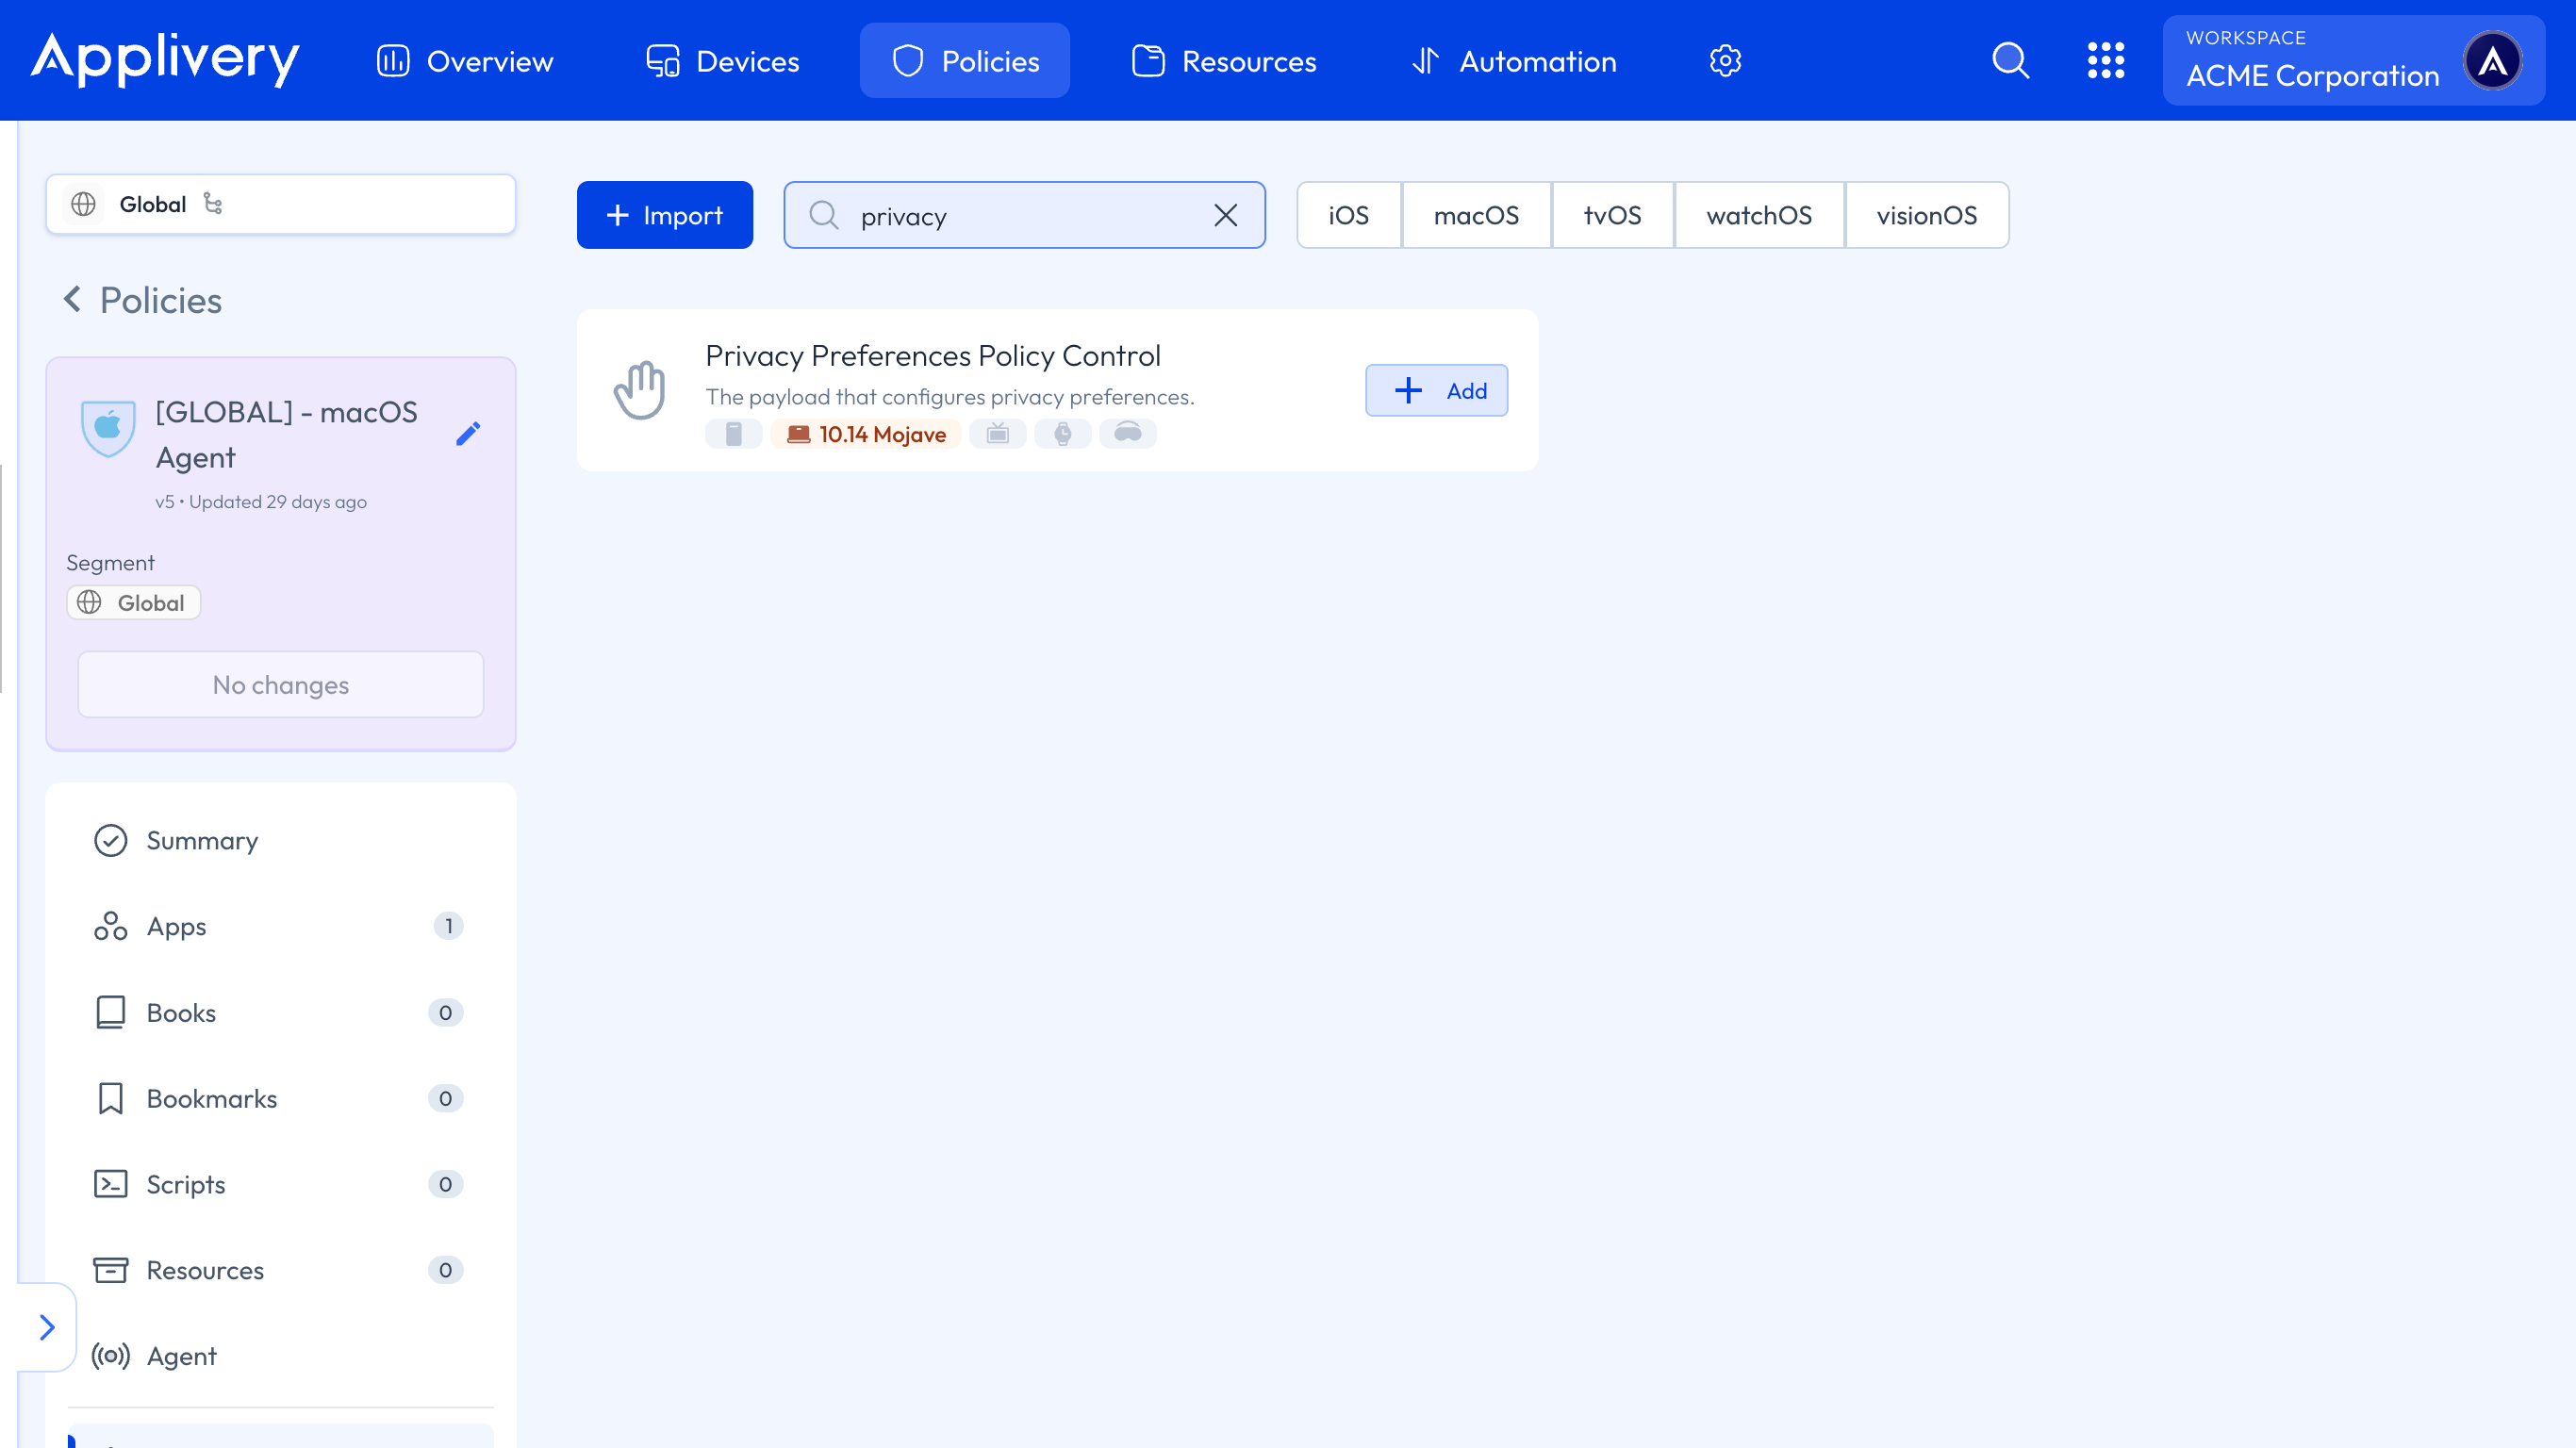
Next, we’ll add several entries related to System Policy All Files. For each element added to this configuration, set the access to Allowed.
The first configuration should include the following params:
- Code requirement:
anchor apple generic and identifier "com.sentinelone.sentineld" and (certificate leaf[field.1.2.840.113635.100.6.1.9] /* exists */ or certificate 1[field.1.2.840.113635.100.6.2.6] /* exists */ and certificate leaf[field.1.2.840.113635.100.6.1.13] /* exists */ and certificate leaf[subject.OU] = "4AYE5J54KN")
Identifier:
com.sentinelone.sentineld.Identifier Type: Bundle ID.
Static Code: Disabled.
For the second configuration:
- Code requirement:
anchor apple generic and identifier "com.sentinelone.sentineld-shell" and (certificate leaf[field.1.2.840.113635.100.6.1.9] /* exists */ or certificate 1[field.1.2.840.113635.100.6.2.6] /* exists */ and certificate leaf[field.1.2.840.113635.100.6.1.13] /* exists */ and certificate leaf[subject.OU] = "4AYE5J54KN")
Identifier:
com.sentinelone.sentineld-helper.Identifier Type: Bundle ID.
Static Code: Disabled.
For the third configuration:
- Code requirement:
anchor apple generic and identifier "com.sentinelone.sentineld-helper" and (certificate leaf[field.1.2.840.113635.100.6.1.9] /* exists / or certificate 1[field.1.2.840.113635.100.6.2.6] / exists / and certificate leaf[field.1.2.840.113635.100.6.1.13] / exists */ and certificate leaf[subject.OU] = "4AYE5J54KN")
Identifier:
com.sentinelone.sentineld-shell.Identifier Type: Bundle ID.
Static Code: Disabled.
For the last configuration:
- Code requirement:
anchor apple generic and identifier "com.sentinelone.sentinel-shell" and (certificate leaf[field.1.2.840.113635.100.6.1.9] /* exists */ or certificate 1[field.1.2.840.113635.100.6.2.6] /* exists */ and certificate leaf[field.1.2.840.113635.100.6.1.13] /* exists */ and certificate leaf[subject.OU] = "4AYE5J54KN")
Identifier:
com.sentinelone.sentinel-shell.Identifier Type: Bundle ID.
Static Code: Disabled.
To apply the custom configuration, navigate to the desired Policy and click + Add configuration from the menu on the left-hand side. Then, select the + Import button and paste the provided .xml content into the editor:
<?xml version="1.0" encoding="UTF-8"?>
<!DOCTYPE plist PUBLIC "-//Apple//DTD PLIST 1.0//EN" "http://www.apple.com/DTDs/PropertyList-1.0.dtd">
<plist version="1.0">
<dict>
	<key>PayloadContent</key>
	<array>
		<dict>
			<key>NotificationSettings</key>
			<array>
				<dict>
					<key>BundleIdentifier</key>
					<string>com.sentinelone.SentinelAgent</string>
					<key>CriticalAlertEnabled</key>
					<true/>
				</dict>
			</array>
			<key>PayloadDescription</key>
			<string>Configures notifications settings for apps</string>
			<key>PayloadDisplayName</key>
			<string>Notifications</string>
			<key>PayloadIdentifier</key>
			<string>com.apple.notificationsettings.26E82306-CDA4-4AF0-9714-0B8363D2A26F</string>
			<key>PayloadType</key>
			<string>com.apple.notificationsettings</string>
			<key>PayloadUUID</key>
			<string>26E82306-CDA4-4AF0-9714-0B8363D2A26F</string>
			<key>PayloadVersion</key>
			<integer>1</integer>
		</dict>
		<dict>
			<key>PayloadDescription</key>
			<string>Configures Conference Room Display mode</string>
			<key>PayloadDisplayName</key>
			<string>Conference Room Display</string>
			<key>PayloadIdentifier</key>
			<string>com.apple.conferenceroomdisplay.B64EF9CA-0B32-43F9-82D7-5ABB51D1422B</string>
			<key>PayloadType</key>
			<string>com.apple.conferenceroomdisplay</string>
			<key>PayloadUUID</key>
			<string>B64EF9CA-0B32-43F9-82D7-5ABB51D1422B</string>
			<key>PayloadVersion</key>
			<integer>1</integer>
		</dict>
		<dict>
			<key>FilterBrowsers</key>
			<false/>
			<key>FilterSockets</key>
			<true/>
			<key>FilterType</key>
			<string>Plugin</string>
			<key>Organization</key>
			<string>Applivery Inc</string>
			<key>PayloadDescription</key>
			<string>Configures content filtering settings</string>
			<key>PayloadDisplayName</key>
			<string>SentinelOne</string>
			<key>PayloadIdentifier</key>
			<string>com.apple.webcontent-filter.B456B4A3-5794-4C8E-99FA-9148C6458AEE</string>
			<key>PayloadType</key>
			<string>com.apple.webcontent-filter</string>
			<key>PayloadUUID</key>
			<string>B456B4A3-5794-4C8E-99FA-9148C6458AEE</string>
			<key>PayloadVersion</key>
			<integer>1</integer>
			<key>PluginBundleID</key>
			<string>com.sentinelone.extensions-wrapper</string>
			<key>UserDefinedName</key>
			<string>SentinelOne</string>
		</dict>
	</array>
	<key>PayloadDisplayName</key>
	<string>SentinelOne Config</string>
	<key>PayloadIdentifier</key>
	<string>com.applivery.sentinelone</string>
	<key>PayloadOrganization</key>
	<string>Applivery</string>
	<key>PayloadRemovalDisallowed</key>
	<false/>
	<key>PayloadType</key>
	<string>Configuration</string>
	<key>PayloadUUID</key>
	<string>9B3EA38F-D1C7-4045-A745-AE3AA25ACCEE</string>
	<key>PayloadVersion</key>
	<integer>1</integer>
Once done, make sure to Save changes to apply the configuration.