Once you have your Android Enterprise configured and you have setup your first Android Policy, you can start enrolling your Android Devices. Let’s take a look at it.
Enrollment options
Applivery supports multiple ways to enroll your Android Devices:
Manual enrollment through a QR code or alphanumeric code.
Automatic enrollments through Smart Enrollments.
Android Zero-touch, designed for automated enrollment.
Management options
As part of Android Enterprise, there are several ways to manage your Devices, depending on the use case:
Company-Owned Devices: Also known as Fully Managed, this is the operating mode that provides full control over the Device. It requires a factory reset (wiping) of the Device to start a clean enrollment.
Company-Owner, Personally-Enabled: They are Company-Owned Devices that employees can use for both personal and work purposes.
Dedicated Devices: Company-Owned Devices assigned to a specific employee or task, used solely for work purposes, and Fully Managed by the organization.
Bring Your Own Device (BYOD): Also known as Work Profile, it refers to personal Devices that employees use for work. The corporate space will be fully encrypted, and you will have full control over it. Devices can be enrolled and unenrolled in/from the Work Profile without requiring a factory reset
Manual enrollment (code or QR)
If Google Workspace is configured as your IDP and you experience any issues during the enrollment process, you will need to review your configuration in the Google Admin Console.
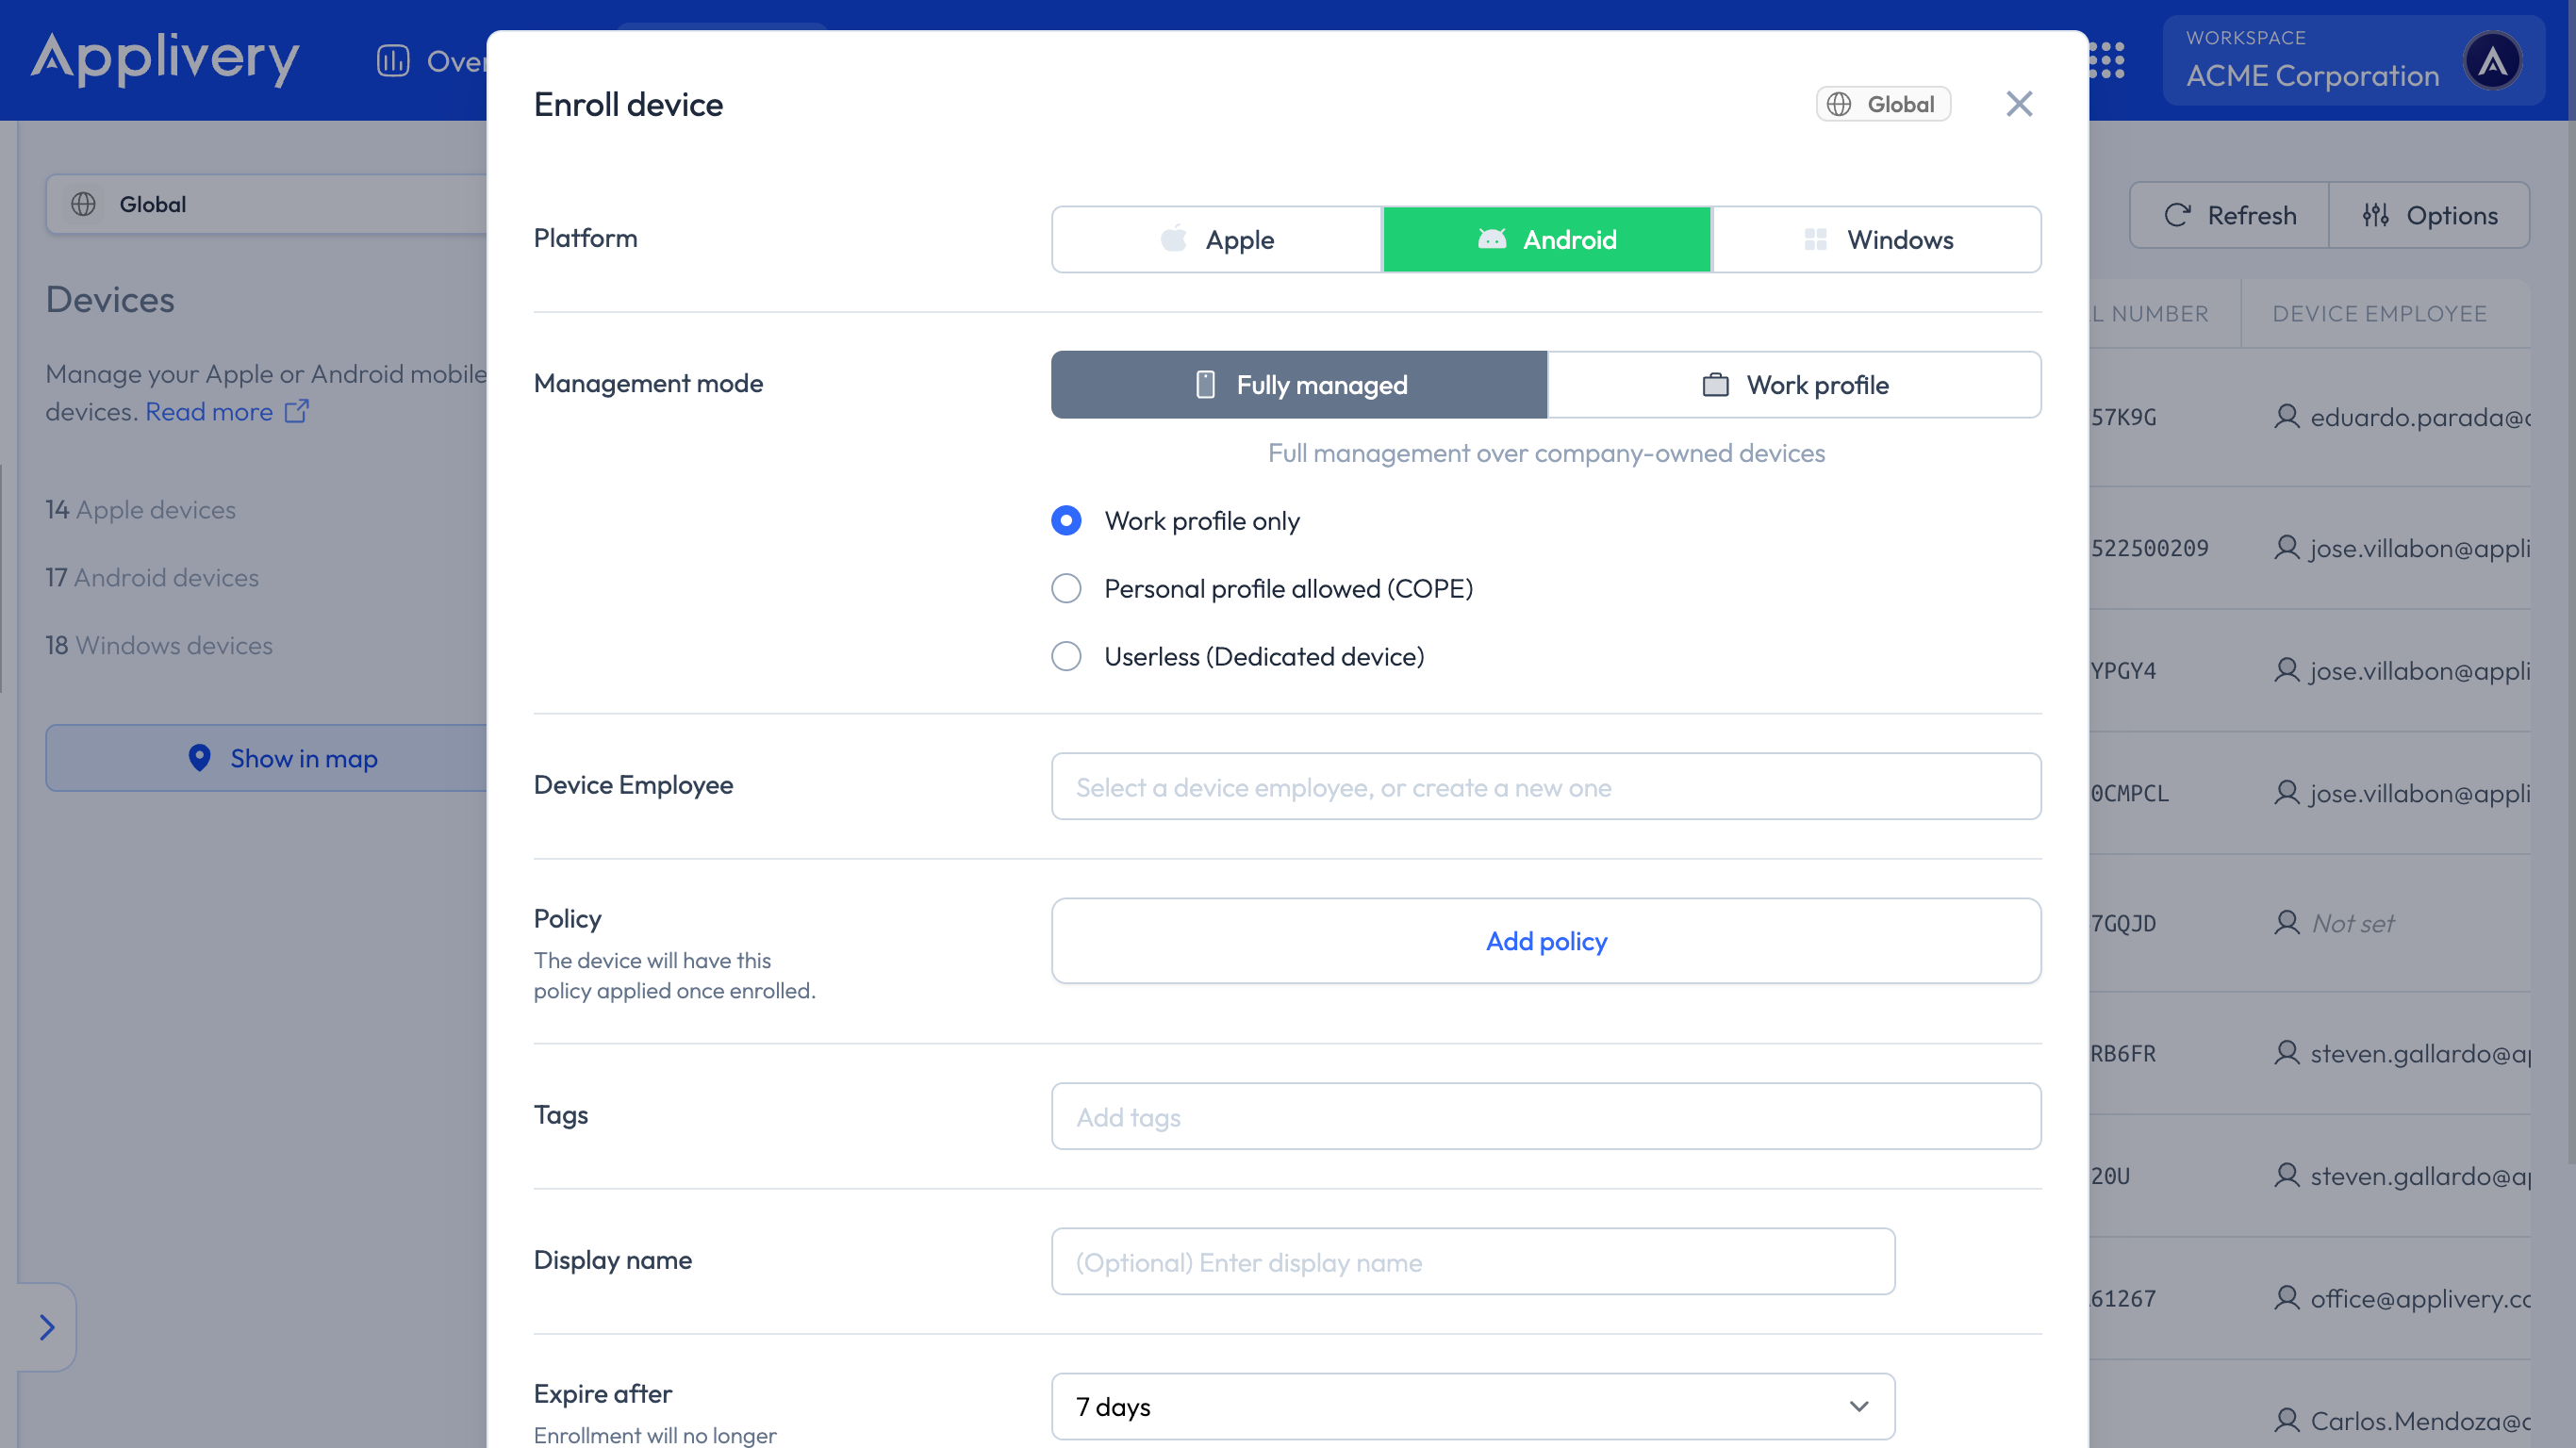
Once in the Applivery Dashboard, navigate to Devices and click + Enroll device. Fill out the form as follows:
Platform: Make sure to choose Android under Platform.
Management mode: Choose between a Fully Managed and Work Profile, as described above.
Device Employee: User who owns the Device. You can create a new employee by introducing the email address.
Policy: Choose the Policy to apply to the Device. You can do so under Policies if you haven’t created it yet. Alternatively, you can create a new Policy here and configure it later.
Tags: Define tags to organize, group, and filter Devices efficiently.
Display name (optional): A friendly name to easily identify the Device among the others.
Expire after: The expiration time of the enrollment token that will be generated.
Send instructions email to employee (optional): Choose whether you want to send a notification to the user, including the enrollment instructions that will vary depending on the enrollment mode.
You can also create bulk enrollments. To do this, simply open the dropdown menu next to + Enroll device and select + Enroll multiple Devices.
An enrollment will be created for each selected Device Employee. If a Device Employee’s email is not found, a new Device Employee will be automatically created.
Once the enrollment is created, it will be added to the list of Devices. Click on it to display the enrollment details and instructions.
The instructions will vary based on the enrollment mode and the type of Device. However, in most cases, you will need to use a QR code to enroll the Device. In summary, enrollment requires the following steps.
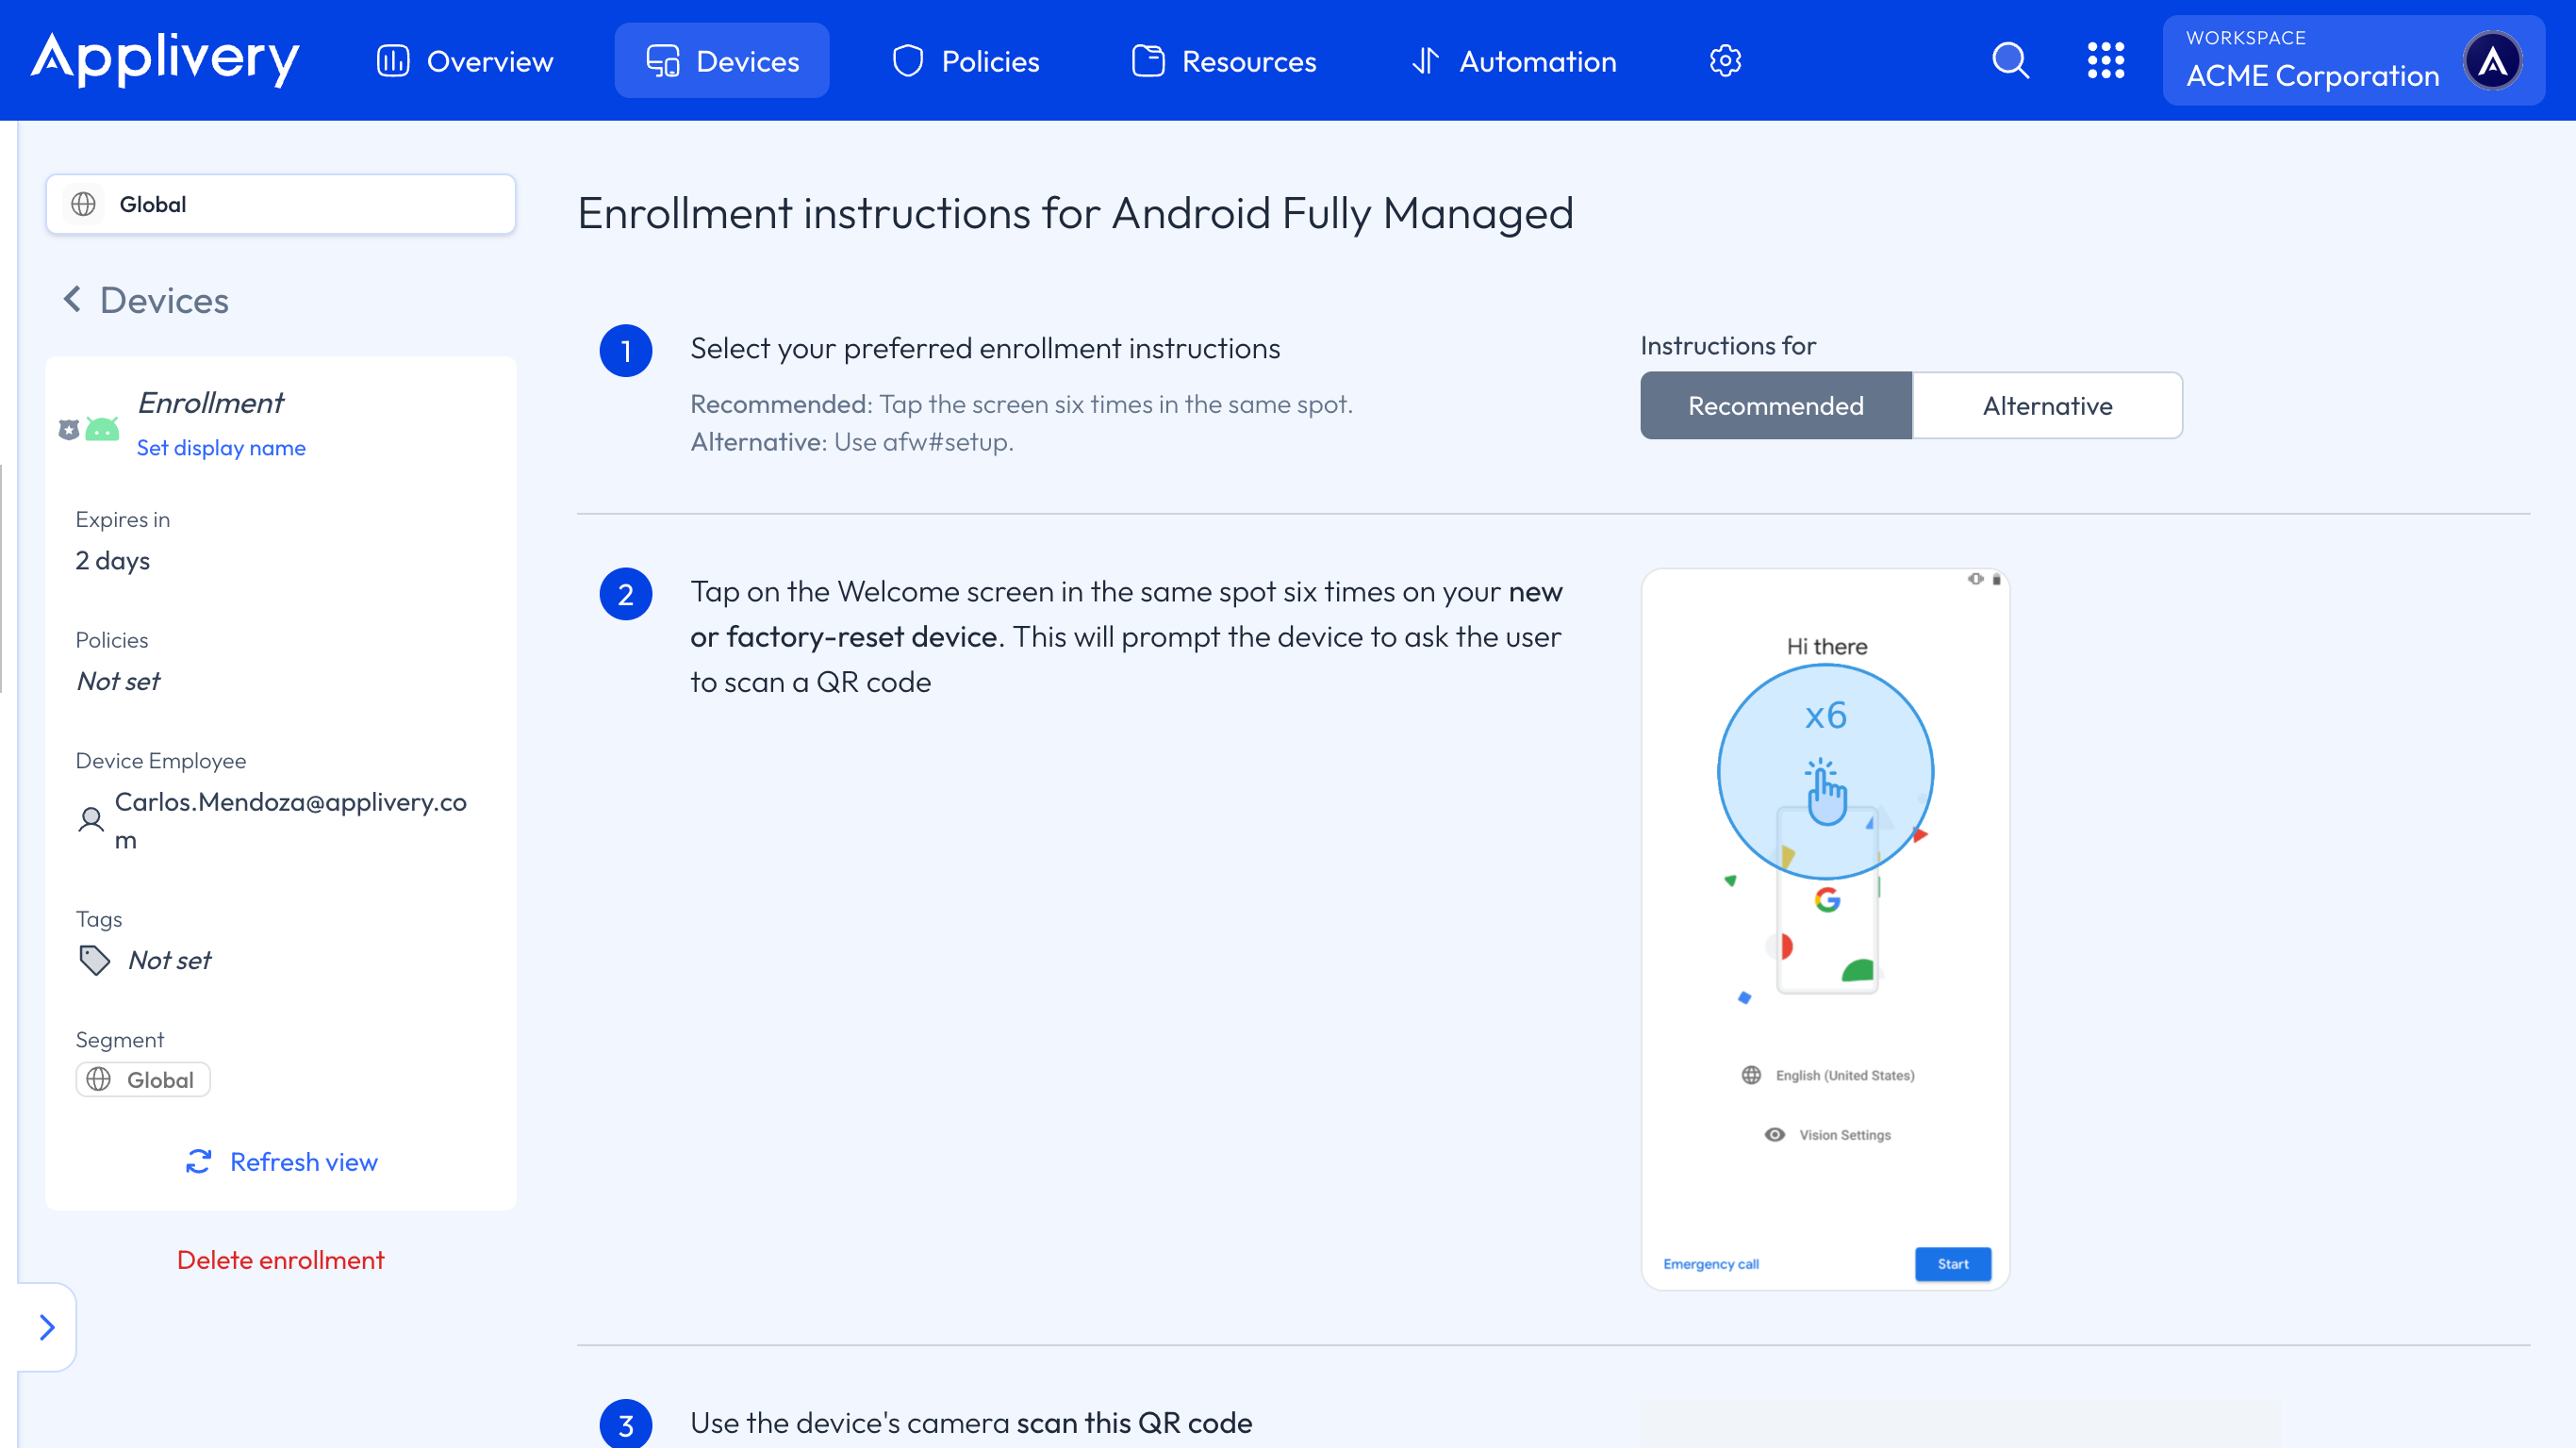
Turn on your wiped or factory-reset Device.
Option 1: On the Welcome screen, select your language.
Option 2: Tap 6 times over the Welcome message until accessing the QR Reader option.
Connect to your Wi-Fi and then choose NEXT.
Accept the Google Terms and Conditions and then choose NEXT.
On the Google sign-in screen, enter afw#setup instead of a Gmail account and then choose NEXT.
On the Enroll this Device screen, allow your Device to scan a QR code or choose to enter the enrollment code manually.
Lastly, please follow all the steps on your Device screen carefully to complete the enrollment.
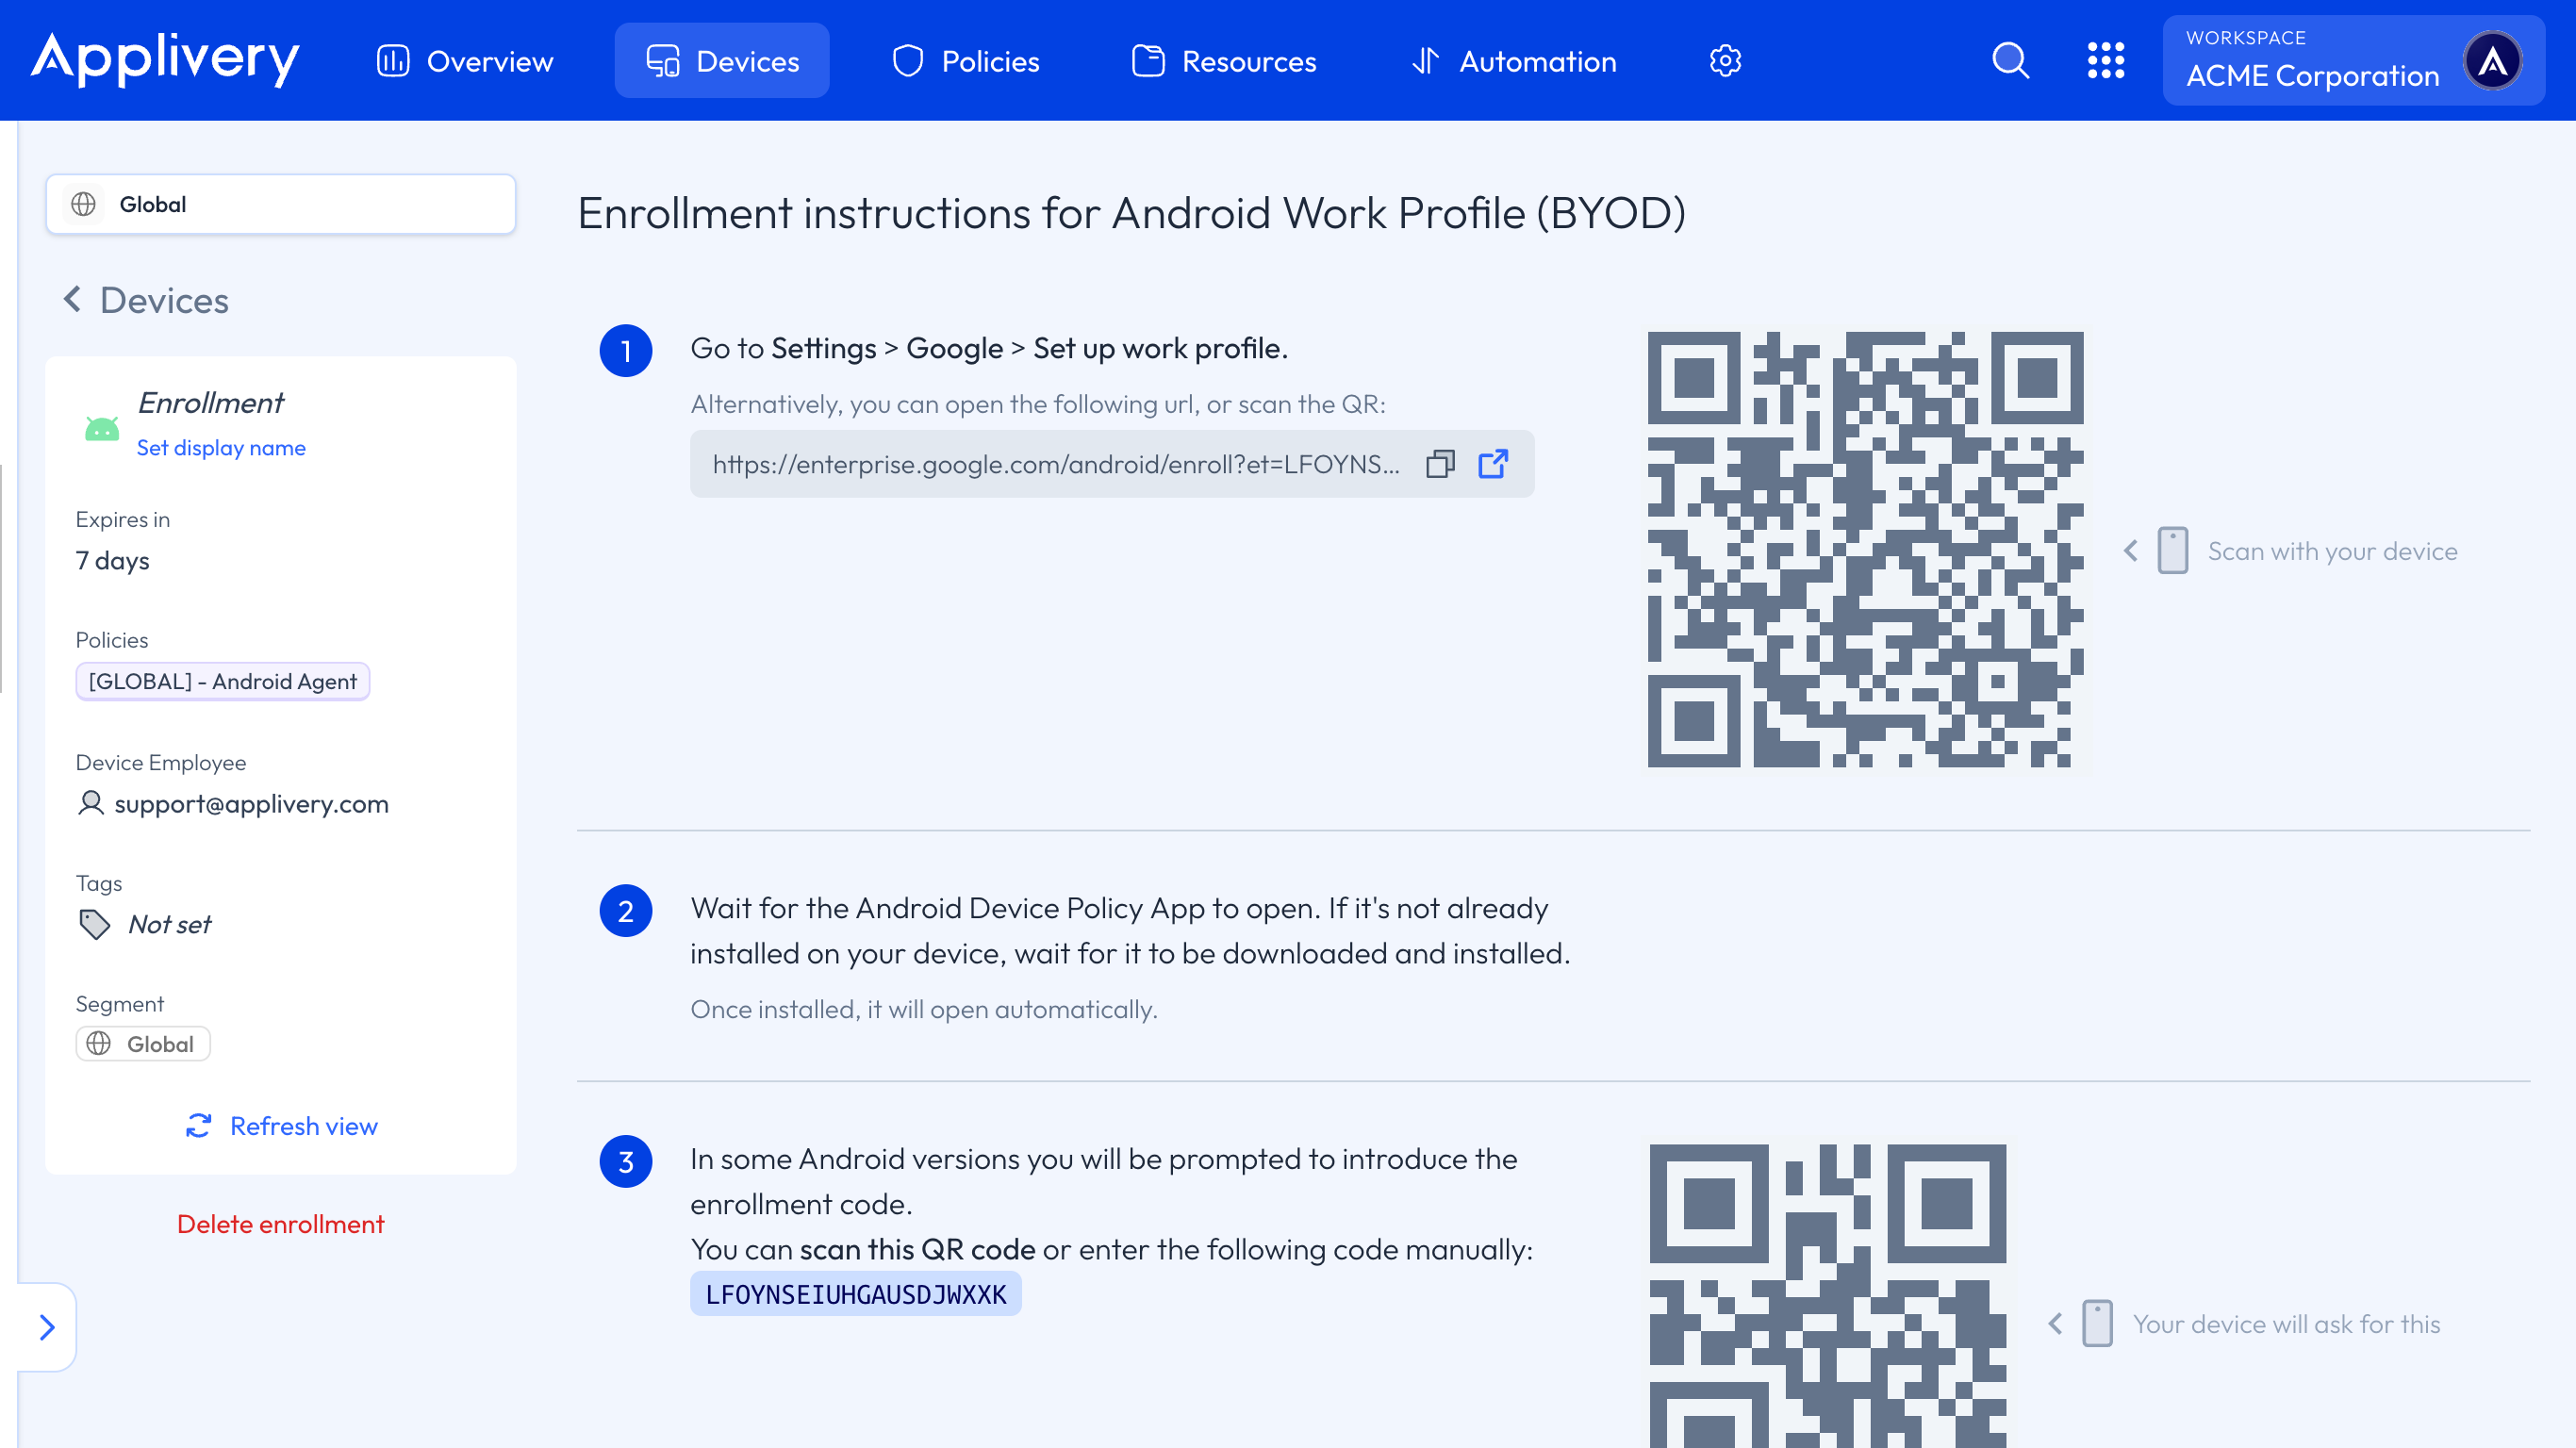
Go to Settings > Google > Set up Work Profile. Alternatively, you can open a provided URL or scan a QR code.
Wait for the opening of the Android Device Policy App. In case it’s not yet installed on your Device, wait for the download/install of the Android Device Policy App on your Device. It will be opened automatically once installed.
In some Android versions, you will be prompted to introduce an enrollment code or scan a QR code to complete the Work Profile setup.
Lastly, please follow all the steps on your Device screen carefully to complete the enrollment.