Web Apps can be easily added to the Home Screen of Android Devices, providing quick access to your favorite web pages or links.
Add your web app to a Device policy
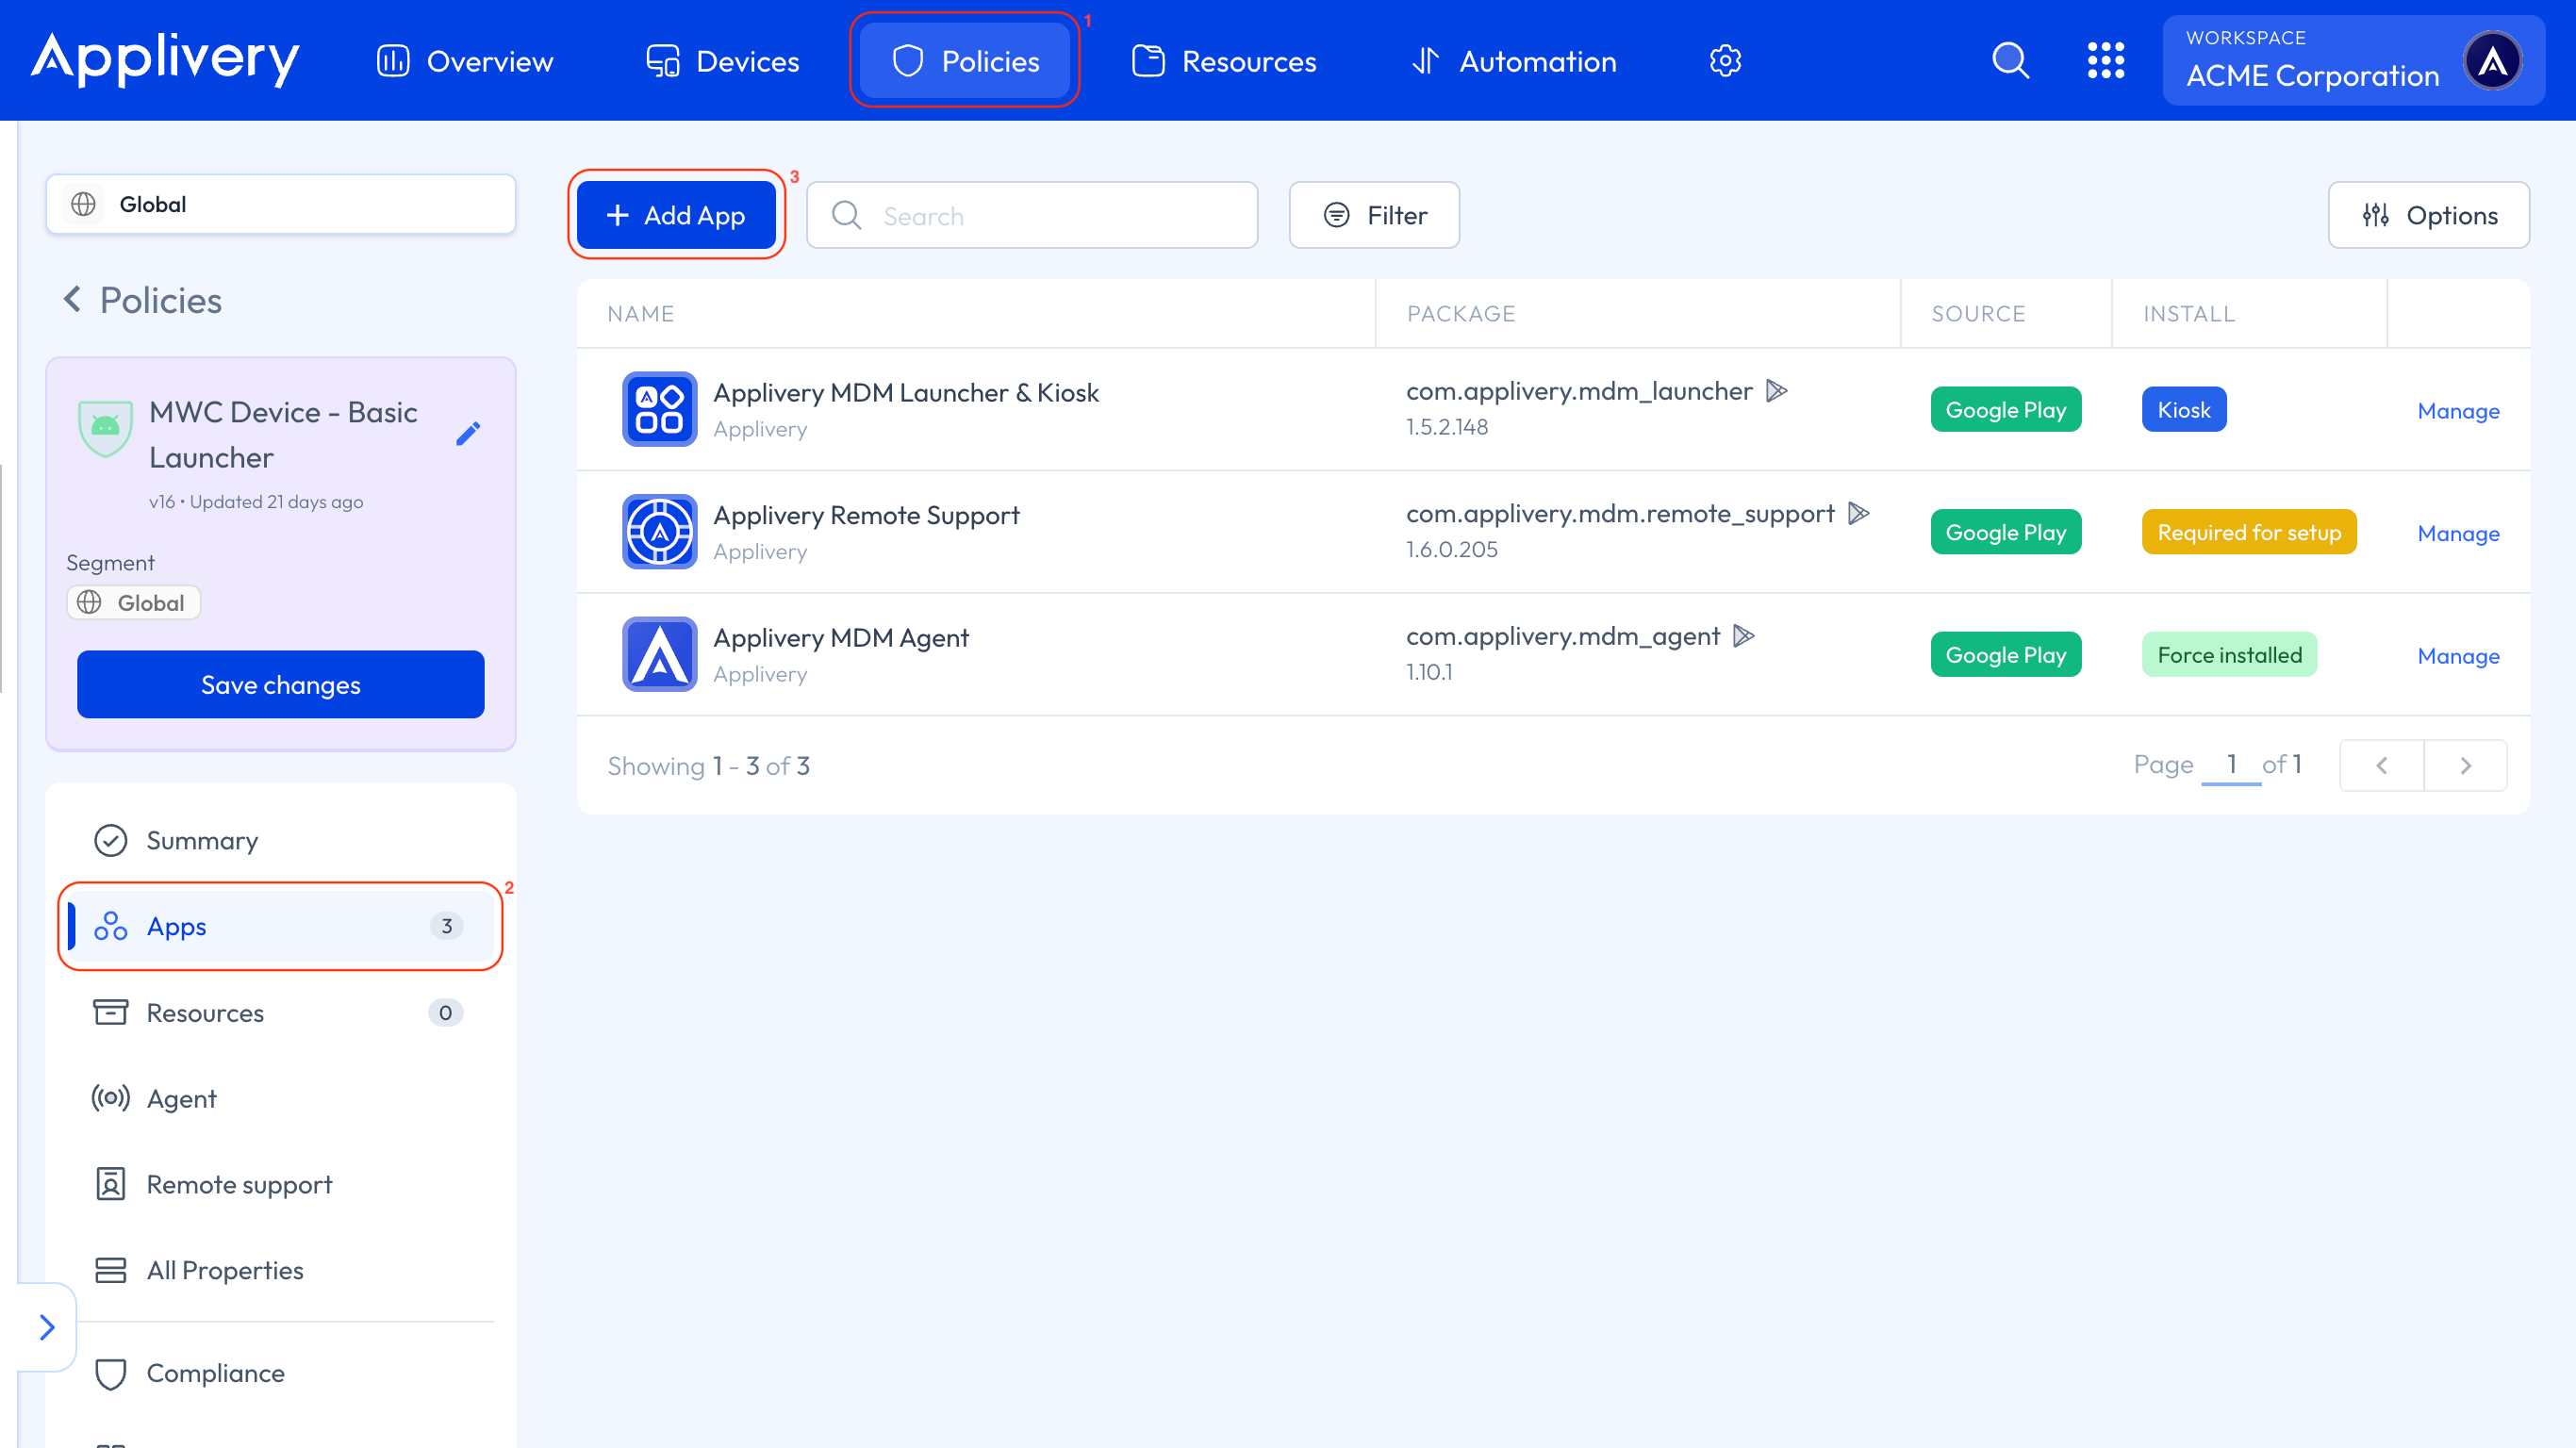
Once in the Applivery Dashboard, go to any of your Policies (1). From the left side menu, go to Apps (2) and click the + Add App button (3).
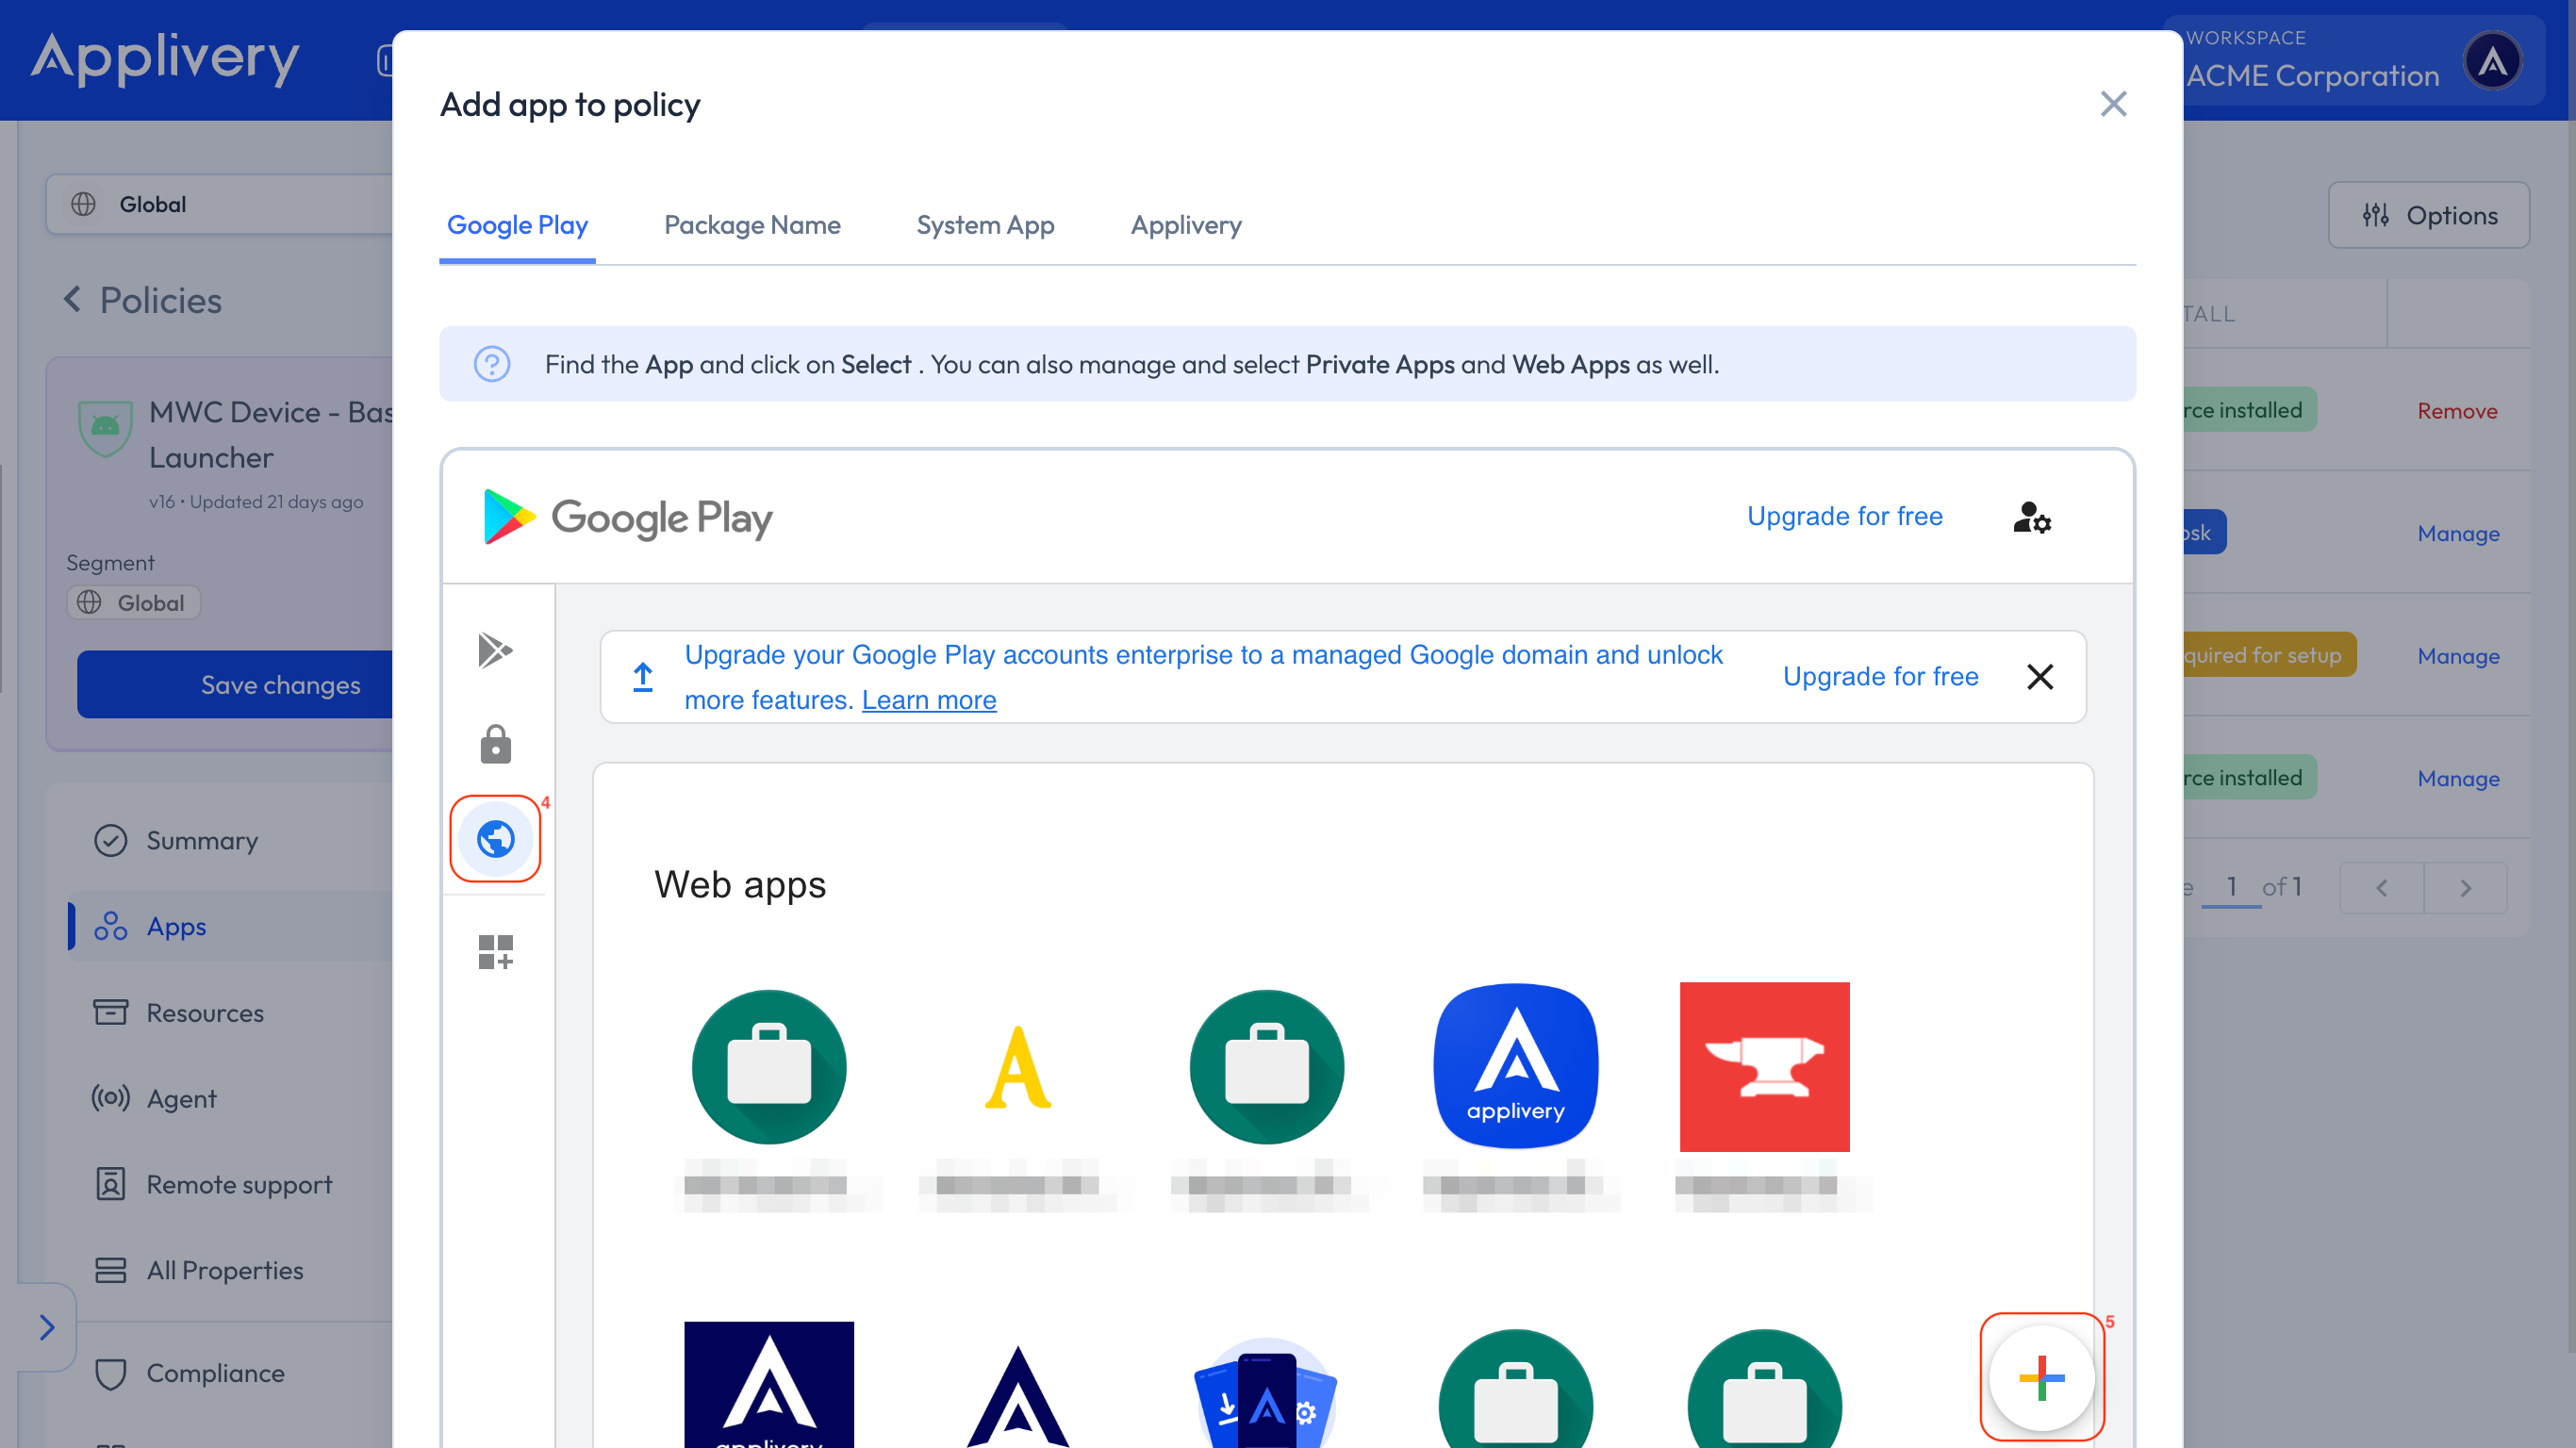
On the left side menu of the Google Play tab, you will find a globe icon labeled Web Apps (4).
Use the + button (5) placed at the lower right side of the screen to add your first Web App.
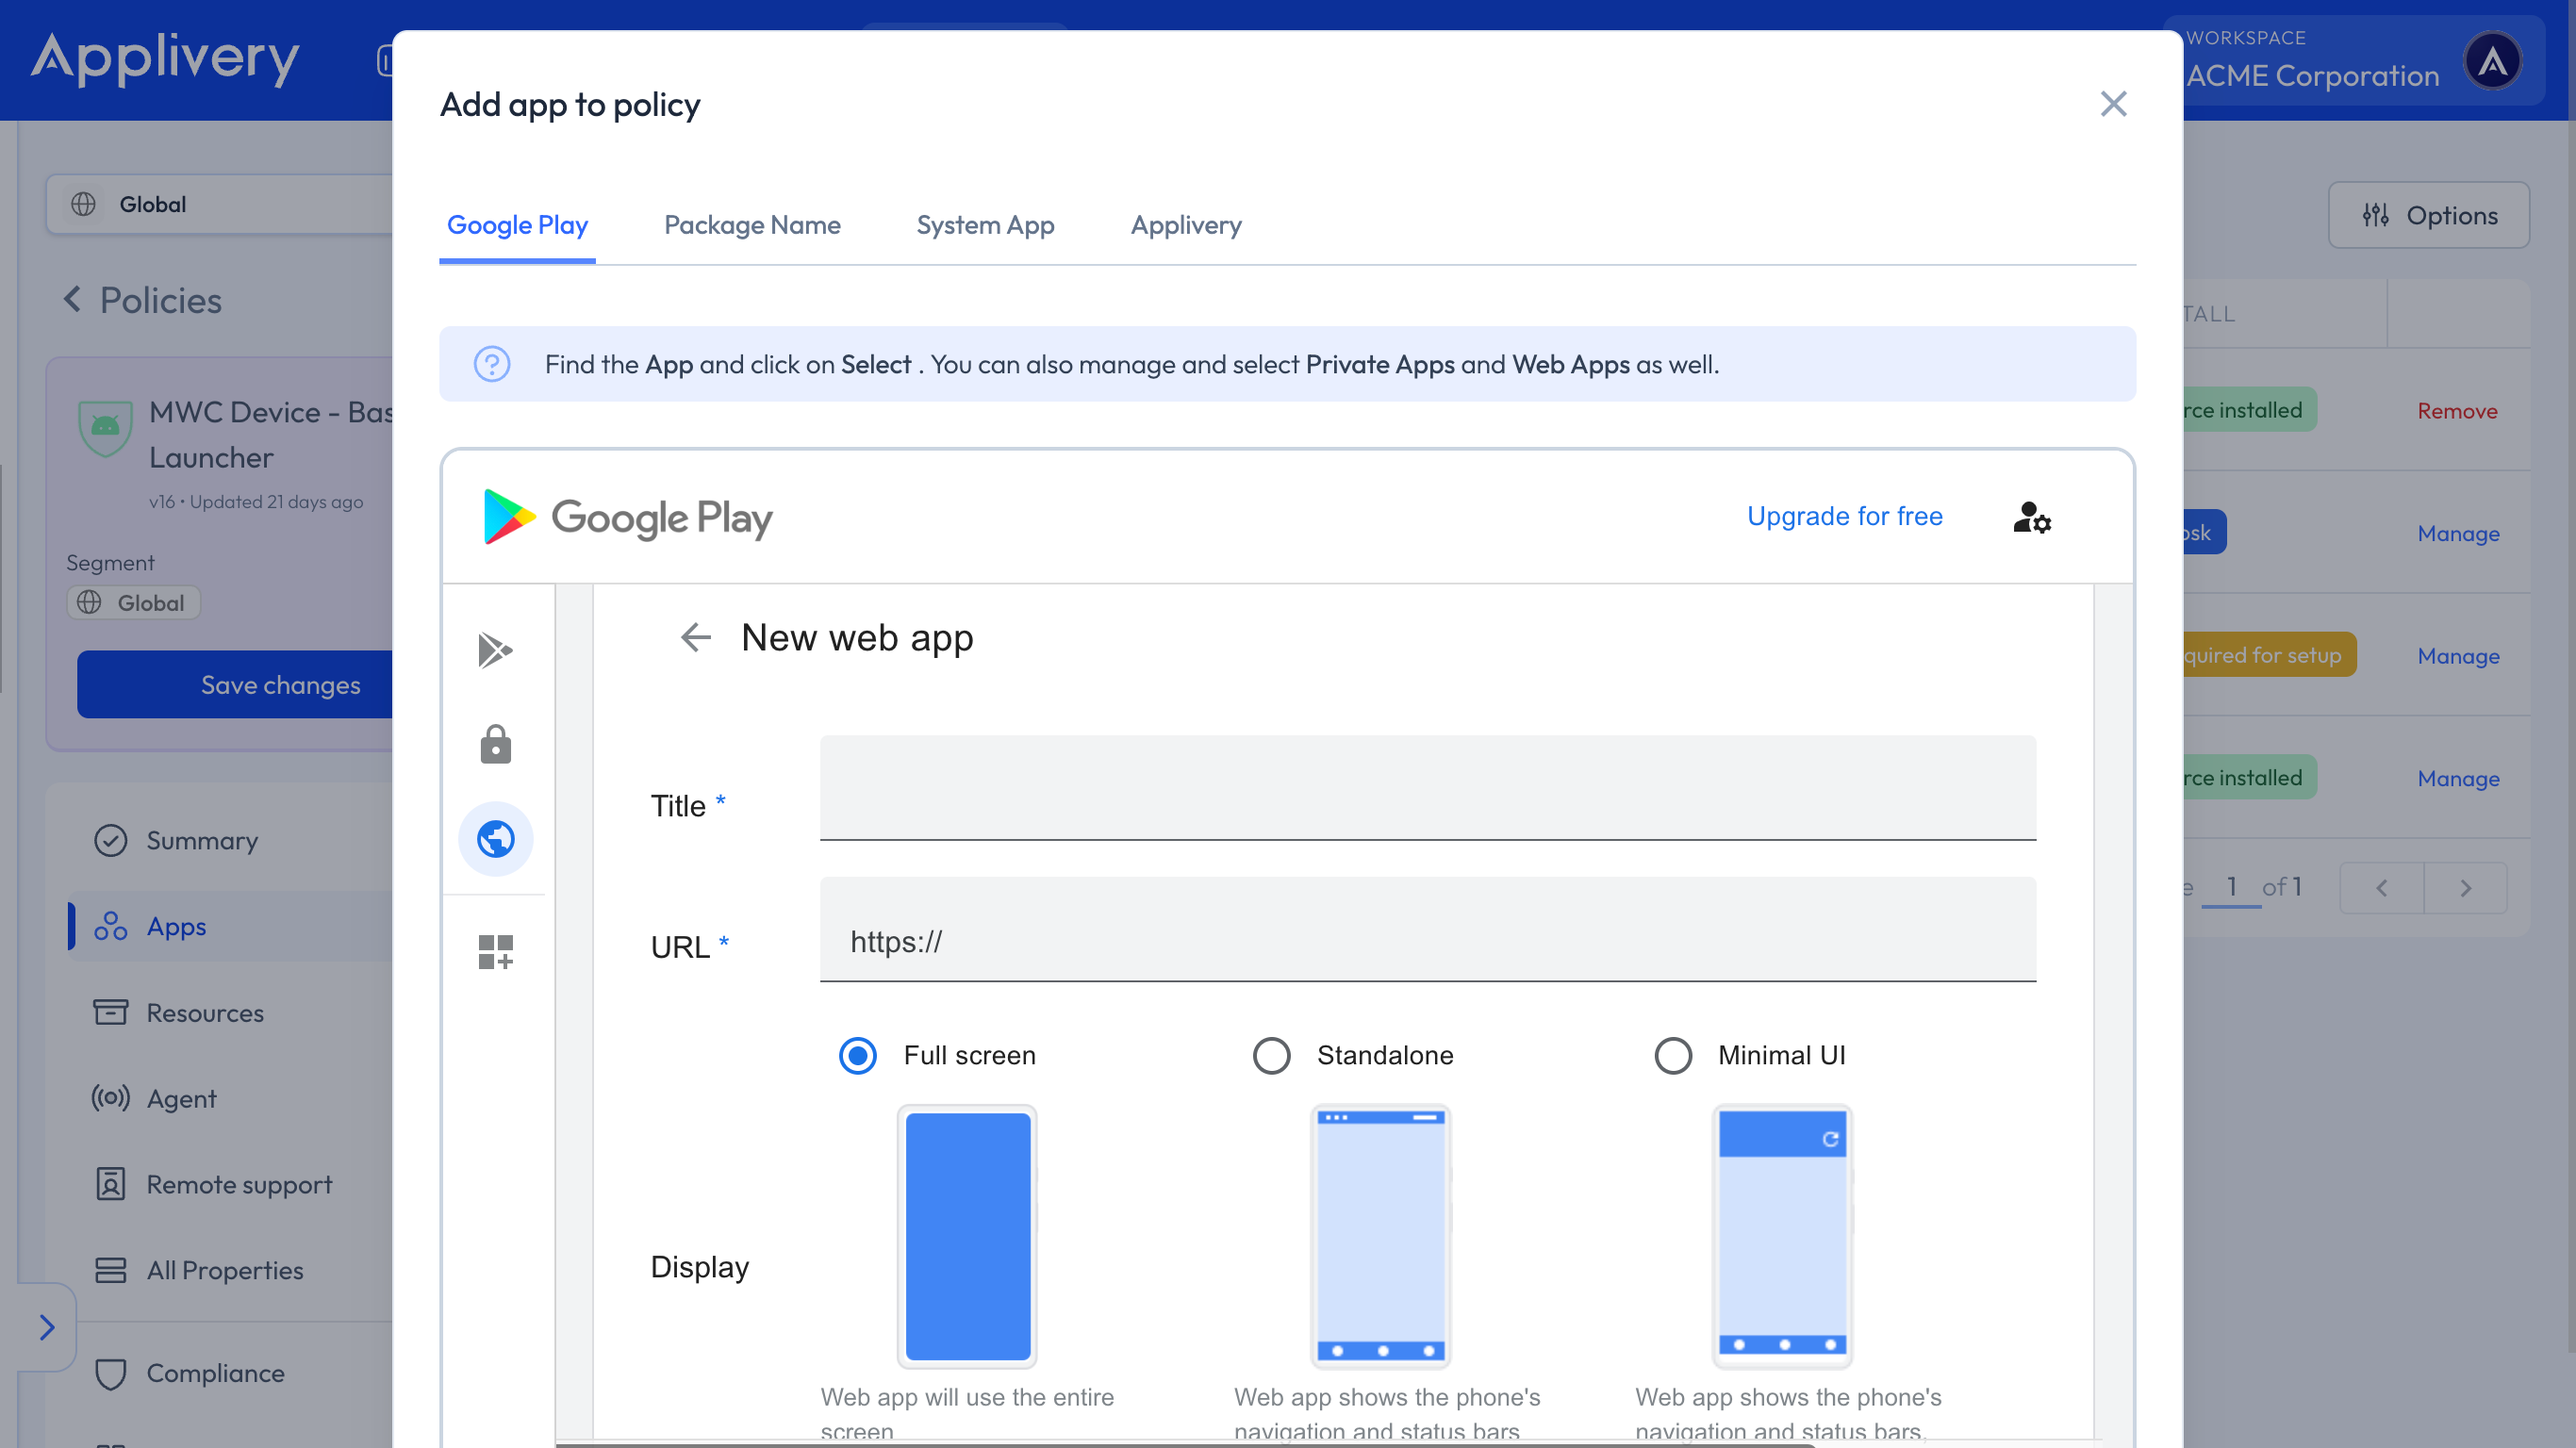
Assign a title to the Web App that will serve as the name displayed to Device users on the App icon.
Add the Web App URL to be launched when the Device user taps the App.
Choose the display mode that determines how the browser presents the content of the website.
Additionally, you have the option to provide an icon for your web App. This icon should be a rectangular JPG or PNG file with a resolution of 512×512. In case an icon is not specified, a default briefcase icon will be used.
After incorporating all the necessary information, proceed by clicking on the Create button. This action will result in the addition of a new Web App.
it might take a few minutes for it to become fully accessible. However, once it’s prepared, you can treat it like any other App by adding it to the list of Apps.
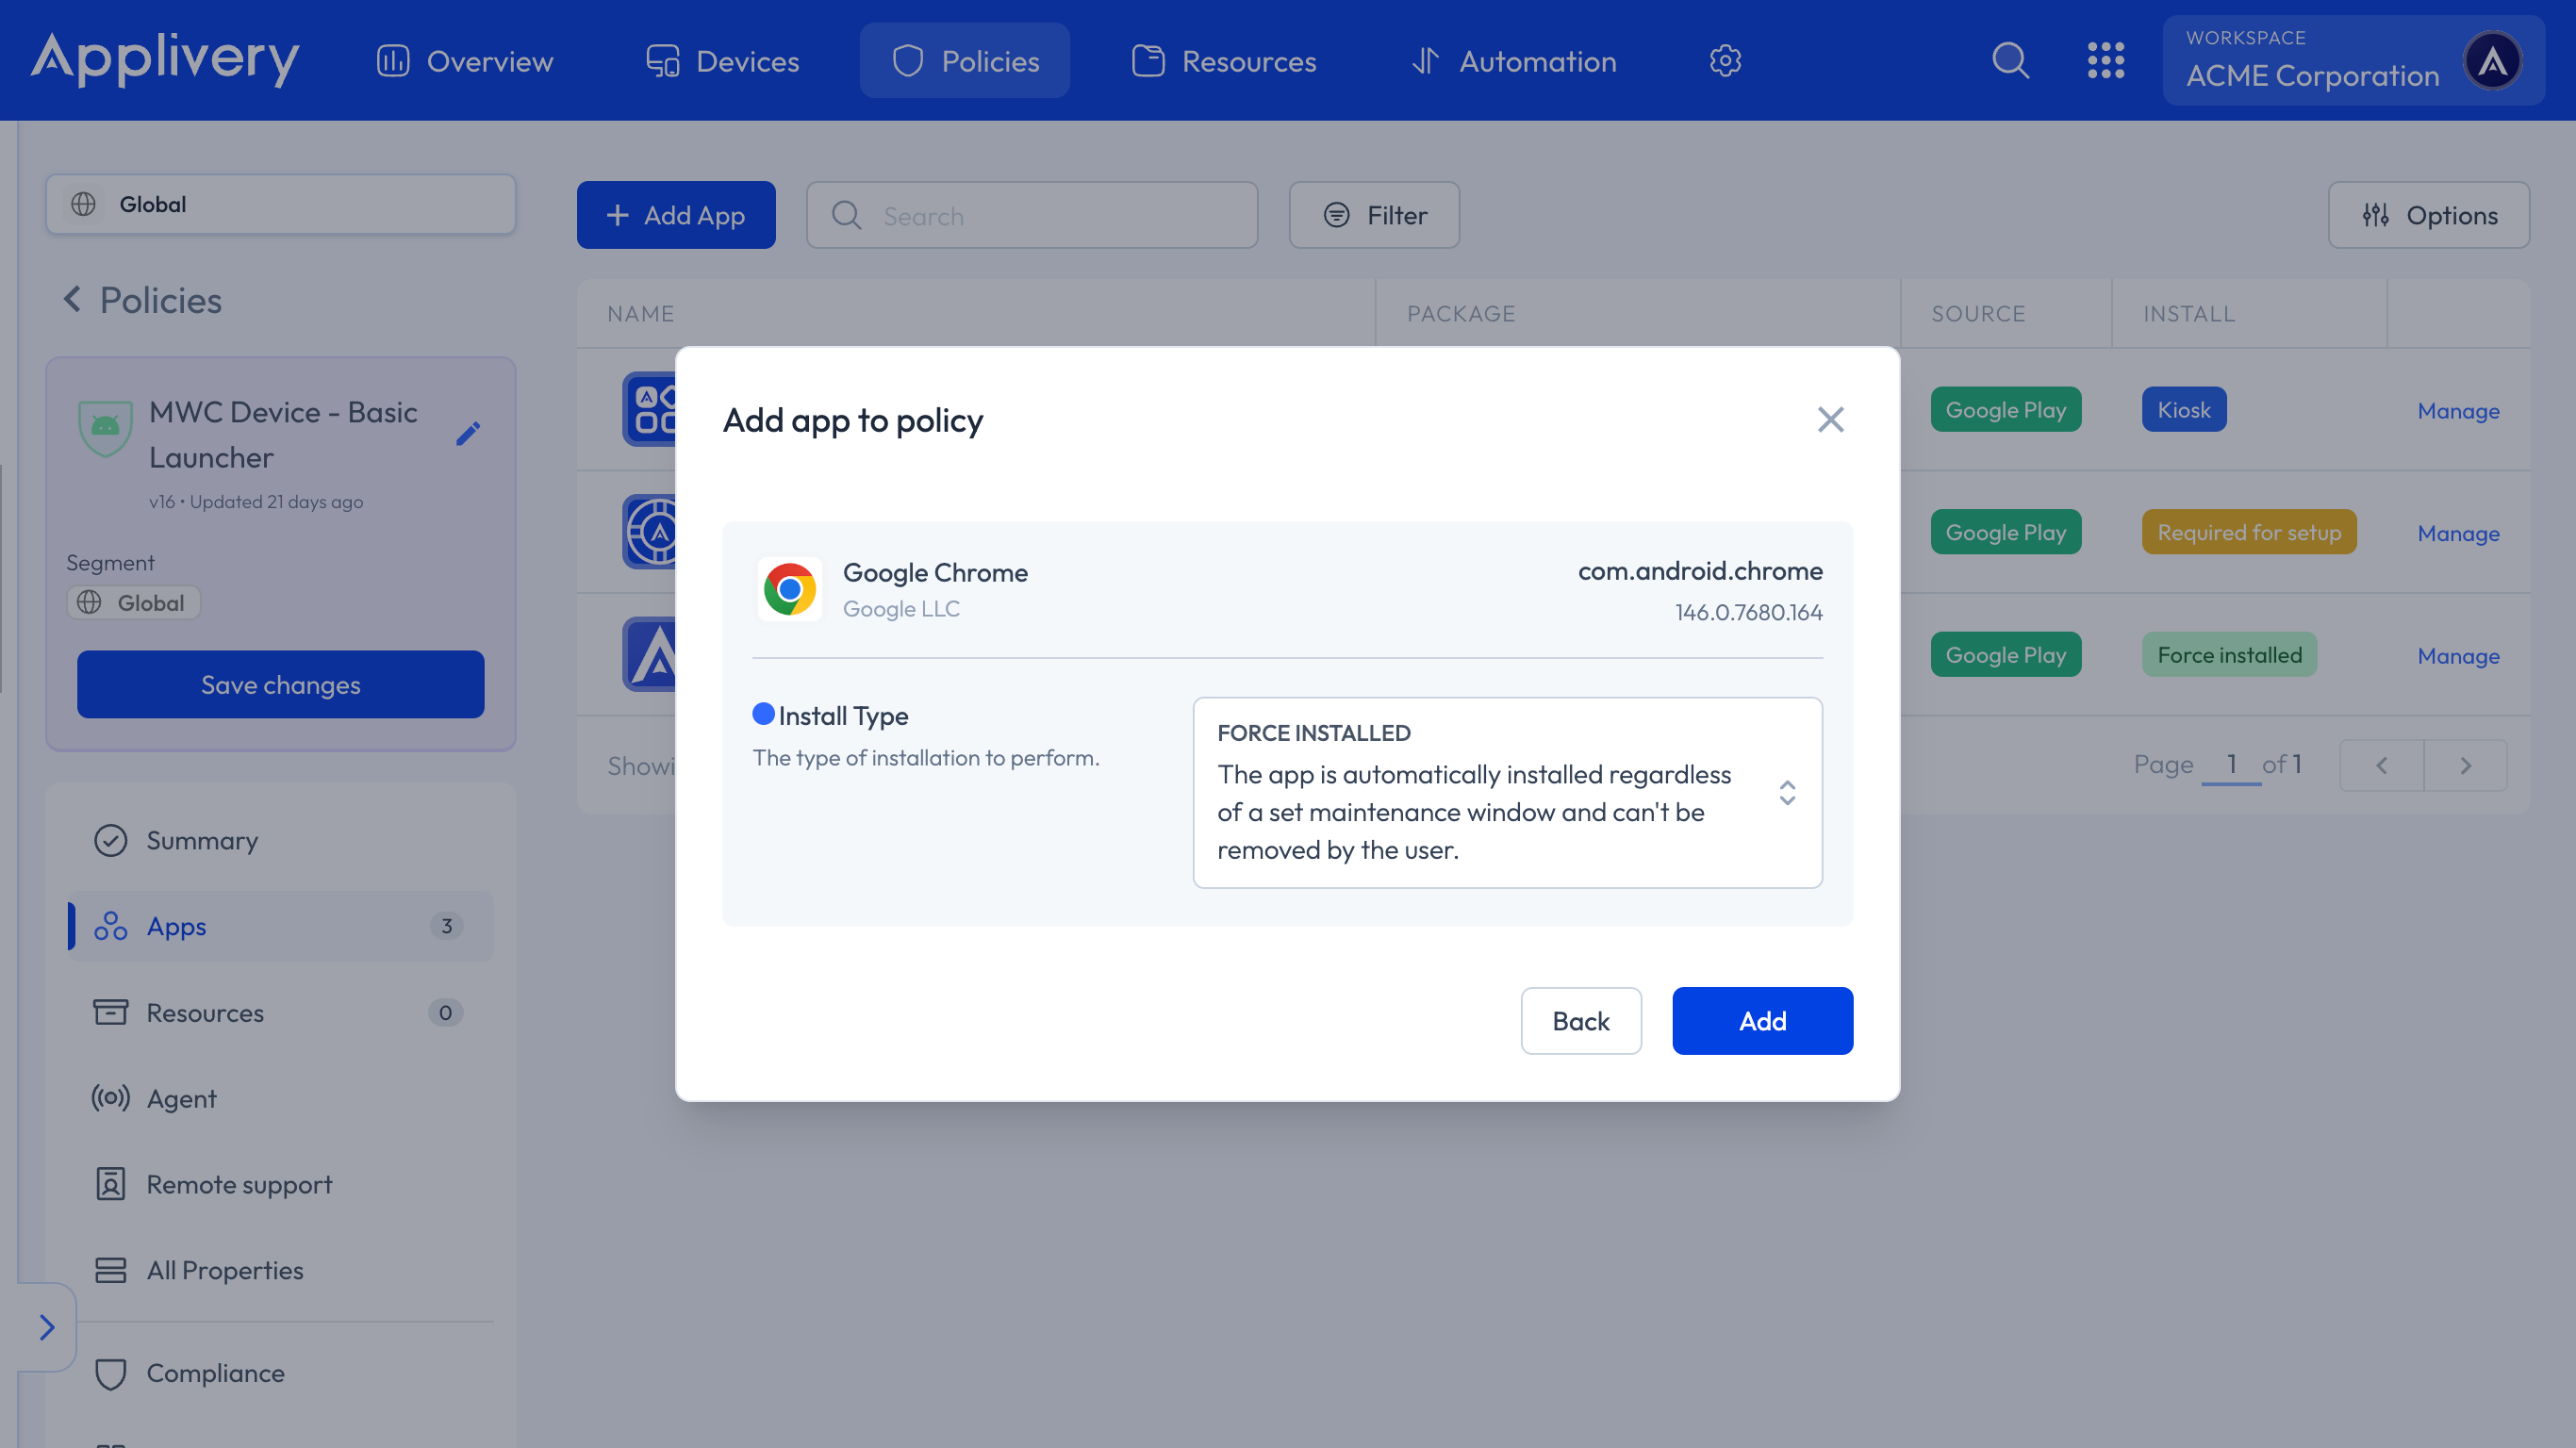
It’s important to select the Force installed install type to ensure its presence on the Device’s home screen.
Web Apps in kiosk mode
To display your Web App in kiosk mode, you’ll need to include a navigator. You can opt for the Google Chrome App from the Google Play tab and choose the Force installed install type.
Additionally, change the install type of your Web App to Kiosk.
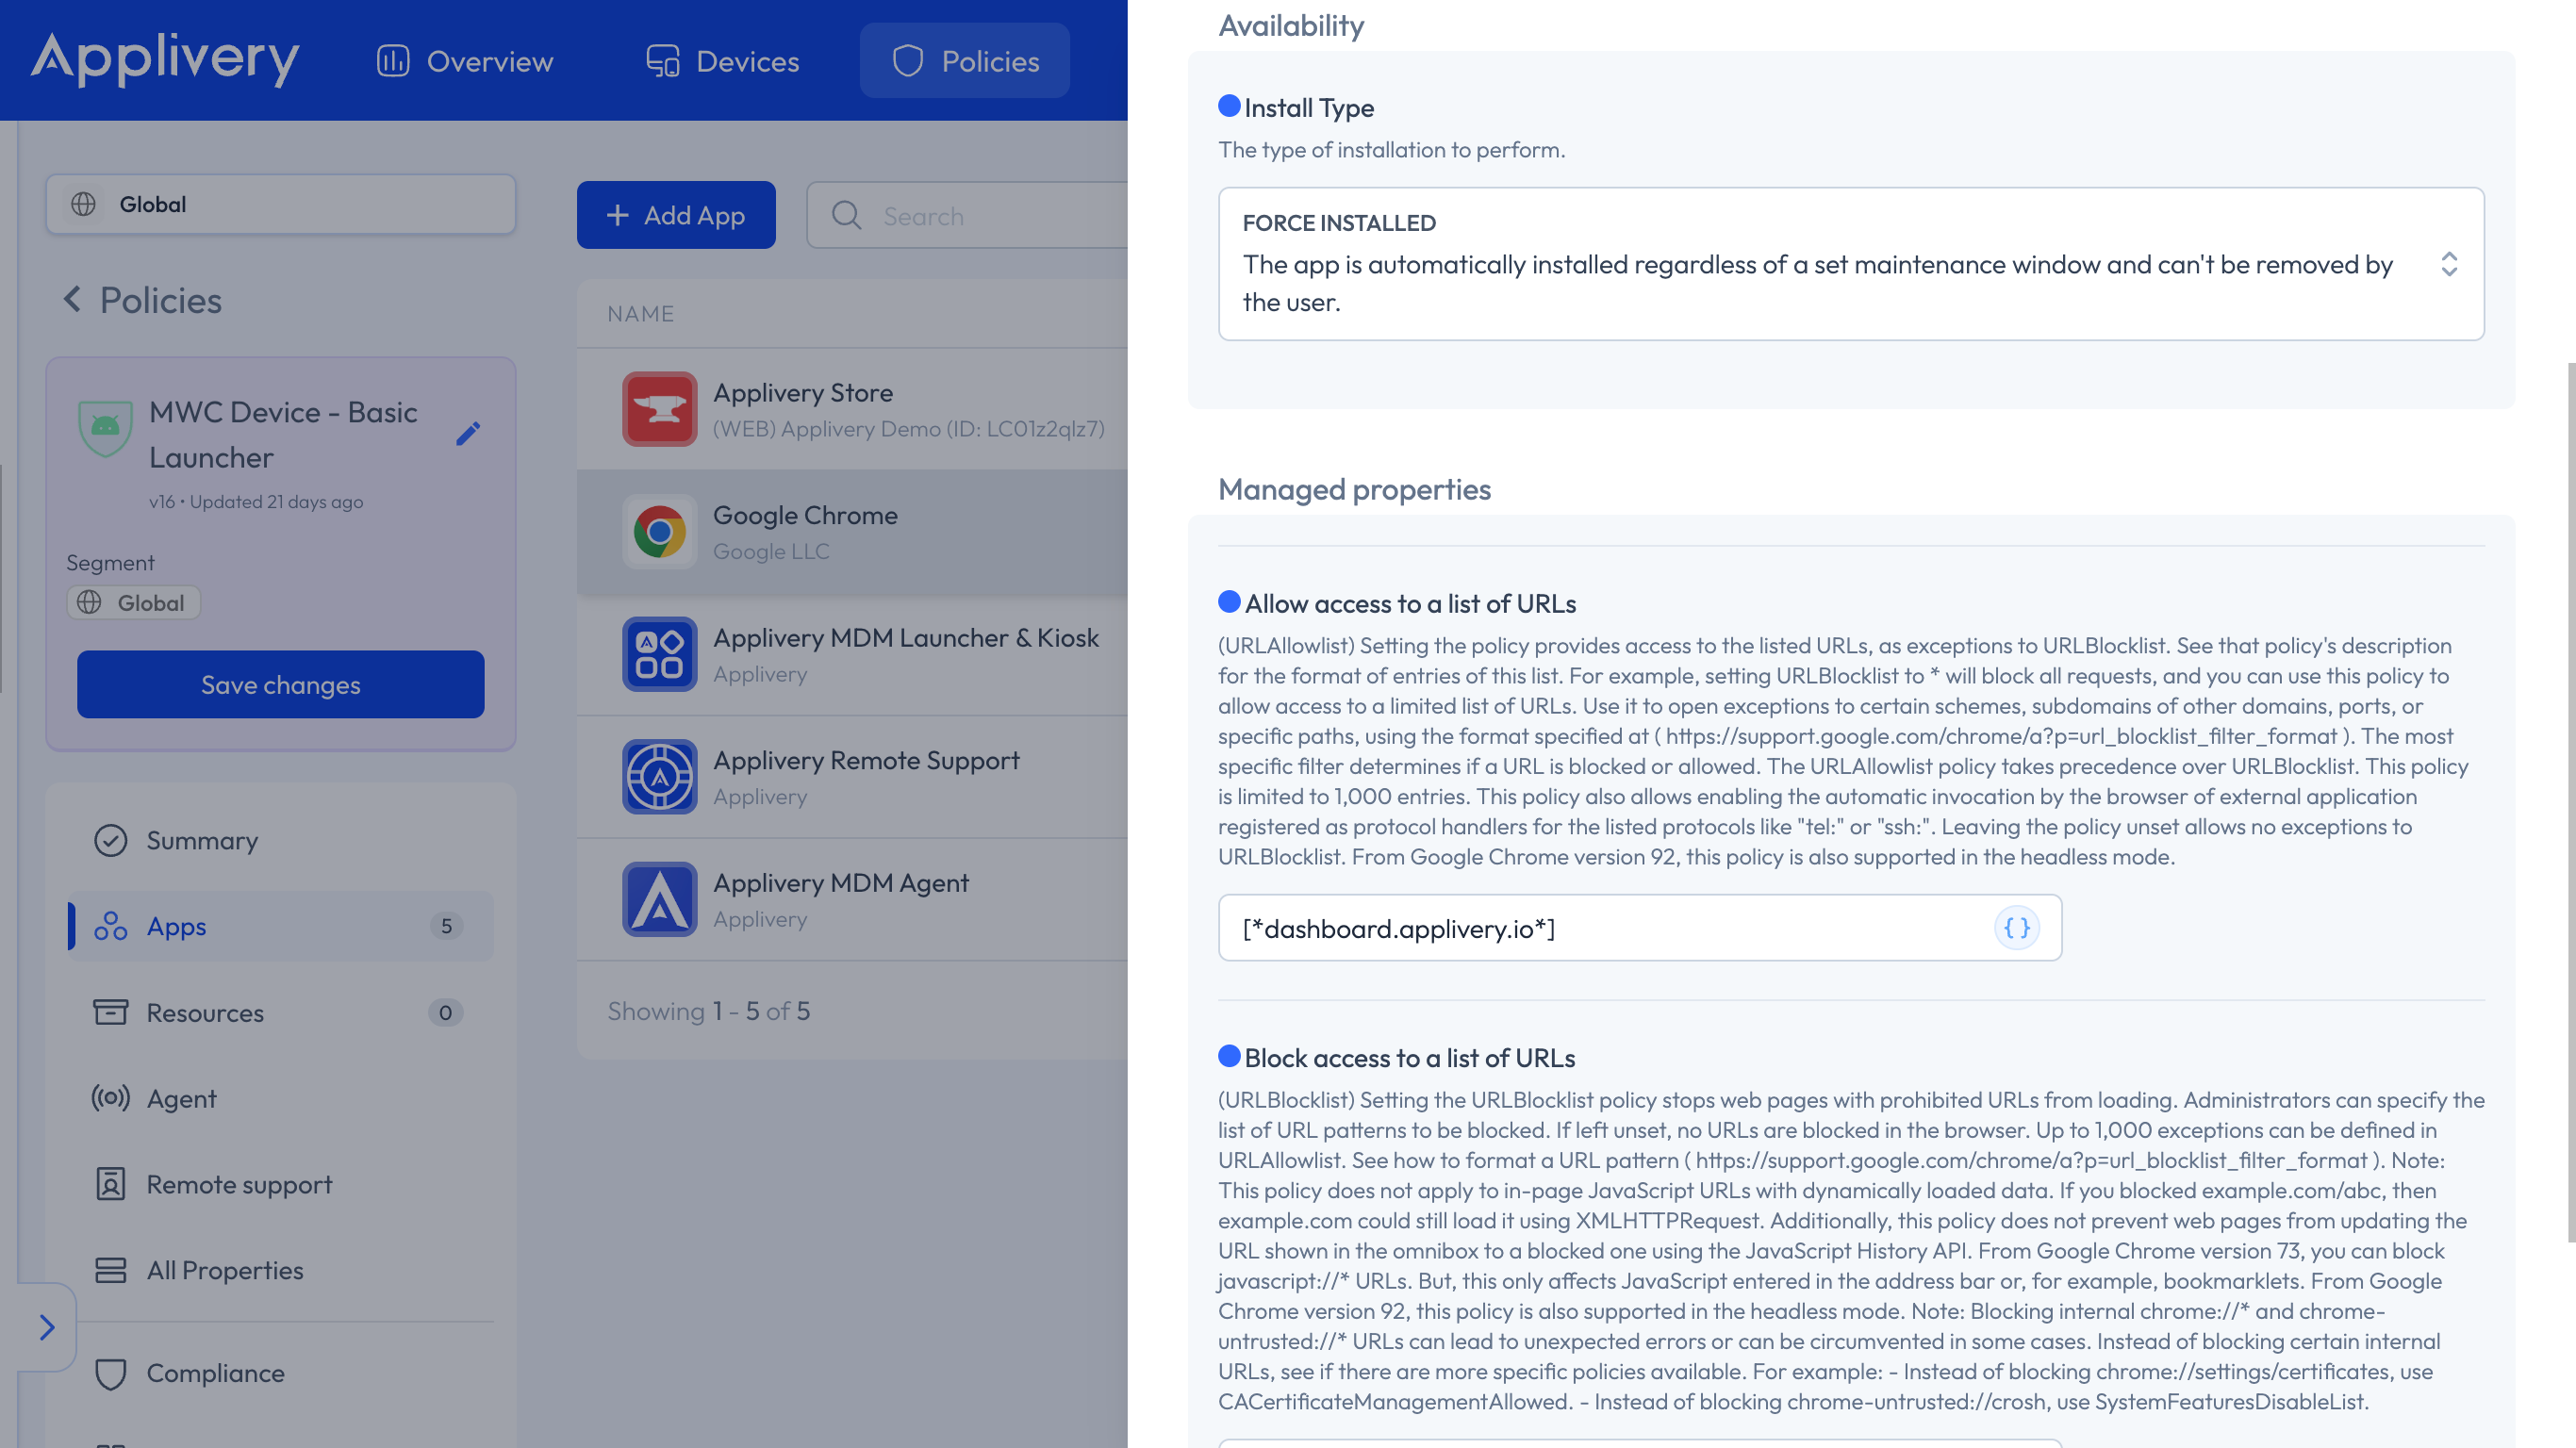
Once you’ve included Google Chrome in your list of Apps, click on it to proceed. This action will show a side menu, where you will be able to configure the App’s Managed properties.
To restrict access to a list of URLs, navigate to the Block access to a list of URLs configuration, where you’ll have two options:
Block a list of URLs by following this format:
["blocked URL1", "blocked URL2"].Alternatively, block access to all URLs except the one specified in Allow access to a list of URLs by defining
["*"].
If you want to enable Device users to open your Web App, it’s crucial to configure the Allow access to a list of URLs setting with your Web App’s specific URL.