
This is a premium feature that might not be available in your current plan. Check the availability on our pricing page.
When receiving user information through SCIM, the data is often organized across multiple schemas. To keep this information consistent, usable, and accessible, Applivery can map specific SCIM attributes into the user’s metadata field.
Understanding SCIM Attribute Storage
All mappable SCIM fields are automatically stored in an internal object called attributesHistory. This object tracks every attribute received from SCIM, whether or not it is currently mapped to metadata.
SCIM Attributes History
The attributesHistory object contains all SCIM attributes in the following structure:
type IProviderSCIMAttributesHistory = {
  namespace: string
  key: string
}
This object is populated automatically with all attributes provided in SCIM requests. Its purpose is to serve as a complete record of any field that can potentially be mapped.
Custom Attribute Mapping
To map SCIM fields into the user’s metadata, you can define a custom mapping through the mappedAttributes property in the SCIM configuration model.
type IProviderSCIMCustomAttributes = {
  name: string
  attributes?: {
    namespace?: string
    key: string
  }[]
}
Each mapping entry supports the following fields:
Name: The key under which the mapped value will be stored inside the user’s metadata.
Attributes: A list of SCIM attributes (optionally specifying their namespace/schema) that will be used to generate this metadata value.
For guidance on defining custom attributes inside your Identity Provider (IdP), refer to the following article in our documentation.
Resolution rules
When resolving which SCIM value to map into metadata, Applivery follows these rules:
If a namespace is specified, the system searches for the SCIM attribute inside that exact namespace/schema.
If no namespace is defined, the system maps the first matching attribute key found in any schema.
When a SCIM payload includes a value for a mapped custom attribute, Applivery automatically writes it into the user’s
metadata:Key: The name defined in the
mappedAttributesentry.Value: The resolved SCIM attribute value based on the mapping rules.
Example of a namespace-based mapping
SCIM payload
{
  "schemas": [
    "urn:ietf:params:scim:schemas:core:2.0:User",
    "urn:company:params:scim:schemas:extension:custom:2.0:User"
  ],
  "urn:ietf:params:scim:schemas:core:2.0:User": {
    "userName": "jane.smith"
  },
  "urn:company:params:scim:schemas:extension:custom:2.0:User": {
    "employeeId": "EMP-4567",
    "department": "Engineering"
  }
}
Custom mapping configuration
const mappedAttributes = [
  {
    name: "department",
    attributes: [
      {
        namespace: "urn:company:params:scim:schemas:extension:custom:2.0:User",
        key: "department"
      }
    ]
  },
  {
    name: "employeeCode",
    attributes: [
      {
        namespace: "urn:company:params:scim:schemas:extension:custom:2.0:User",
        key: "employeeId"
      }
    ]
  }
]
Result in the user's metadata
{
  "metadata": {
    "department": "Engineering",
    "employeeCode": "EMP-4567"
  }
}
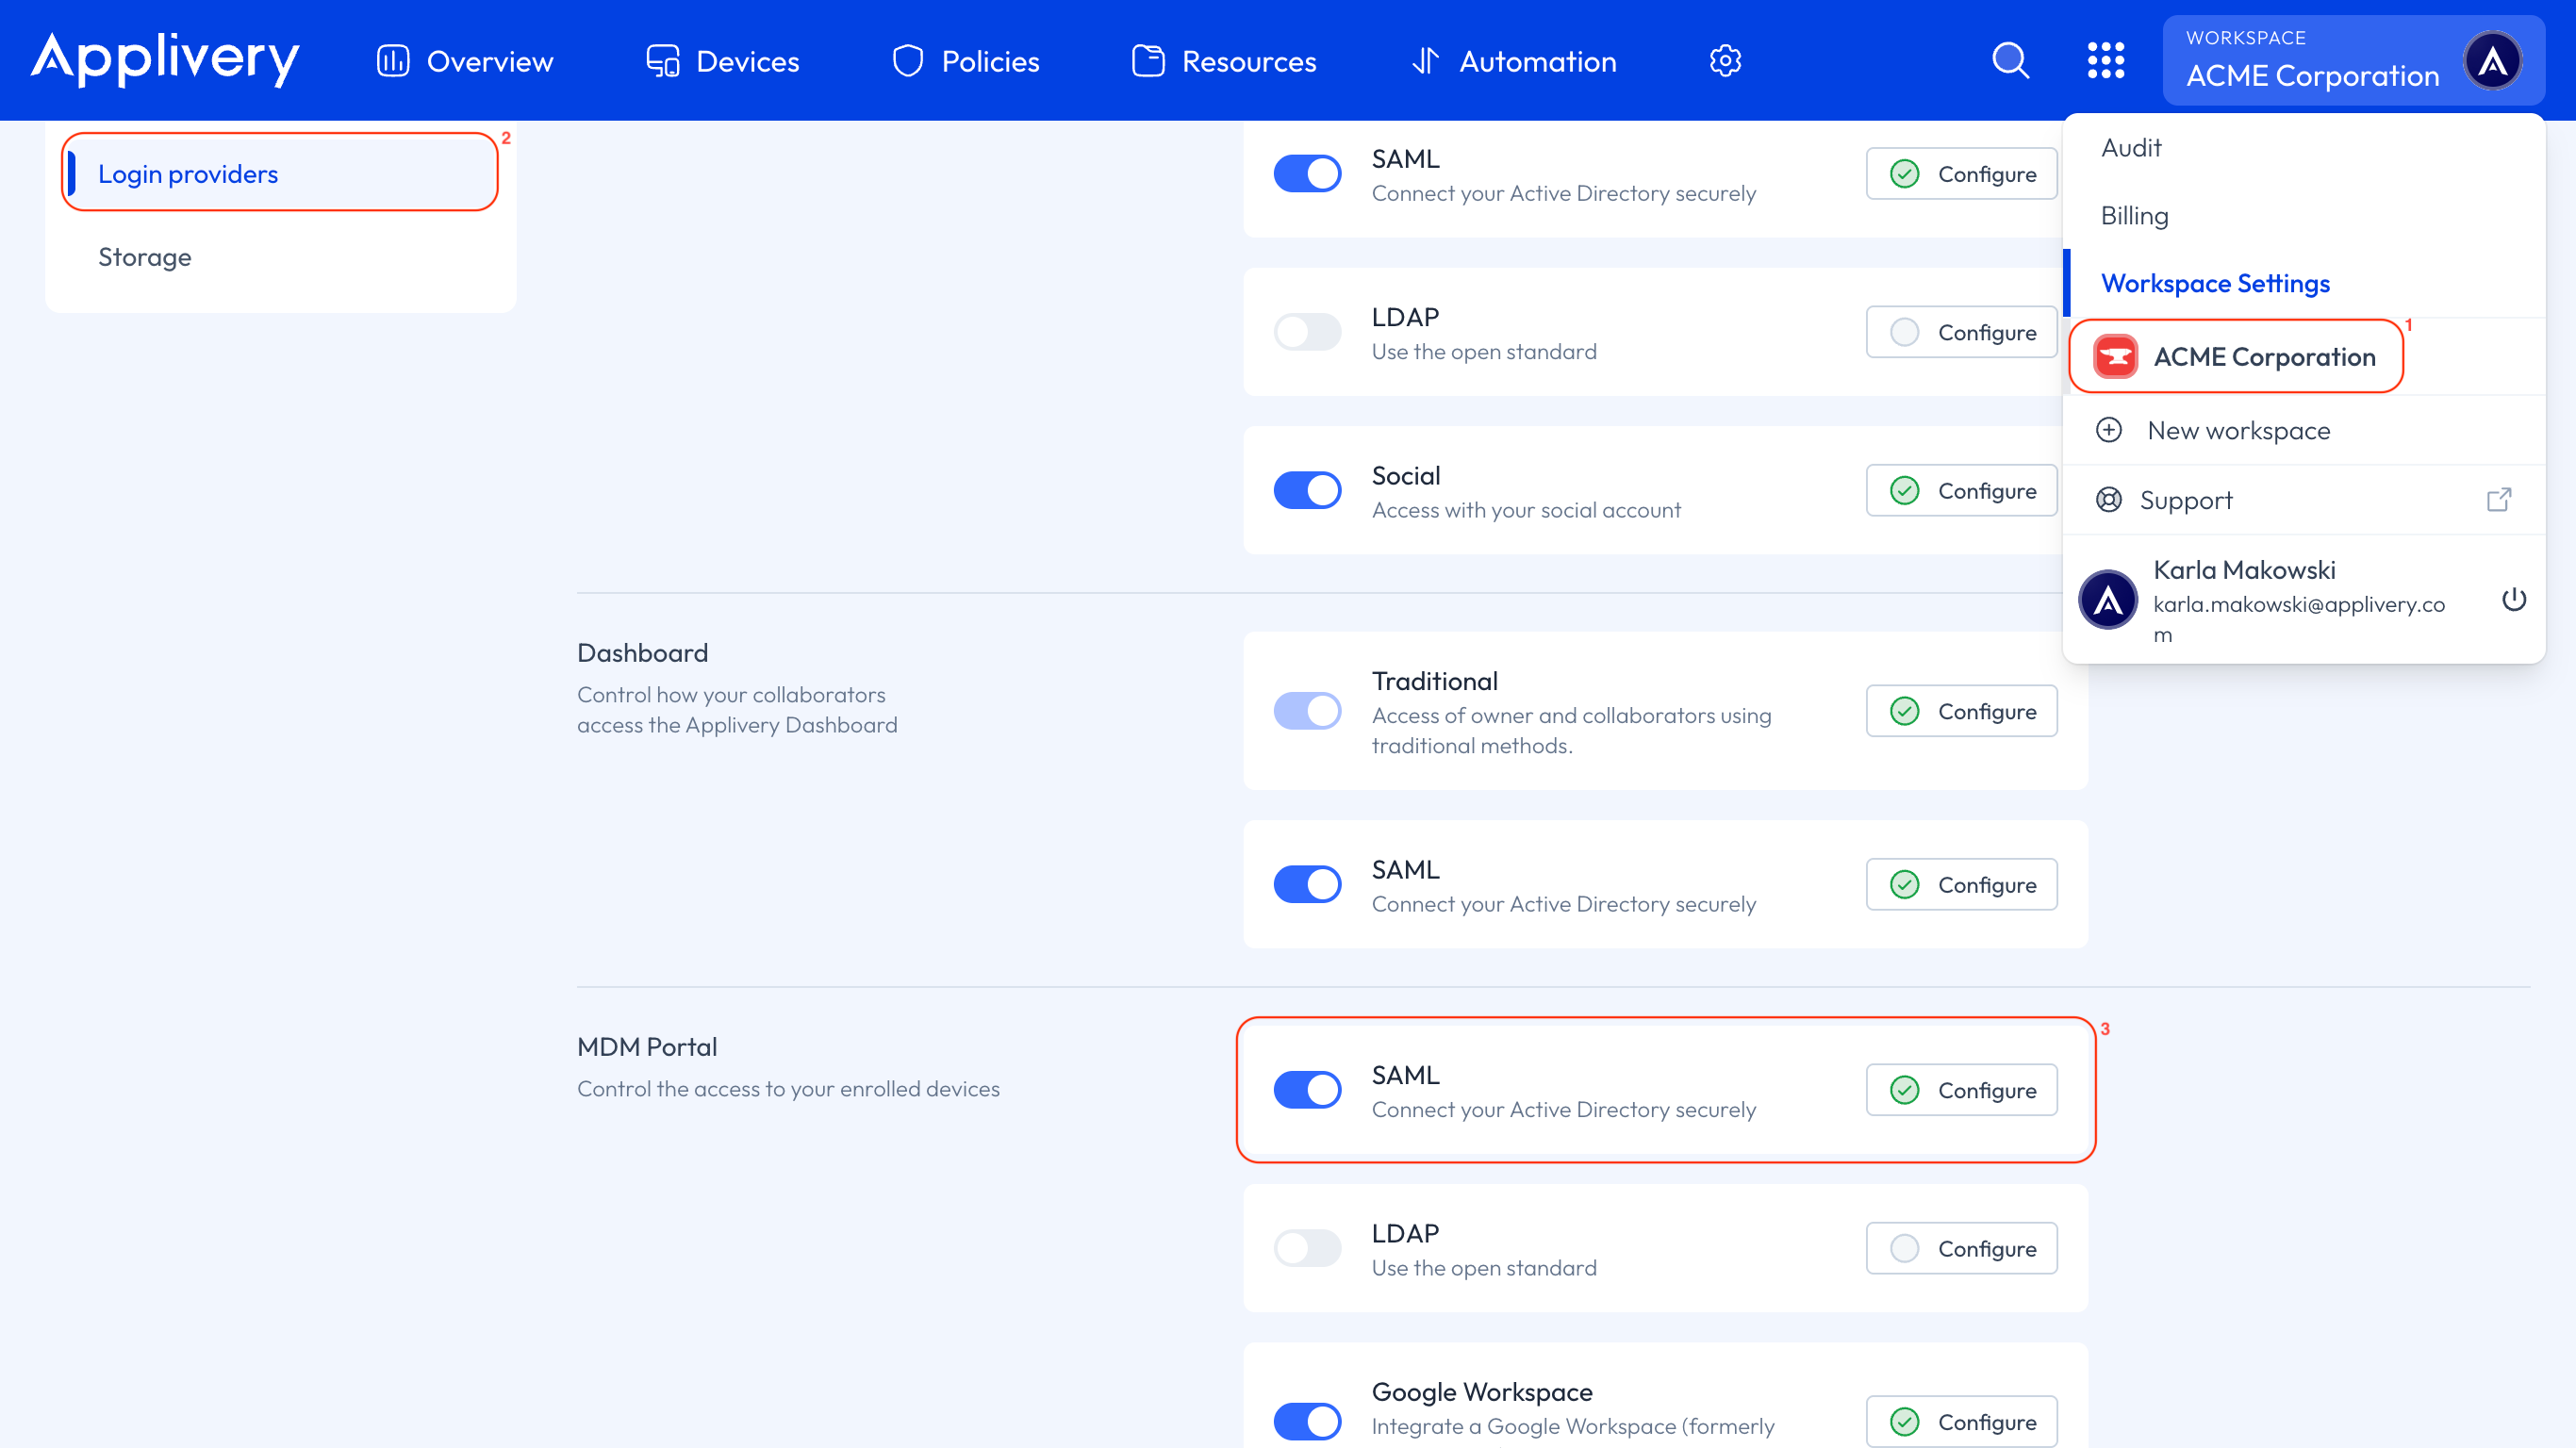
Configure Attribute Mapping on Applivery
Once in the Applivery Dashboard, go to your Workspace Settings (1) from the top dropdown menu, then open Login providers (2) in the left-hand menu and click the SAML option under the MDM Portal section (3).
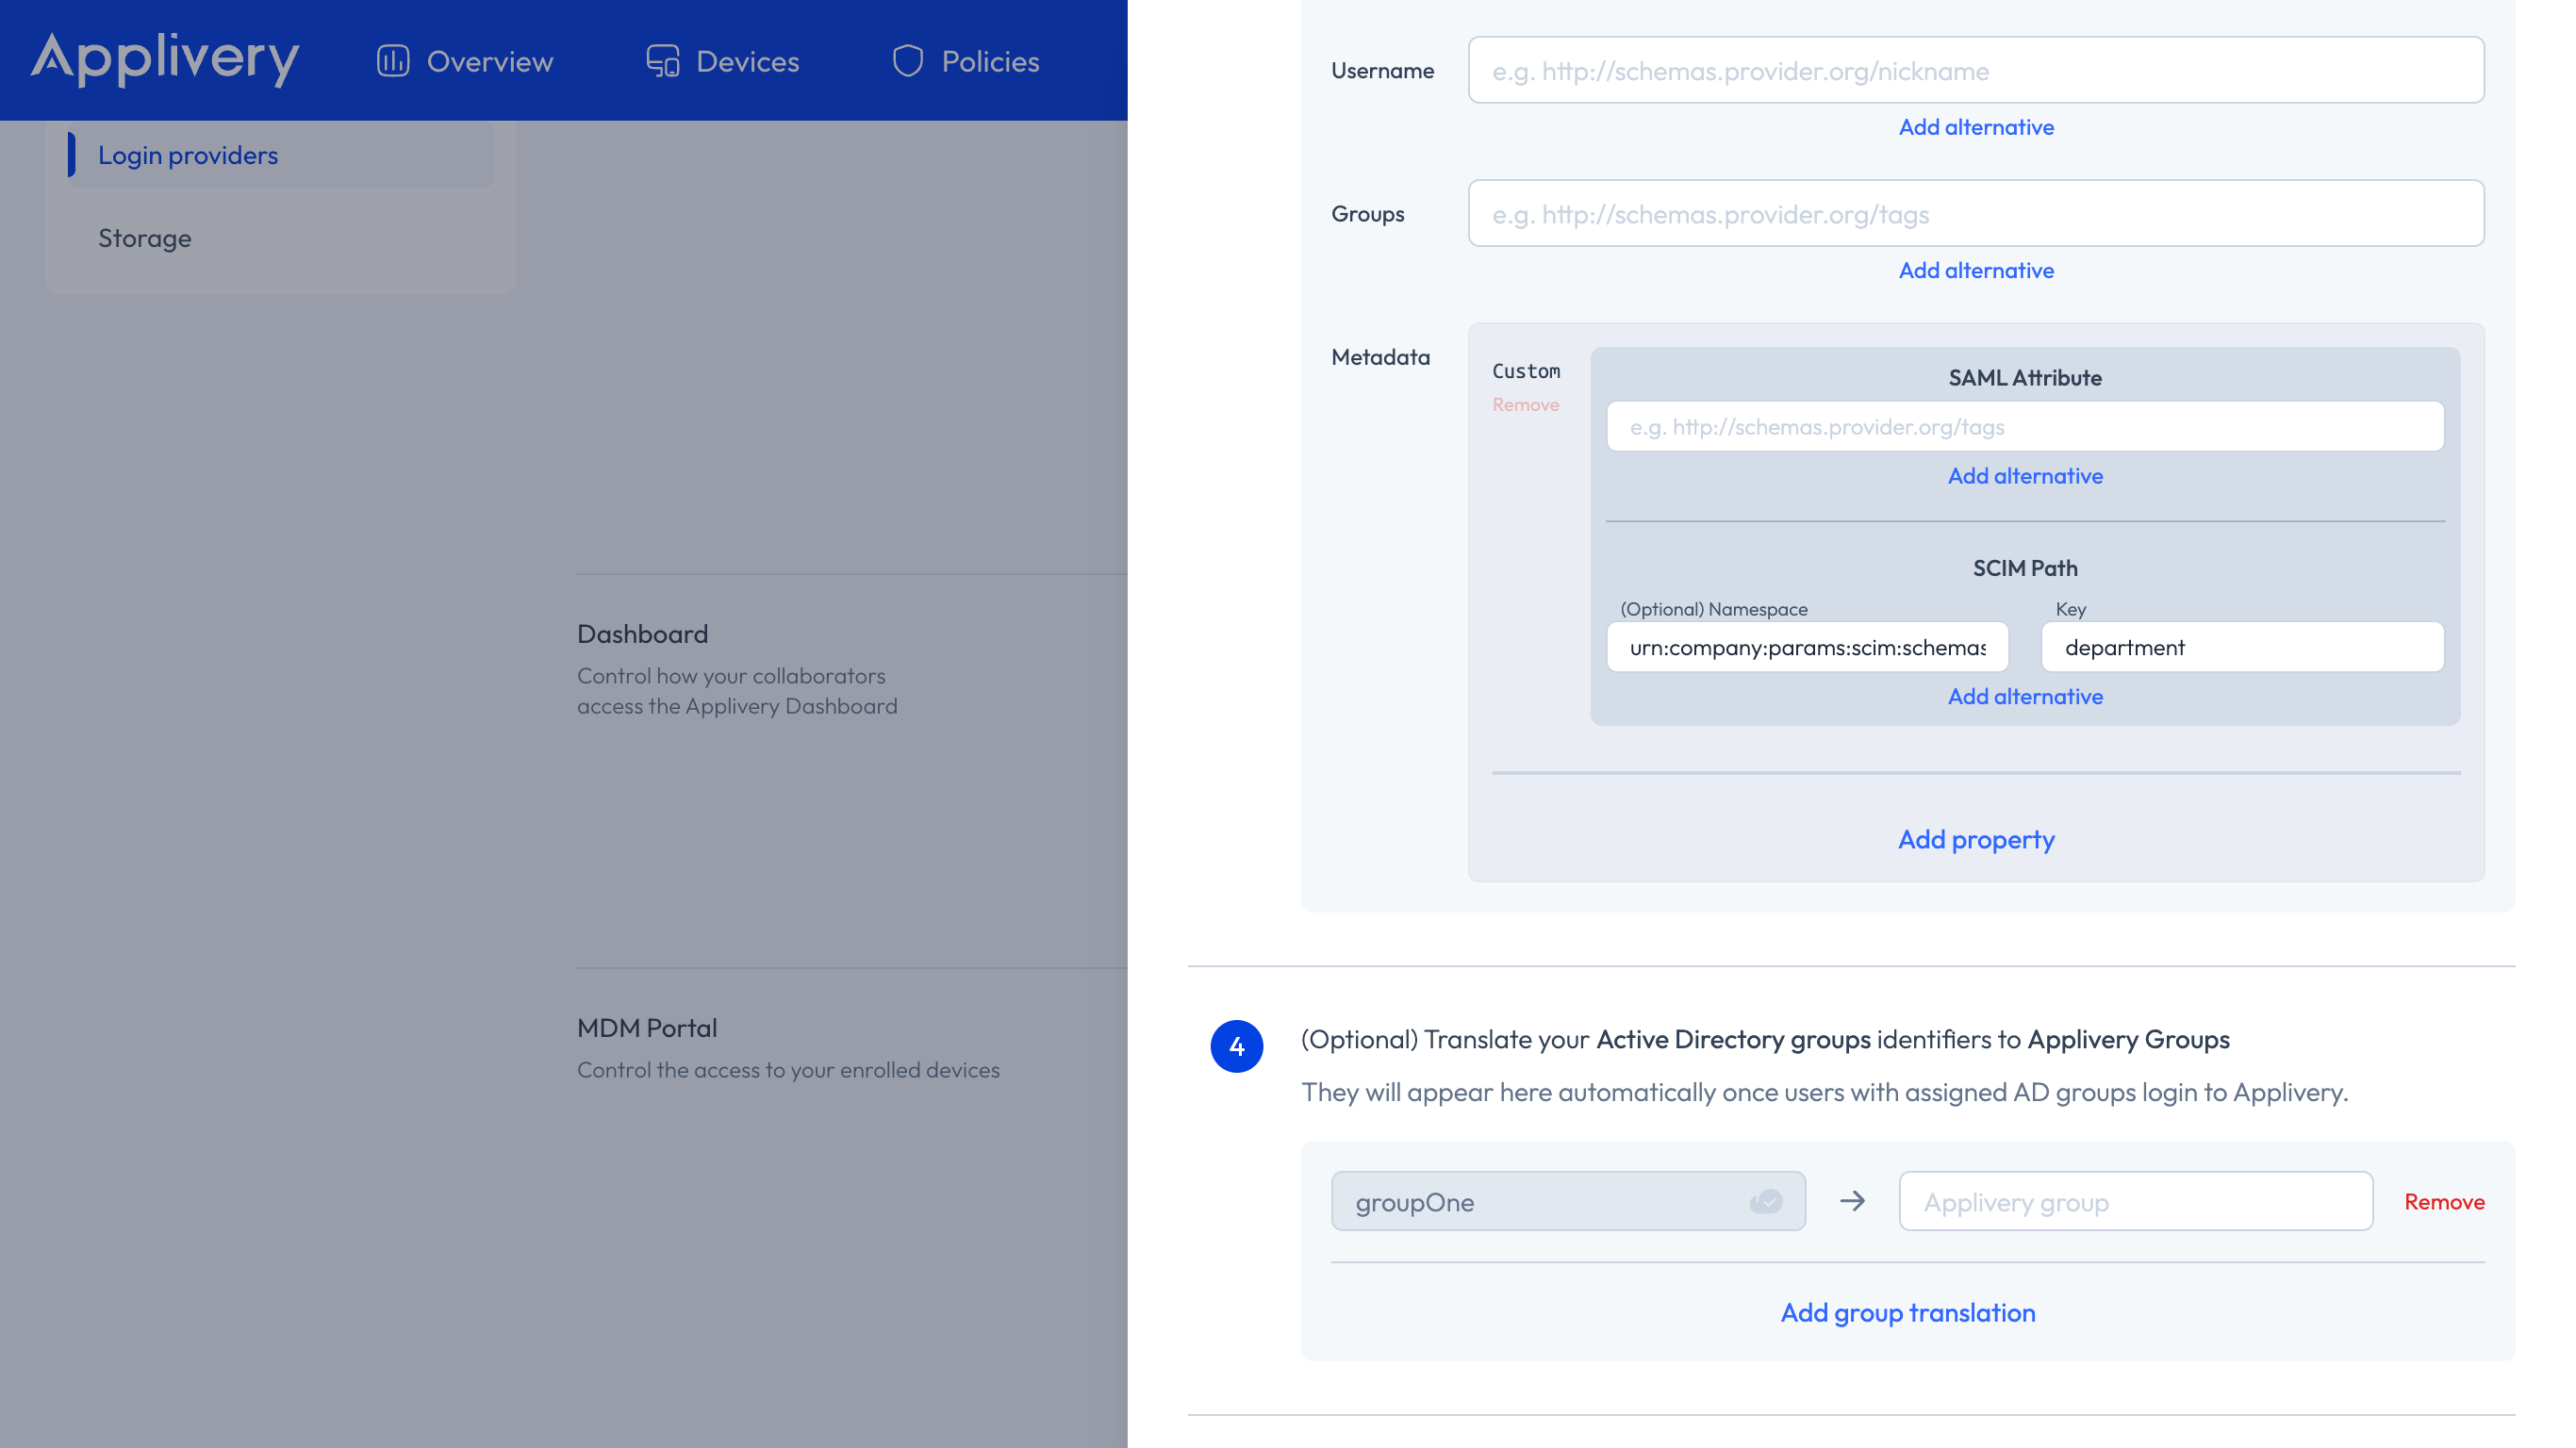
Scroll down to Step 3 and enter the appropriate namespace. You can determine the correct namespace based on the attribute type (Core, Enterprise, or Custom) and its value.
To save your changes, simply click Save. Once your IdP performs its next scheduled sync, the mapped attributes on both sides will begin populating each user’s metadata in Applivery.
To summarize:
SCIM attributes can be mapped to user metadata using
mappedAttributes.namespacehelps disambiguate attributes when multiple schemas are involved.Any unmapped SCIM attributes are stored in
attributesHistoryfor future reference.This mapping system gives you full control over how user data is stored and leveraged downstream.