
This is a premium feature that might not be available in your current plan. Check the availability on our pricing page.
Customers can now manage their own Storage regions in AWS S3 and GCP Cloud Storage. This tutorial will help you properly configure your custom Storage region in AWS and GCP.
AWS S3
Bucket creation
Log in to your Amazon Web Services console with your credentials.
Go to the Storage > S3 section.
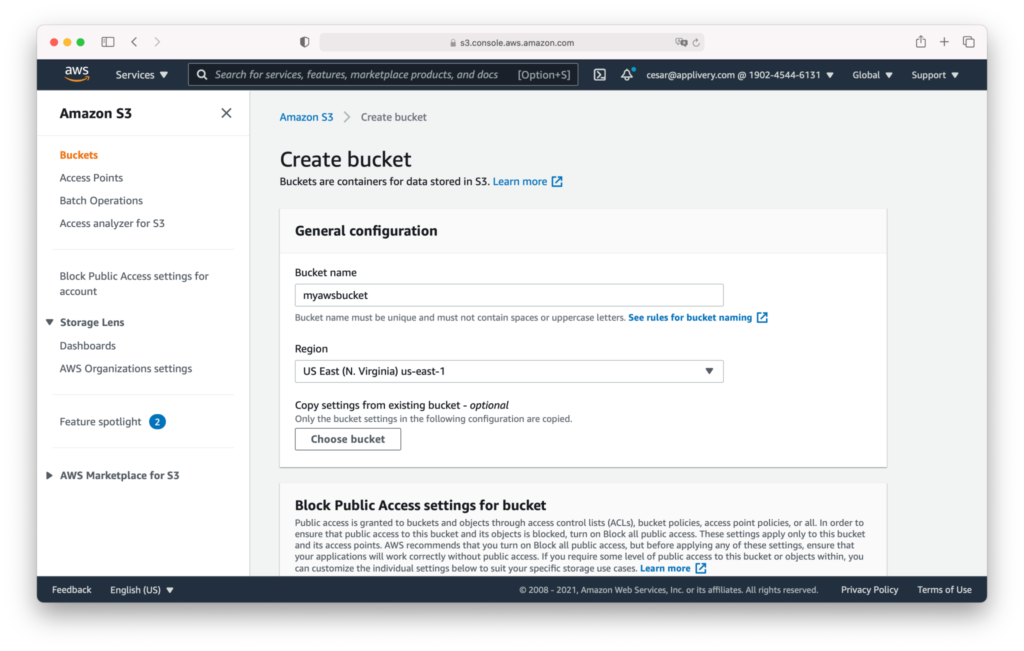
Click the Create bucket orange button.
Fill out your bucket information (Bucket name and Region).
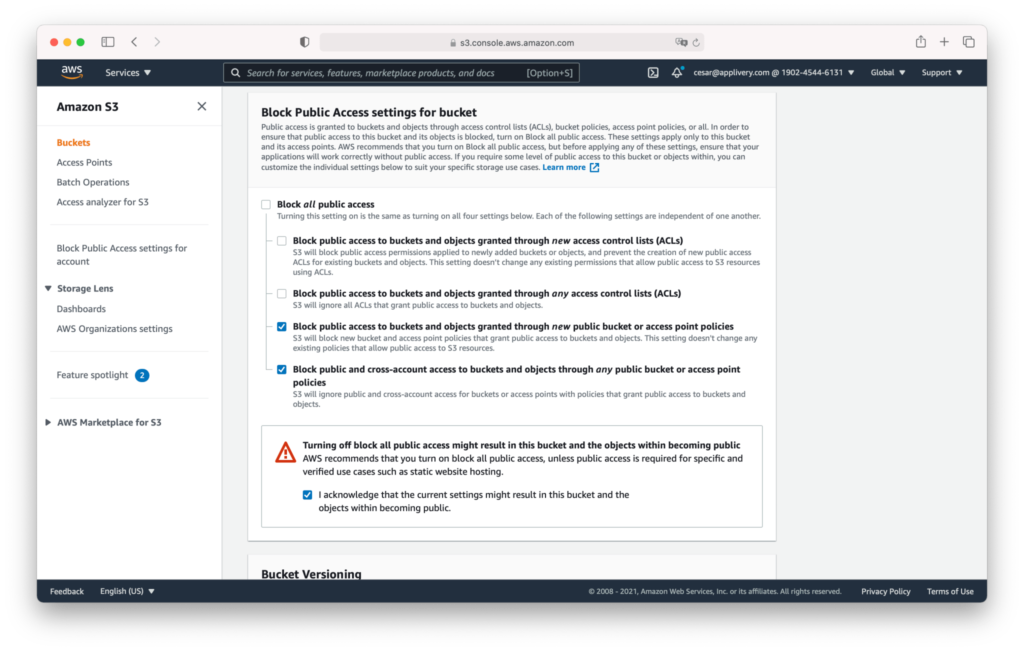
Scroll down until the Block Public Access settings for bucket section and select the following two options:
Block public access to buckets and objects granted through new public buckets or access point Policies.
Block public and cross-account access to buckets and objects through any public bucket or access point Policies.
I acknowledge that the current settings might result in this bucket and the objects within becoming public.
Scroll down and click the Create bucket orange button.
Credentials configuration
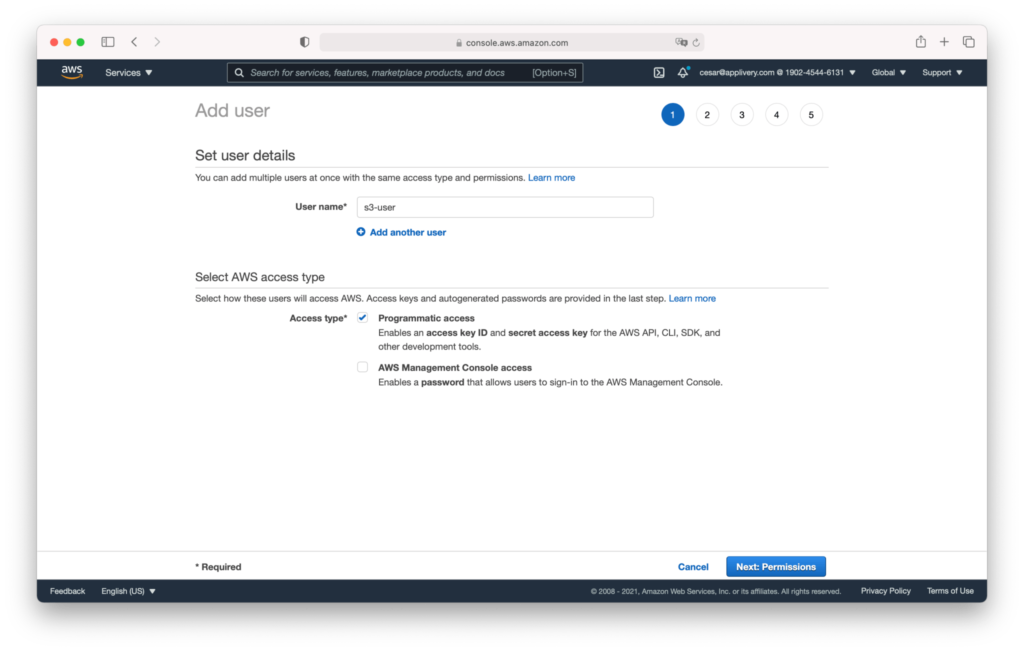
We recommend creating a new AWS User and credentials. Go to AWS IAM > Users section and click the Add user button.
Select a user name and choose the Programmatic access option under the access type section.
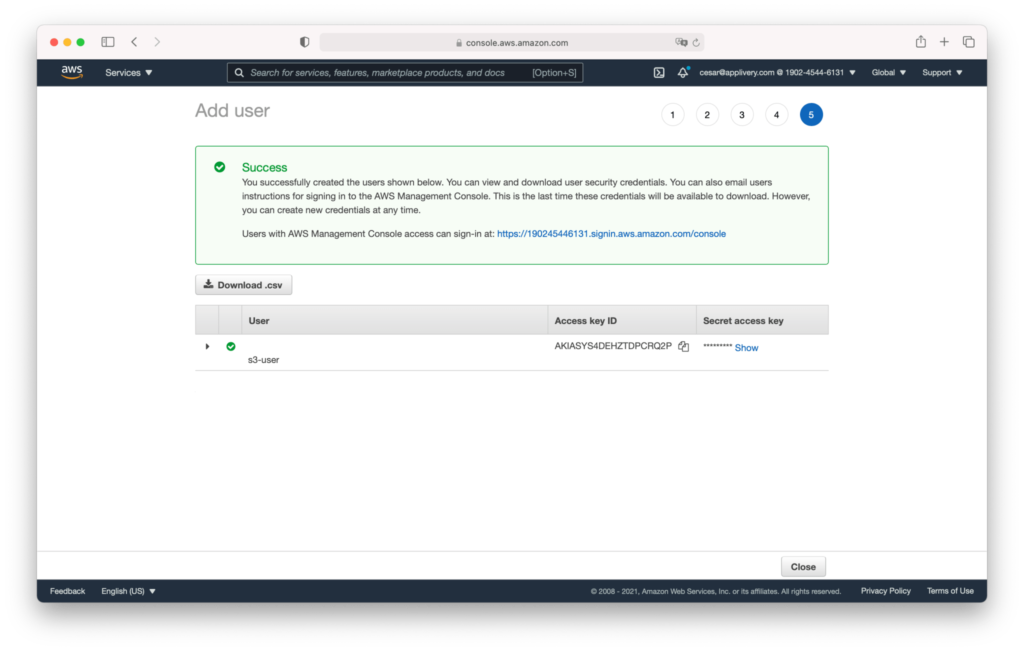
Click Next, and follow steps 2, 3, and 4 without changing anything, maintaining the default options, and finish by clicking the Create user button.
The user credentials will be displayed, copied, and stored securely. You will have to provide them to our team.
Grant permissions
Now we have to grant some additional permissions to the new user. For this example, we will use the Inline AWS Policies, but as an alternative, you can create a new Policy and attach it to the user.
Click on the new user and click Add inline policy under the Permissions tab.
Use the {} JSON editor and enter the following AWS Policy:
{
    "Version": "2012-10-17",
    "Statement": [
        {
            "Effect": "Allow",
            "Action": [
                "s3:PutObject",
                "s3:GetObject",
                "s3:DeleteObject",
                "s3:GetBucketLocation",
                "s3:PutObjectAcl"
            ],
            "Resource": [
                "arn:aws:s3:::mycustom-private-bucket",
                "arn:aws:s3:::mycustom-private-bucket/*"
            ]
        }
    ]
}
Note that you have to substitute the `arn:aws:s3
mycustom-private-bucket` with the ARN of the bucket you created in the previous step.
:::
Select your new Storage region
Once created, a new record will be added to the list, easily identifiable as it will be displayed as a You or Managed by title.
You can configure your Custom Storage Region at the Workspace or App levels:
Workspace: The configuration will be applied to the entire Workspace. It will apply to all Apps except those that already have a Custom Storage region configured. To do so, just click Select on this screen to enable it at the entire Workspace level.
App: The configuration will be applied just to this App, regardless of the Workspace configuration. To do so, go to your App Settings > Advanced and Select the Storage provider you’d like.
Only the new Builds uploaded will be stored in the new region. Previous ones will remain in the same place.
GCP Cloud Storage
Create a service account
Log in to your Google Cloud console with your credentials.
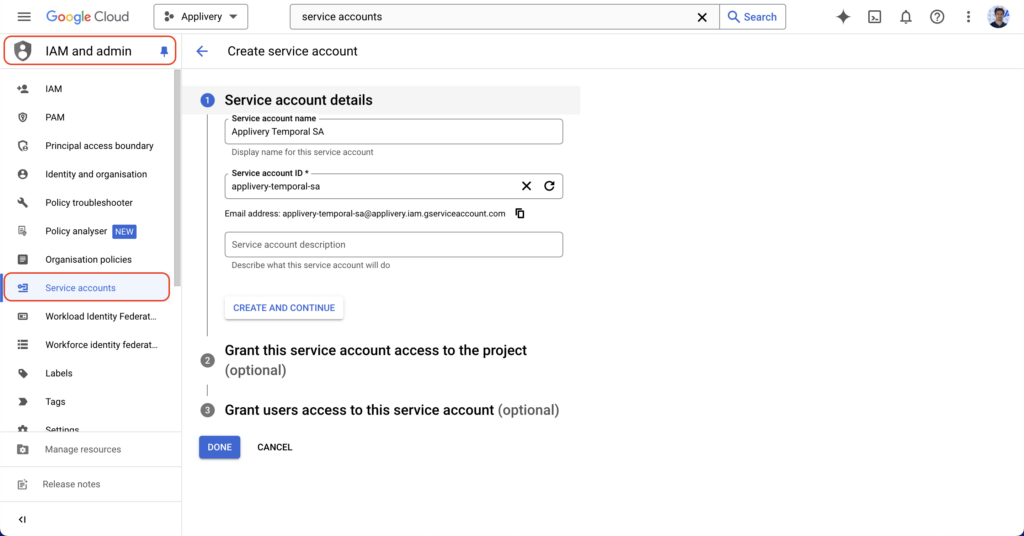
Go to the IAM > Service Accounts section and click the Create service account button.
Fill out Step 1 with your service account information. You can safely skip Steps 2 and 3 for now. Then click Done.
Once the service account has been created, click the CREATE KEY button.
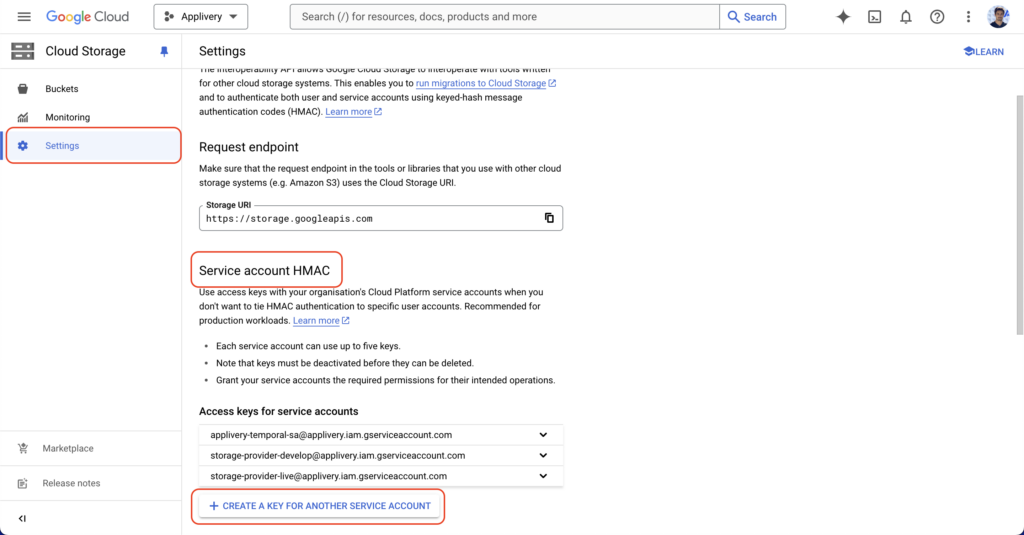
Now, navigate to Cloud Storage in the GCP products menu, then click Settings > Interoperability.
Then scroll down to Service account HMAC and click +CREATE A KEY FOR ANOTHER SERVICE ACCOUNT.
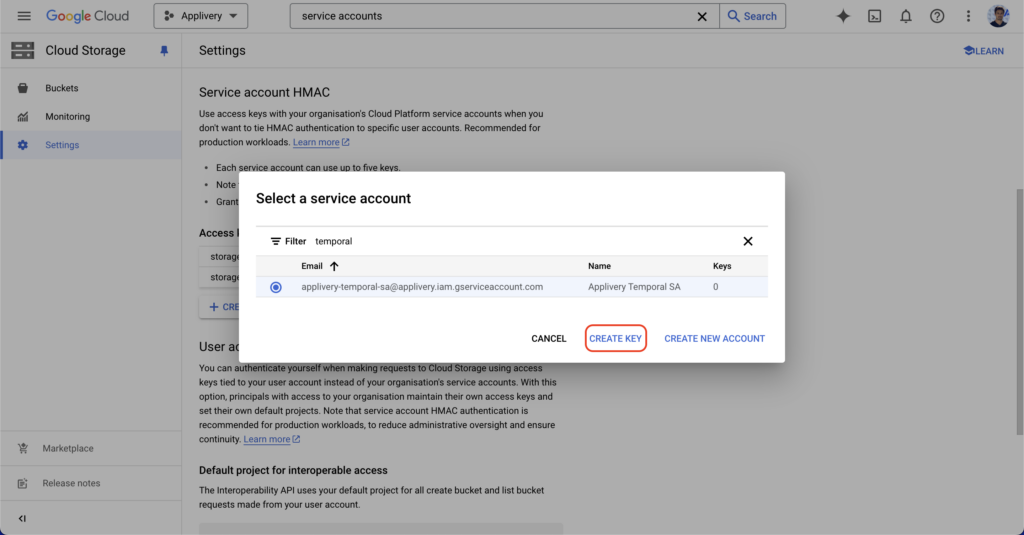
Use the filtering options to find the Service Account that you generated in the previous step. Select it and then click CREATE KEY.
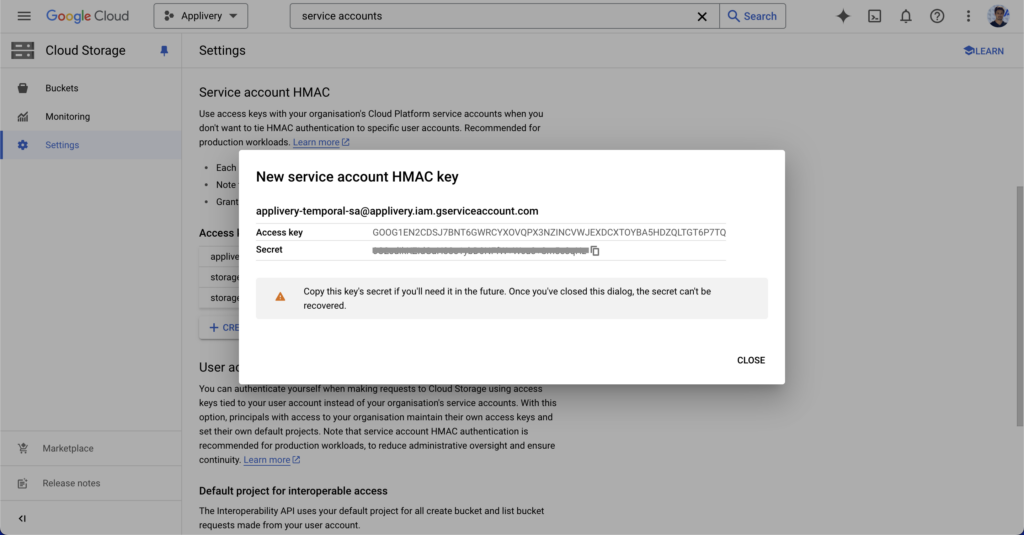
A new Access key and Secret pair will be generated. Save these values for later.
Create a Cloud Storage bucket
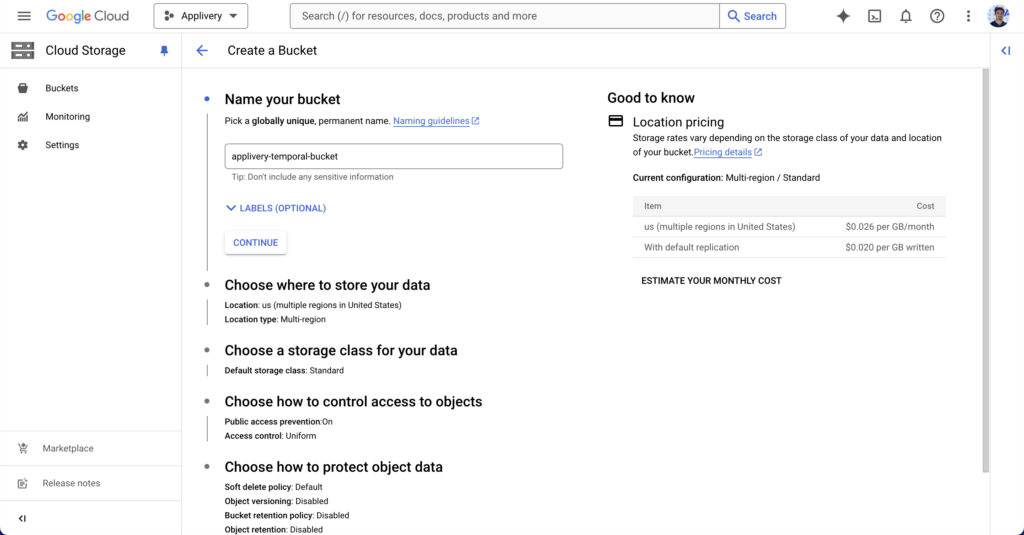
Now navigate to Cloud Storage, from the products menu, and click Create bucket.
Fill out the bucket name and click CONTINUE.
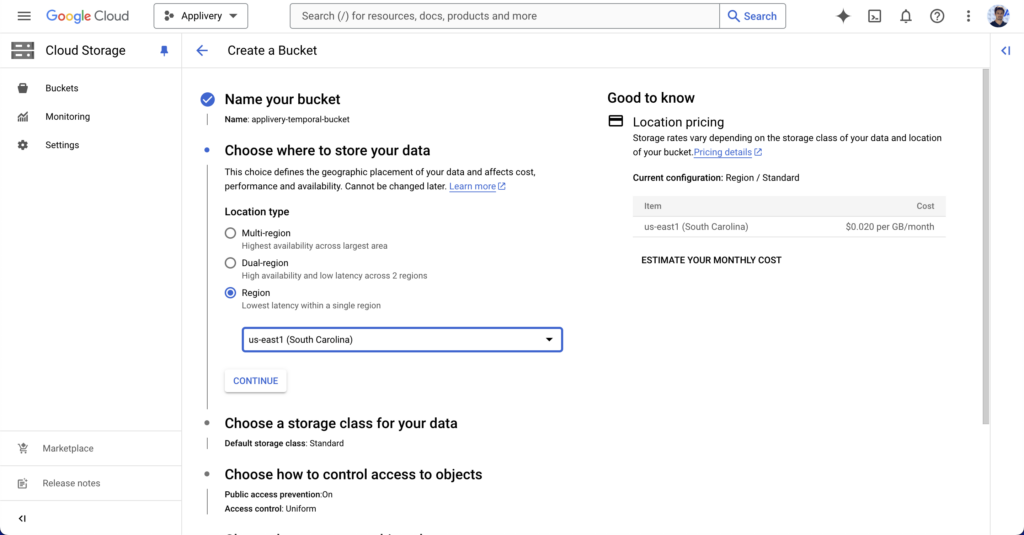
Choose where to store your data from the available regions. You can choose regional storage, dual storage, and multi-region storage.
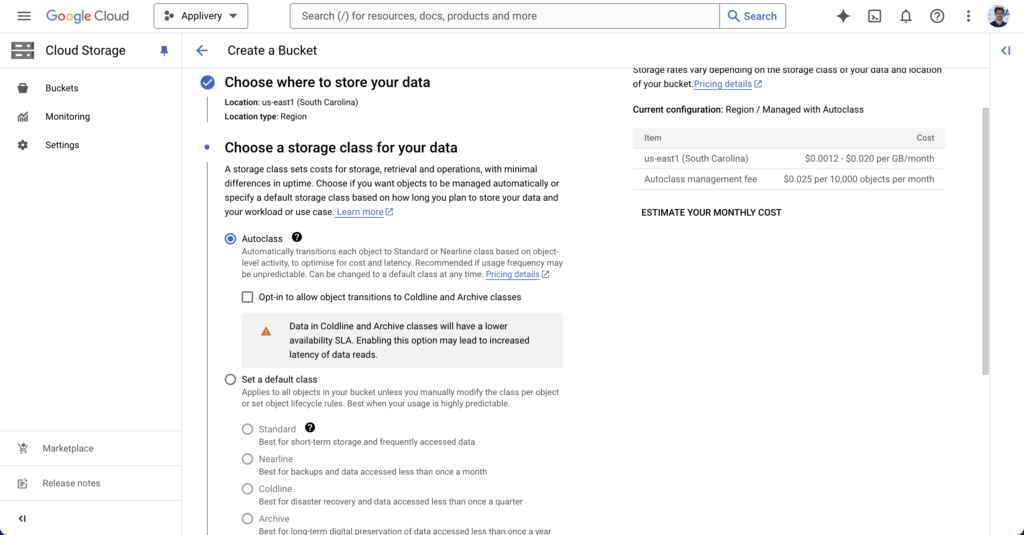
Next, choose the storage class. We recommend using the “autoclass” option provided by GCP that automatically transitions each object to Standard or Nearline class based on object-level activity, to optimise for cost and latency. Recommended if usage frequency may be unpredictable.
Define an access control policy that must be set to “Fine-grained” as Applivery will define individual access Policies for each object.

Under data protection, we recommend choosing “Soft-delete policy” and then “Use default retention duration“. Then click the CREATE button to finish.

Update bucket permissions
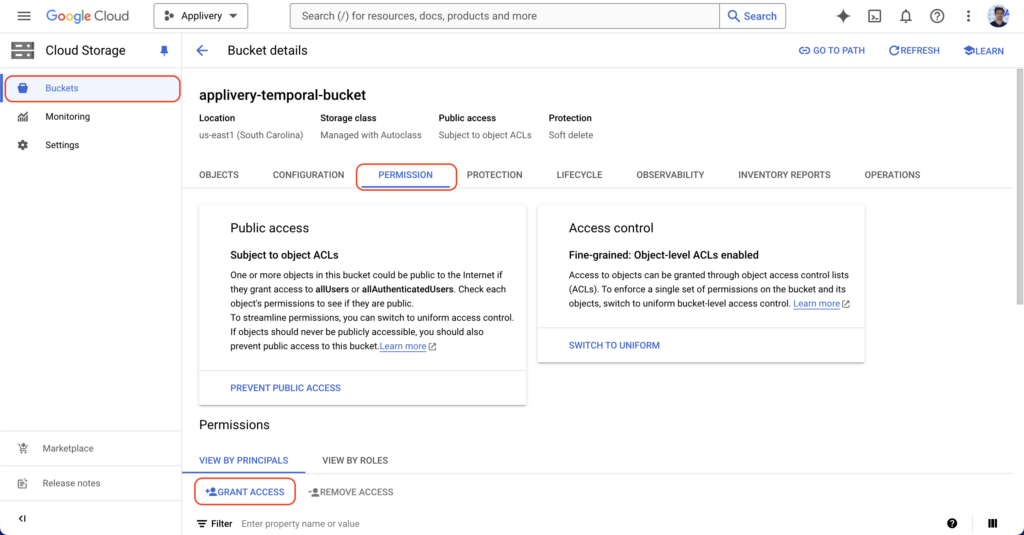
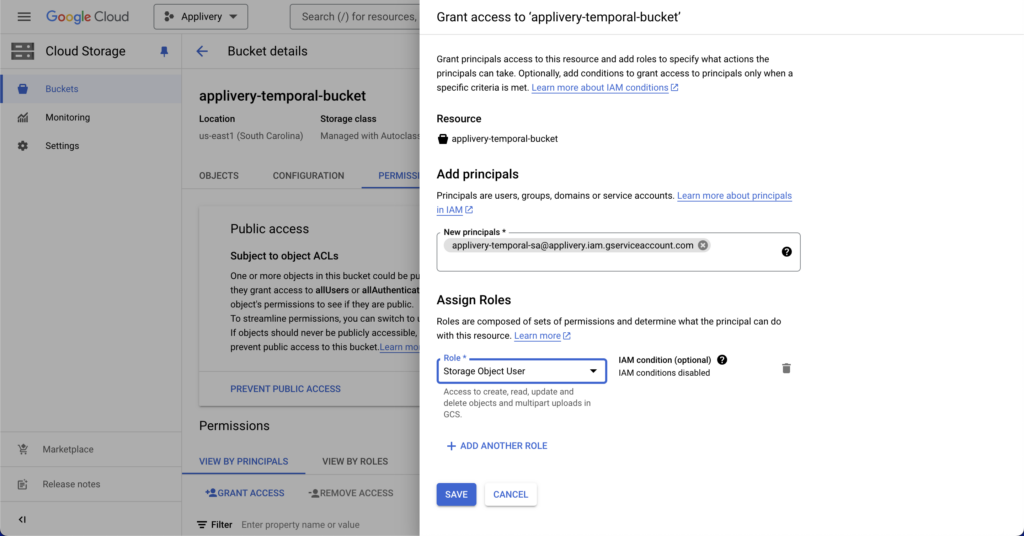
Now go to Buckets, select the bucket recently created, and click PERMISSIONS.
Click +GRANT ACCESS.
In the side panel, search for the service account under “New principals” and assign the “Storage Object User” role. Then click SAVE.
Configure your Custom Storage Region in Applivery
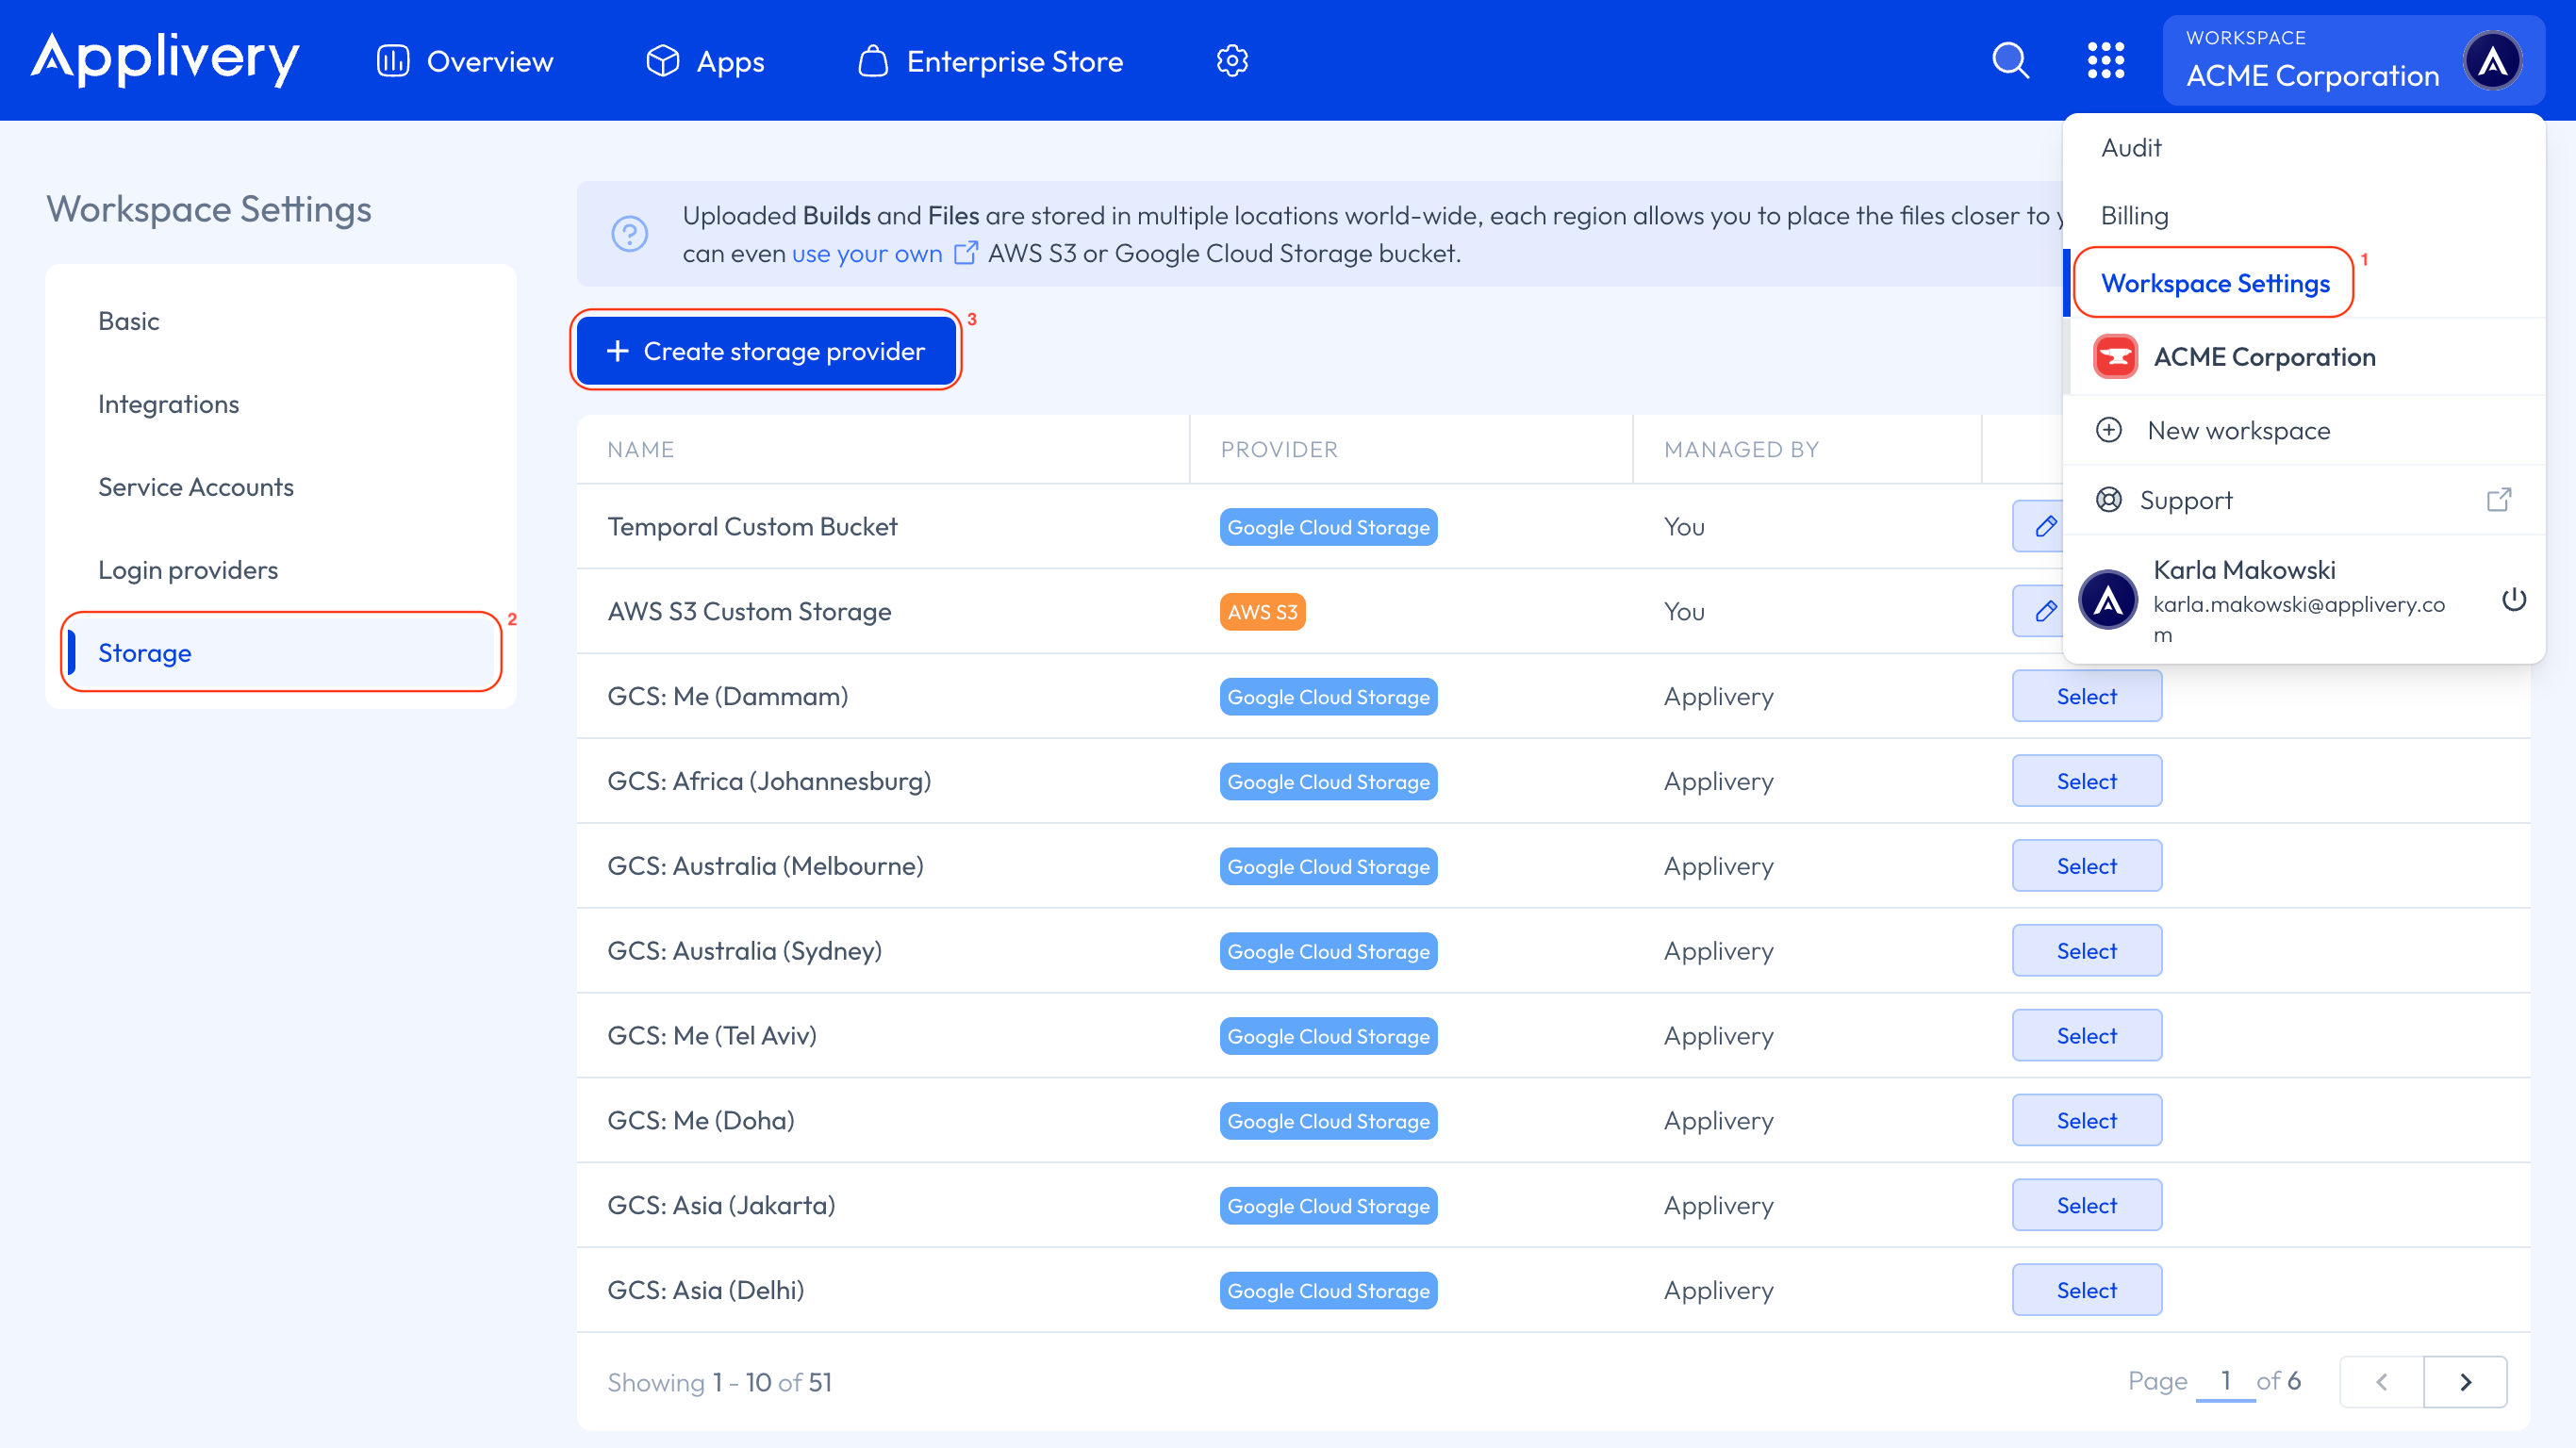
Now that the AWS S3 or GCP Cloud Storage configuration is complete, open the top dropdown menu and access your Workspace Settings 1 in the Applivery Dashboard. Then select Storage 2 from the left-hand menu and click the + Create storage provider 3 button.
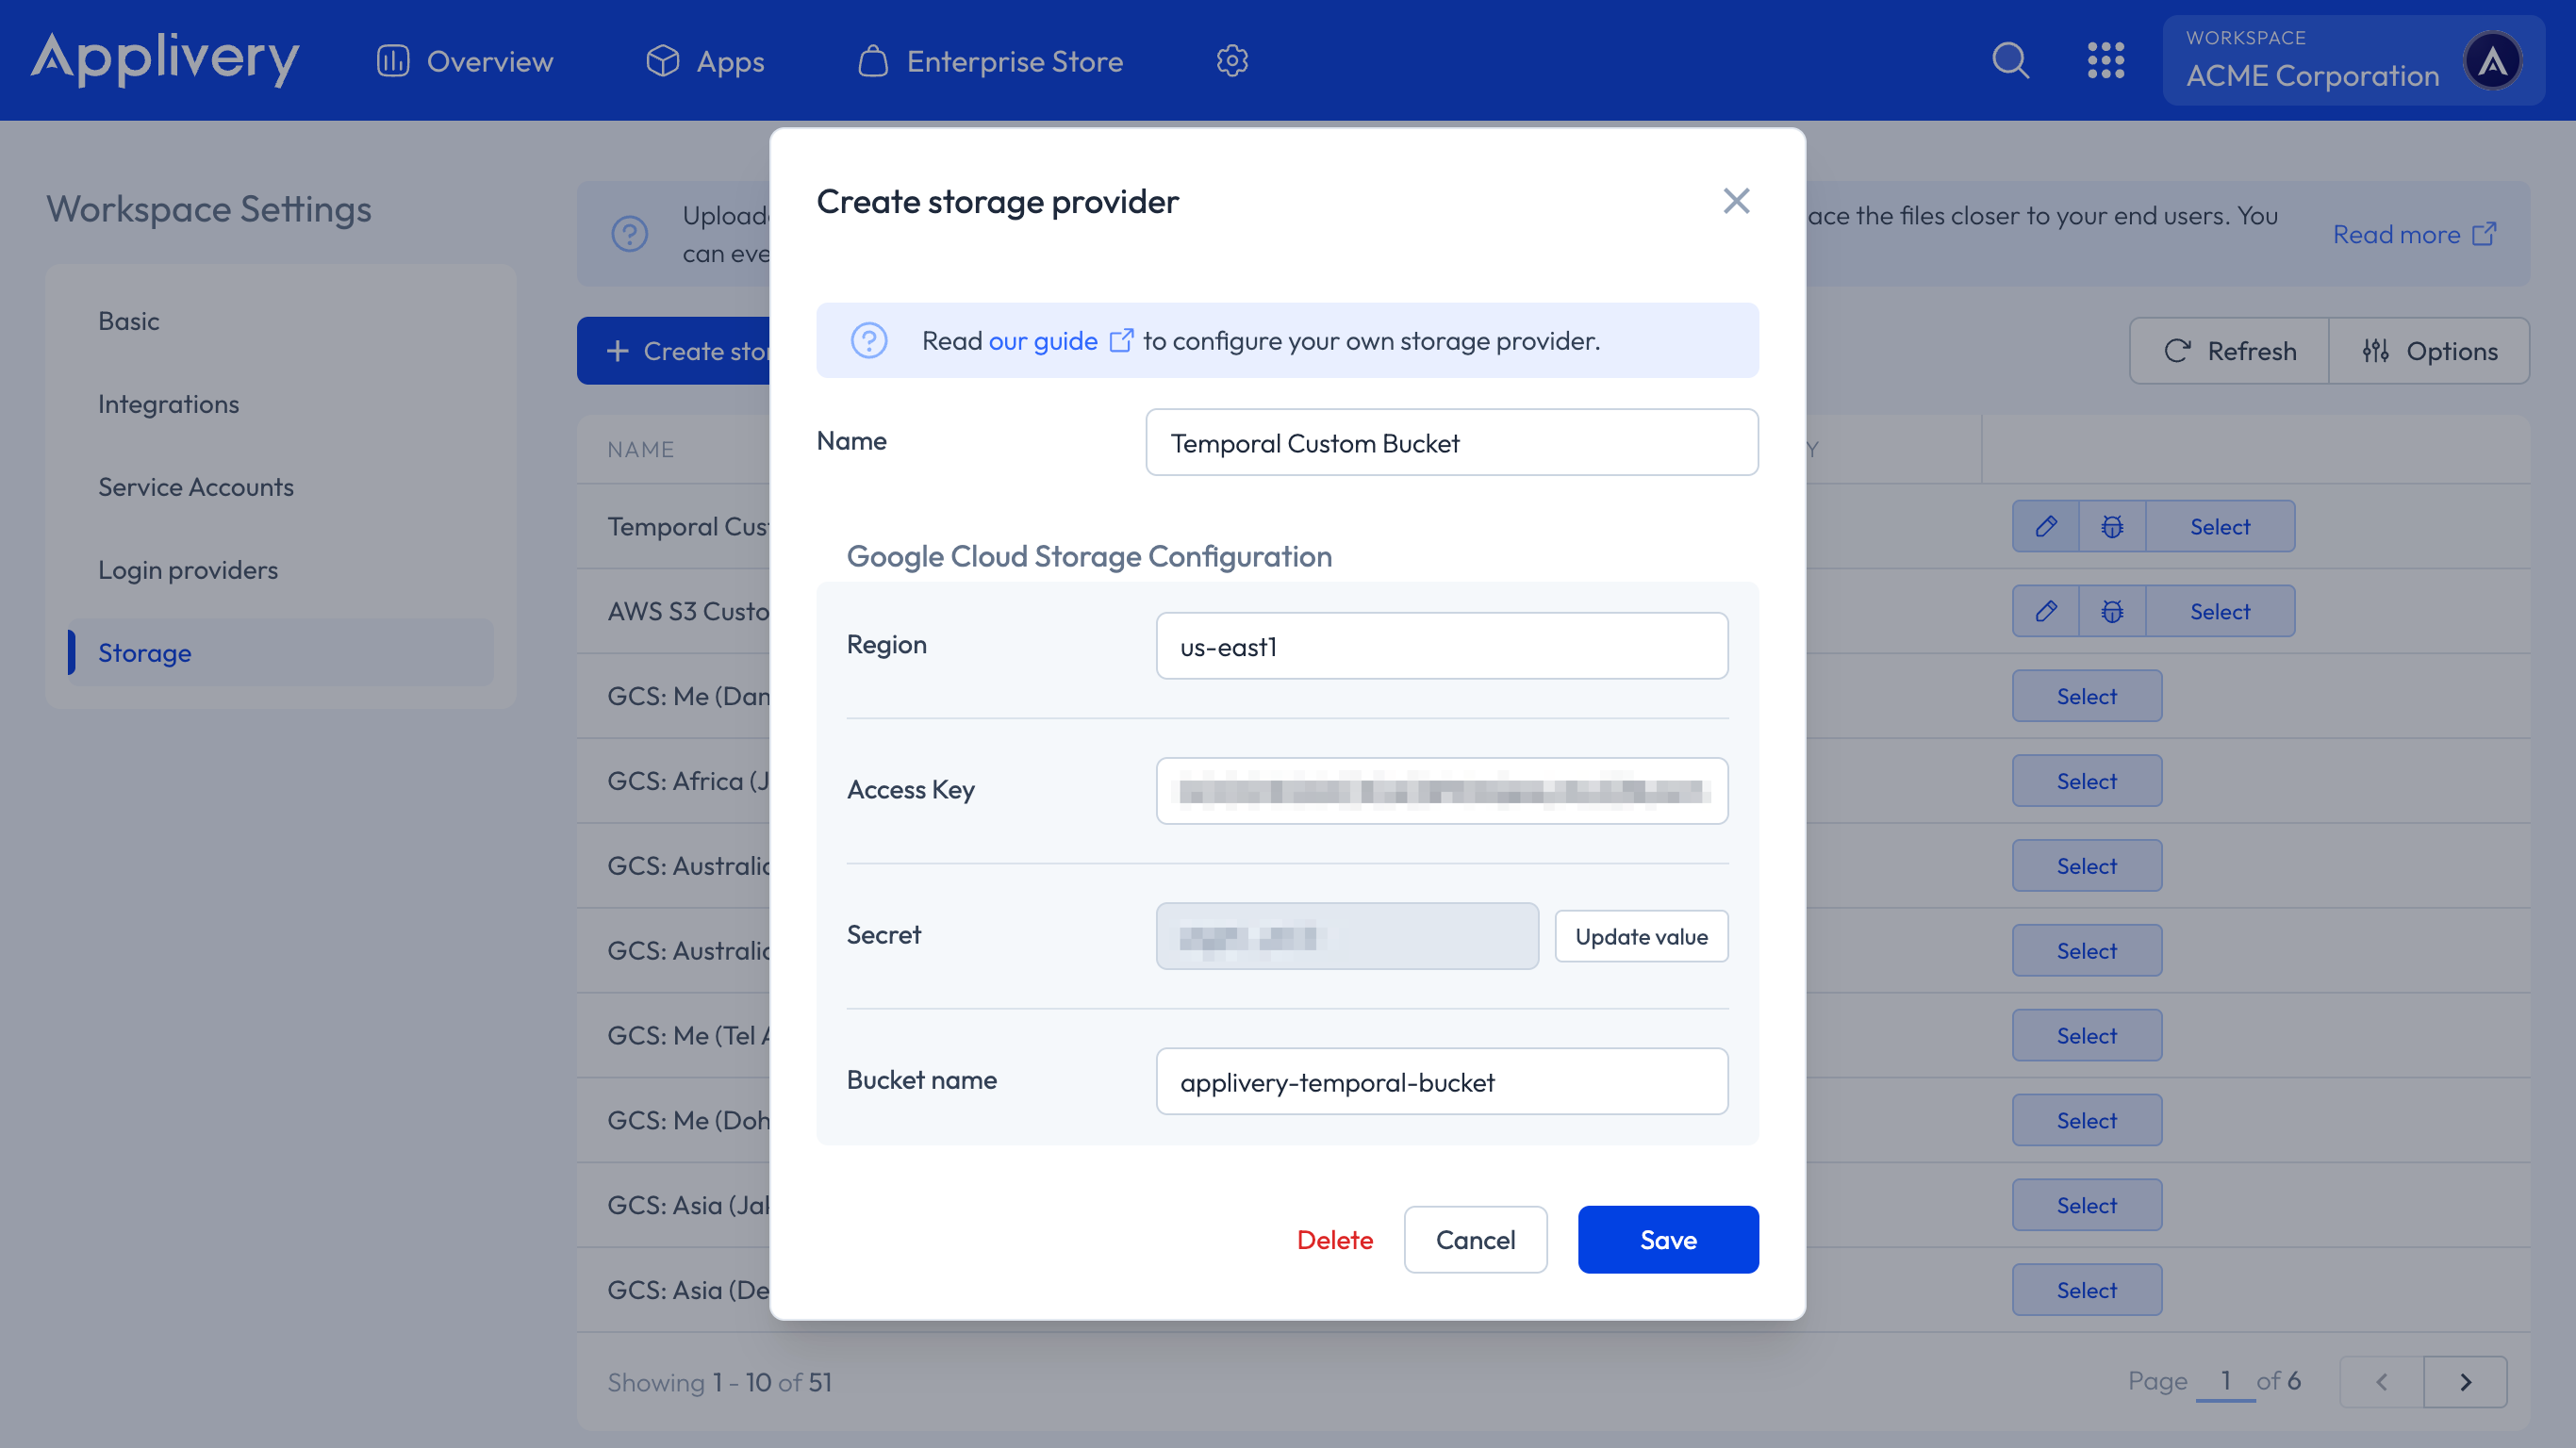
Complete the form with the information you generated in the previous steps. Then click the Save button.
Enabling storage buckets
You can switch between storage regions by just clicking the Select button beside every storage region.
Testing new configurations
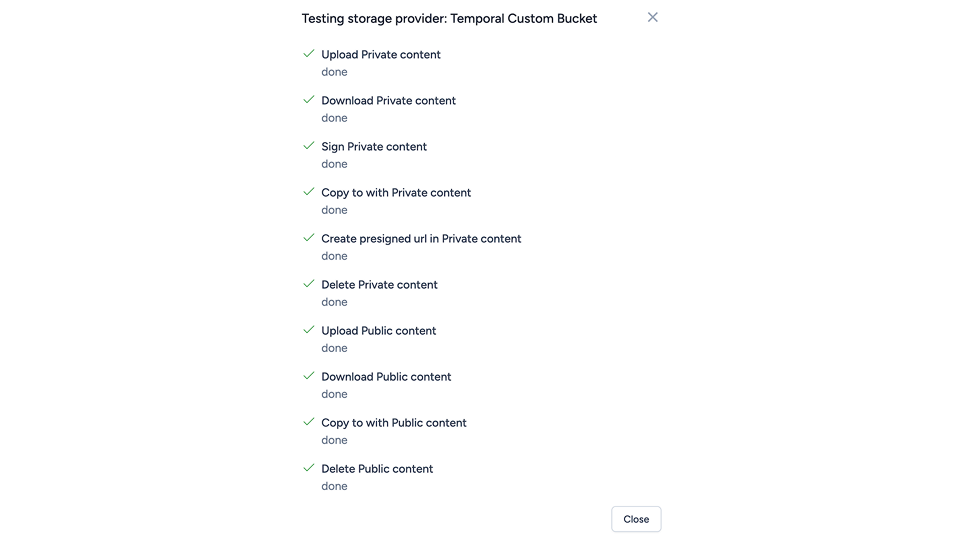
You can use the bug icon located on each Storage region to test the proper configuration of the bucket. Applivery will run a series of tests that will confirm if the bucket has been properly configured.

A successful test will look like this:
Disabling a Custom Storage Region
You can disable a Custom Storage Region by clicking the Select button of the default storage region (Ireland).
Removing a Custom Storage Region
You can permanently remove a Custom Storage Region by clicking the pencil button 4 beside it and then the Delete 5 button at the bottom of the modal view. The Storage Region will be permanently removed from the system.
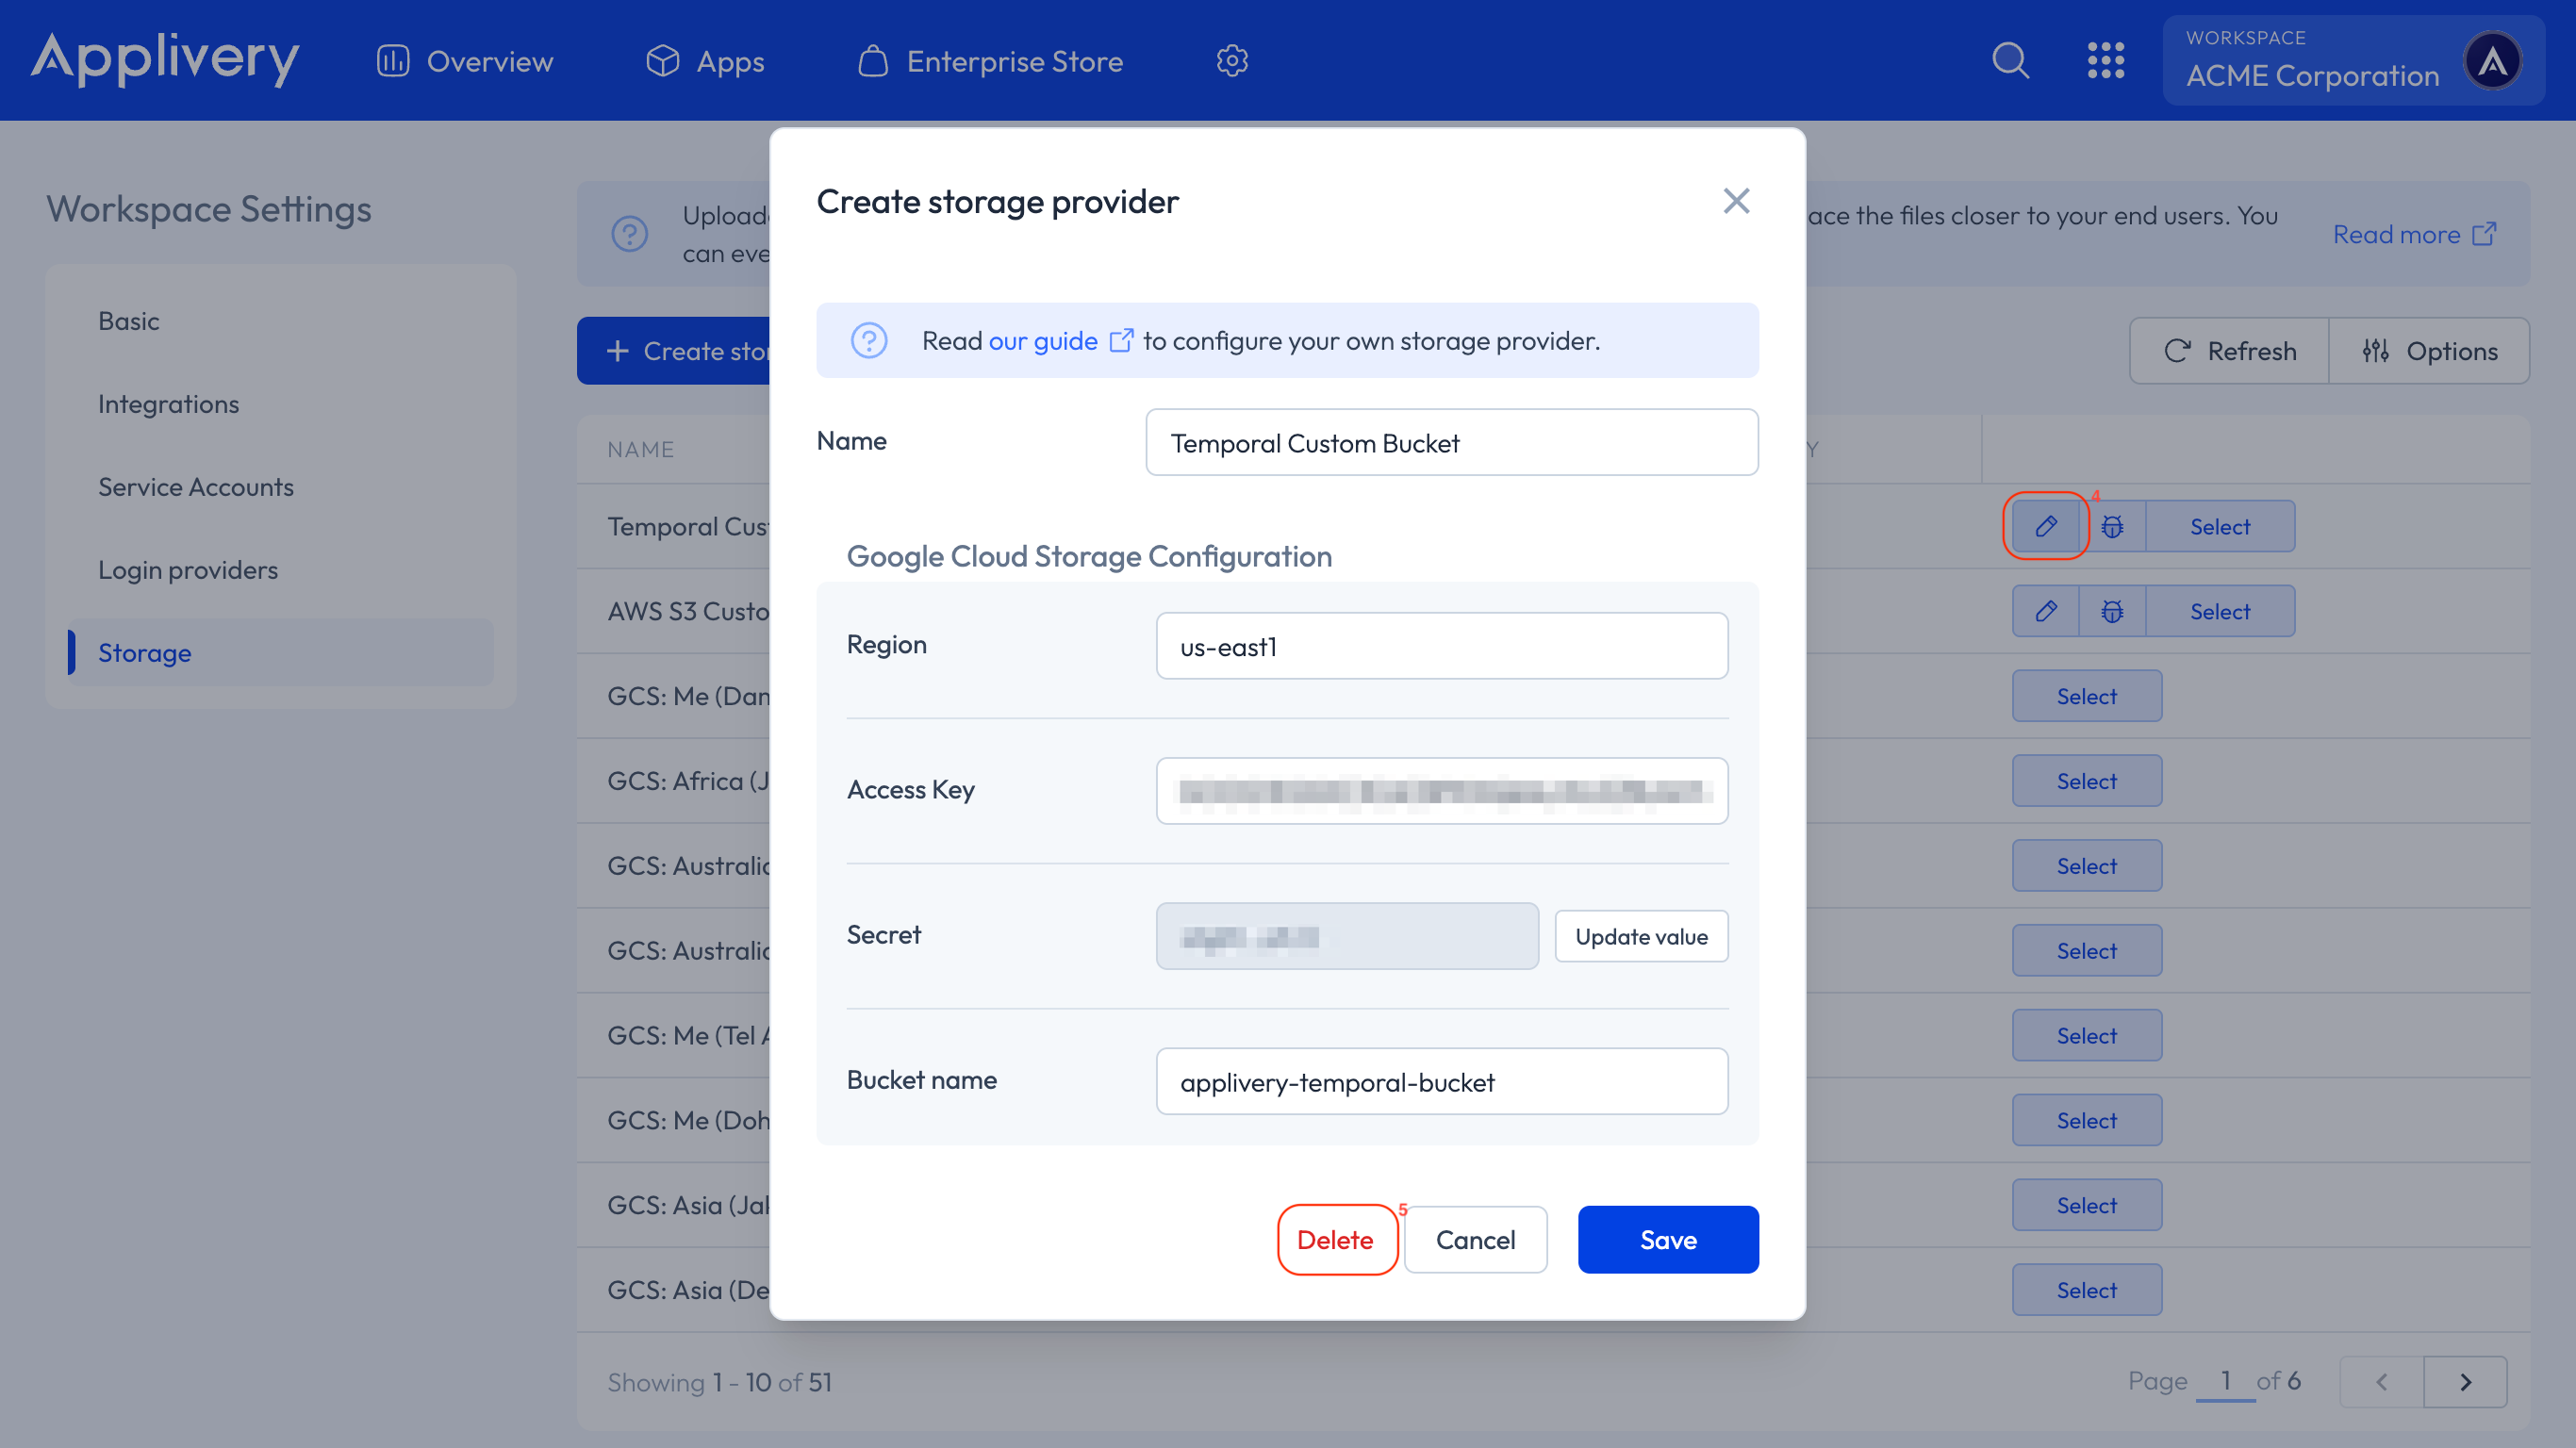
The Builds uploaded to this storage will not be accessible anymore.