
External Devices such as USB drives, external hard disks, and portable media can pose serious security risks in enterprise environments. They can be used to transfer sensitive data, introduce malware, or bypass corporate access controls. For organizations that manage Windows Devices at scale, restricting external device usage is a critical step in maintaining compliance and protecting company data.
Applivery enables IT administrators to enforce these restrictions easily through policy configuration. By using the appropriate group policy settings, you can block or limit access to specific types of external Devices across your entire device fleet—without relying on manual intervention.
Blocking Removable Storage Devices
Once in the Applivery Dashboard, head to Policies (1). Choose the Policy where you want to add the configuration.
In the left-hand menu, select + Add configuration (2) and search for Removable Storage (3).
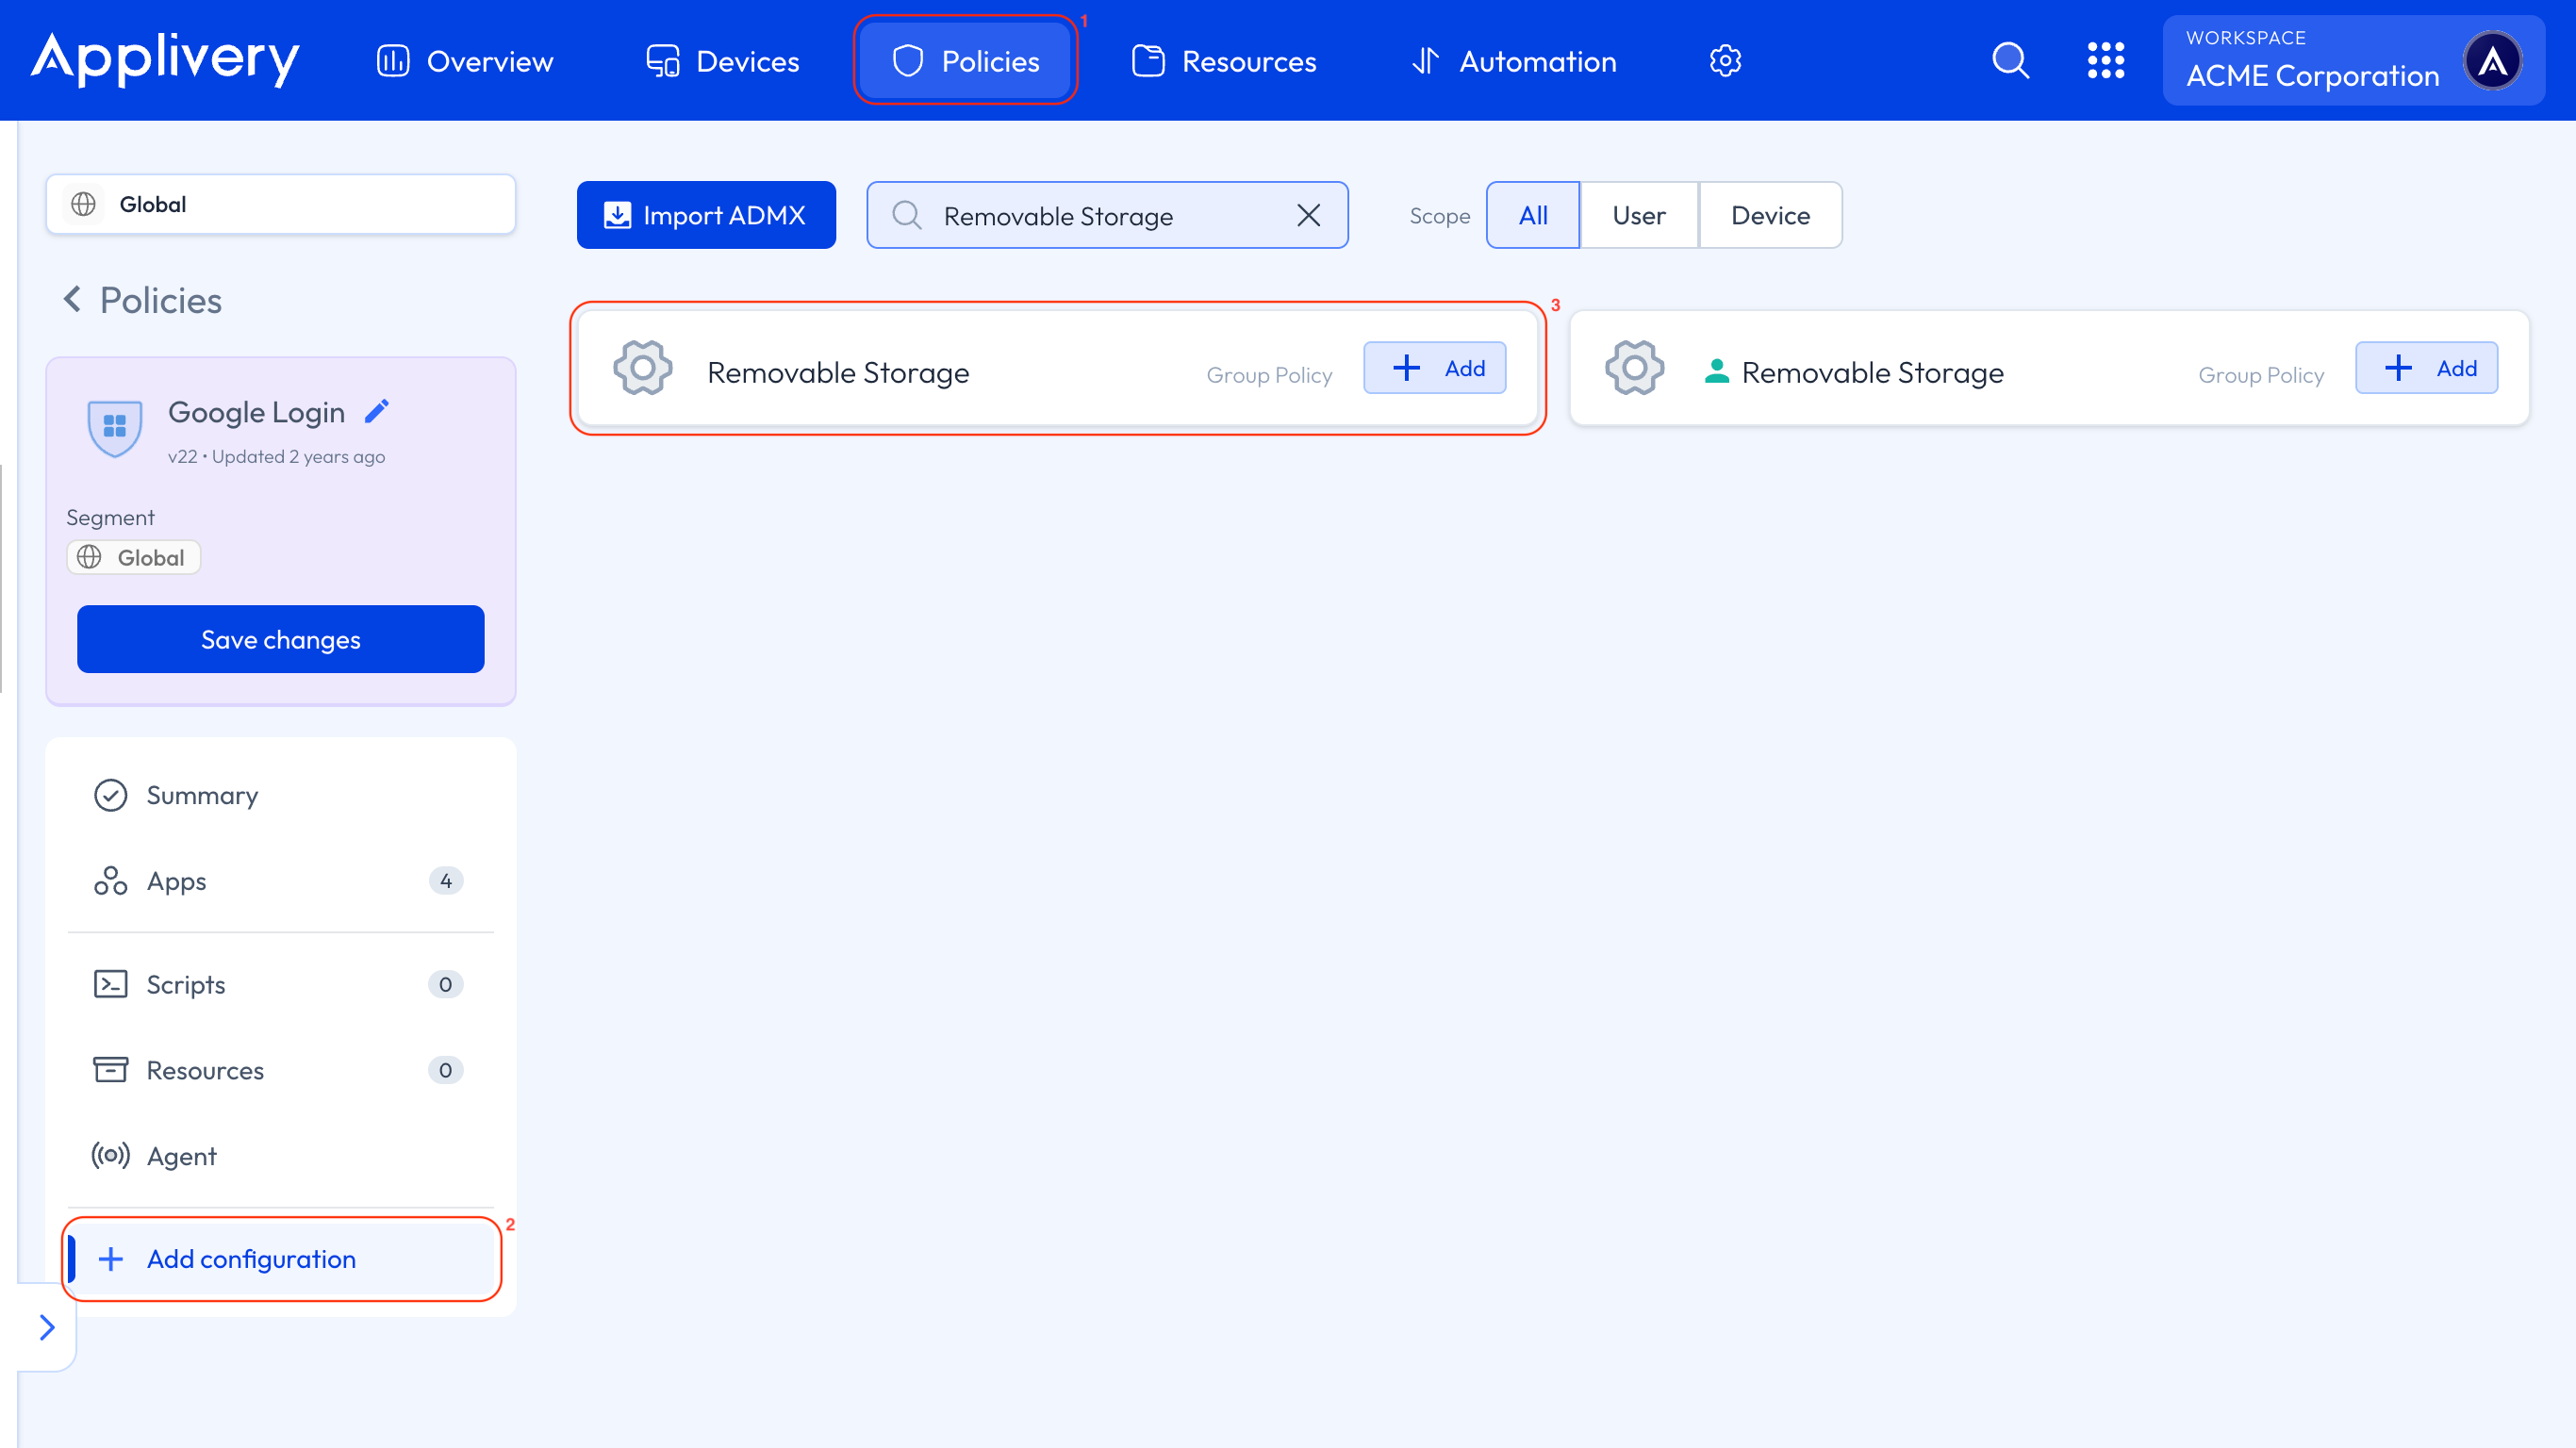
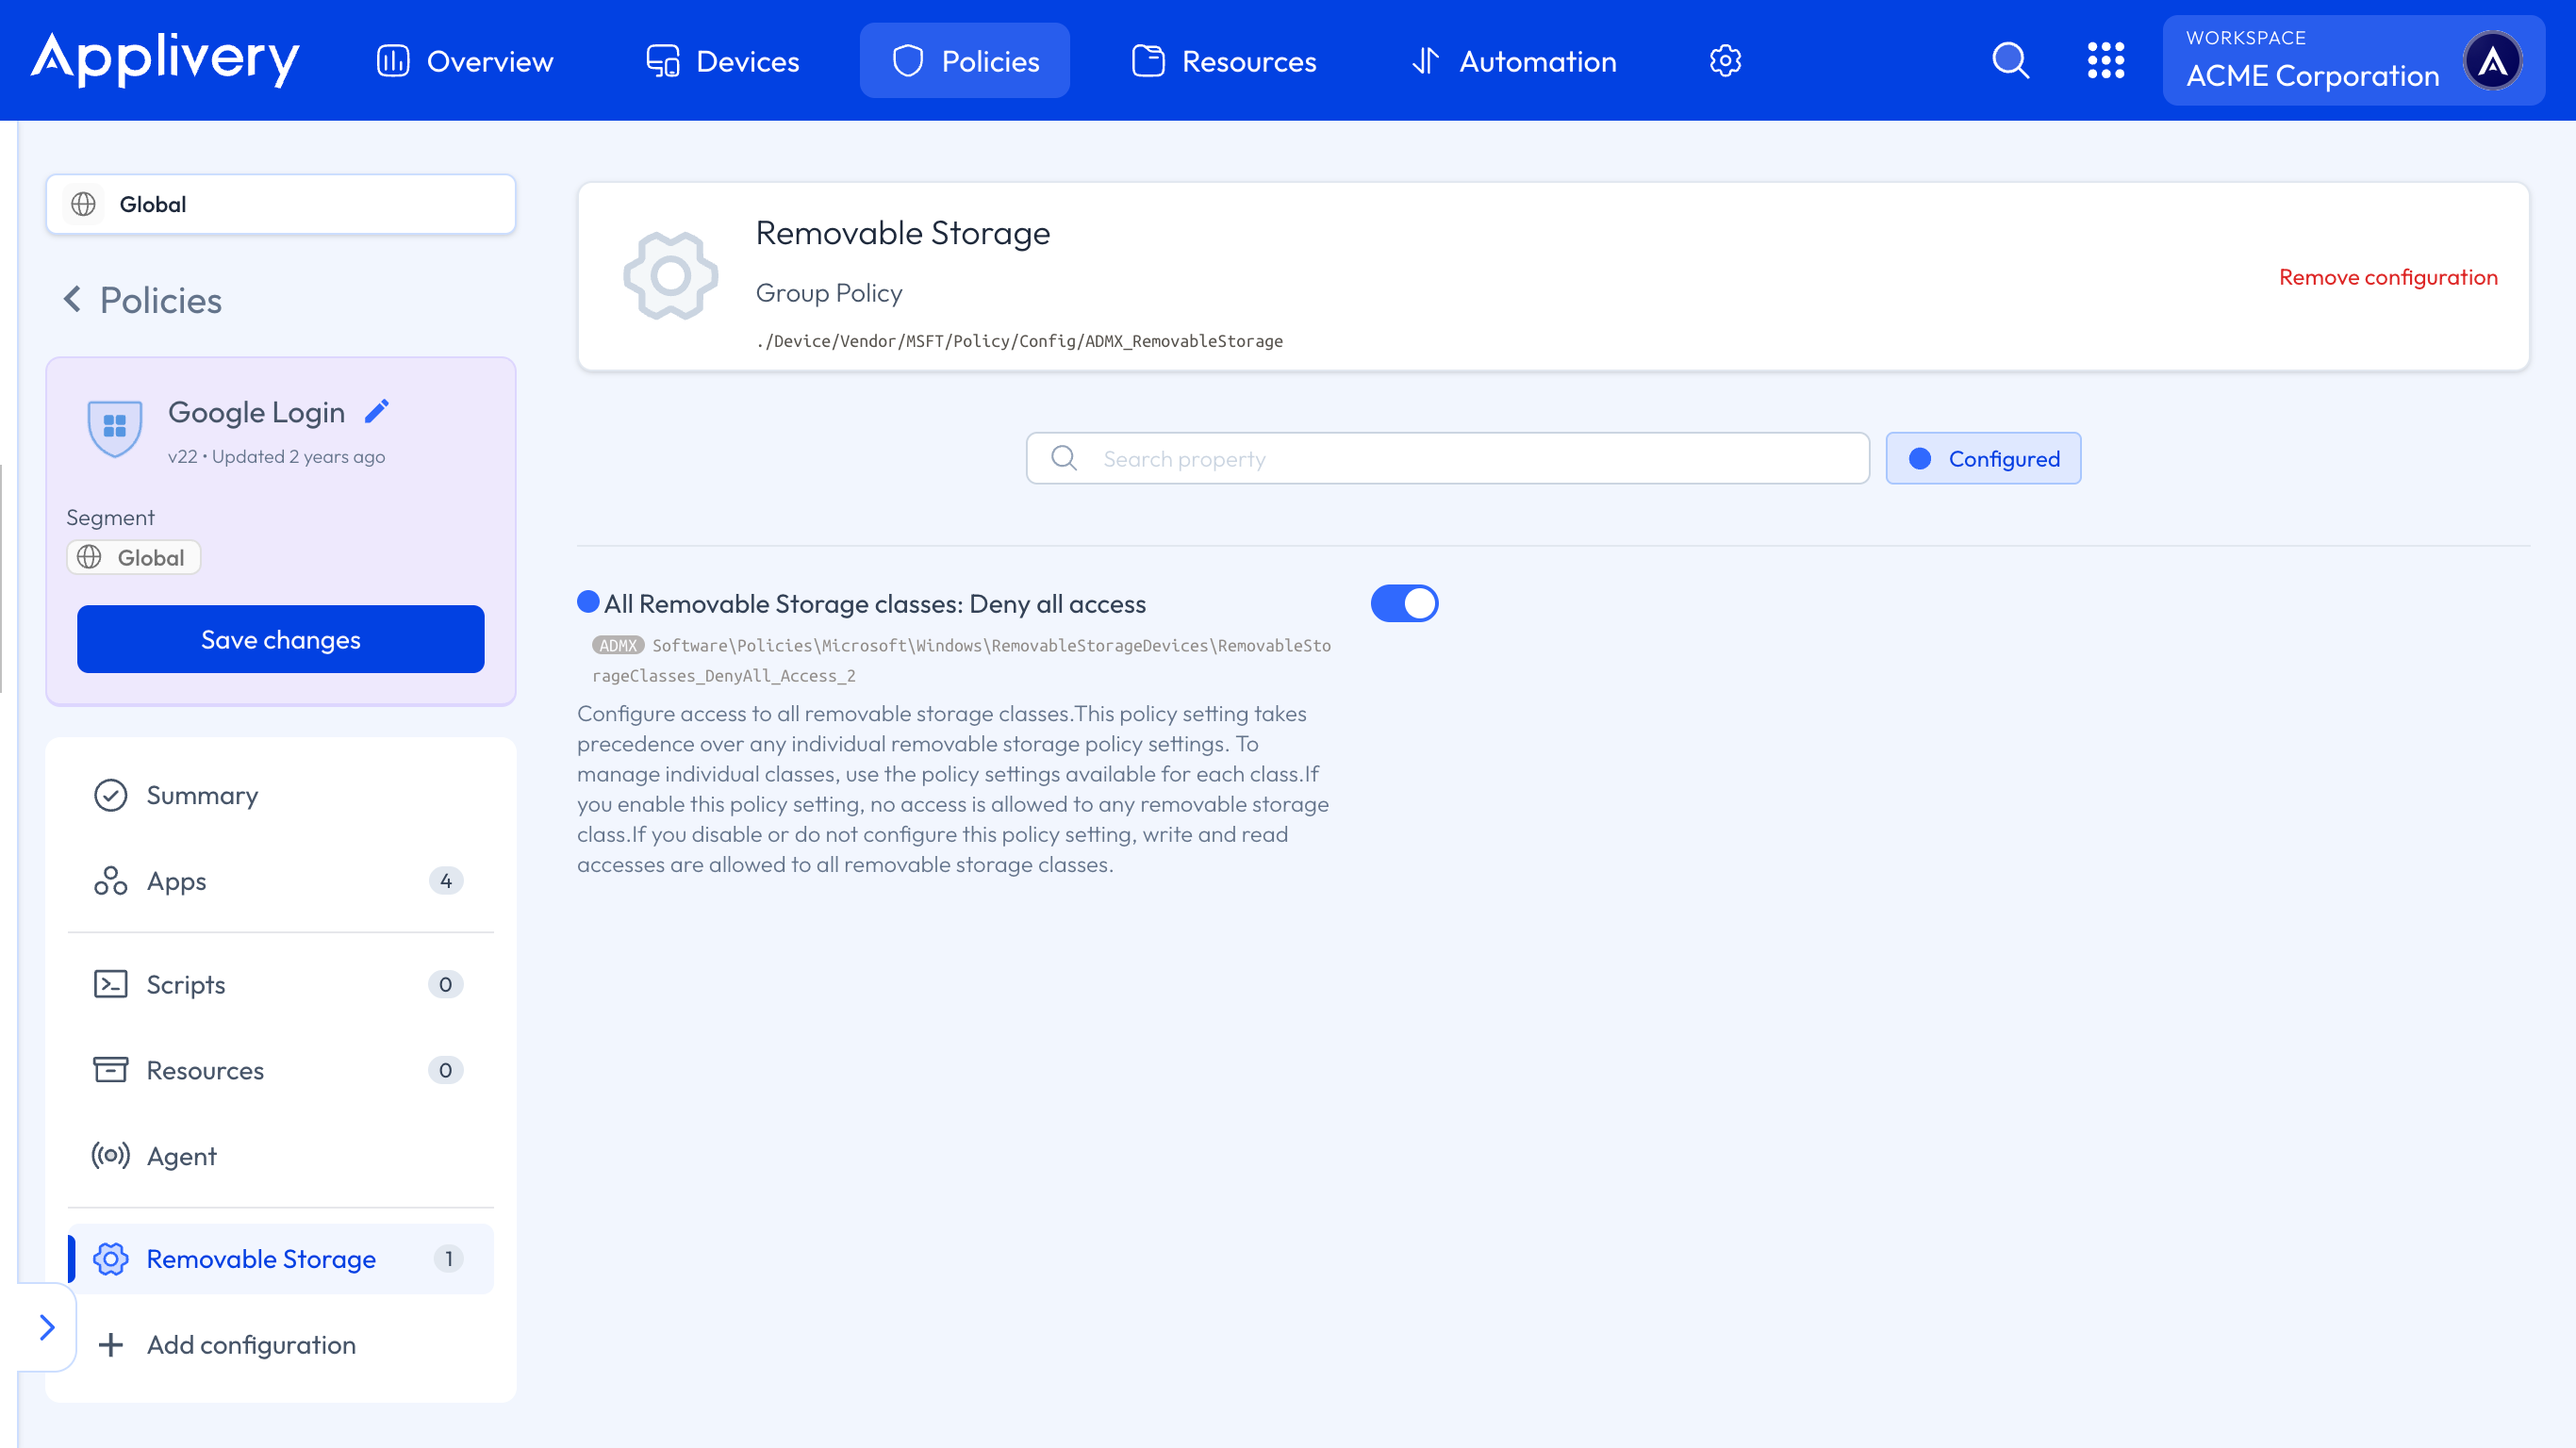
Locate the configuration and enter All Removable Storage classes: Deny all access. When enabled, it blocks read, write, and execute access to all removable storage Devices.
Block External Device Installations
If the Device was connected before the Policy was applied, it won’t be blocked—its driver is already installed. This approach is more complex and best suited for advanced scenarios. If your goal is simply to block removable storage, we recommend using the configuration described earlier.
Another way to block external Devices is by allowing only specific types of Devices to be installed.
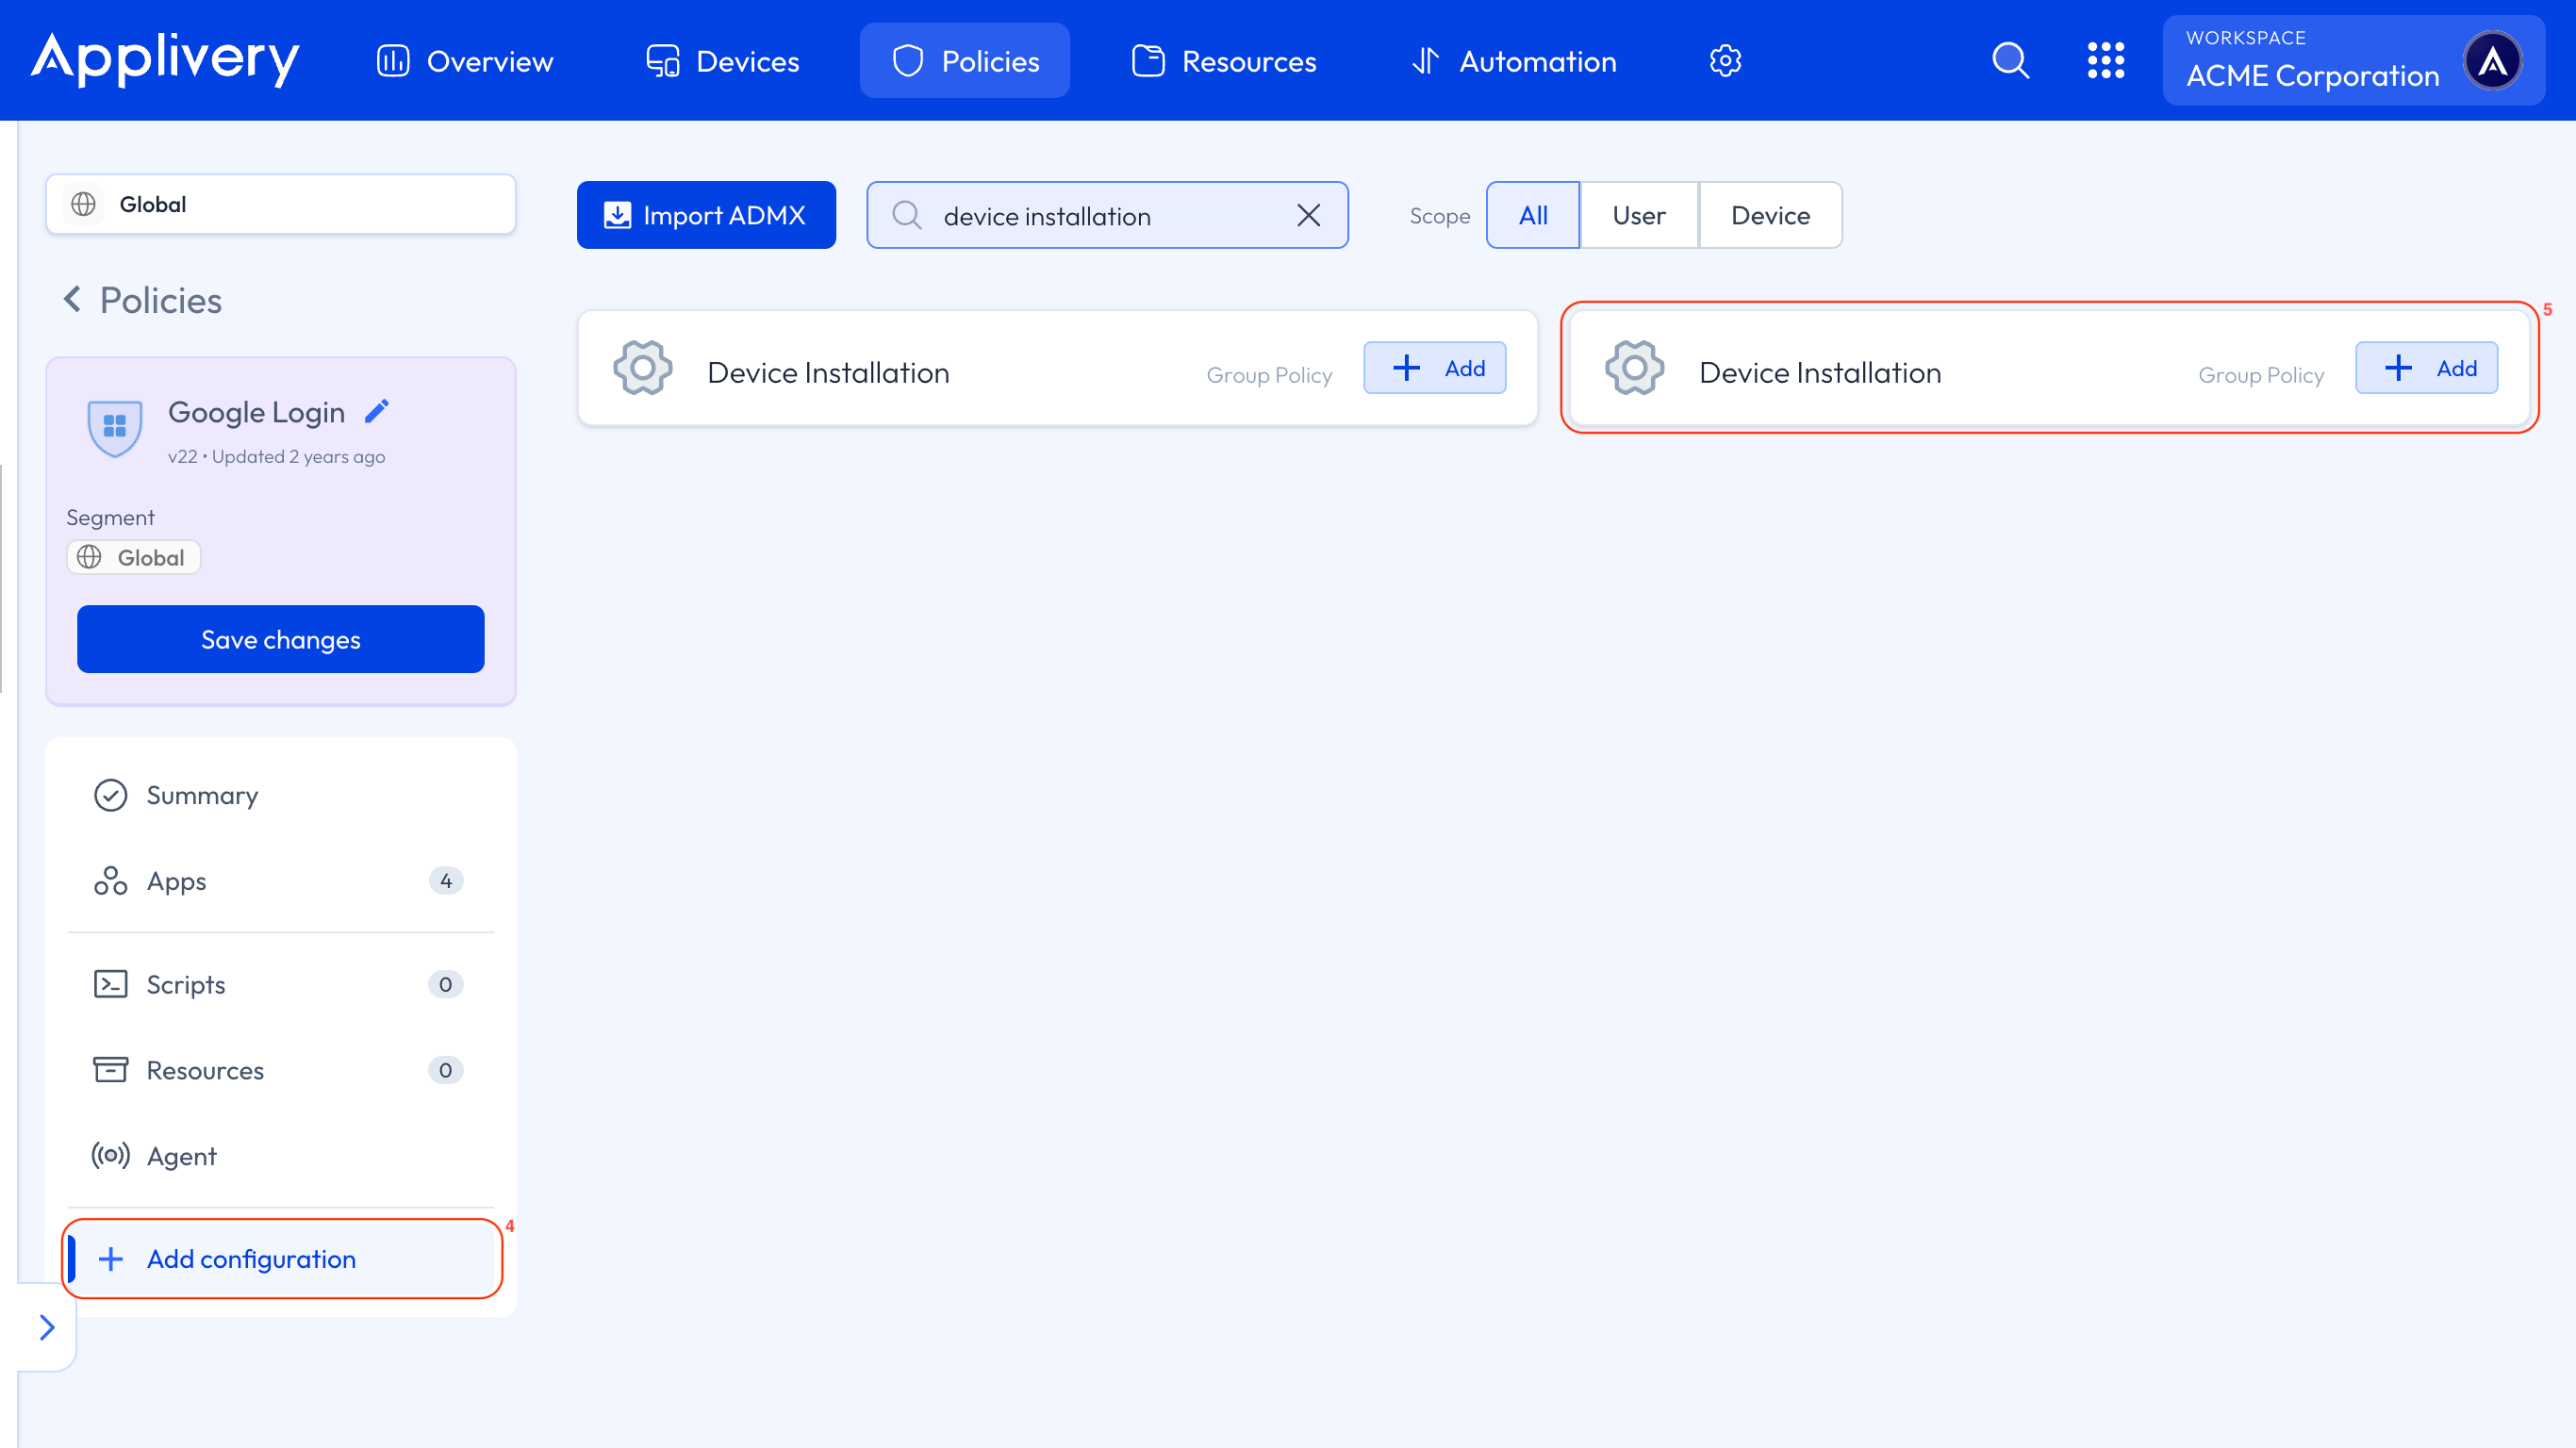
In the left-hand menu, select + Add configuration (4) and search for Device Installation (5).
Locate the relevant configuration and enable the following two settings:
- Prevent installation of Devices not described by other policy settings.
- Allow installation of Devices using drivers that match these device setup classes.
This combination blocks all device installations except those explicitly allowed.
To allow specific Devices, you’ll need to define their Device Setup Classes, also known as Class GUIDs. You can find these in Device Manager on a Windows machine by opening the Device’s properties and navigating to the Details tab.

Common Class GUIDs
| Device type | Class GUID |
|---|---|
| Mice and keyboards | {4d36e96f-e325-11ce-bfc1-08002be10318} |
| Audio endpoint | {c166523c-fe0c-4a94-a586-f1a80cfbbf3e} |
| Camera | {ca3e7ab9-b4c3-4ae6-8251-579ef933890f} |
| Monitor | {4d36e96e-e325-11ce-bfc1-08002be10318} |
| Media (audio and video) | {4d36e96c-e325-11ce-bfc1-08002be10318} |
Other Methods to Control Device Installation
Controlling device installation isn’t limited to Class GUIDs. Applivery also provides other configuration templates to give you more granular control:
Block specific Device IDs (Hardware IDs).
Allow only specific Device IDs.
Block entire Device Setup Classes (Class GUIDs)
Allow entire Device Setup Classes.
Use Device Instance IDs.
And more…