
This is a premium feature that may not be available on your current plan. Check availability on the Applivery pricing page.
System for Cross-domain Identity Management (SCIM) is an open standard that automates user and group provisioning across cloud services. Rather than managing users manually inside Applivery, SCIM lets your Identity Provider push user and group information automatically — creating, updating, and deactivating users and keeping group memberships in sync without any manual intervention.
When combined with SAML SSO, SCIM handles the provisioning side of identity management. SAML authenticates users when they log in, while SCIM continuously keeps the user directory and group structure in Applivery up to date. Crucially, SCIM group management is fully independent of SAML — groups pushed via SCIM exist in Applivery as first-class objects before any user ever logs in, and they don't require any additional group configuration on the SAML side.
SCIM works on top of an existing SAML SSO integration. If you haven't set that up yet, start with the Single Sign-On with Okta guide first.
What SCIM manages in Applivery
SCIM can manage three types of resources in Applivery, each with different provisioning behavior depending on the portal you configure it for.
When SCIM is configured for the Enterprise Store, Applivery can automatically create or remove employee accounts in response to changes in Okta. When a user is created in Okta, you can choose to either do nothing or automatically create them as an employee. When they are deactivated, you can choose to either do nothing or remove them from Applivery.
When SCIM is configured for the Dashboard, Applivery manages collaborator accounts. When a user is created in Okta, you can choose to either do nothing or create them as a collaborator with a default role (Admin, Developer/Editor, or Viewer). When they are deactivated, you can do nothing or remove them as a collaborator.
The initial role assigned on creation can be overridden by group-based role mapping — see Role mapping below.
When SCIM is configured for the MDM Portal, Applivery offers the most granular deactivation options. When a user is created in Okta you can do nothing or create them as an MDM employee. When they are deactivated, you have five options: do nothing, unassign the user from their devices, change the policy of their assigned devices, remove the user, or remove the user and all their associated devices.
Setting up SCIM
There are two ways to configure SCIM with Okta. The native approach — recommended — adds SCIM directly to your existing Applivery SAML application in Okta, keeping SSO and provisioning together in a single app. A separate app approach using a standalone SCIM app from the Okta catalog is also available as a fallback.
Once in the Applivery Dashboard, go to your Workspace Settings from the top dropdown menu, then open Login providers in the left-hand menu. Find the SAML row and click Configure for the portal you want to protect — Dashboard, App Store, or MDM Portal. Scroll to the bottom of the SAML configuration screen and click Enable SCIM.
Applivery will generate a Base URL and Bearer Token. Copy both — you'll need them in Okta. The provisioning behavior options (what happens when a user is created or deactivated) are also available here, specific to the portal you selected.
In the Okta Admin Portal, open the Applivery SAML application you already have configured. Go to the General tab, find the App Settings section, and click Edit. Under Provisioning, select SCIM and click Save. A new Provisioning tab will appear in the application.
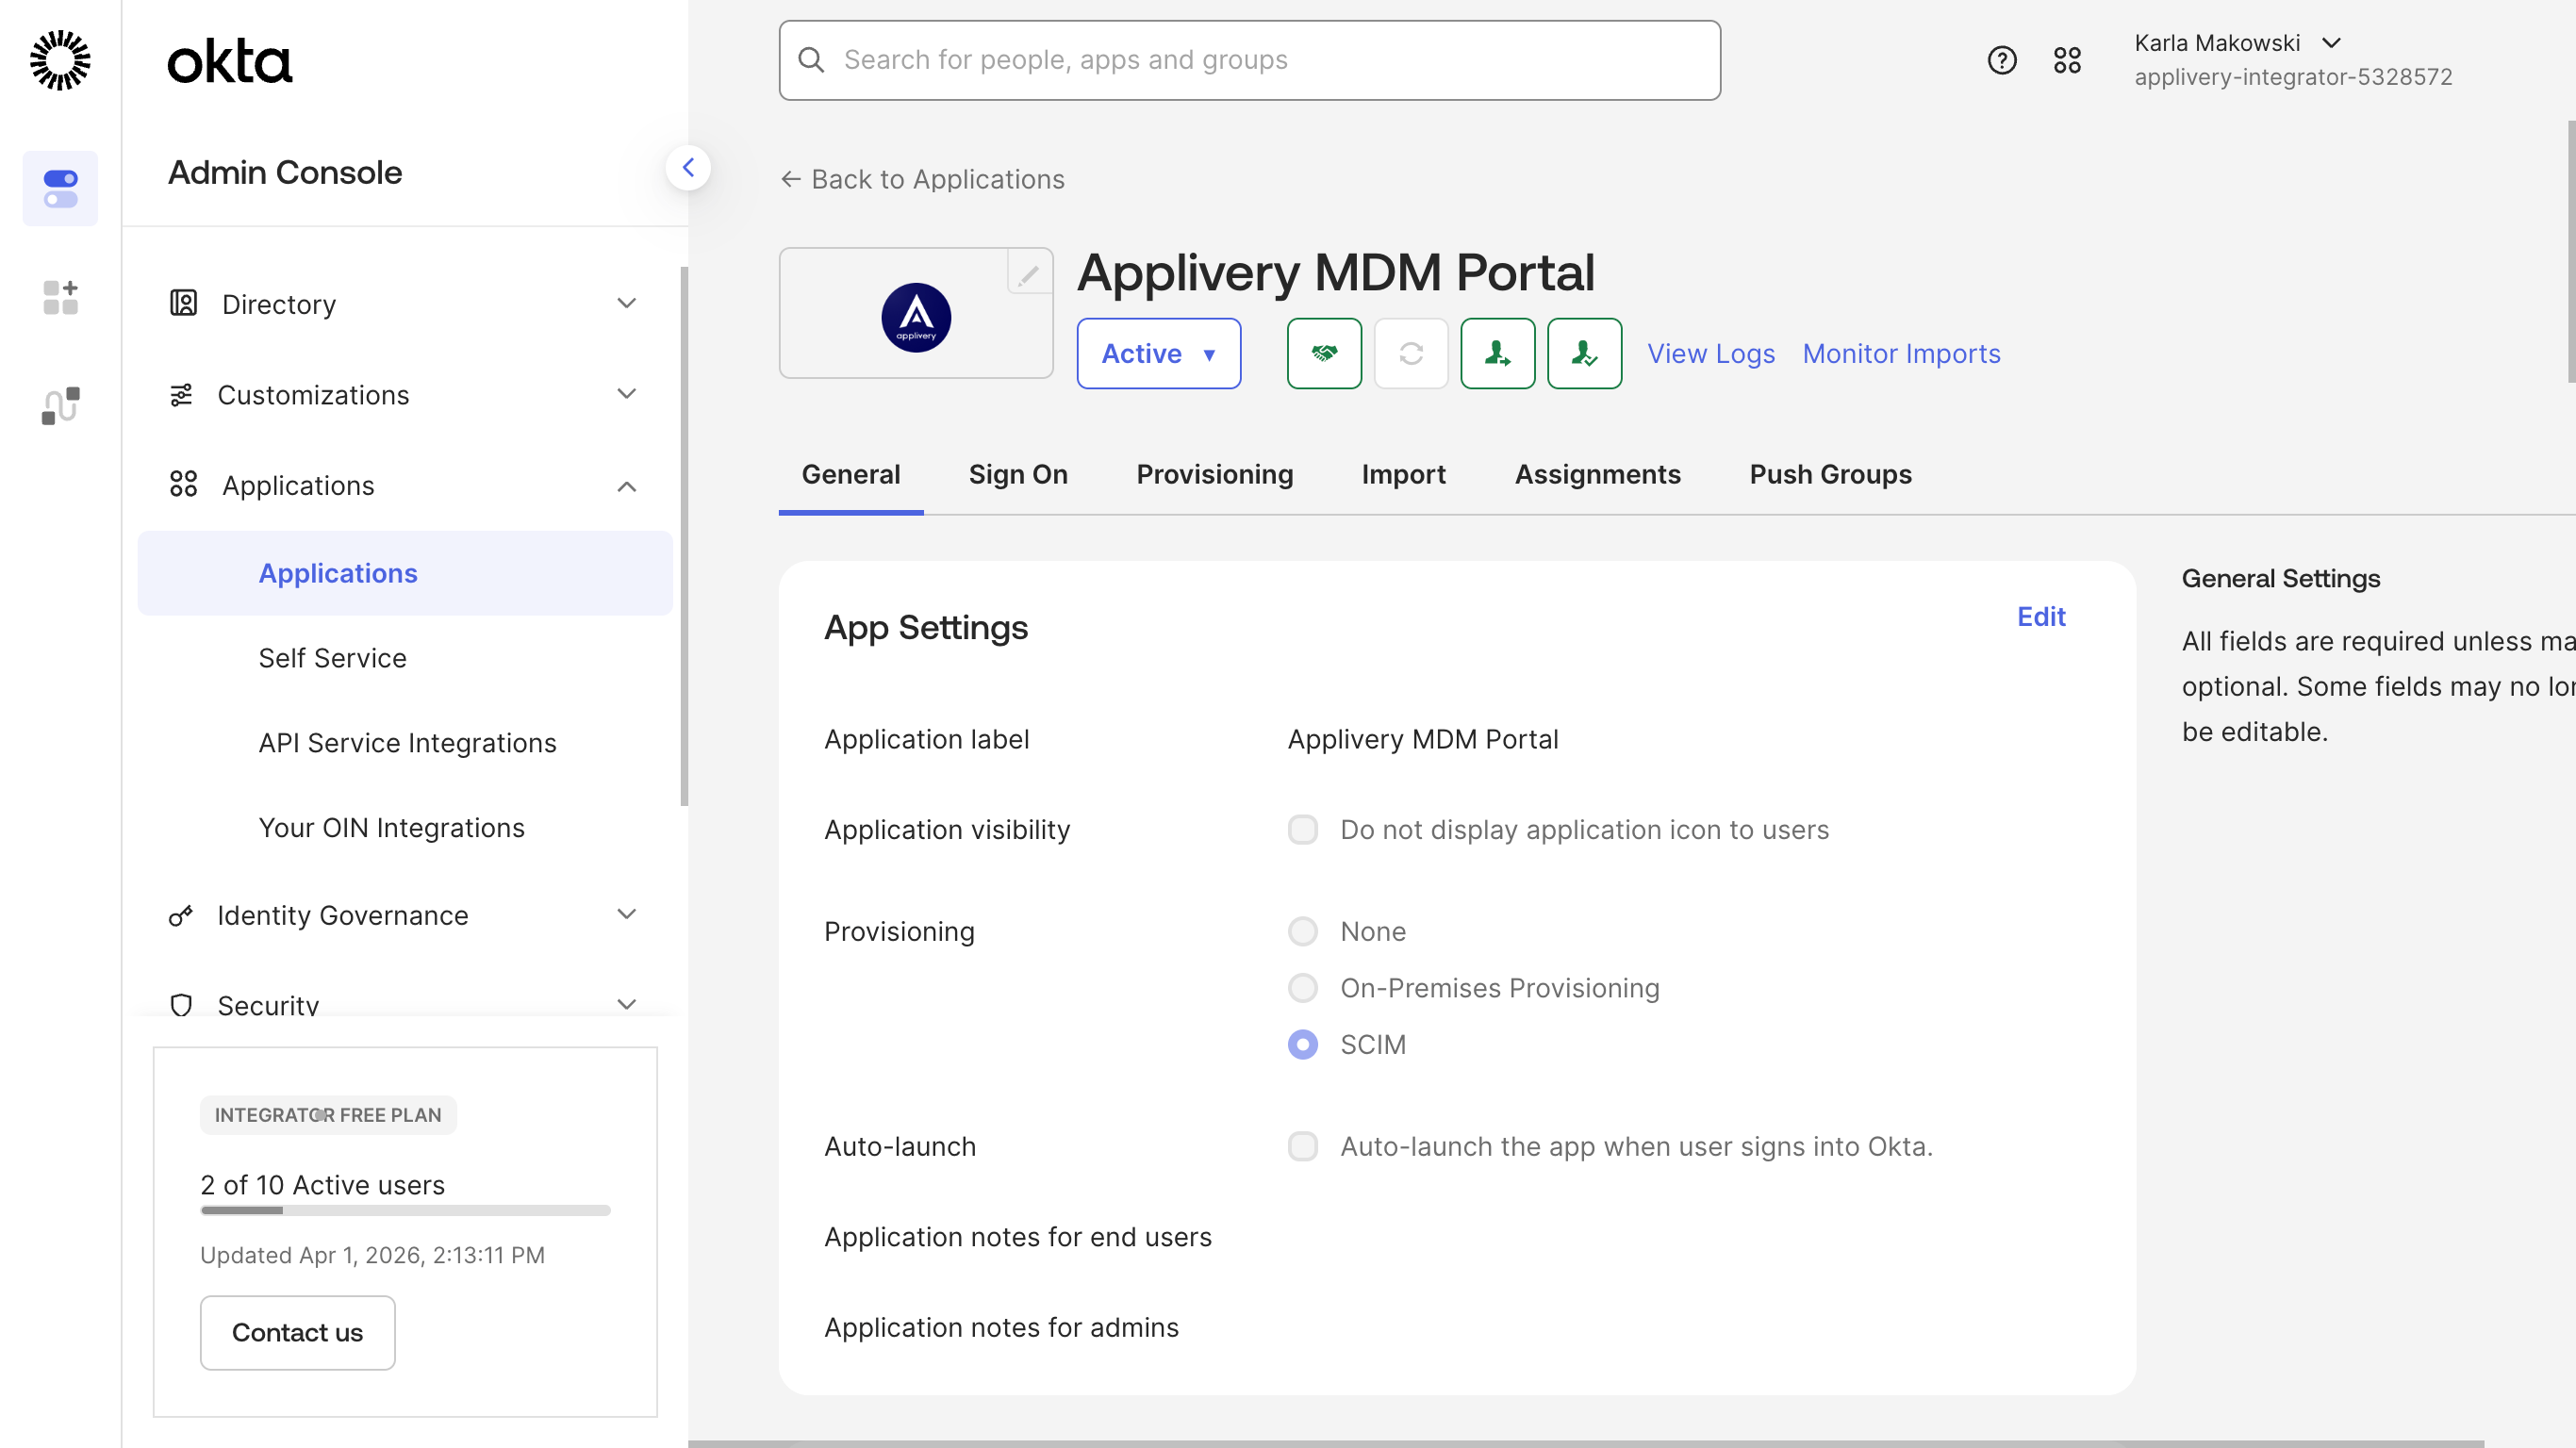
The SCIM option under App Settings may not be available in all Okta plans. If it doesn't appear, contact Okta support to have it enabled for your organization, or use the separate app approach described at the end of this guide.
Go to the Provisioning tab and select Integration from the left sidebar. Click Edit and fill in the connection details:
Field | Value |
|---|---|
SCIM connector base URL | The Base URL generated by Applivery in Step 1 |
Unique identifier field for users |
|
Supported provisioning actions | Push New Users, Push Profile Updates, Push Groups |
Authentication Mode | HTTP Header |
Authorization (Bearer token) | The Bearer Token generated by Applivery in Step 1 |
Click Test Connector Configuration to verify. If the test passes, click Save.
Still in the Provisioning tab, select To App from the left sidebar and click Edit. Enable Create Users, Update User Attributes, and Deactivate Users, then save.
Go to the Push Groups tab at the top of the Provisioning section. Click Push Groups → Find groups by name, search for the Okta groups you want to sync to Applivery, select each one, and click Save. Add more groups by clicking Save & Add Another.
When a group is pushed, Okta sends both the group object and its members to Applivery. These groups are immediately available in Applivery for publication filters, role mapping, and access control — no additional SAML configuration needed.
Okta does not support using the same group for both Assignments and Push Groups. If you run into syncing issues, use separate groups for assigning users to the app and for pushing groups to Applivery.
Role mapping
When SCIM is configured for the Dashboard, you can map Okta groups to Applivery collaborator roles. If a user is being provisioned for the first time — meaning they don't yet exist in Applivery — their role is determined by the groups they belong to in Okta:
Okta group | Applivery role |
|---|---|
| Admin |
| Developer / Editor |
| Viewer |
| Unassigned |
If a user belongs to more than one of these groups, the highest-privilege role takes precedence.
Role mapping applies only to App Distribution. Device Management permissions are governed exclusively by Segment permissions.
Attribute mapping
Beyond user creation and group sync, SCIM can also push custom user attributes from Okta into the metadata field of the corresponding user object in Applivery. This is useful for storing department, cost center, employee ID, or any other custom field from your directory. See the full guide in SCIM Attribute Mapping.
Alternative: separate Okta SCIM app
If enabling SCIM directly on your SAML application is not available in your Okta plan, you can configure provisioning using a standalone SCIM app from the Okta catalog. This approach uses two separate Okta applications — one for SAML SSO and one for SCIM provisioning.
Configure provisioning with a separate SCIM app
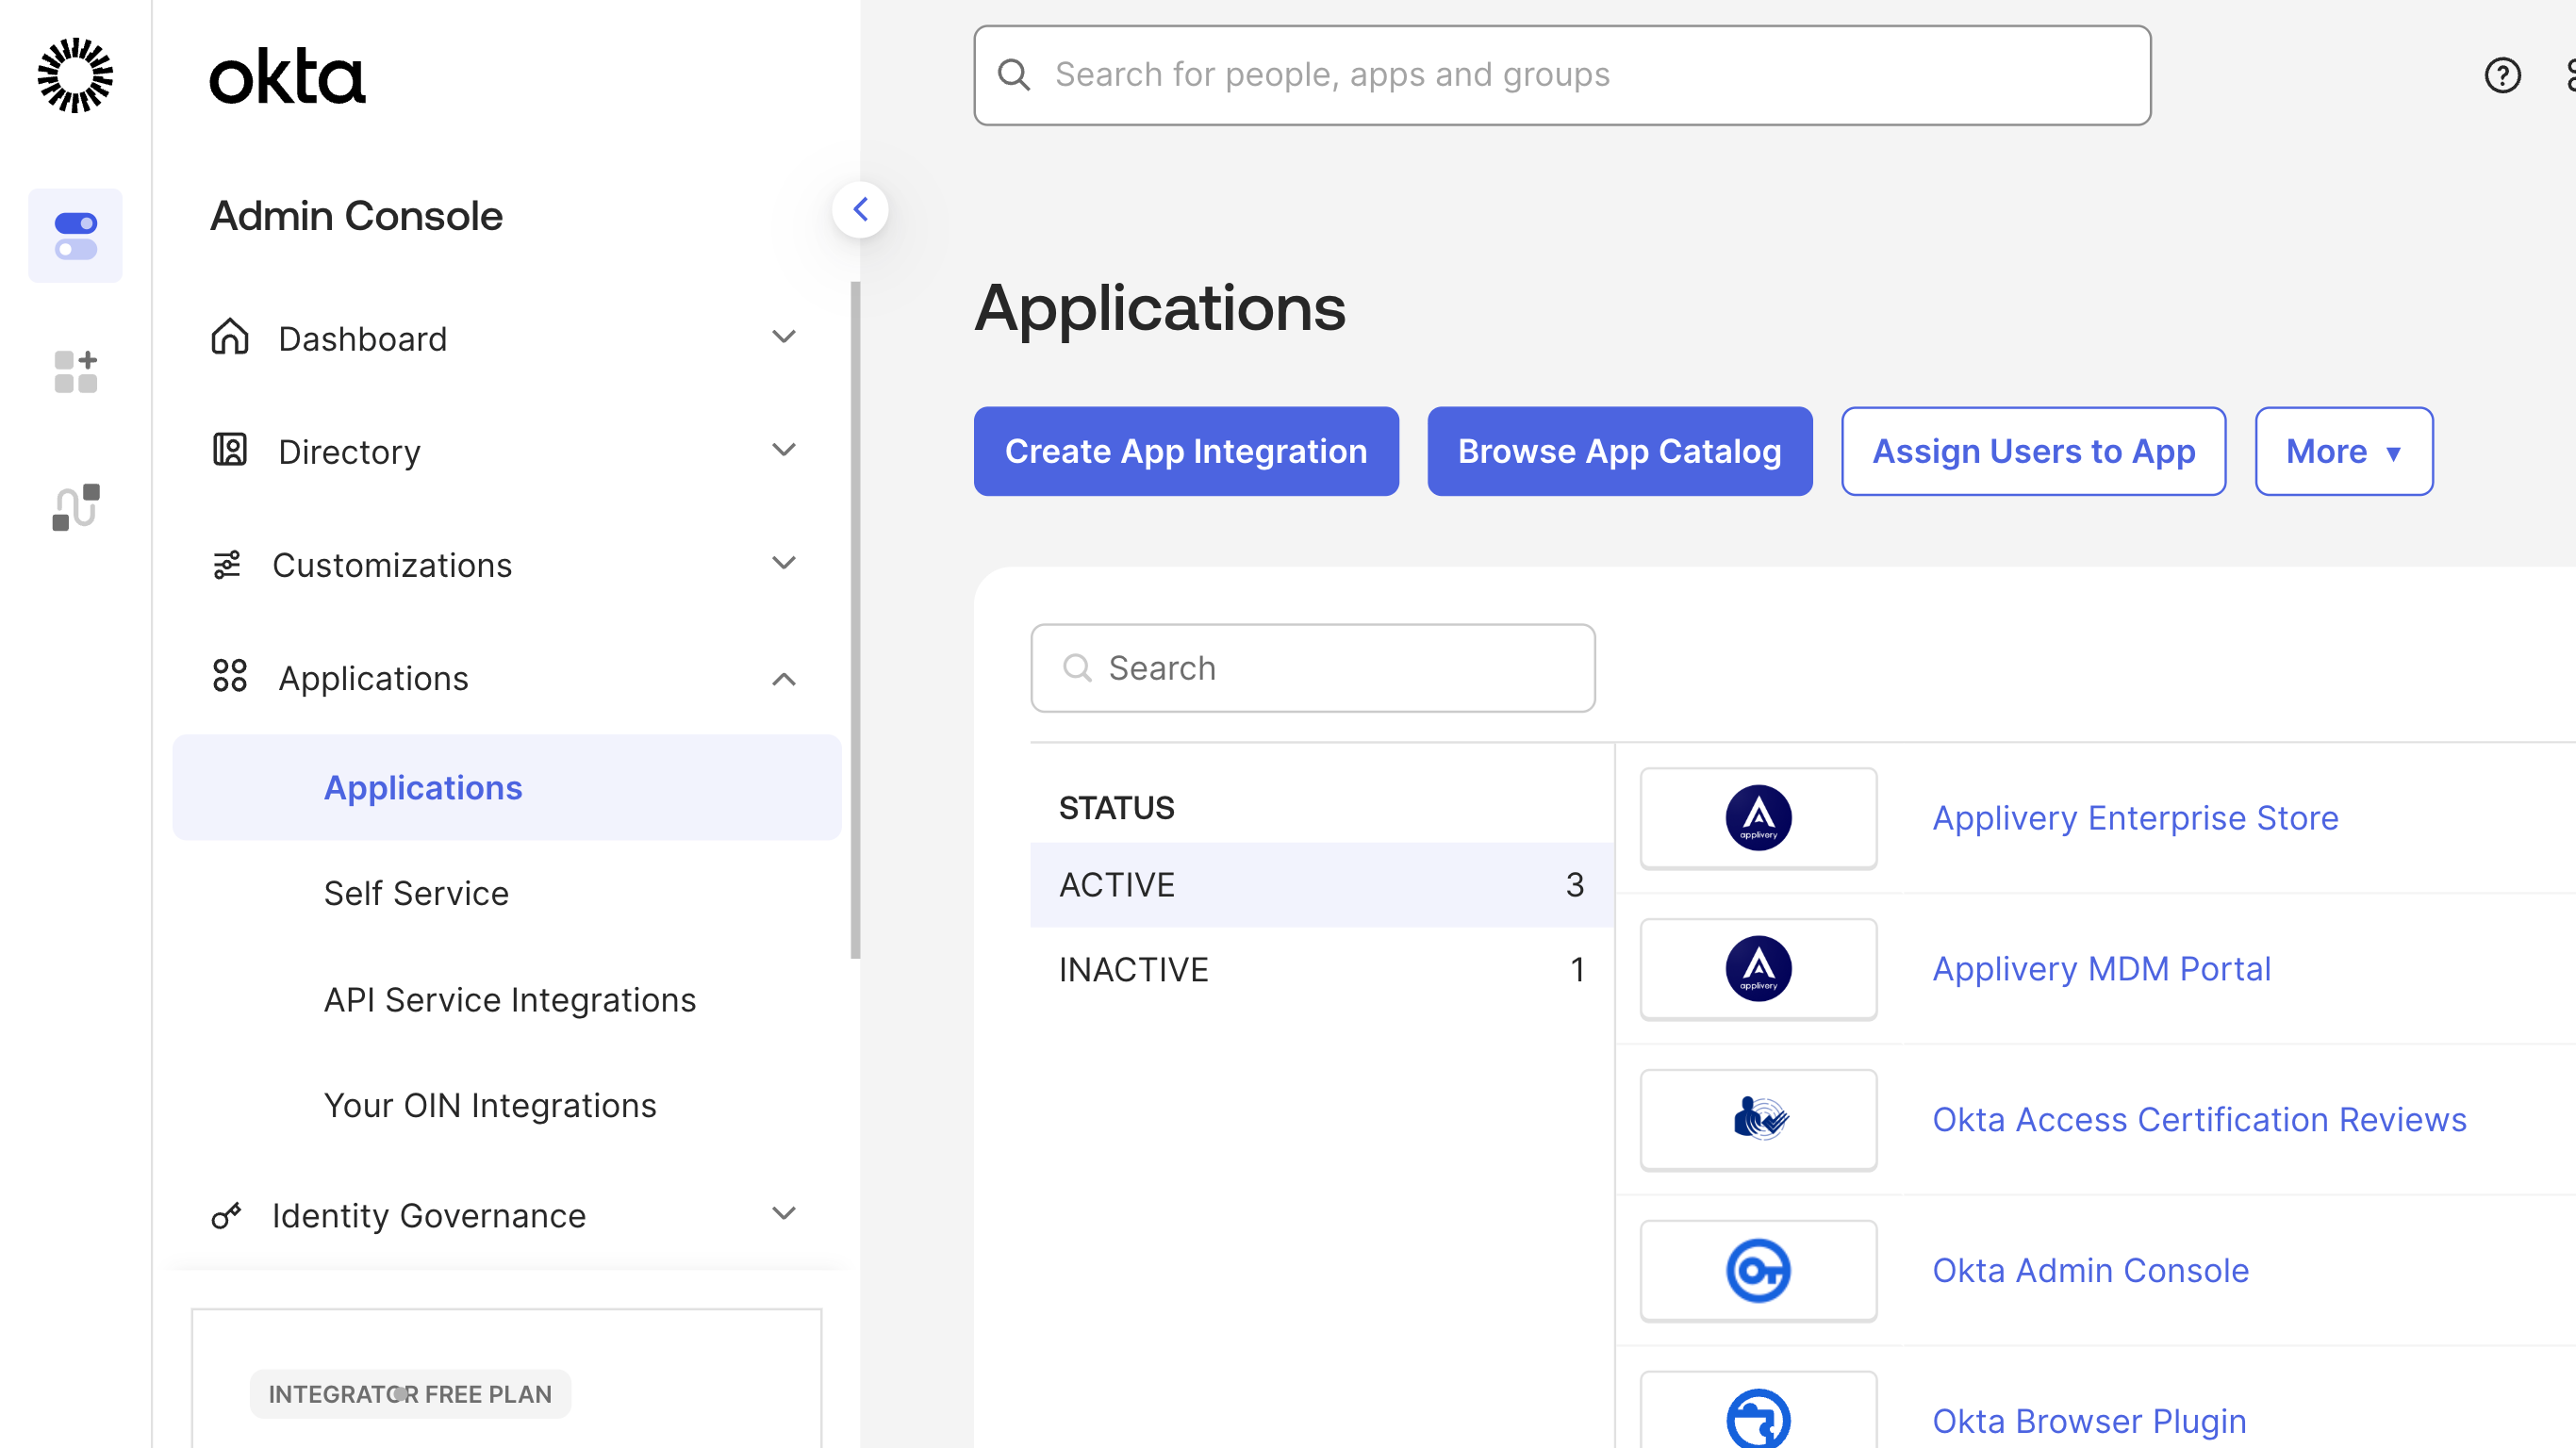
In the Okta Admin Portal, go to Applications (inside Applications) and click Browse App Catalog.
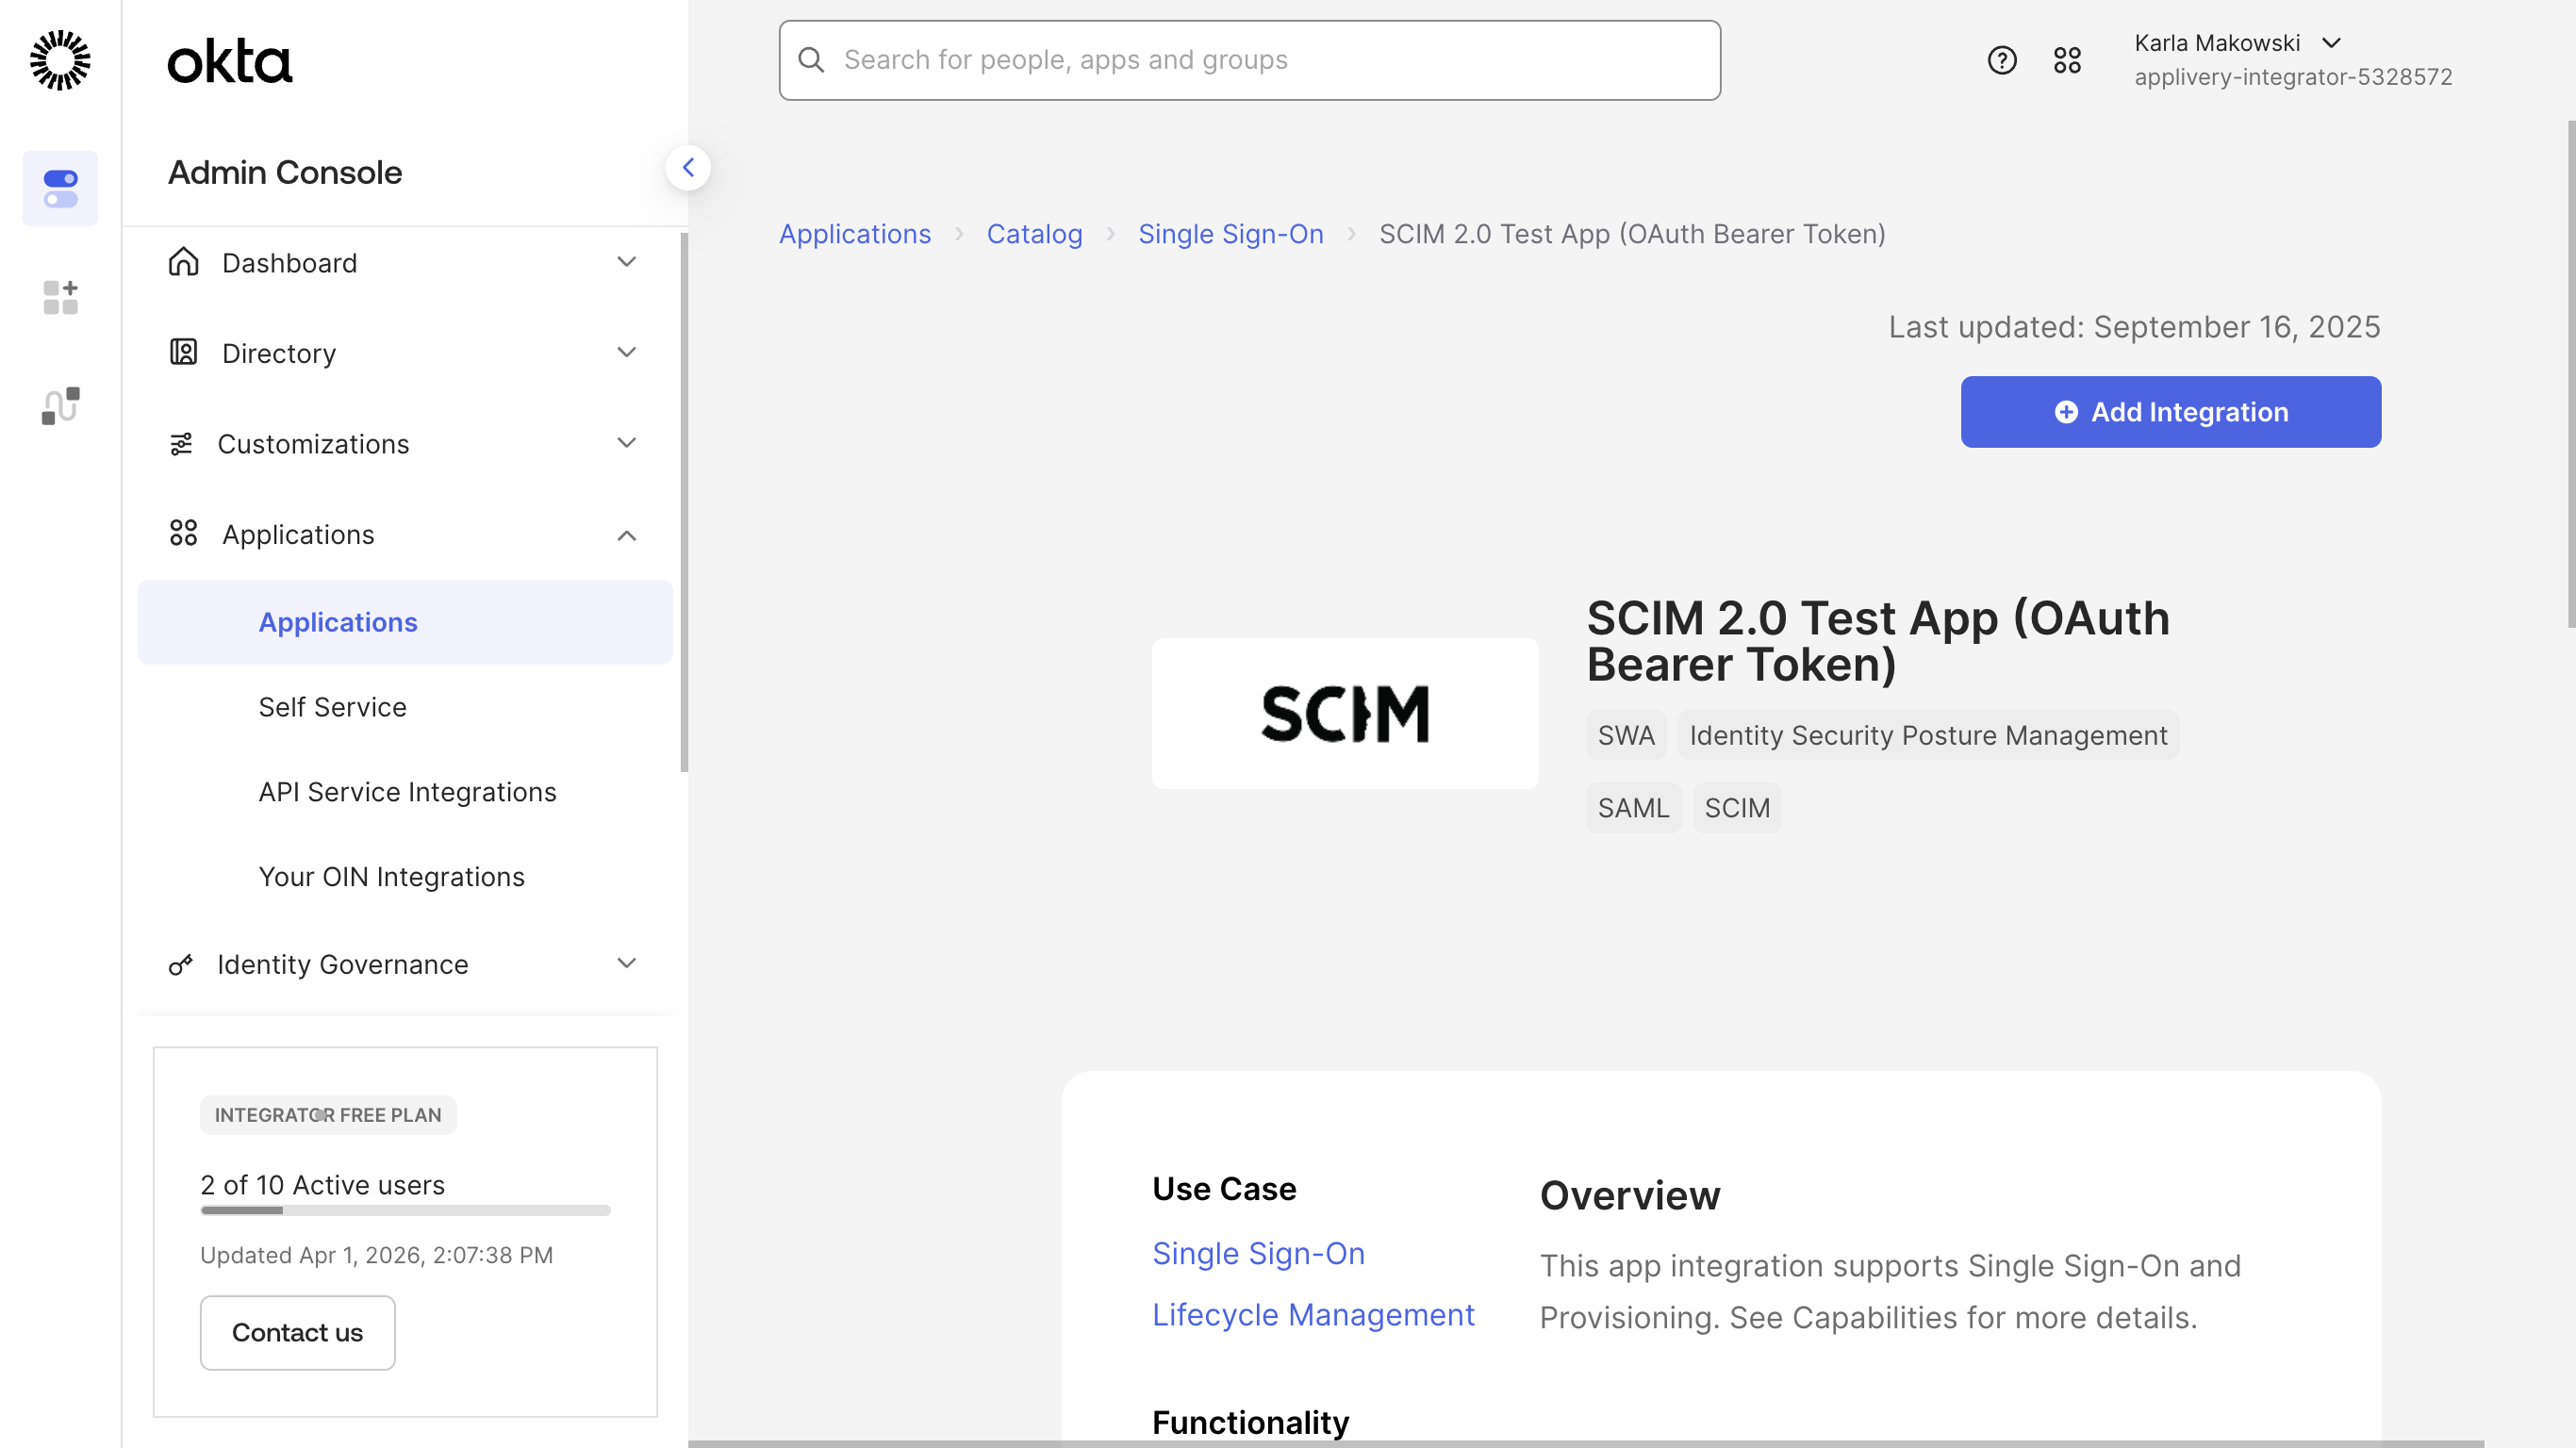
Search for SCIM 2.0 Test App (OAuth Bearer Token), select the first result, and click + Add integration. Give it a label (e.g., Applivery SCIM) and complete the general settings, then click Done.
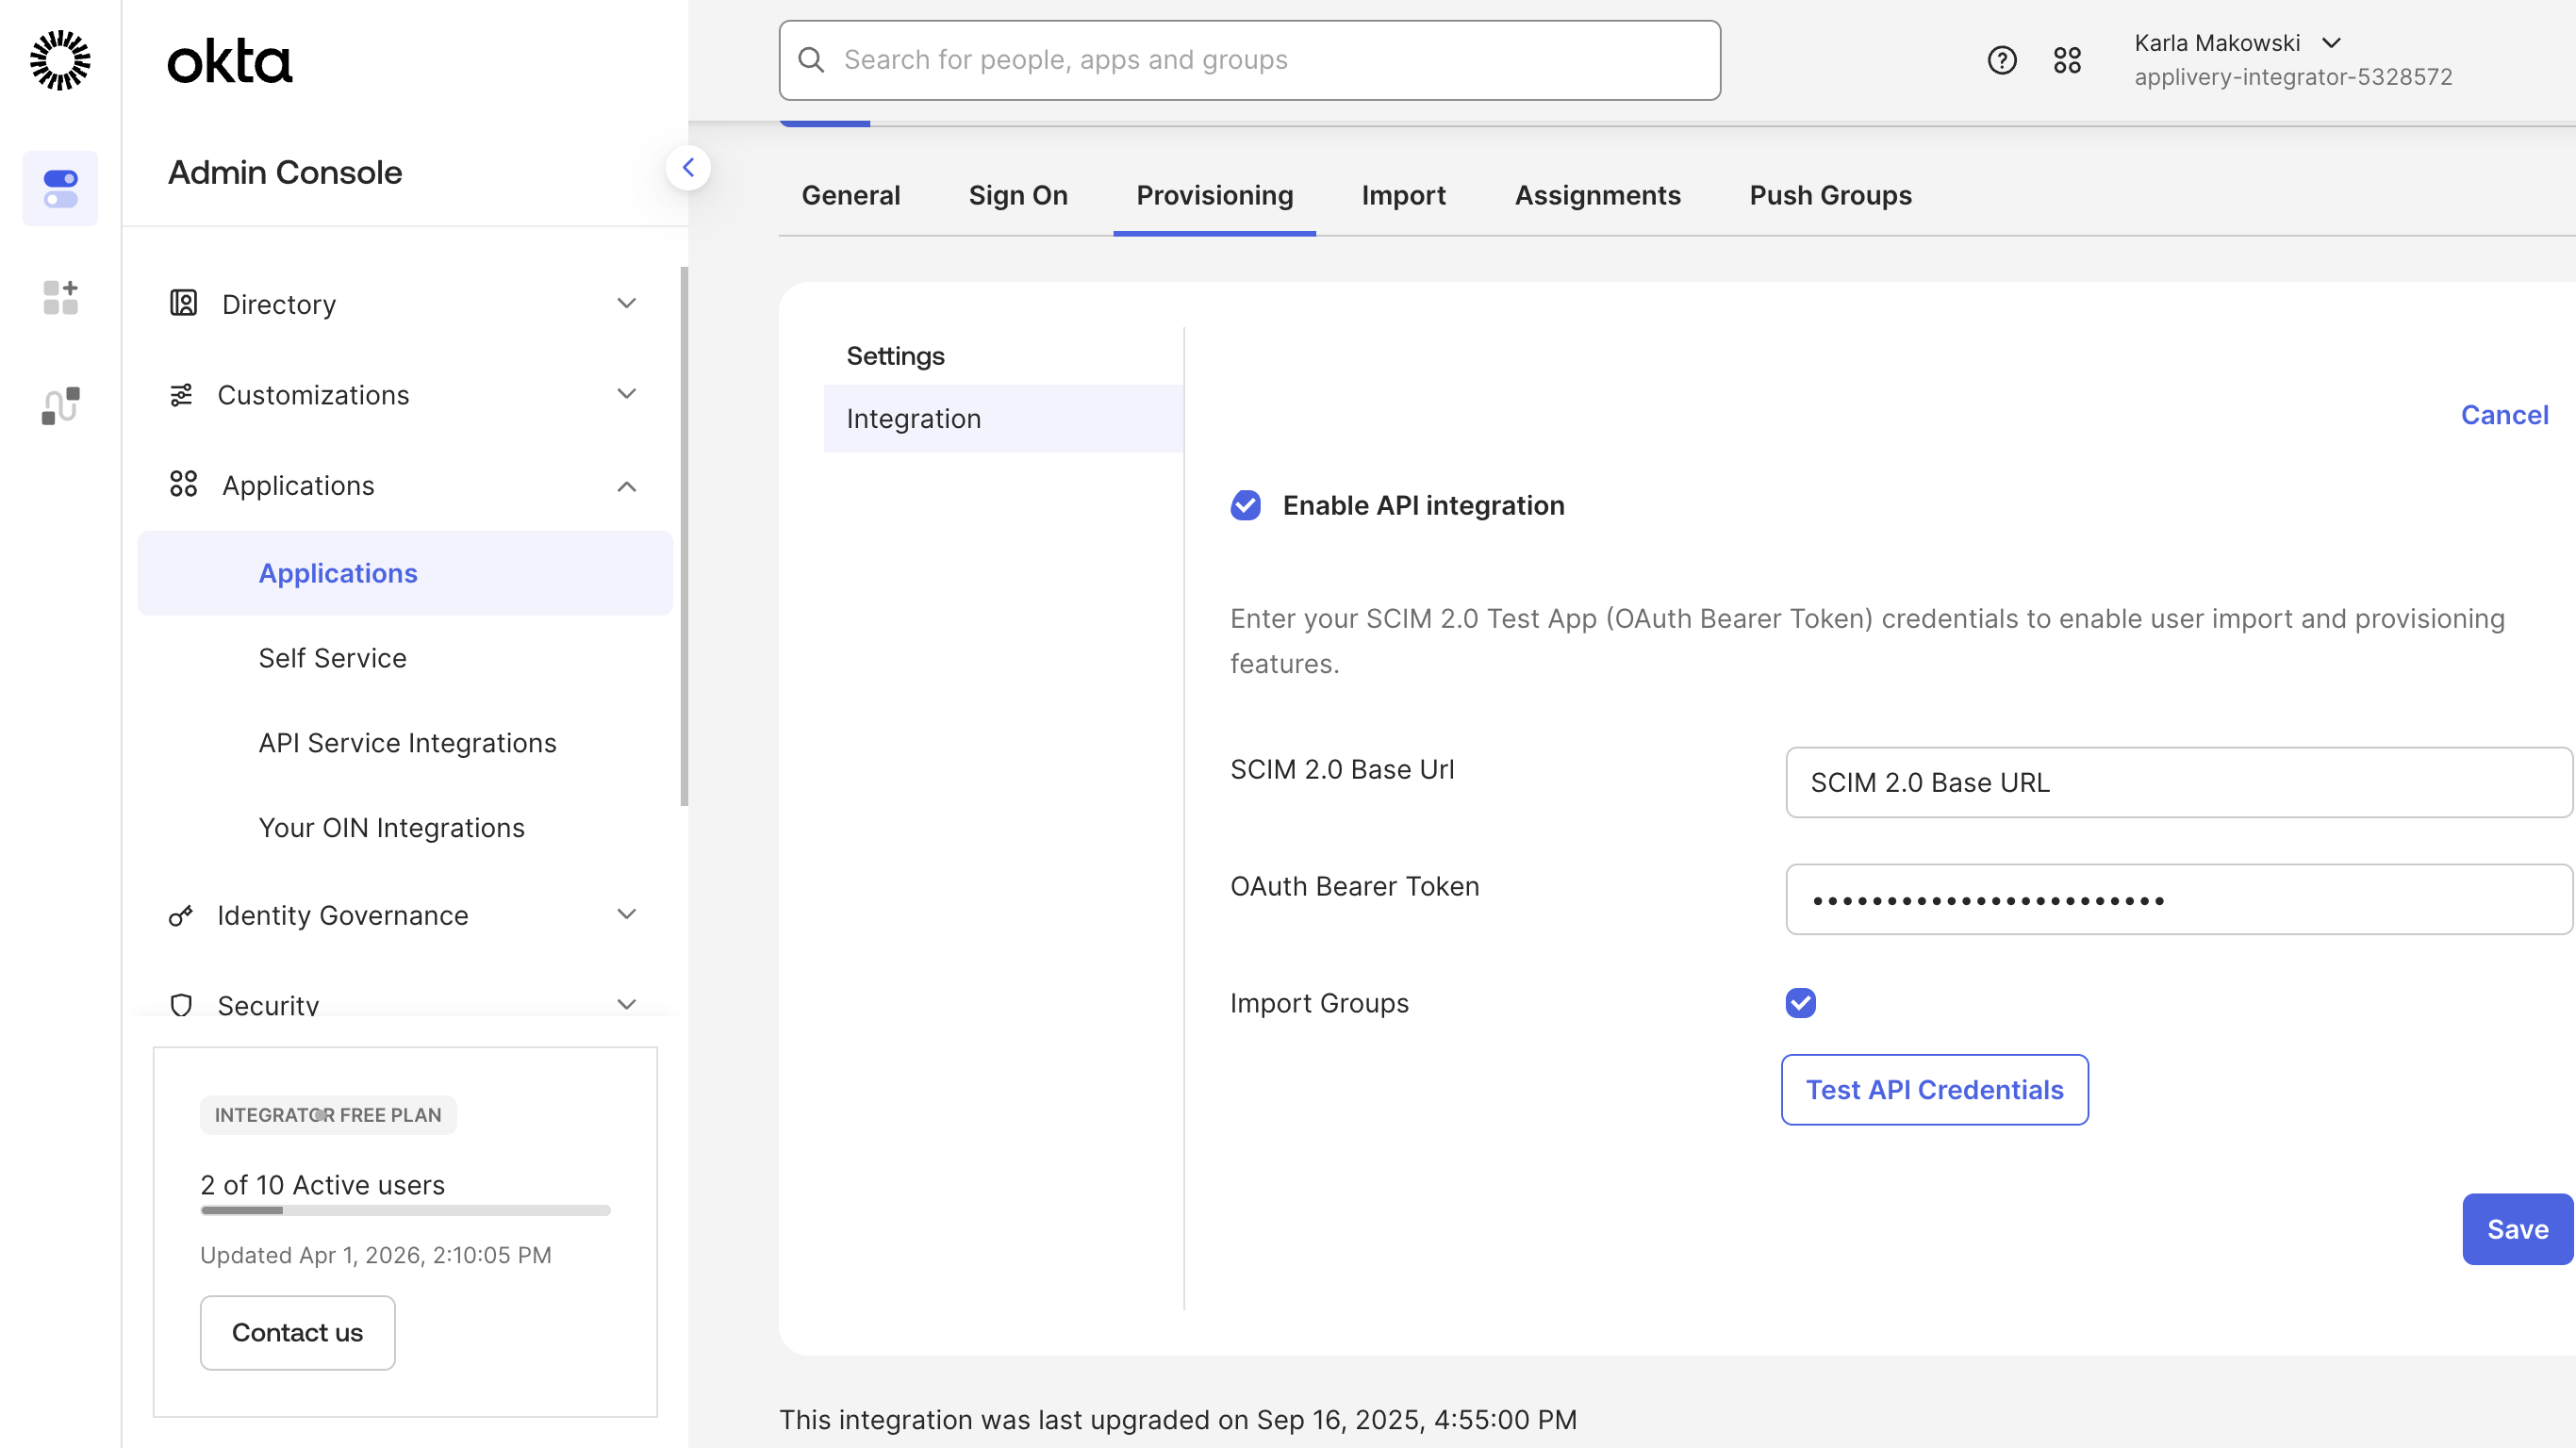
Inside the new app, go to the Provisioning tab and click Configure API Integration. Enter the Base URL and Bearer Token from Applivery (Step 1 of the main guide). Click Test API Credentials — Okta will send a GET request to Applivery to verify the connection. If it passes, click Save.
Still in Provisioning, click Edit under Provisioning to App and enable Create Users, Update User Attributes, and Deactivate Users.
To sync groups, go to the Assignments tab, select Groups from the sidebar, click Assign → Assign to Groups, and select the Okta groups you want to provision into Applivery.