
FileVault, available in macOS 10.3 and newer versions, encrypts your entire disk to safeguard your data and prevent unauthorized access on your Mac.
Once enabled, you’ll need a Password or Recovery Key to access your Device, ensuring your data remains secure and inaccessible without proper authentication. FileVault also automatically encrypts all new files, providing continuous protection.
Enabling FileVault is a useful configuration to protect your data in case your Mac is lost or damaged.
Once configured, deleting the Policy or disassociating Devices will not turn off FileVault.
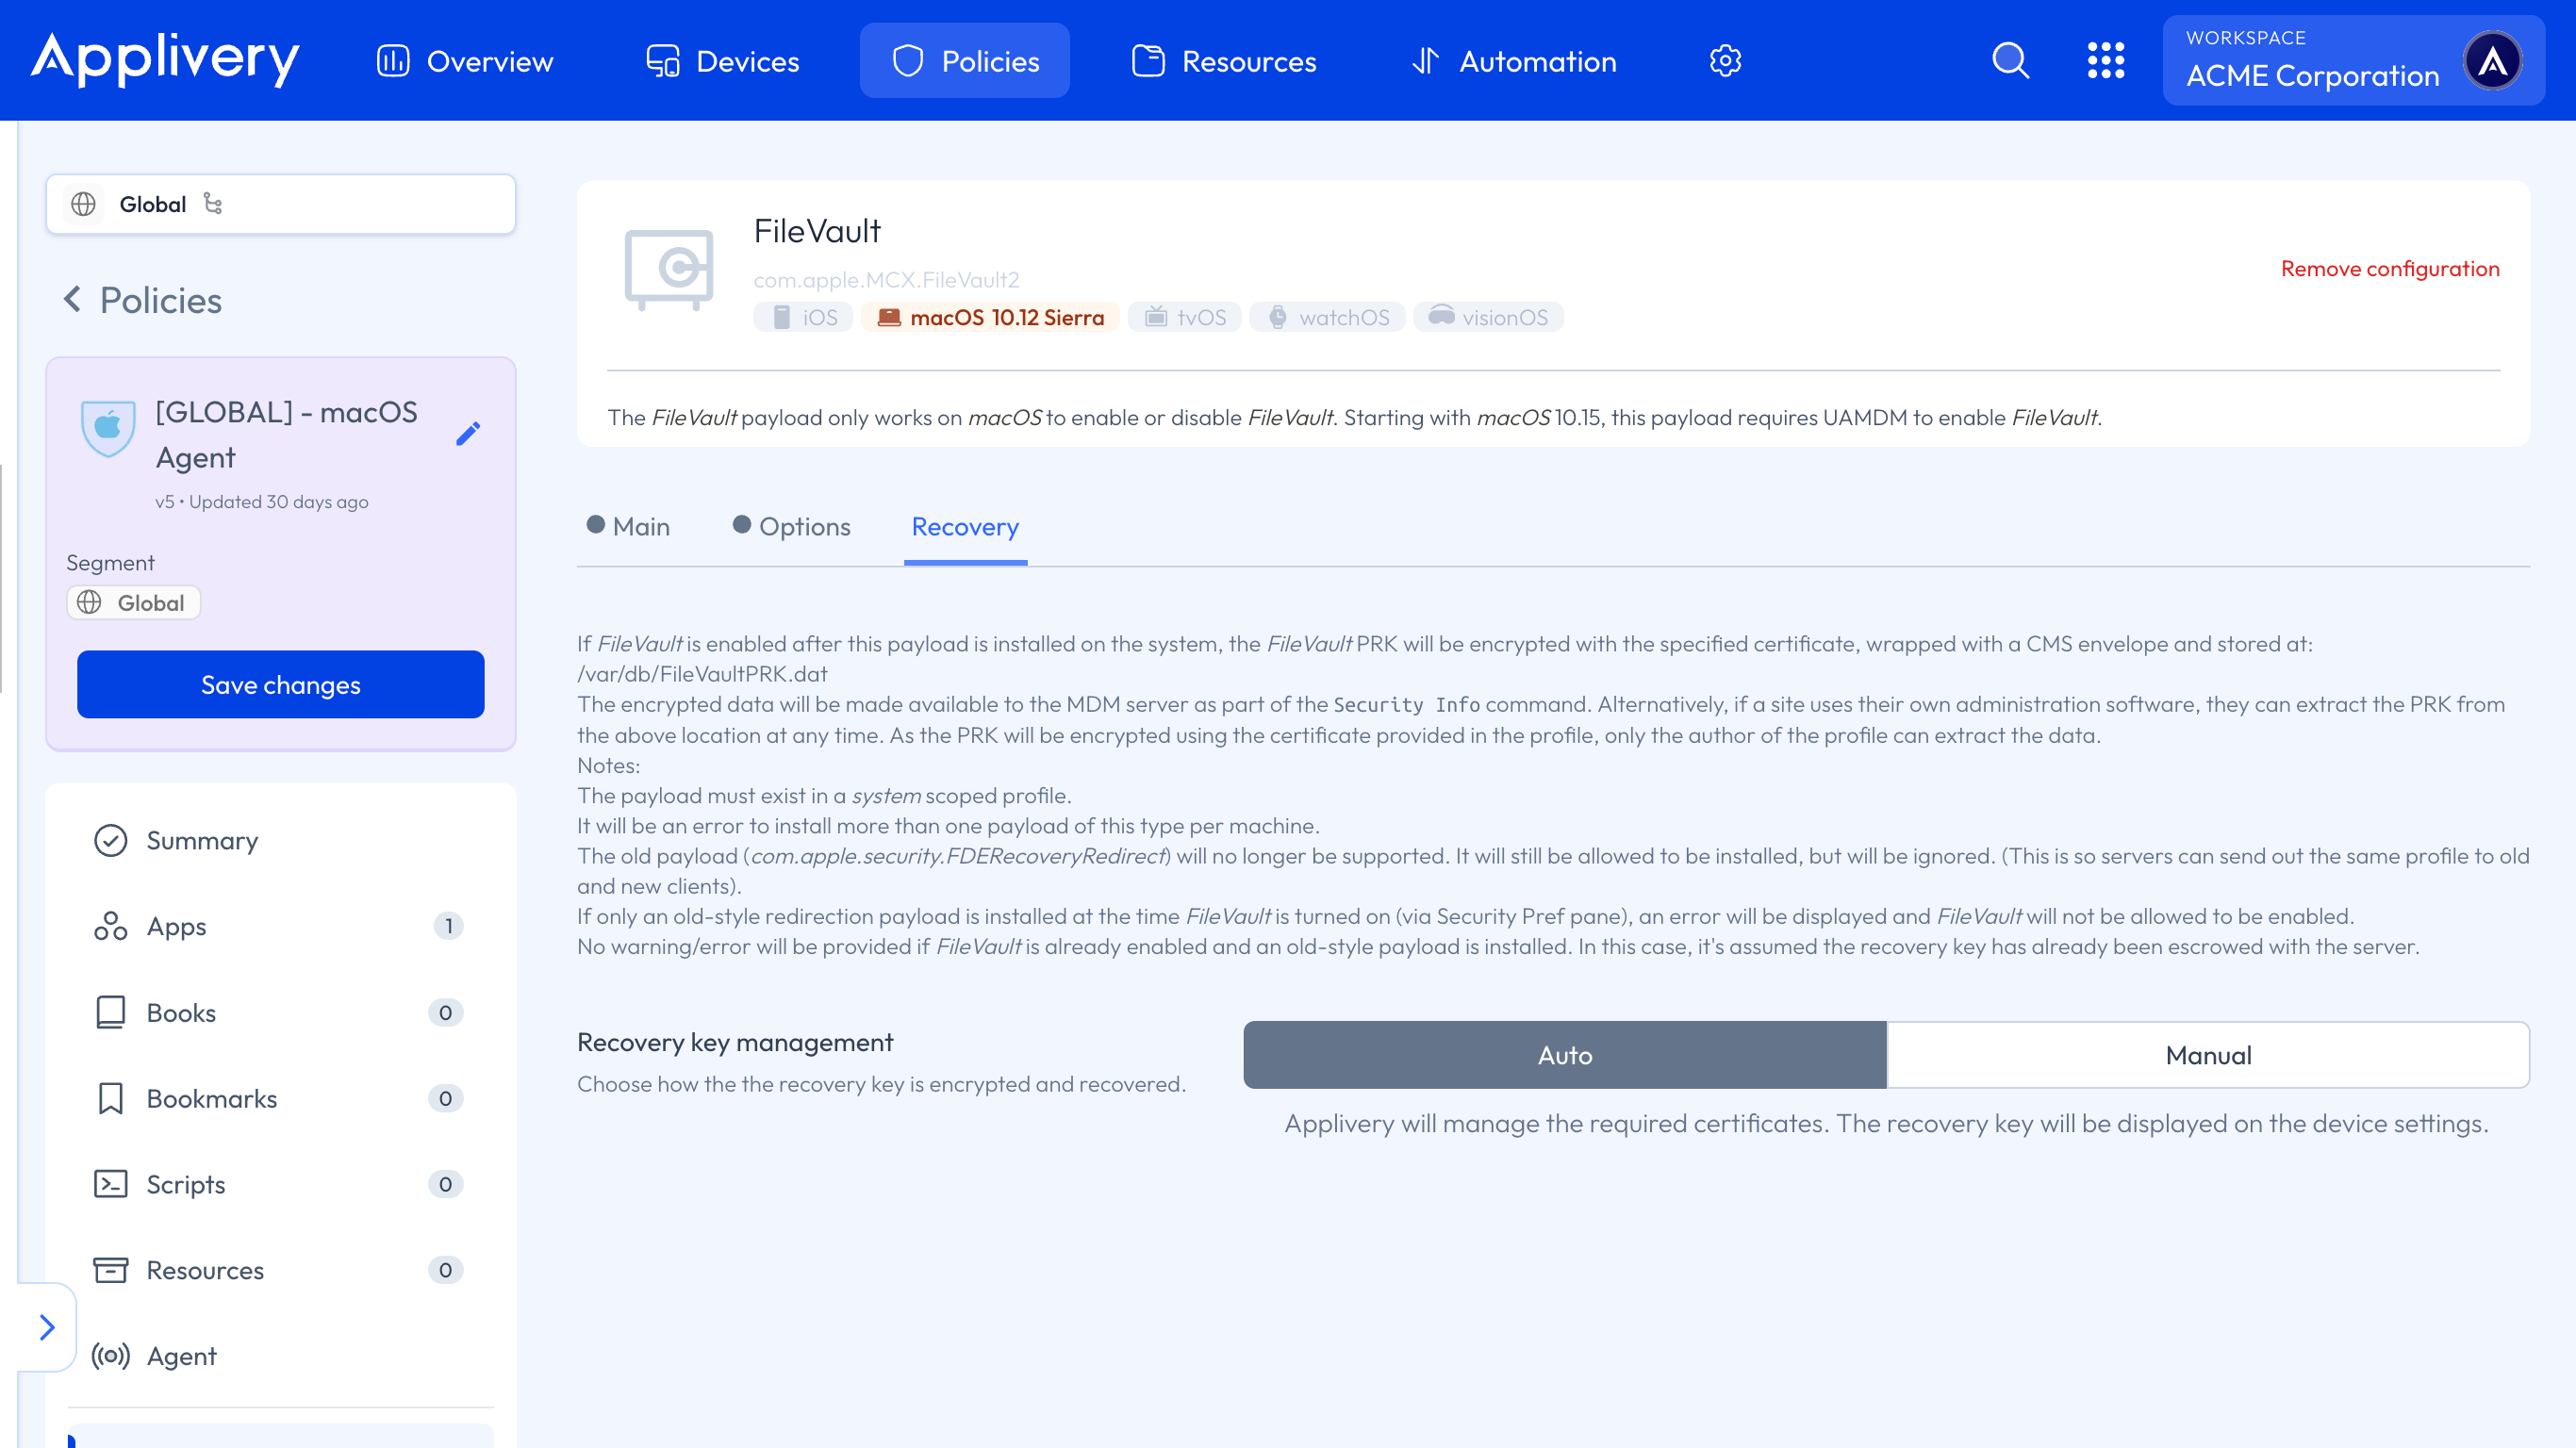
With Applivery, you have two options for Recovery Key management (being able to choose how the Recovery Key is encrypted and recovered):
Auto (recommended): Applivery will handle the necessary certificates. The Recovery Key will be displayed in the Device settings.
Manual: You will need to upload the Public Key. Later, you can download the encrypted Recovery Key and decrypt it on your Device using the Private Key.
Recovery Key Management - Auto
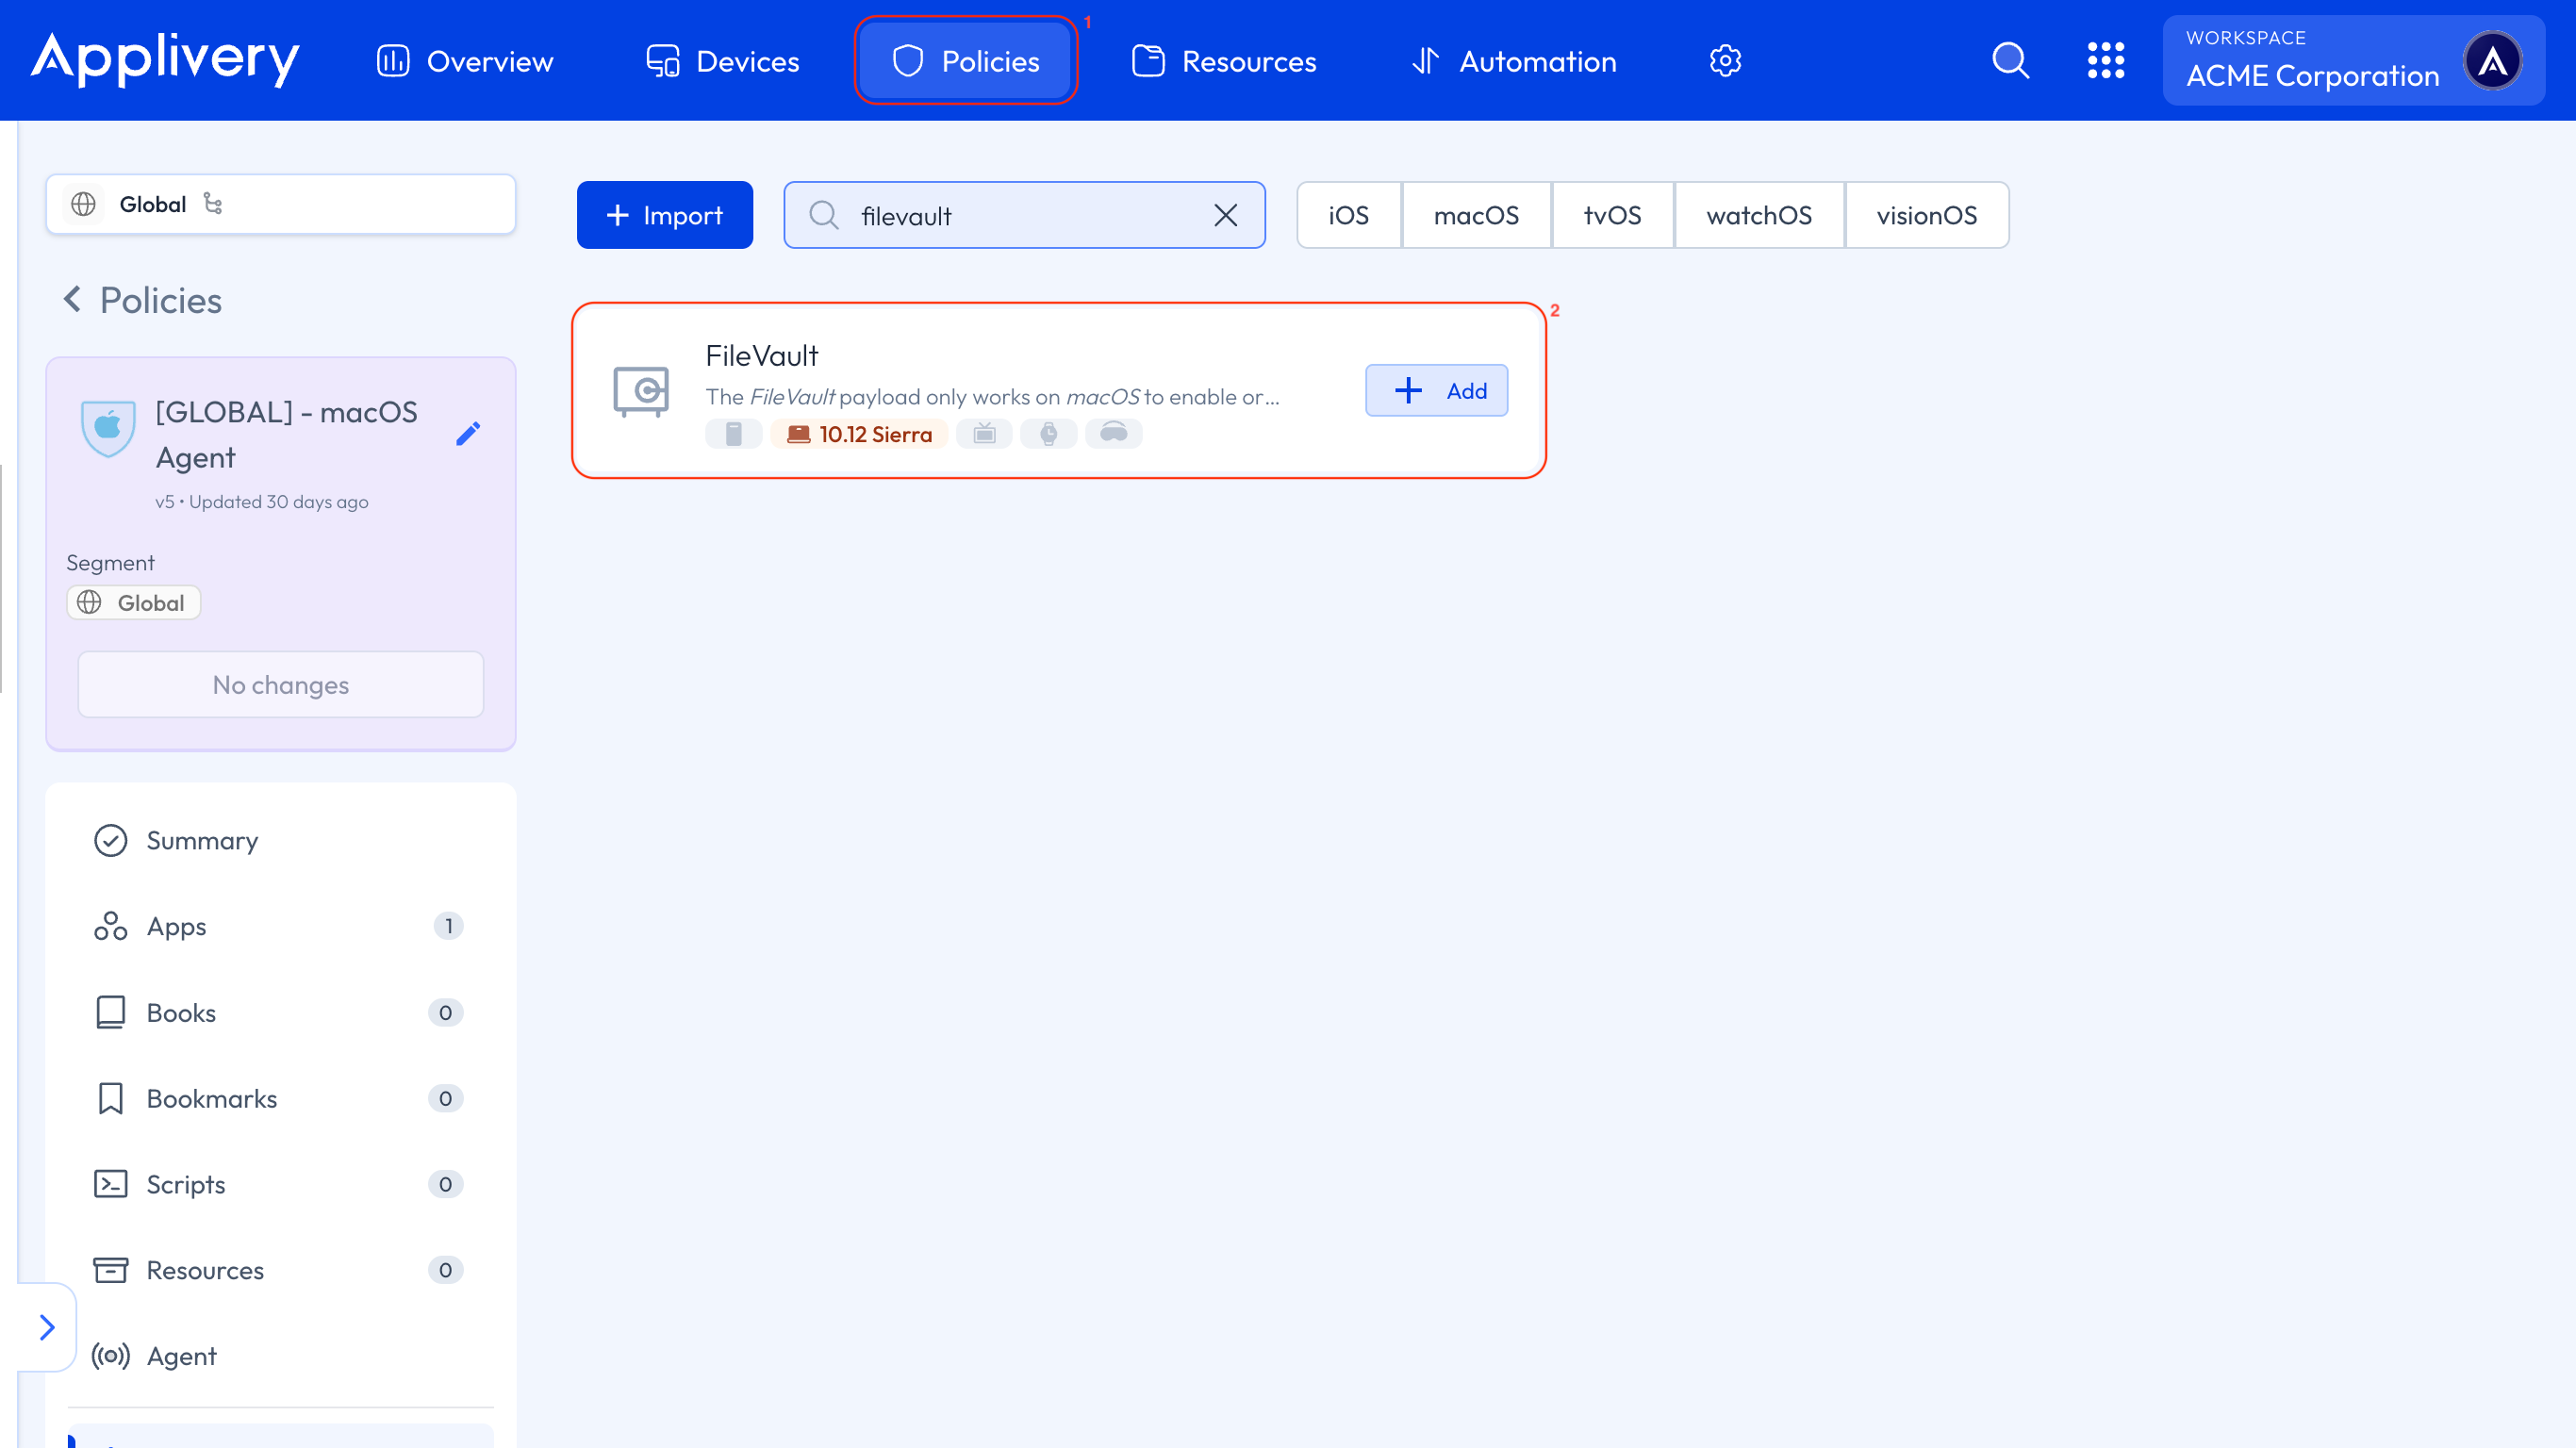
Once in the Applivery Dashboard, navigate to any of your Policies (1) or create a new one.
From the left-hand menu, navigate to the + Add configuration option and select FileVault (2).
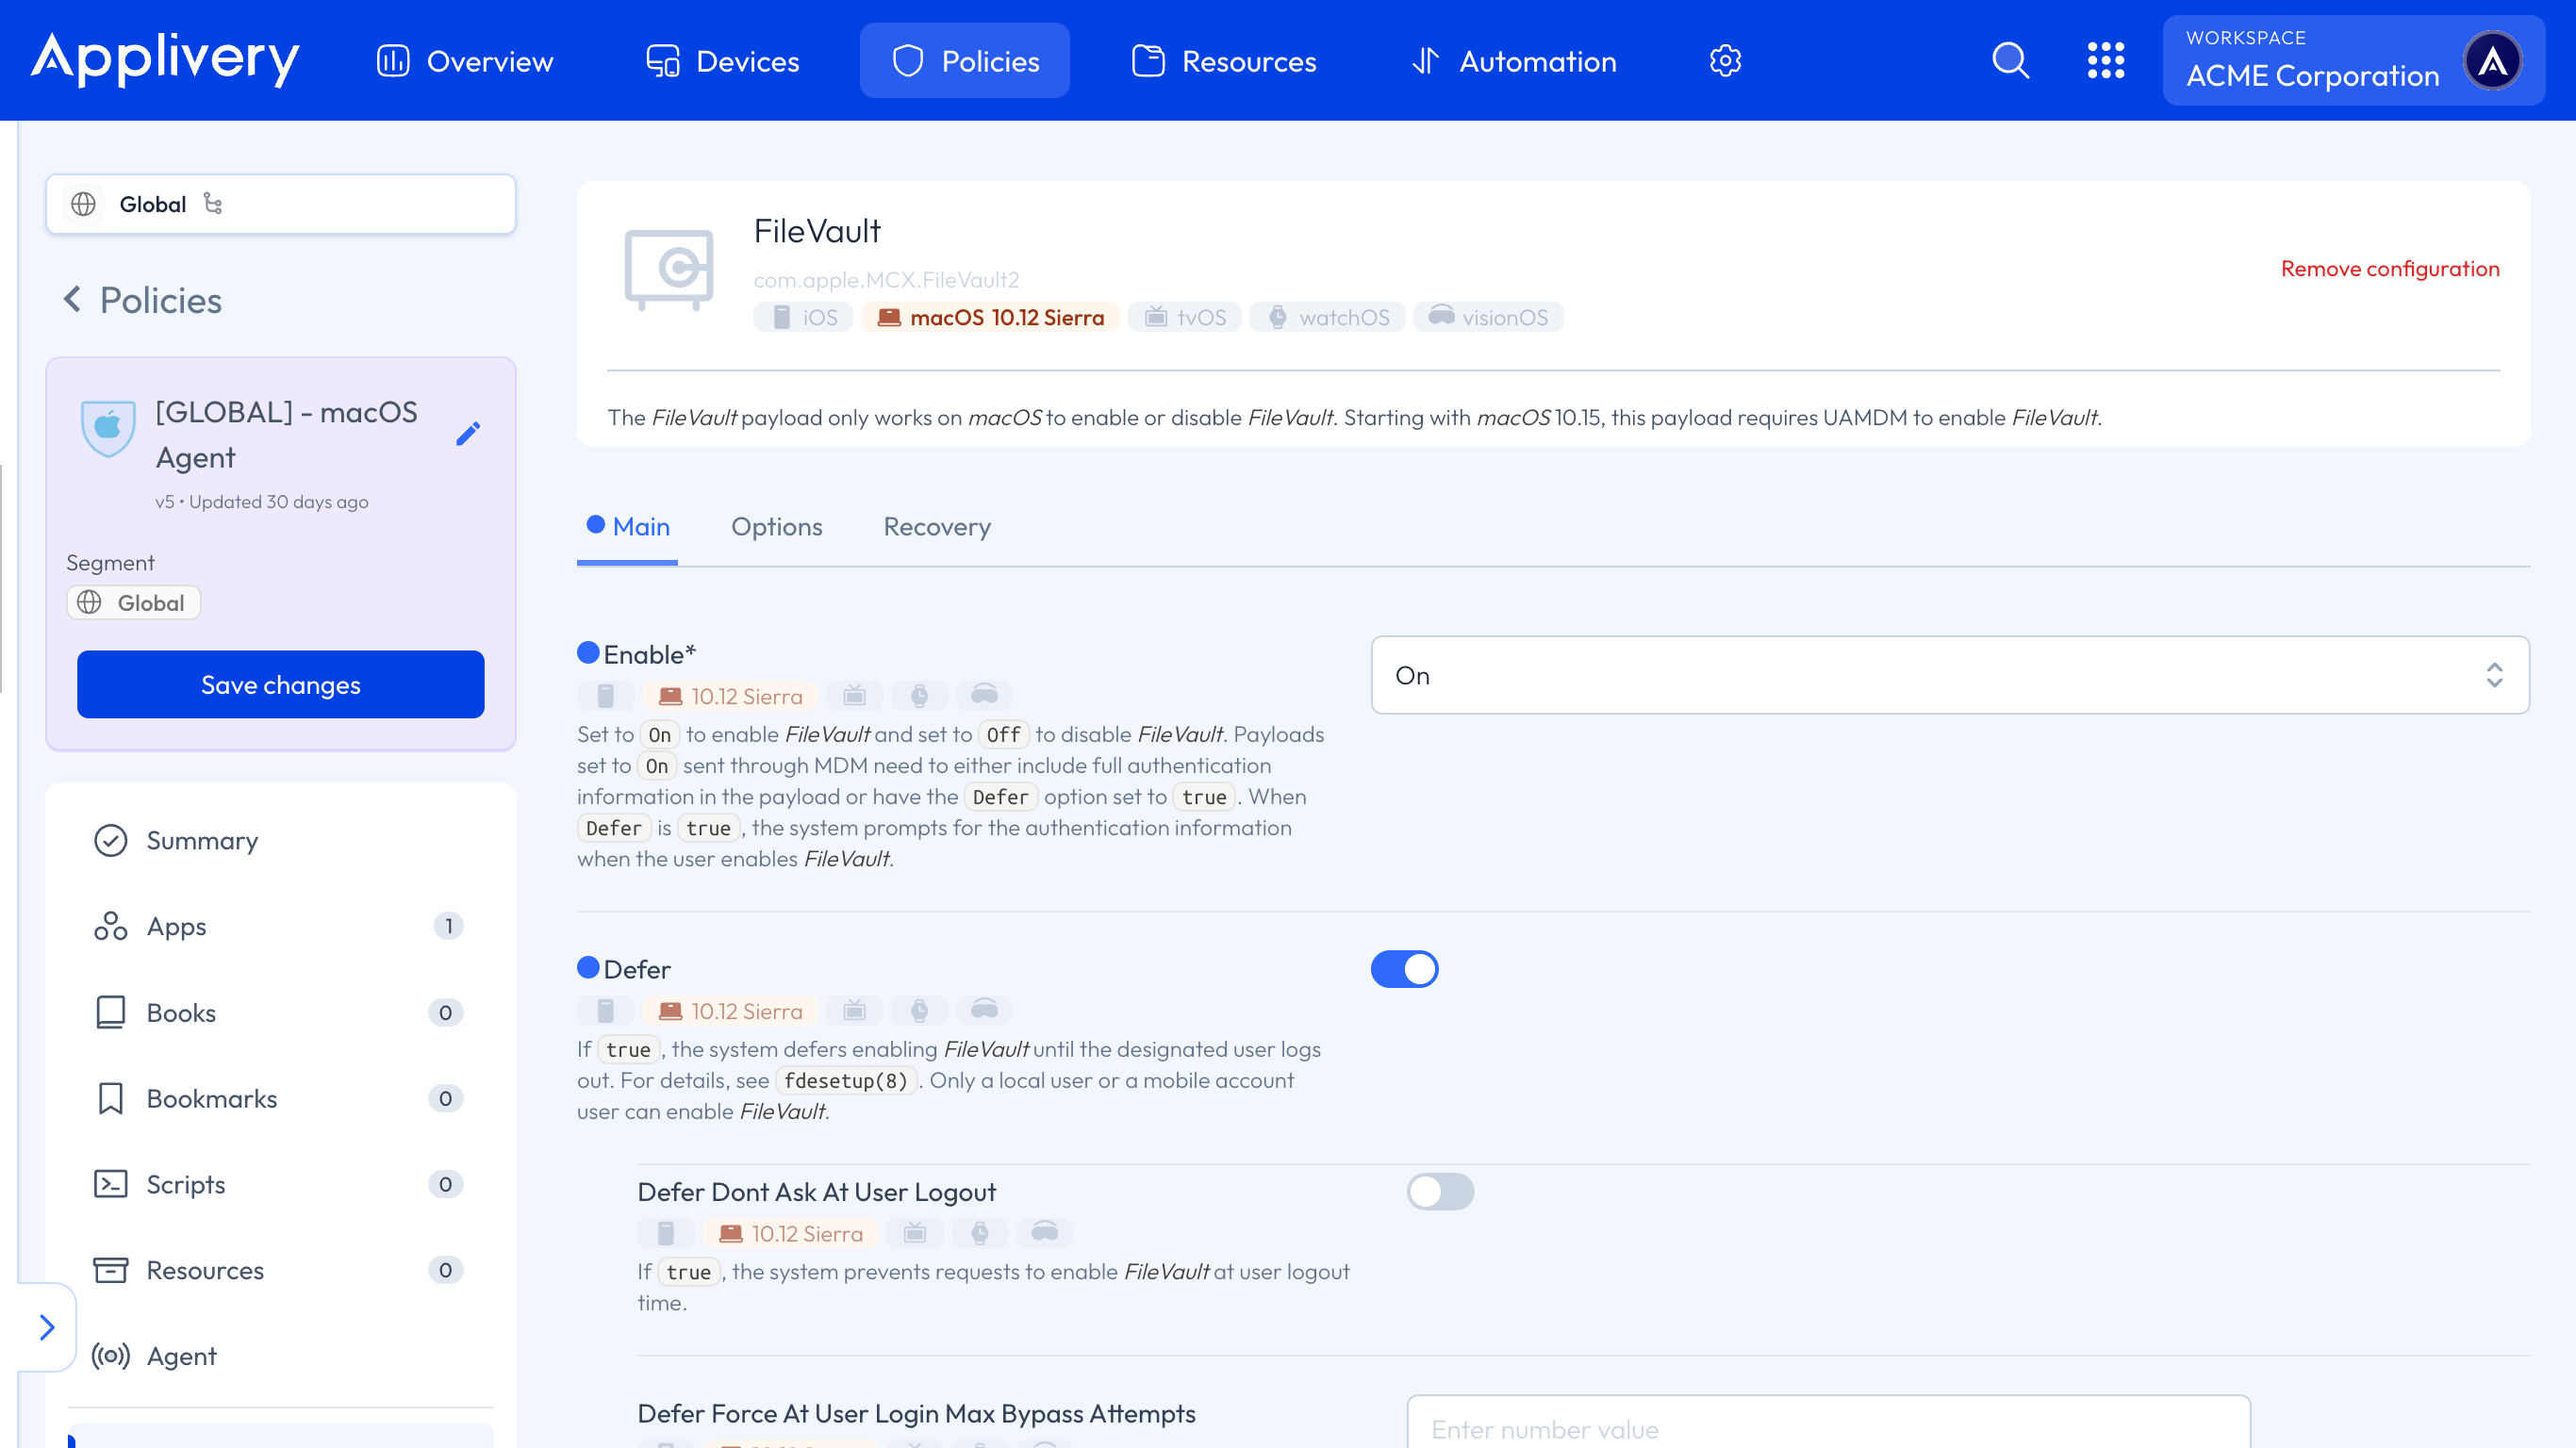
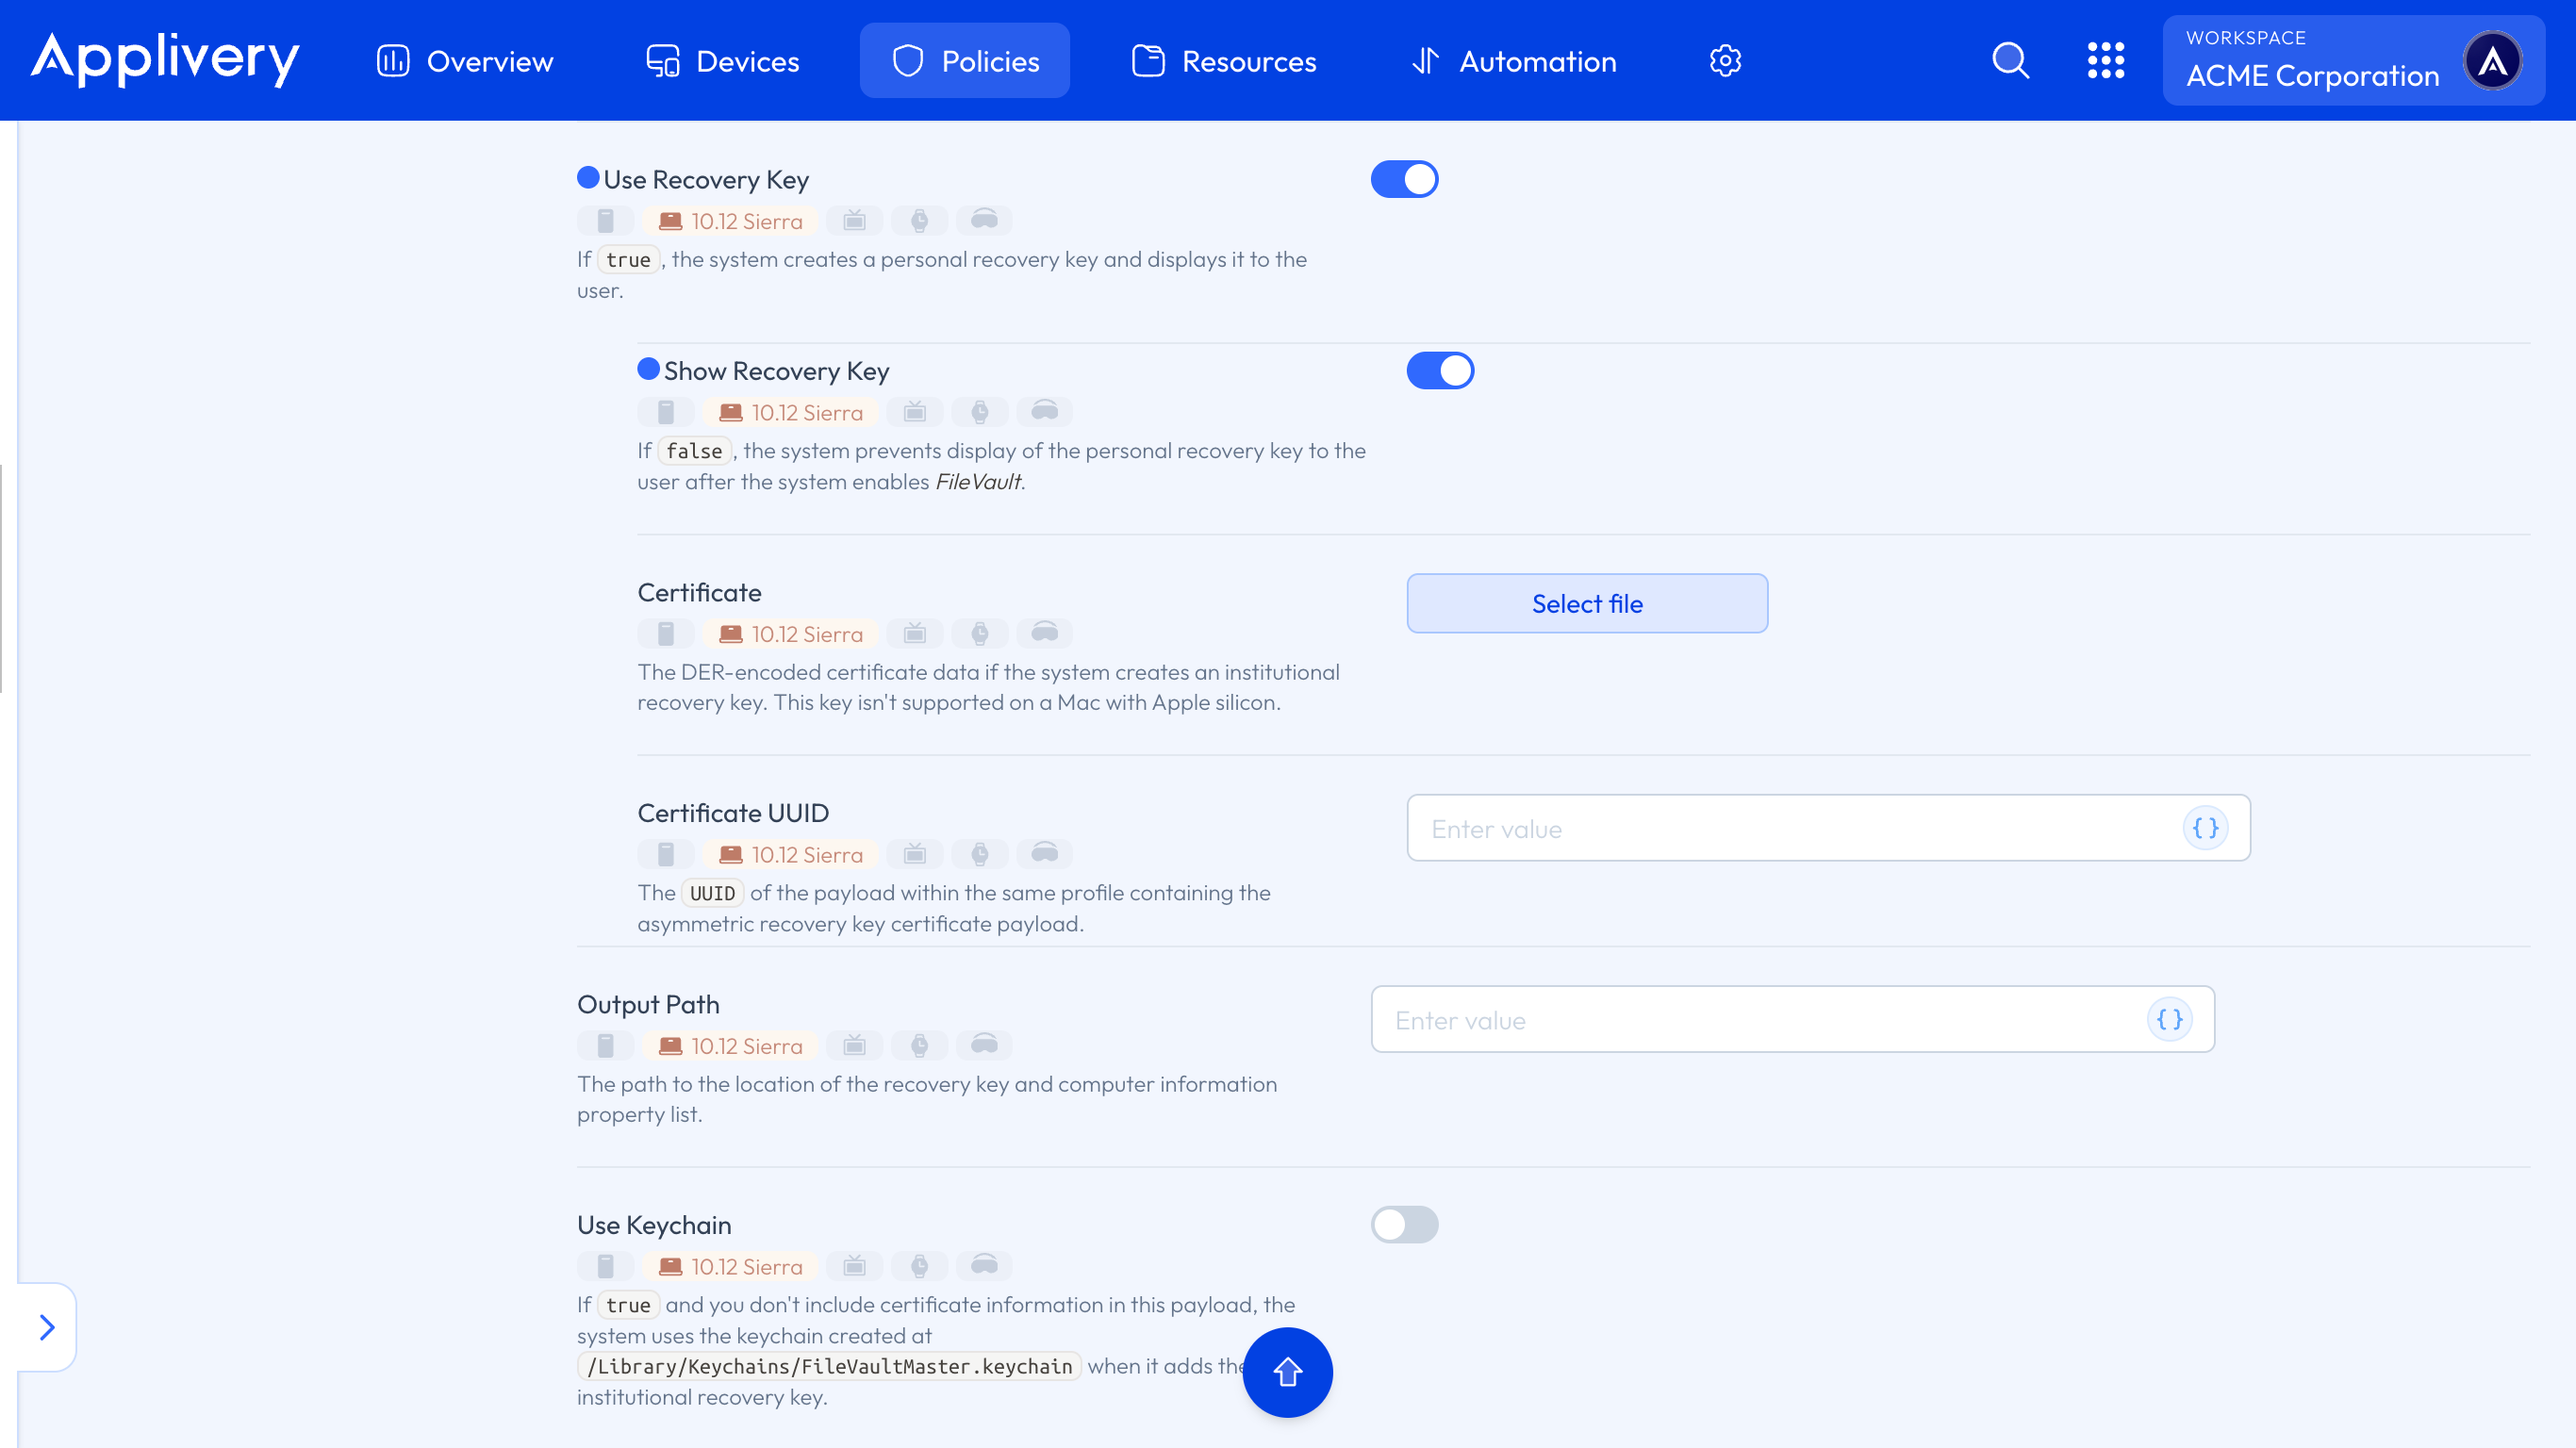
In the Main menu, you will need to Enable FileVault and select the Defer option, which postpones enabling FileVault until the user logs out. Additionally, check the Use Recovery Key and Show Recovery Key options to display it later.
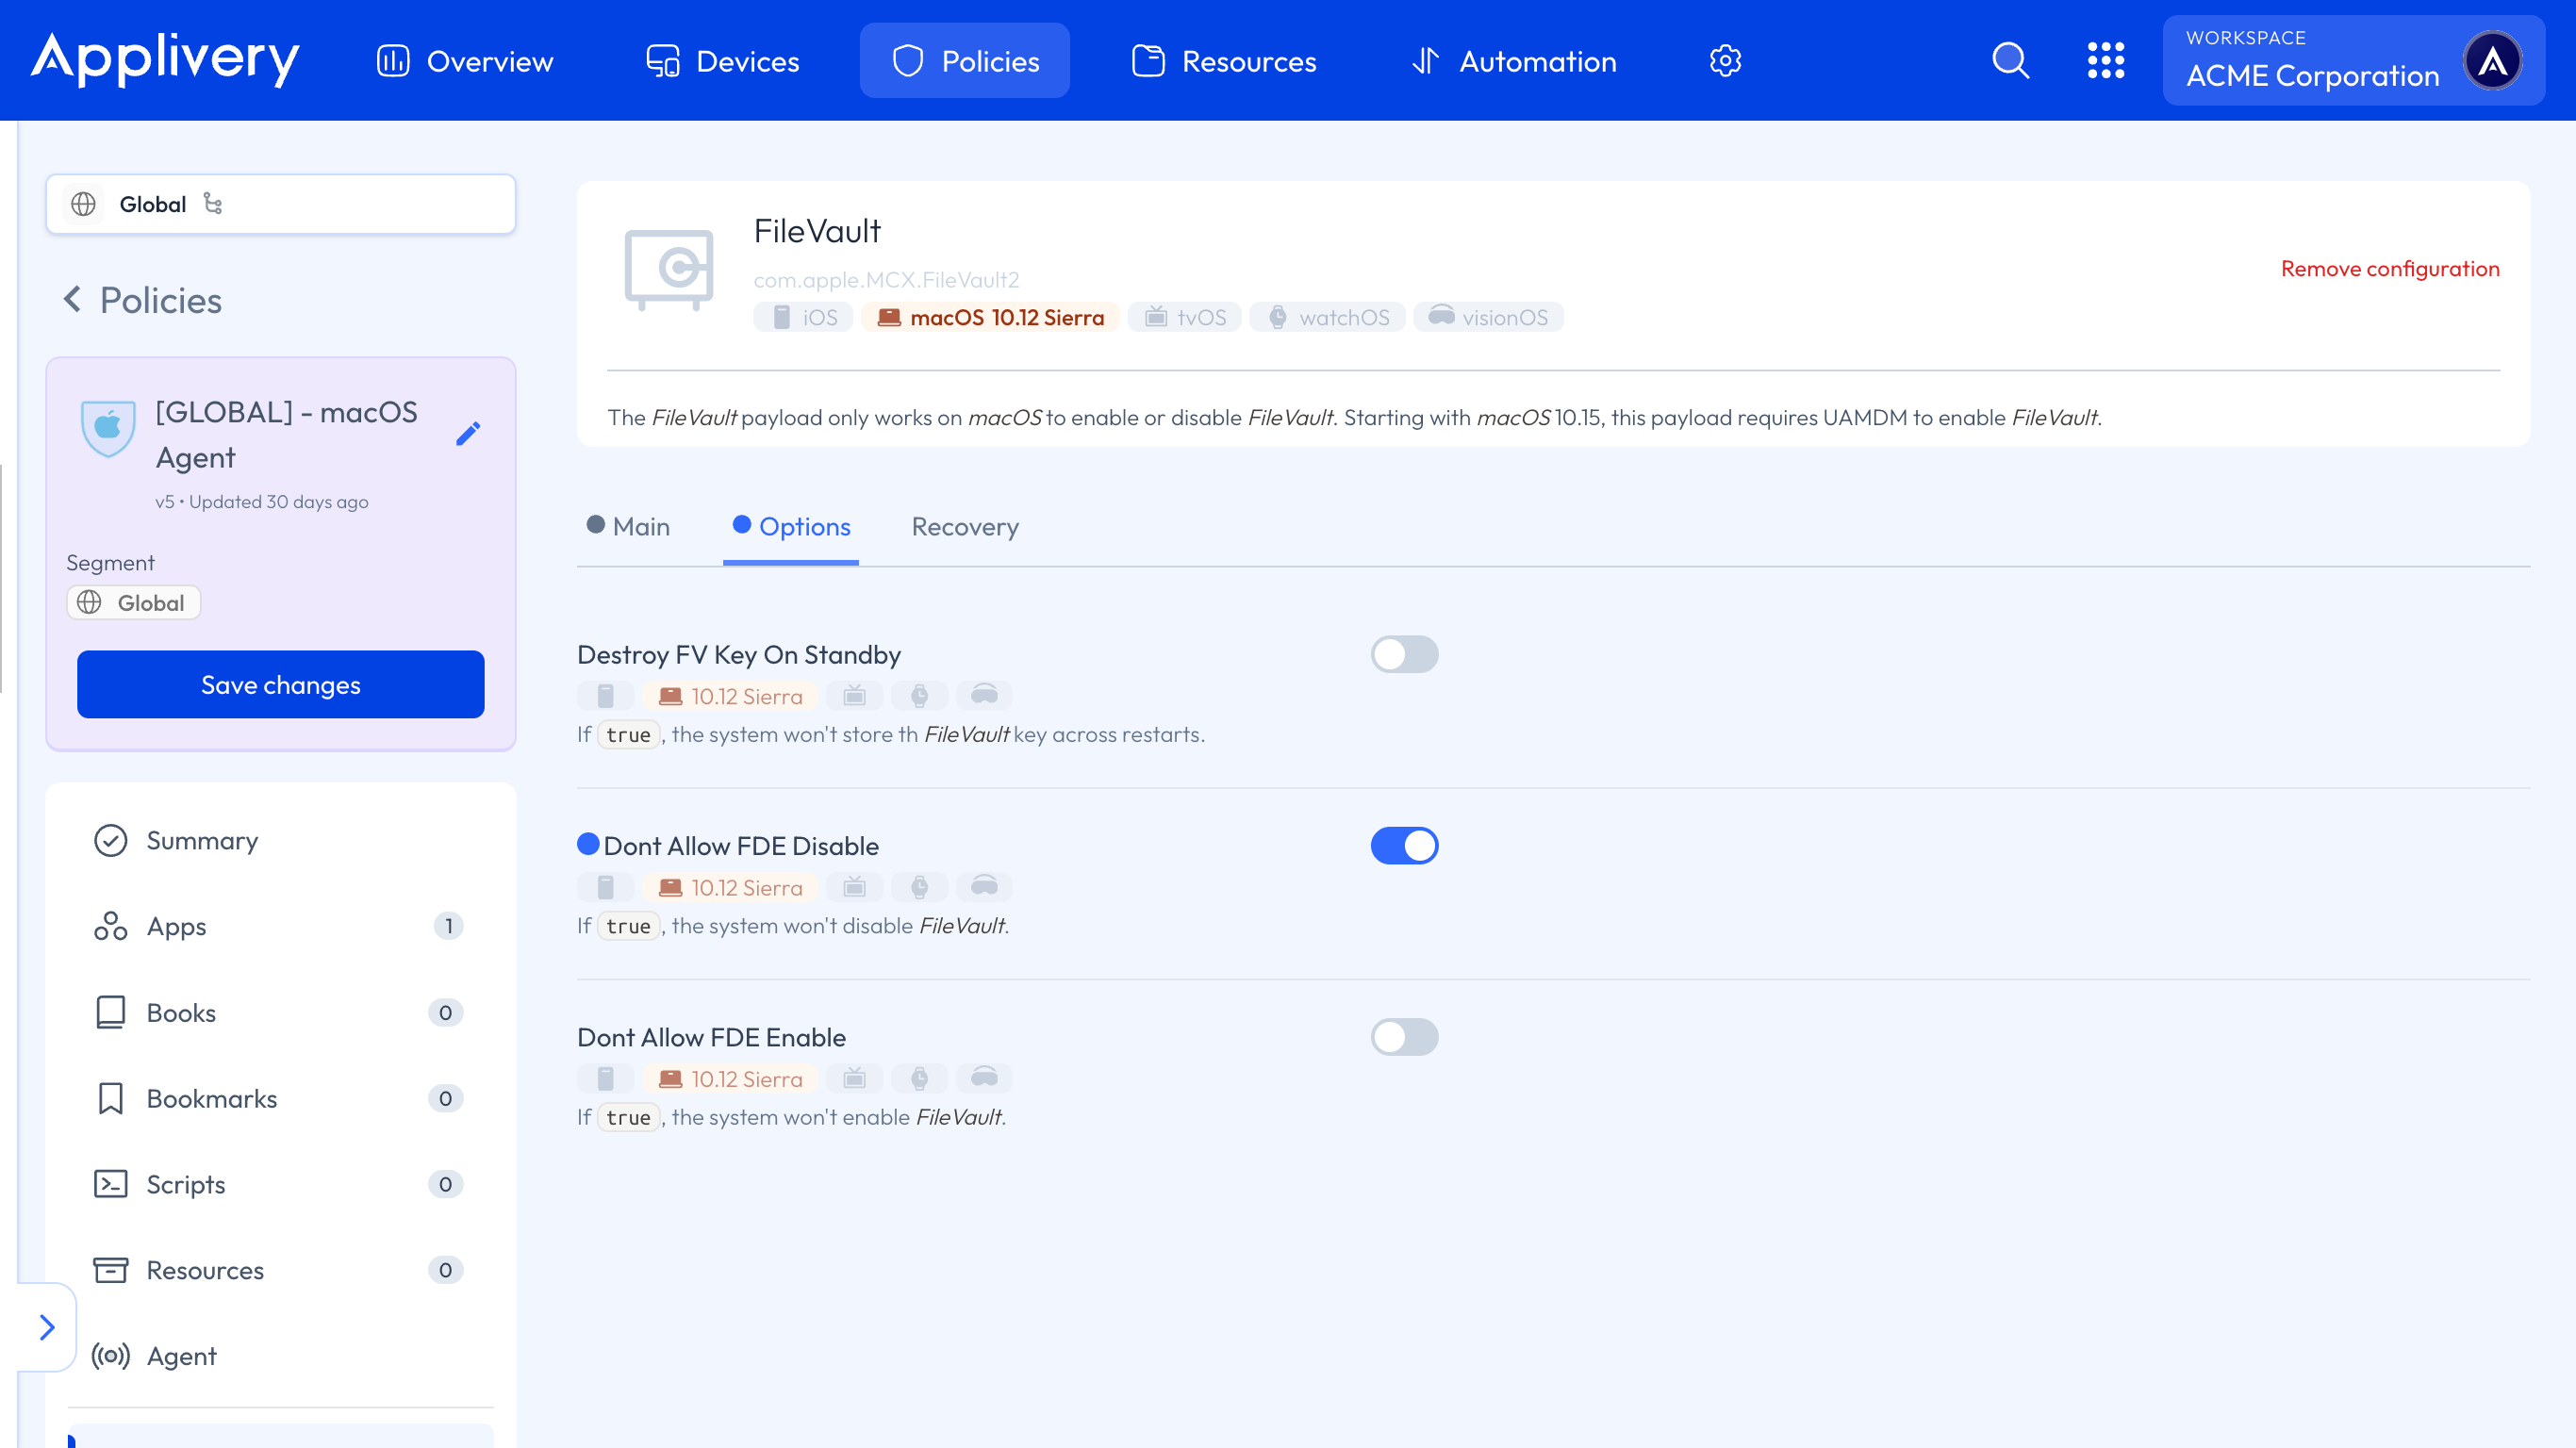
In the Options menu, select Don’t Allow FDE Disable to prevent FileVault from being disabled.
In the Recovery menu, leave the Auto option selected. Applivery will handle the necessary certificates, and the Recovery Key will be displayed in the Device Settings.
After saving and updating the Policy, the user will need to log out. Upon the next login, the FileVault activation forms will appear.
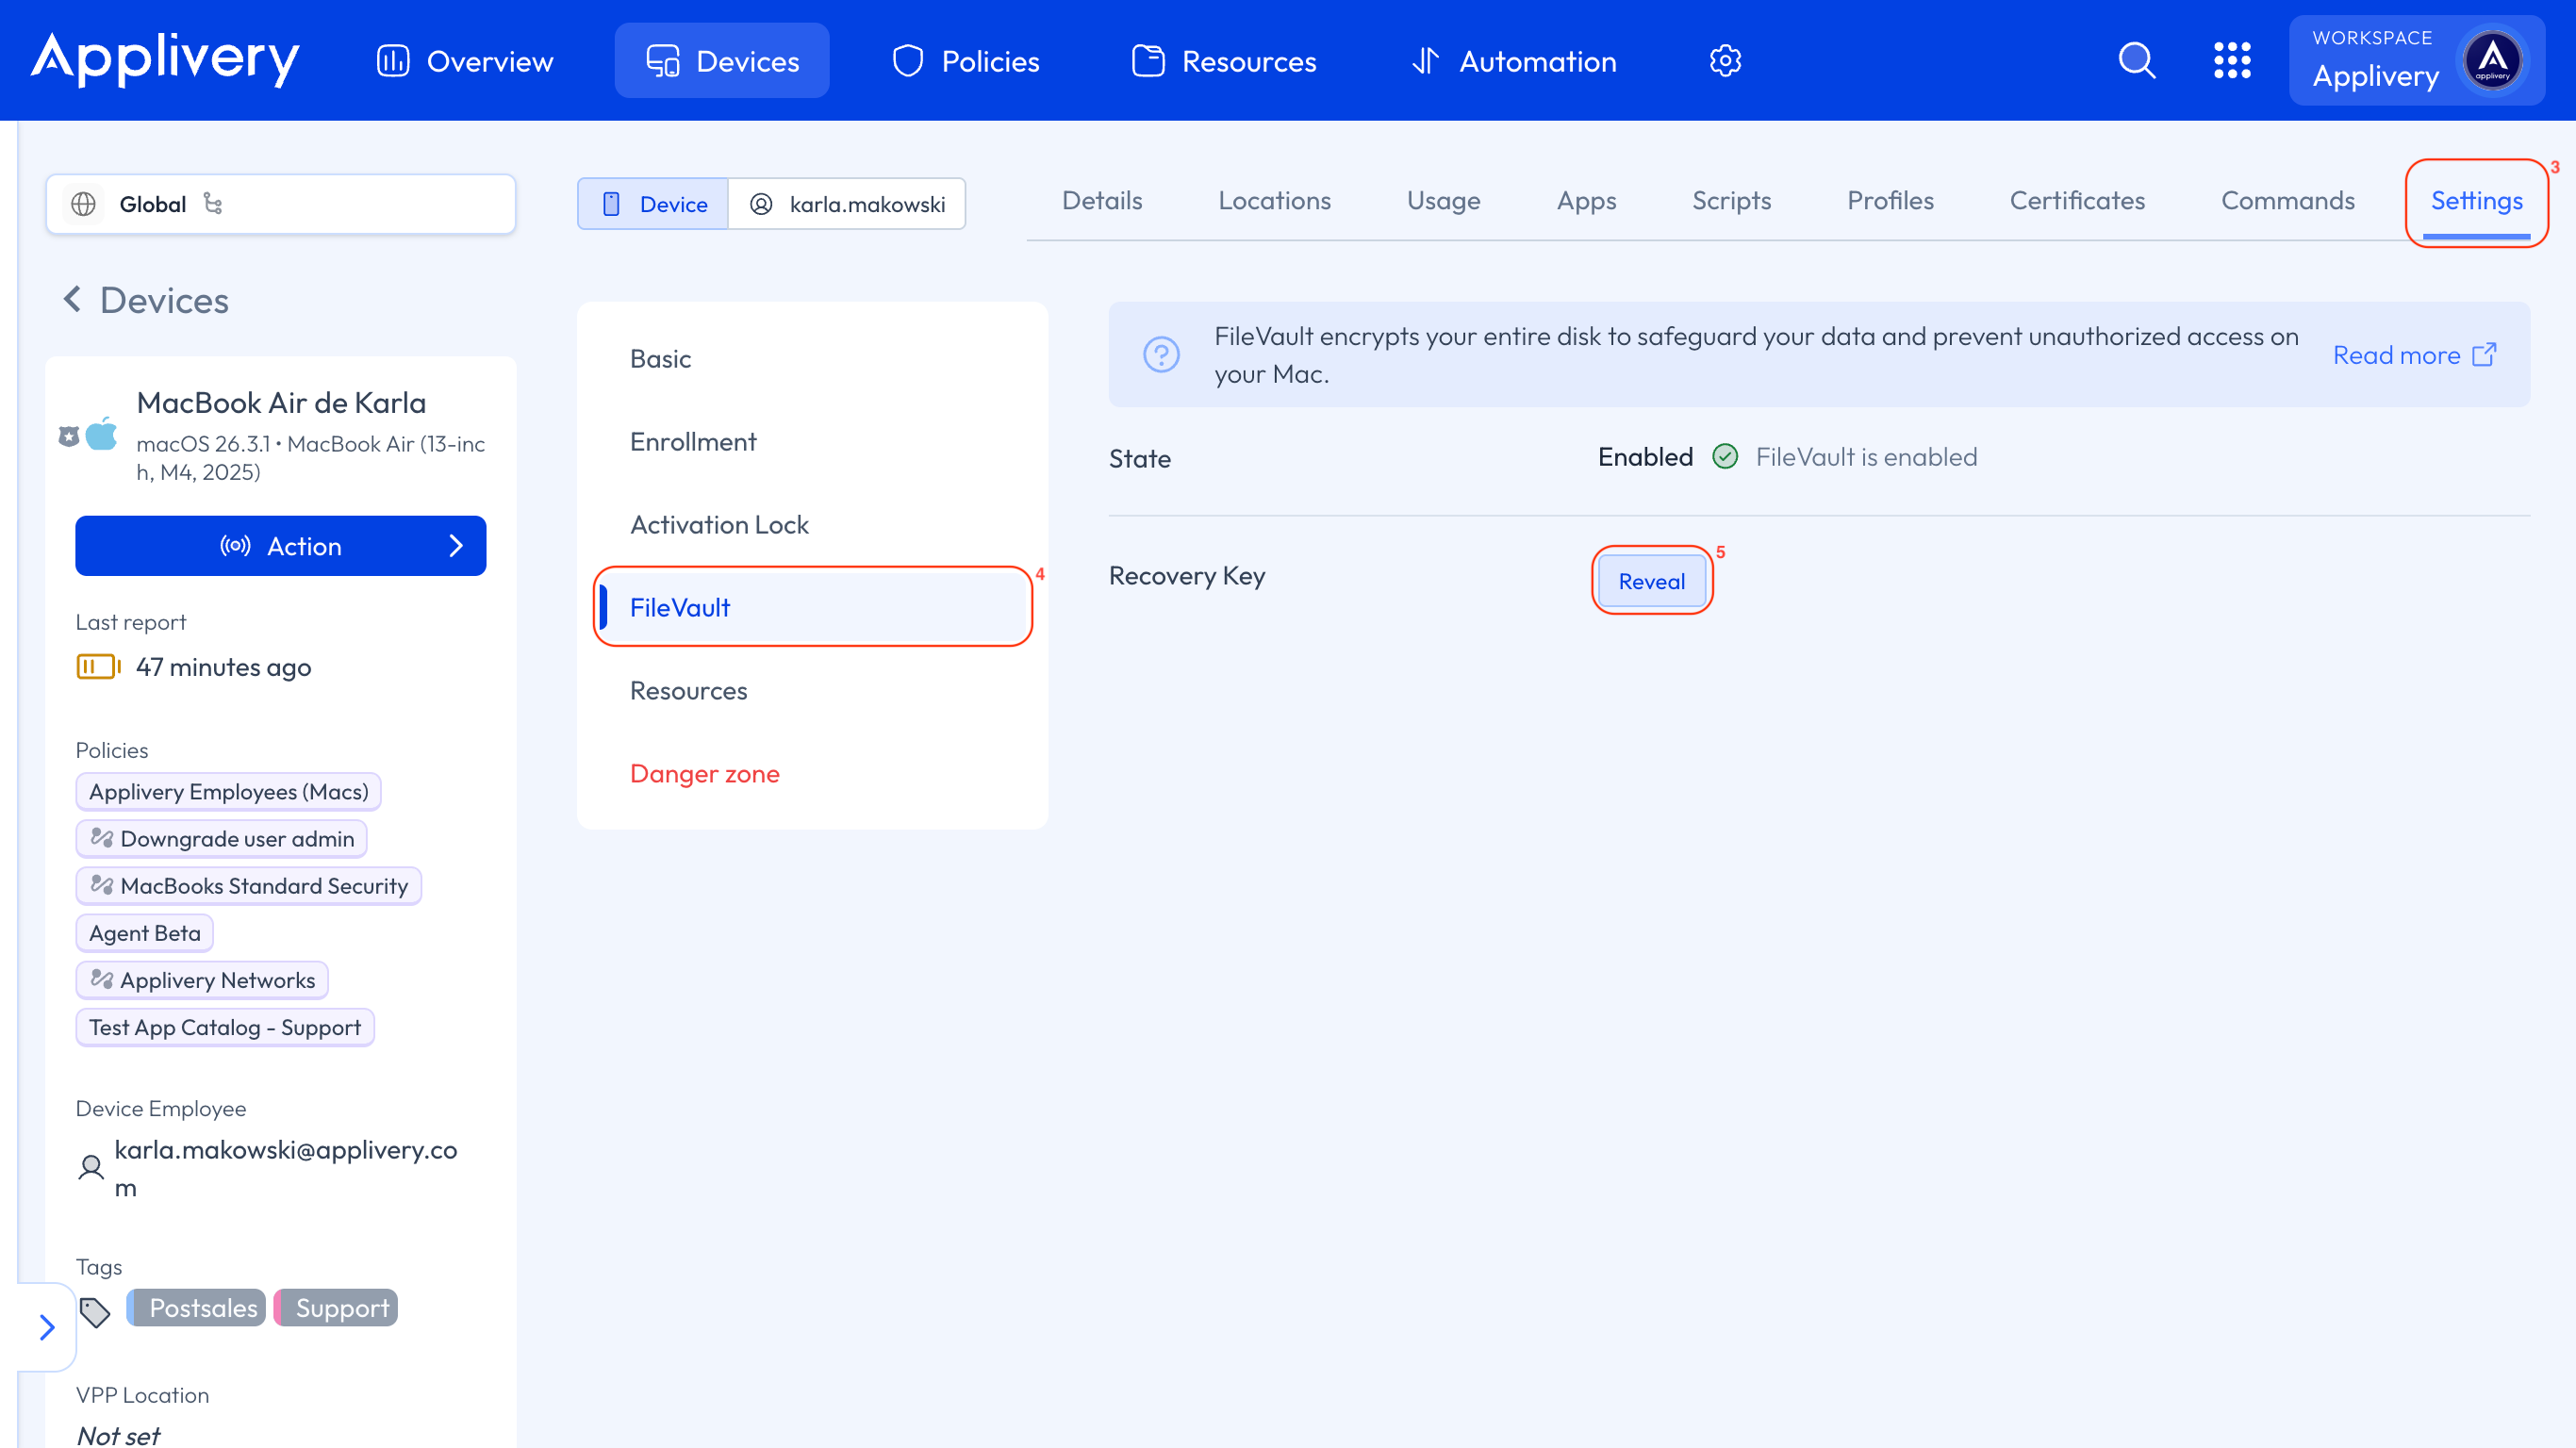
On the Applivery Dashboard, go to any of your Devices, selecting the one from which you want to obtain the Recovery Key.
Go to the Settings (3) tab, and select FileVault (4) from the left-hand menu. Click the Reveal button (5) to retrieve the Recovery Key.
Recovery Key Management - Manual
To encrypt the Recovery Key, an encryption certificate must be created and uploaded to Applivery.
On a macOS computer (10.8+), open Terminal and execute the command:
openssl req -x509 -nodes -newkey rsa:2048 -keyout private.pem -out public.der -days 365 -outform der
This will generate a Public Key in .der format.
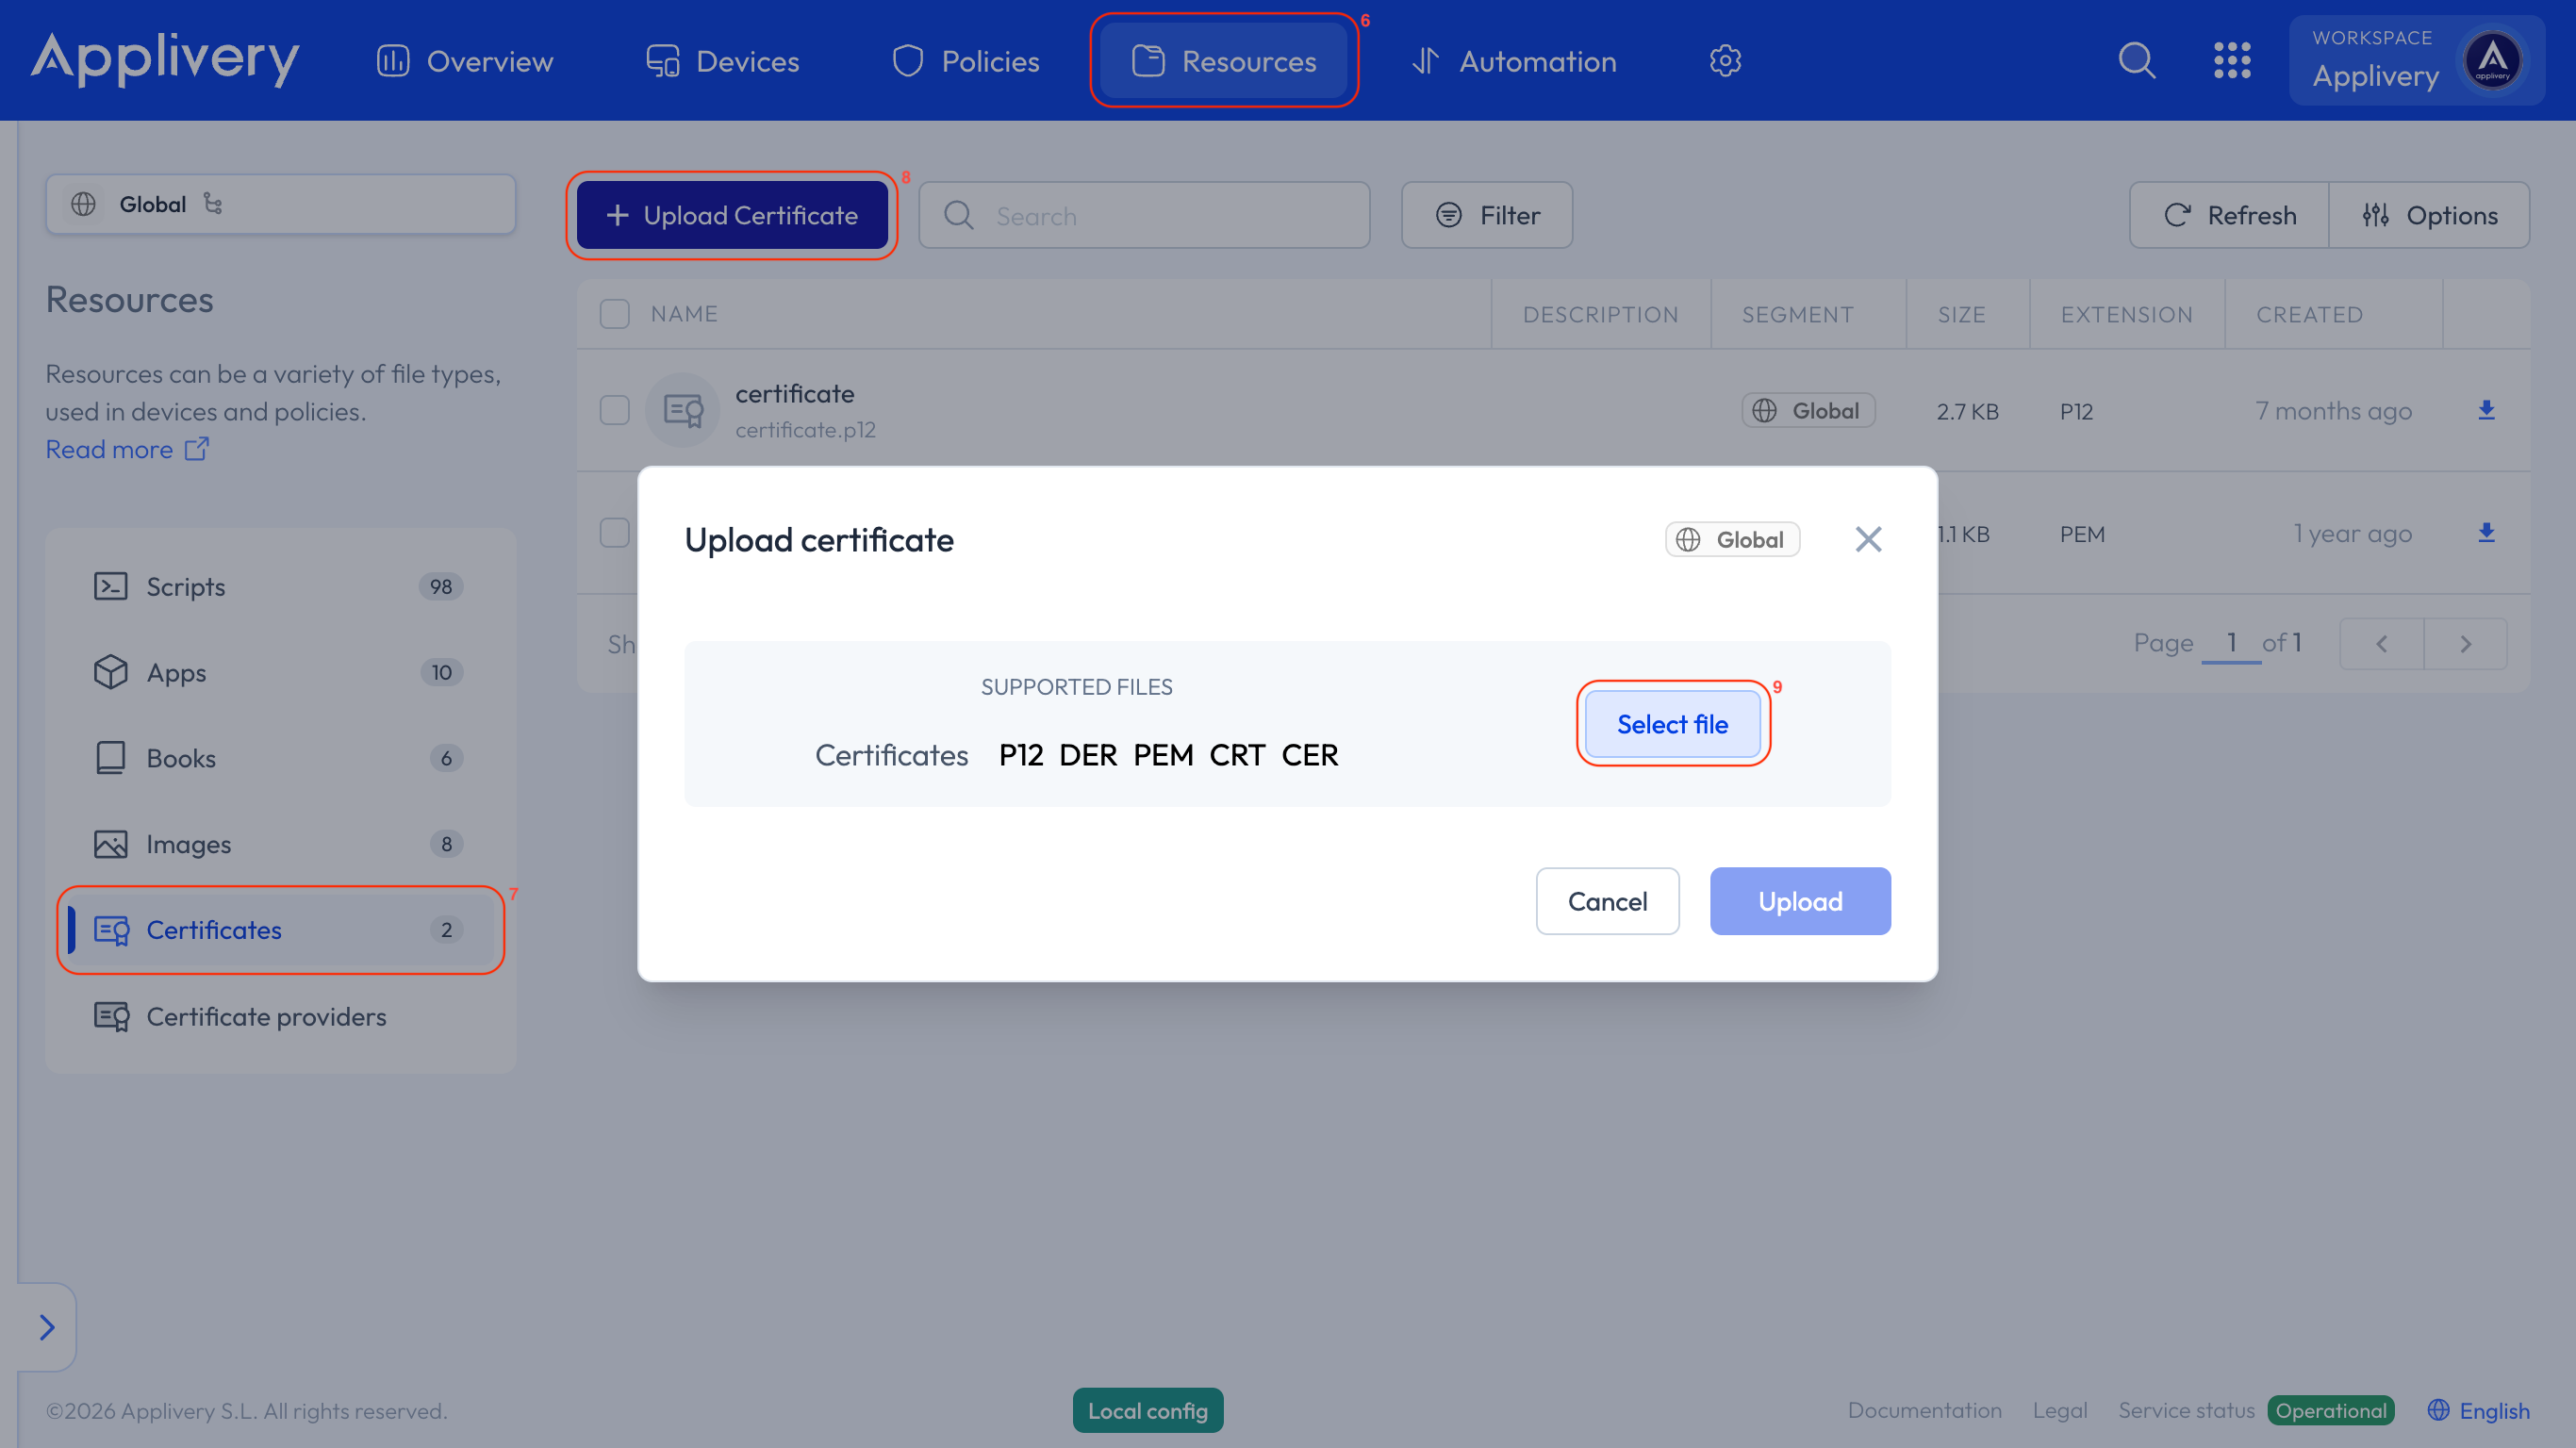
After creating the certificate, go to Resources (6) and select Certificates (7) from the left-hand menu. Click on + Upload Certificate (8).
A modal view will appear, allowing you to upload the newly created certificate by clicking on the Select file (9) button and loading it from your drive.
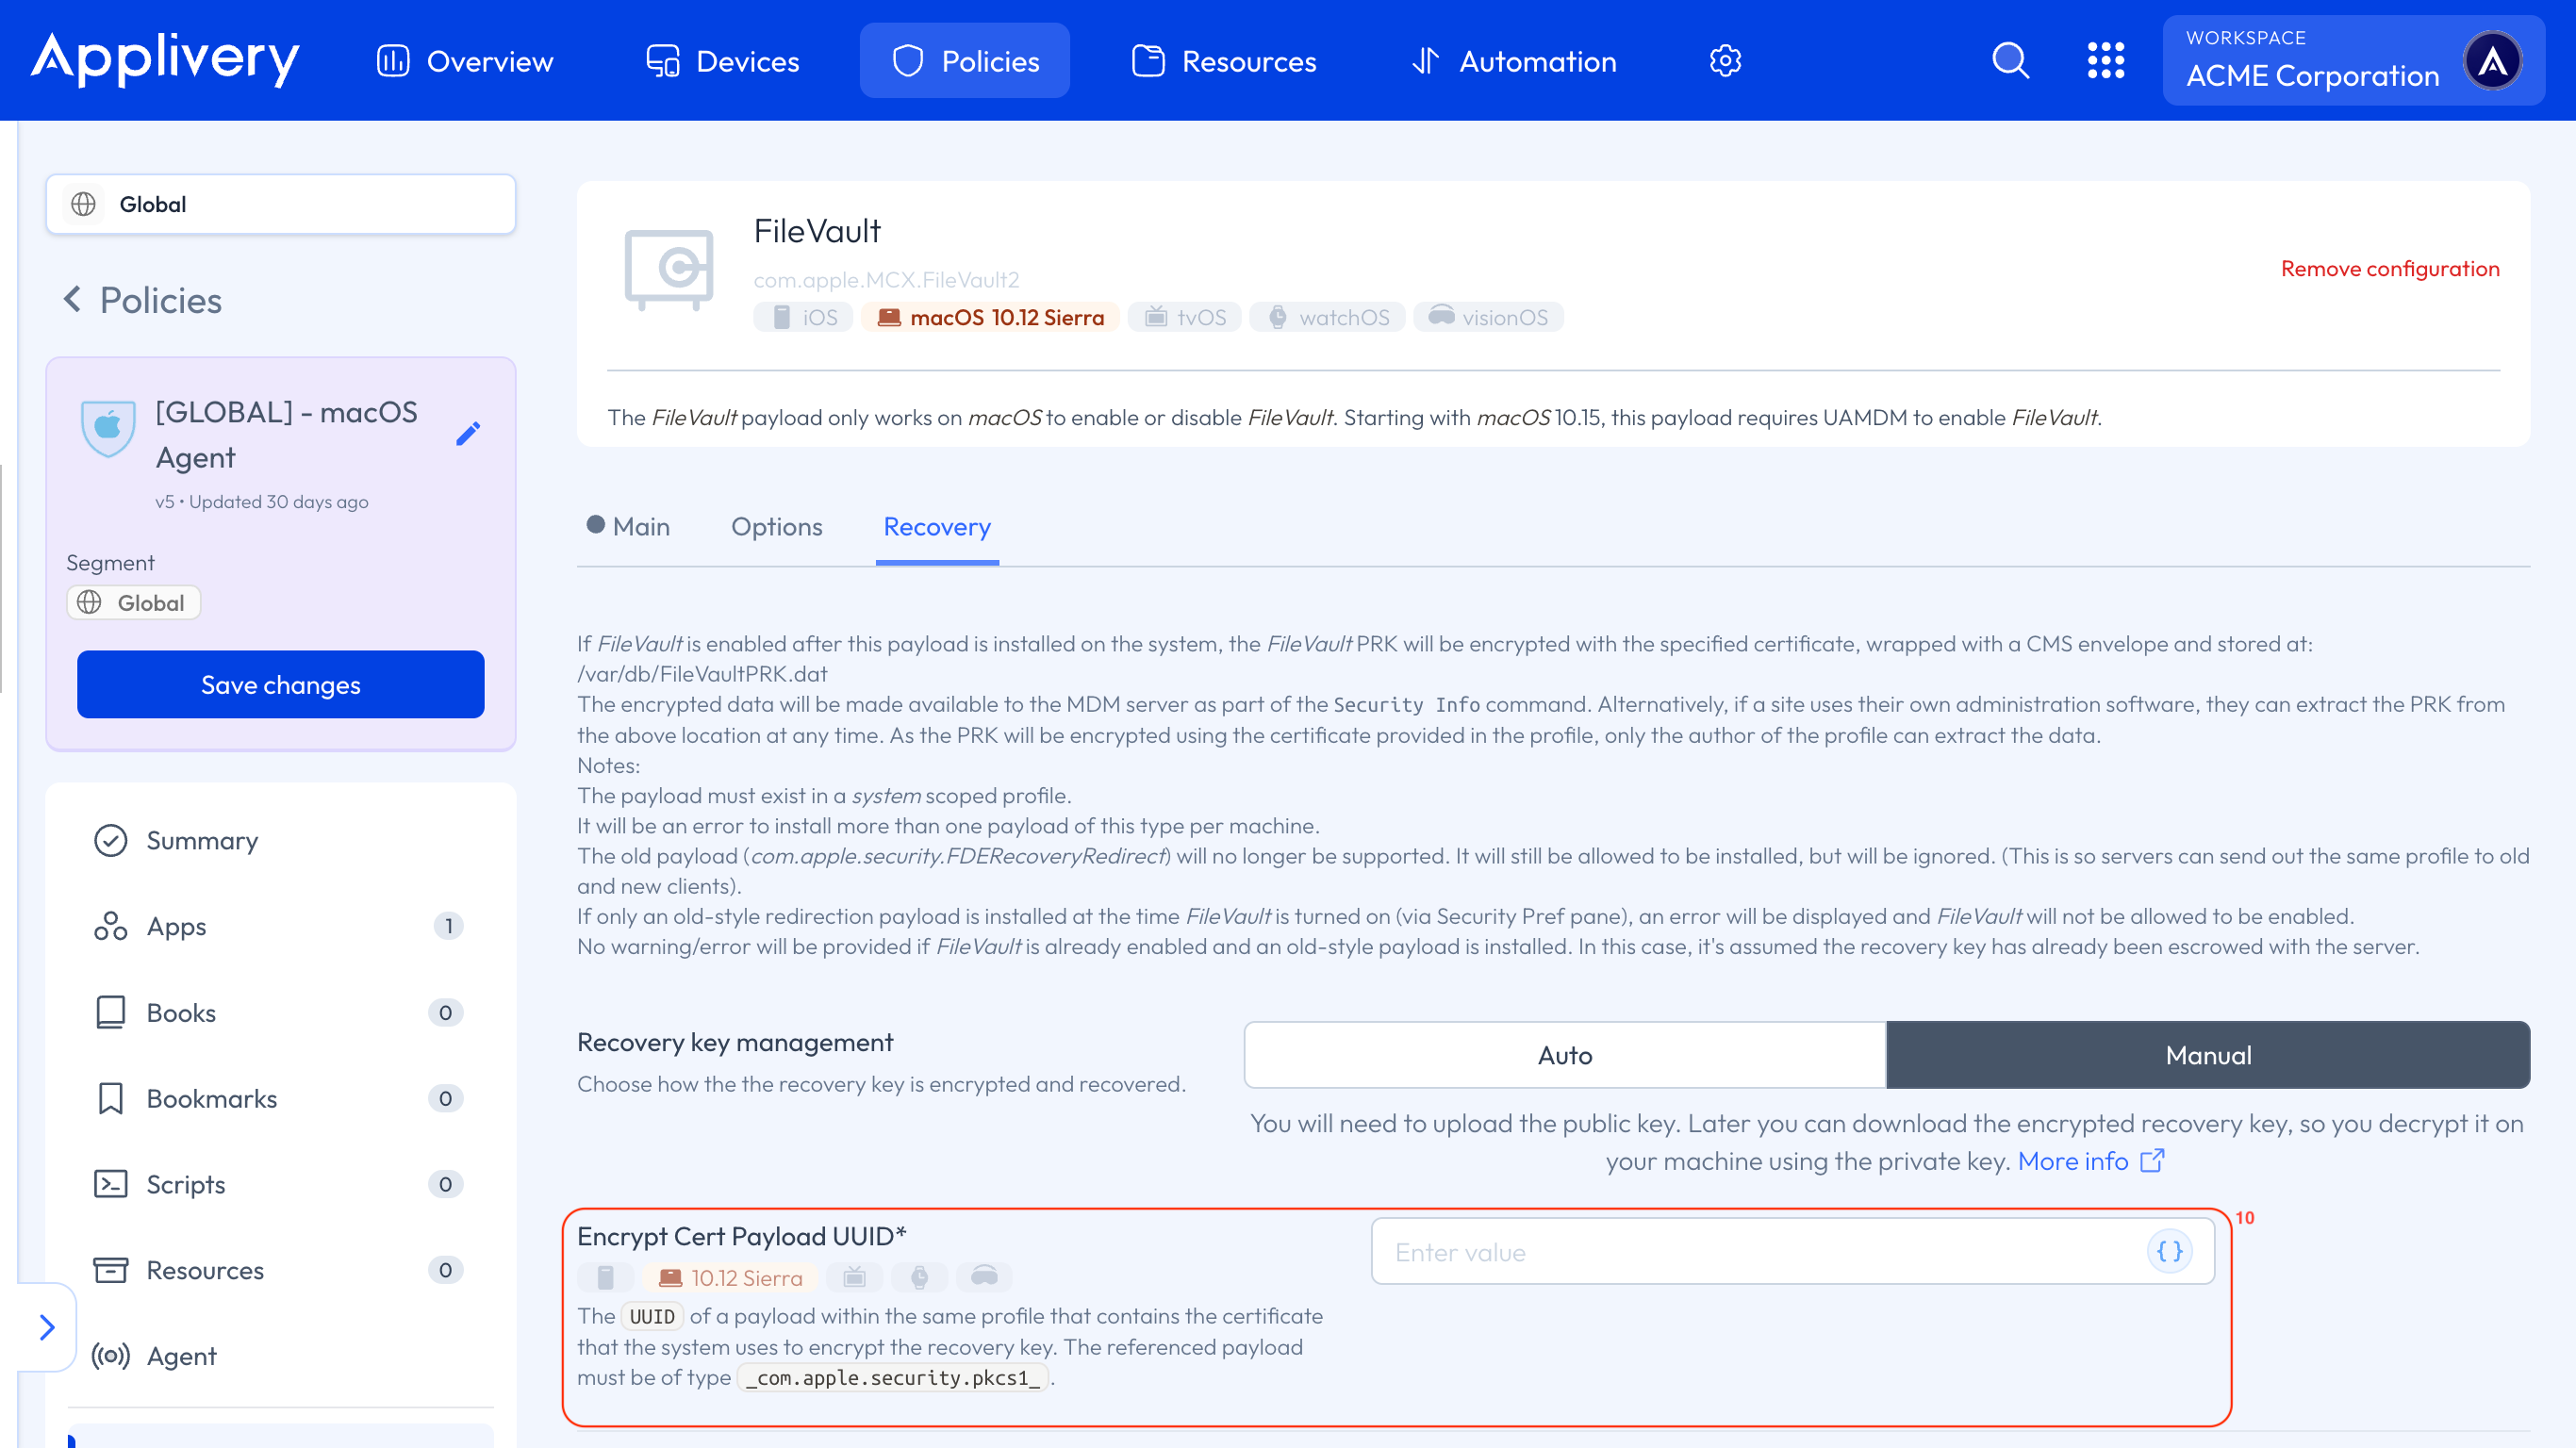
You will need to perform the same configurations you did in Auto mode for the Main and Options menus. Only the settings for the Recovery menu will be modified.
This time, you will select Manual for Recovery Key Management. In the Encrypt Cert Payload UUID (10) field, you will load the certificate previously uploaded in the Certificates section.
Describe the Location field to indicate where the Recovery Key is stored, ensuring users know where to find it.
For the Device Key field, enter a string (help text) for users who may have forgotten their password. Site admins can use this key to locate the escrowed key for the specific Device. This key supersedes the RecordNumber key used in the previous escrow mechanism. If the key is absent, the Device serial number is used instead.
After saving and updating the Policy on the terminal, the user will need to log out.
Upon the next login, the FileVault activation forms will appear. Once completed, send an Update status command, and you will then have the encrypted key available on the Device under the FDE Personal Recovery Key CMS field.
Once the Policy is applied, users will not be able to modify the FileVault settings under System Preferences > Security & Privacy > FileVault. The settings as configured in the Policy will be enforced.
Applying another FileVault Policy to an already encrypted Device has no effect.
Finally, navigate to any of your Devices. Go to the Settings section, select FileVault from the left-hand menu, and click on the Download encrypted file button.
A .dat file will be downloaded, and you will need to execute the following command to decrypt the key:
openssl cms -decrypt -in recovery.dat -inform DER -inkey filevault_privateKey.pem
The FileVault Recovery Key cannot be retrieved if the Device was encrypted prior to enrollment or before a FileVault Policy was applied to it.
Troubleshooting
Weird or unreadable characters when displaying the FileVault Recovery Key
If the FileVault Recovery Key is displayed with strange or unreadable characters, it usually means the Device was already encrypted before being enrolled in Applivery. In this scenario, Applivery is retrieving the previously encrypted Recovery Key, not a newly generated one.
To resolve this issue, follow these steps:
Have the user manually disable FileVault on the Device by going to System Settings > Privacy & Security > FileVault > Turn Off. This action must be performed by an administrator user on the Mac.
Once FileVault has been turned off, ask the user to log in again to the Device.
After the next login, FileVault will generate a new Recovery Key, which will be properly managed and displayed by Applivery without formatting issues.
This process ensures that the Recovery Key is regenerated under Applivery management and can be correctly viewed and stored for future recovery scenarios.