Packages are like neatly wrapped parcels for your software – they come with all the necessary bits and bobs to install or update applications on your device. These files, often end in .pkg or .mpkg, contain everything needed for smooth installations, updates, and removals of your apps.
Moreover, you may find yourself needing these application packages (PKGs) to deploy apps on devices running macOS version 10.13.6 or above.
Please note that the approach to installing PKGs differs according to your billing plan. Depending on your plan, you can either distribute them to individual devices or utilize policies for streamlined management. Take a look at the different pricing options here.
Let’s now explore how to achieve this.
Deploying PKGs to individual devices
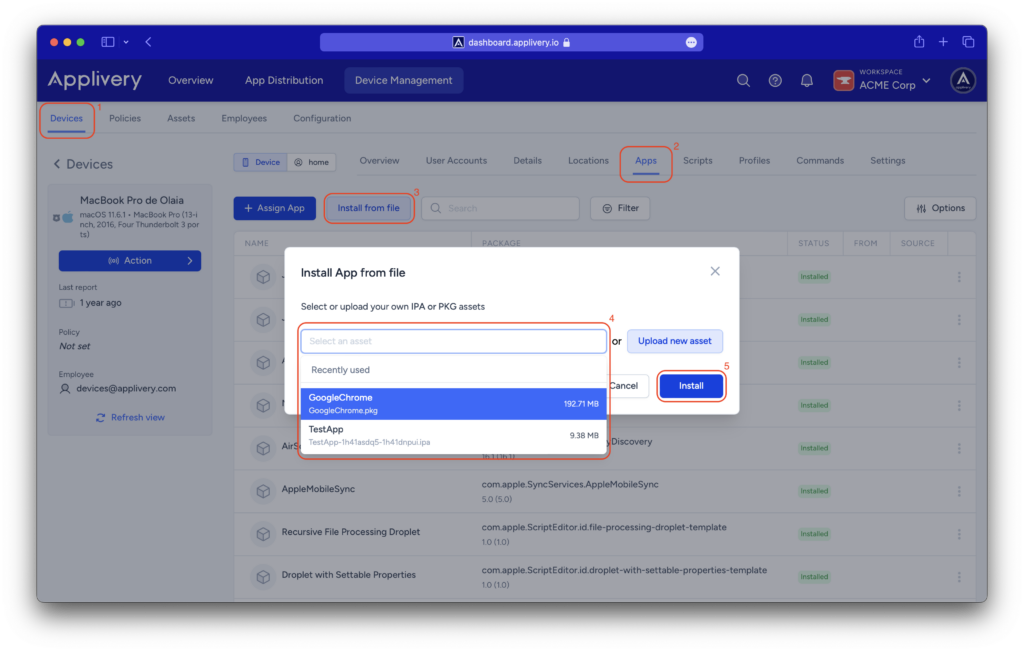
Once in the Applivery Dashboard, locate the device you want to install the PKG to in the Devices (1) section (under Device Management > Devices).
Navigate to the Apps (2) tab and click on the Install from file (3) button.
This will allow you to select the PKG (4) from your drive and Install (5) it on your device.
Using policies to optimize PKGs management
Alternatively, PKGs can be managed through Applivery’s app repository (App Distribution).
This feature enables you to deploy packages from Applivery at the policy level, in addition to maintaining versions of PKGs updated.
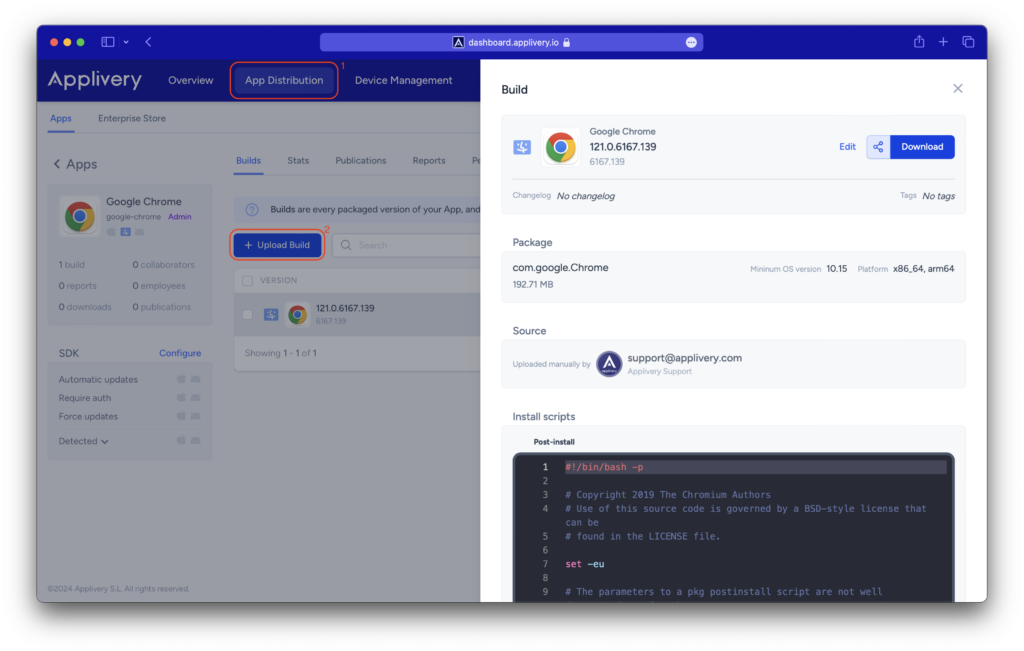
Once in the Applivery Dashboard, navigate to the App Distribution (1) section.
Follow the steps outlined in our documentation to create your first app and upload your first build (2).
After uploading your PKG, head to the Policies (1) section within Device Management > Policies. Select the Policy where you need to deploy your app.
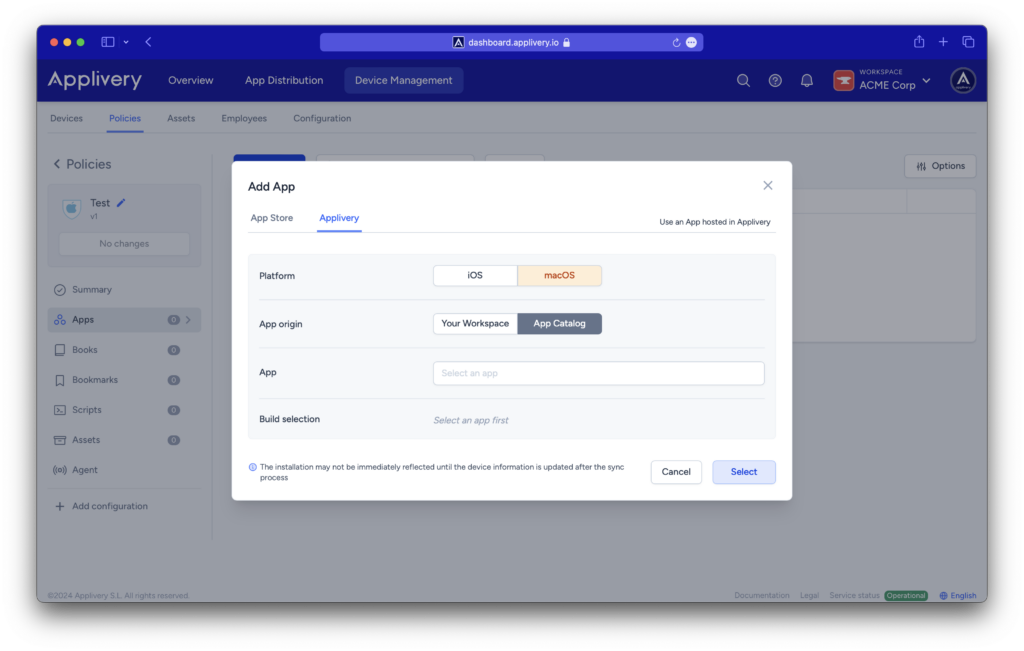
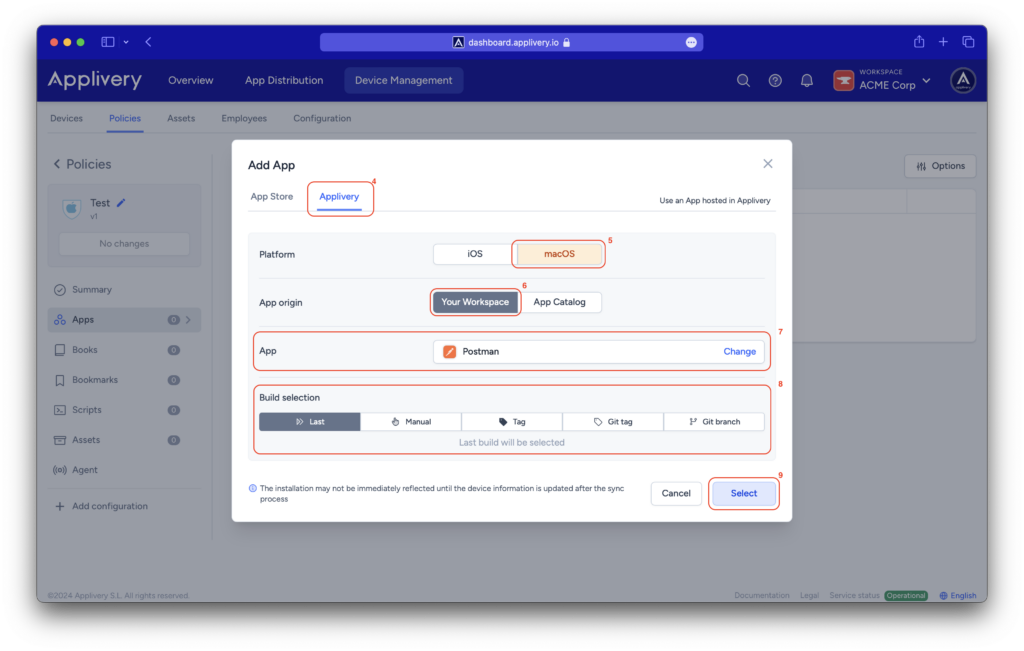
Navigate to the Apps (2) section from the left side menu and click the + Add App button (3).
Switch to the Applivery tab (4), and then choose the Platform (5), find your app in the App selector (6), click Your Workspace as the App origin (7), then choose either the Last build or manually select one in the Build selection field (8), click Select (9), and finally, click Save changes.
You can also deploy apps that are not yet available at the Mac App Store to your macOS devices from the Applivery macOS App Catalog. By selecting App Catalog as the App origin, you’ll access an app repository that offers always up-to-date and fully automated patch management for macOS devices.
You can explore our in-depth documentation for guidance here.